ASSEMBLY
33
32 INSTALLATION
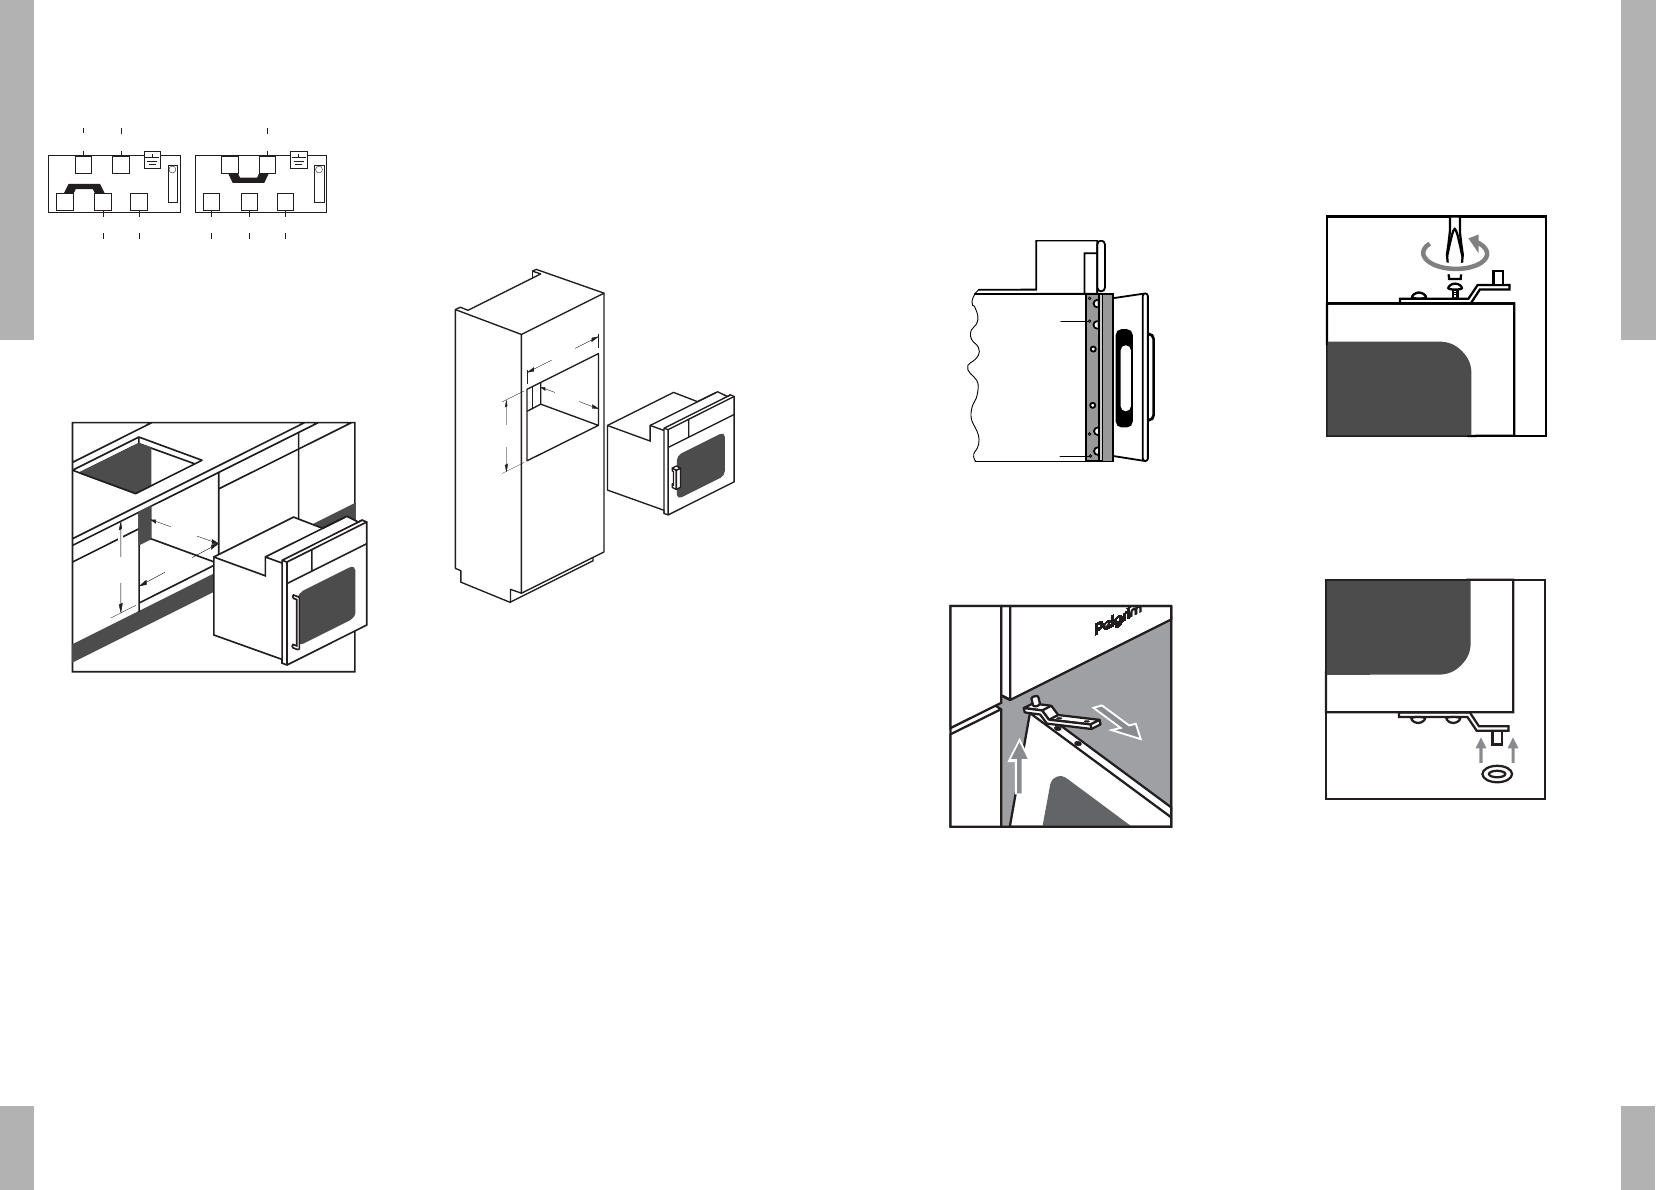
Assembly
Left- or right-hinged oven door
■ Remove the protective frame by removing
screws 1 and 2 (see fig. 7). Remove the
frame and replace screws.
■ Remove the upper hinge by removing the
two screws. Lift the door from the lower
hinge (see fig. 7a).
■ Re-fasten the hinge to the door.
■ Turn the door around so that the handle is
on the other side.
■ Remove the hinge that is now at the top
(see fig. 7b). Attention: the ring belongs in
the lower hinge.
■ Slide the door into the lower hinge. Place
the ring between the hinge and the hinge
holder (see fig. 7c).
■ Now reassemble the upper hinge.
■ Assemble the protective frame on the other
side of the oven.
■ Unscrew the catch pin of the door lock and
move it to the other side.
fig. 7a
fig. 7b
fig. 7
fig. 7c
Electrical connection
Two or three phases (OKW97).
Combination of oven 950 with Pelgrim cooker
(see fig. 5)
For installation of this combination appliance,
see the cooker instructions.
Solo oven 990 (see fig. 6)
■ Connect oven to the electrical mains.
■ Slide the oven into the cupboard.
■ Open the oven door and fasten the oven
with two screws on each side wall.
Combination of the 970 oven and the Pelgrim
electrical or ceramic cooker
After the electrical or ceramic cooker has been
installed in accordance with the instructions
supplied with the appliance:
■ Connect the oven to the electrical mains
and connect the cooker’s 15-pole plug to
the oven’s counter-plug.
■ Now slide the oven into the cupboard.
■ Open the oven door and fasten the oven
with two screws on each side wall.