17
16
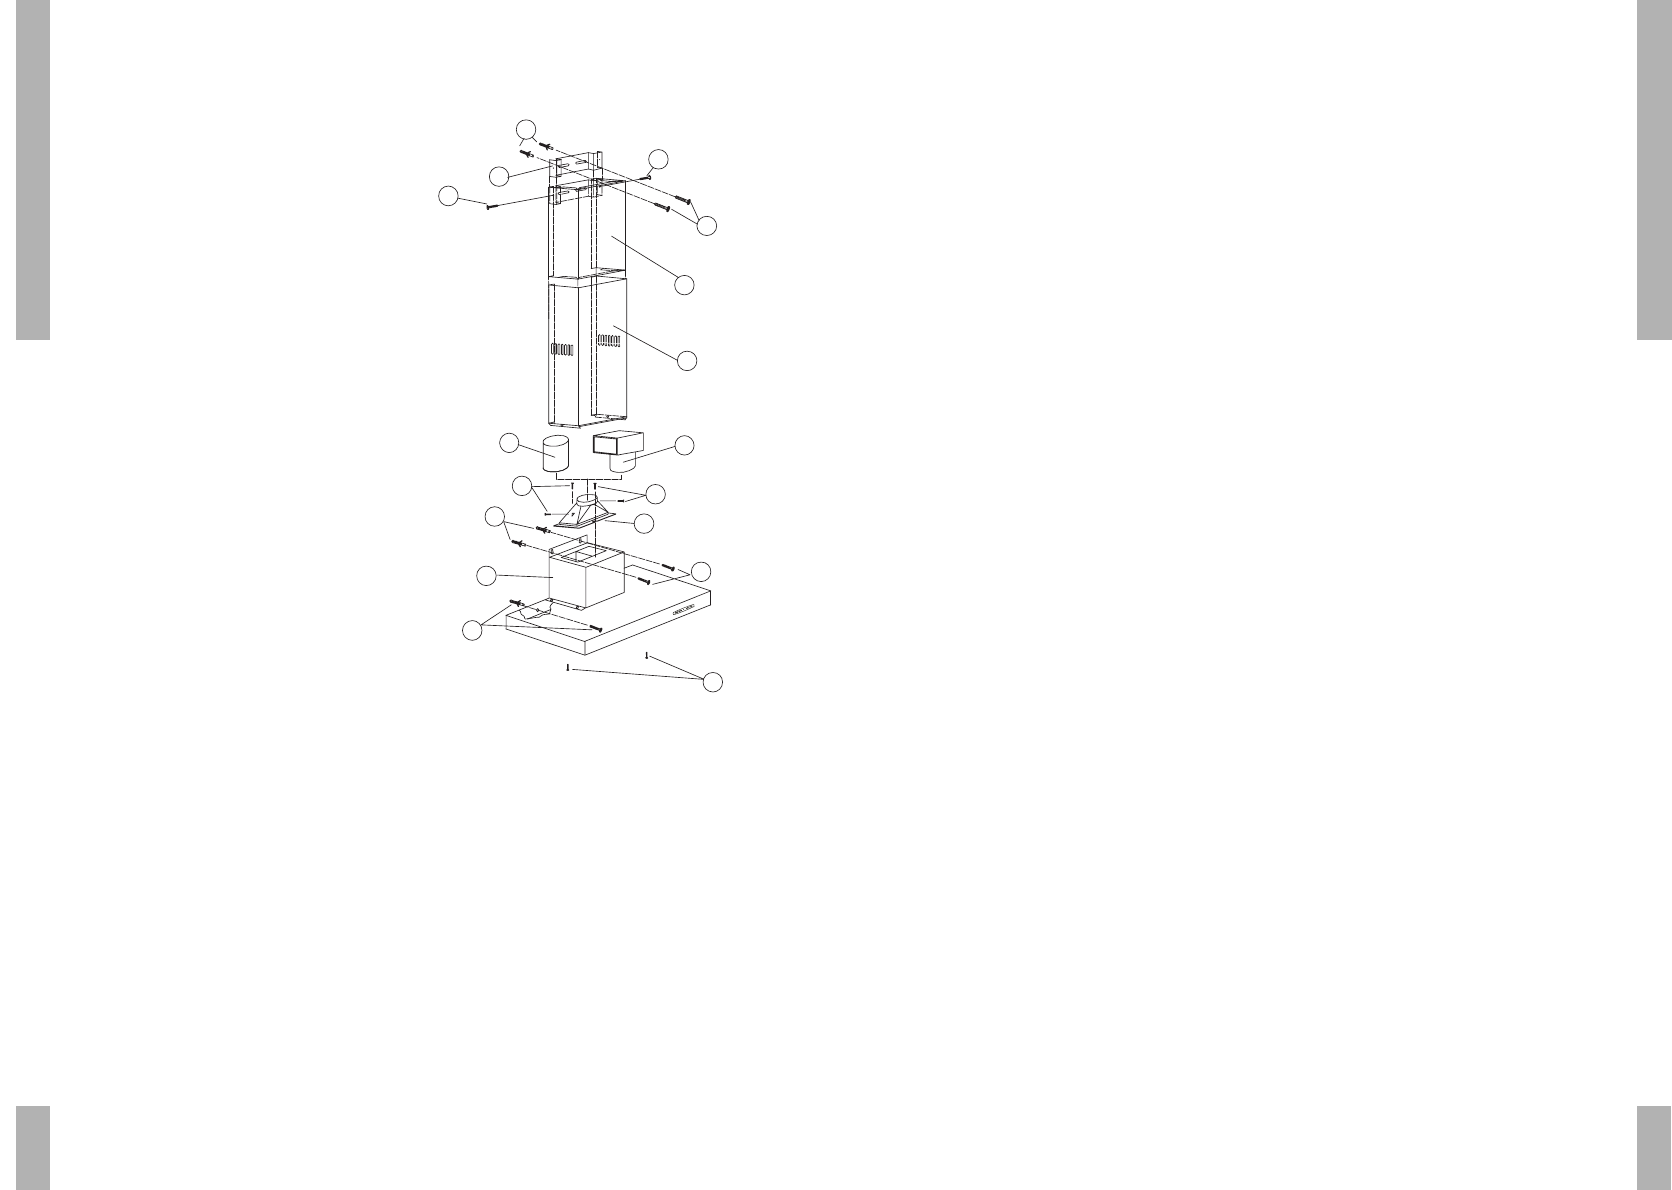
INSTALLATION
■ To install the extractor hood correctly, fix
the hood to the wall from the inside with
2 screws (O).
■ Now connect the extractor hood to the
electricity supply in your home.
■ Attach the protective strips over the edges
■ Remove the film from the filters.
Connect the duct
■ First determine the position and distance
with regard to the fixing bracket (B). Mark
the holes that must be drilled and drill the
2 holes.
■ Fix the bracket to the wall with the screws
(A) provided.
■ If the recirculation system is to be applied,
mount the T-piece (G) instead of a duct.
■ Fix the short pipe (D) to the mounting
bracket (C) using 2 screws (B).
■ Place 2 cage nuts in the openings of the
duct (E), which can be found on the bottom
part of the duct.
■ Place duct (E) over the inner duct (D) by
pulling the two side pieces slightly apart.
■ Now screw 2 screws (Q) into the cage nuts
of the duct (E) from the inside of the
extractor hood.
Electrical connection
■ Make sure the supply voltage ratings
correspond with those stated on the
appliance data plate.
■ Attention: If you want to make a fixed
connection, ensure that a multi-pole switch
with a distance between contacts of 3 mm
is installed in the supply cable.
■ The appliance must be connected to a
system equipped with earth or ground
plate.
■ Colour of the wires:
- green/yellow = earth
- blue = phase N
- brown = phase L
INSTALLATION
General
This appliance should be connected to the
power supply by a recognized fitter who is
familiar with, and works according to the
correct safety regulations. This appliance
meets the European requirements CEE 89/336
EMC and CEE 73/23; 93/68 LVD.
Important that you know
■ If the cooker hood is to be fitted to an
existing duct no other appliances, such as
a geyser or heater, may be connected to
that same duct.
■ Consider local regulations with respect to
the ventilation of gas appliances!
■ The cooker hood should be mounted at
least 650 mm. above the hob.
■ The shorter the duct, and the fewer the
bends in it, the better the cooker hood will
work.
■ Before you start drilling check that there
are no installation cables present.
■ The diameter of the outlet flange is 150 mm.
Although an adapter 150/125 mm is
available, we recommend that an extractor
duct measuring 150 mm be installed. A
smaller diameter results in a lower
extracting capacity and a higher noise
level.
Mounting the canopy hood
■ First determine the position and distance
with regard to the canopy hood. Consider
the minimum distance of 650 mm between
the cooking area and the hood. Mark the
holes that must be drilled and drill the
4 holes.
■ Fix the hood to the wall with the 2 plugs
and screws (N) provided.
■ Mount the two flange halves (H) with the
2 screws (I) and then fix the flange (H) to
the upper part of the motor group (L) with
the 4 screws (I) of the filter in the hood.