Operation
Switching on
Press the on/off button (1) for the required
cooking zone.
Setting the power
With the and buttons you can select
other power levels (settings 1-12). The
settings that you should select for various
dishes can be found in the cooking tables on
page 21 and 22. The hob is equipped with 3
buttons, with which you can choose one of the
programmed power levels 6, 10 or 12 (see
appliance information).
Setting the cooking time
For the rear cooking zone’s you can set the
cooking times to a maximum of 99 minutes.
Switch on the rear zone and select the
required power level. With the timer buttons
and (see appliance information) you
can set the required cooking time. Once the
clock has been set, it will count down
automatically. During the count down you can
change the cooking time with the and
buttons.
Switching off
By pressing the on/off button once more the
cooking zone will be switched off.
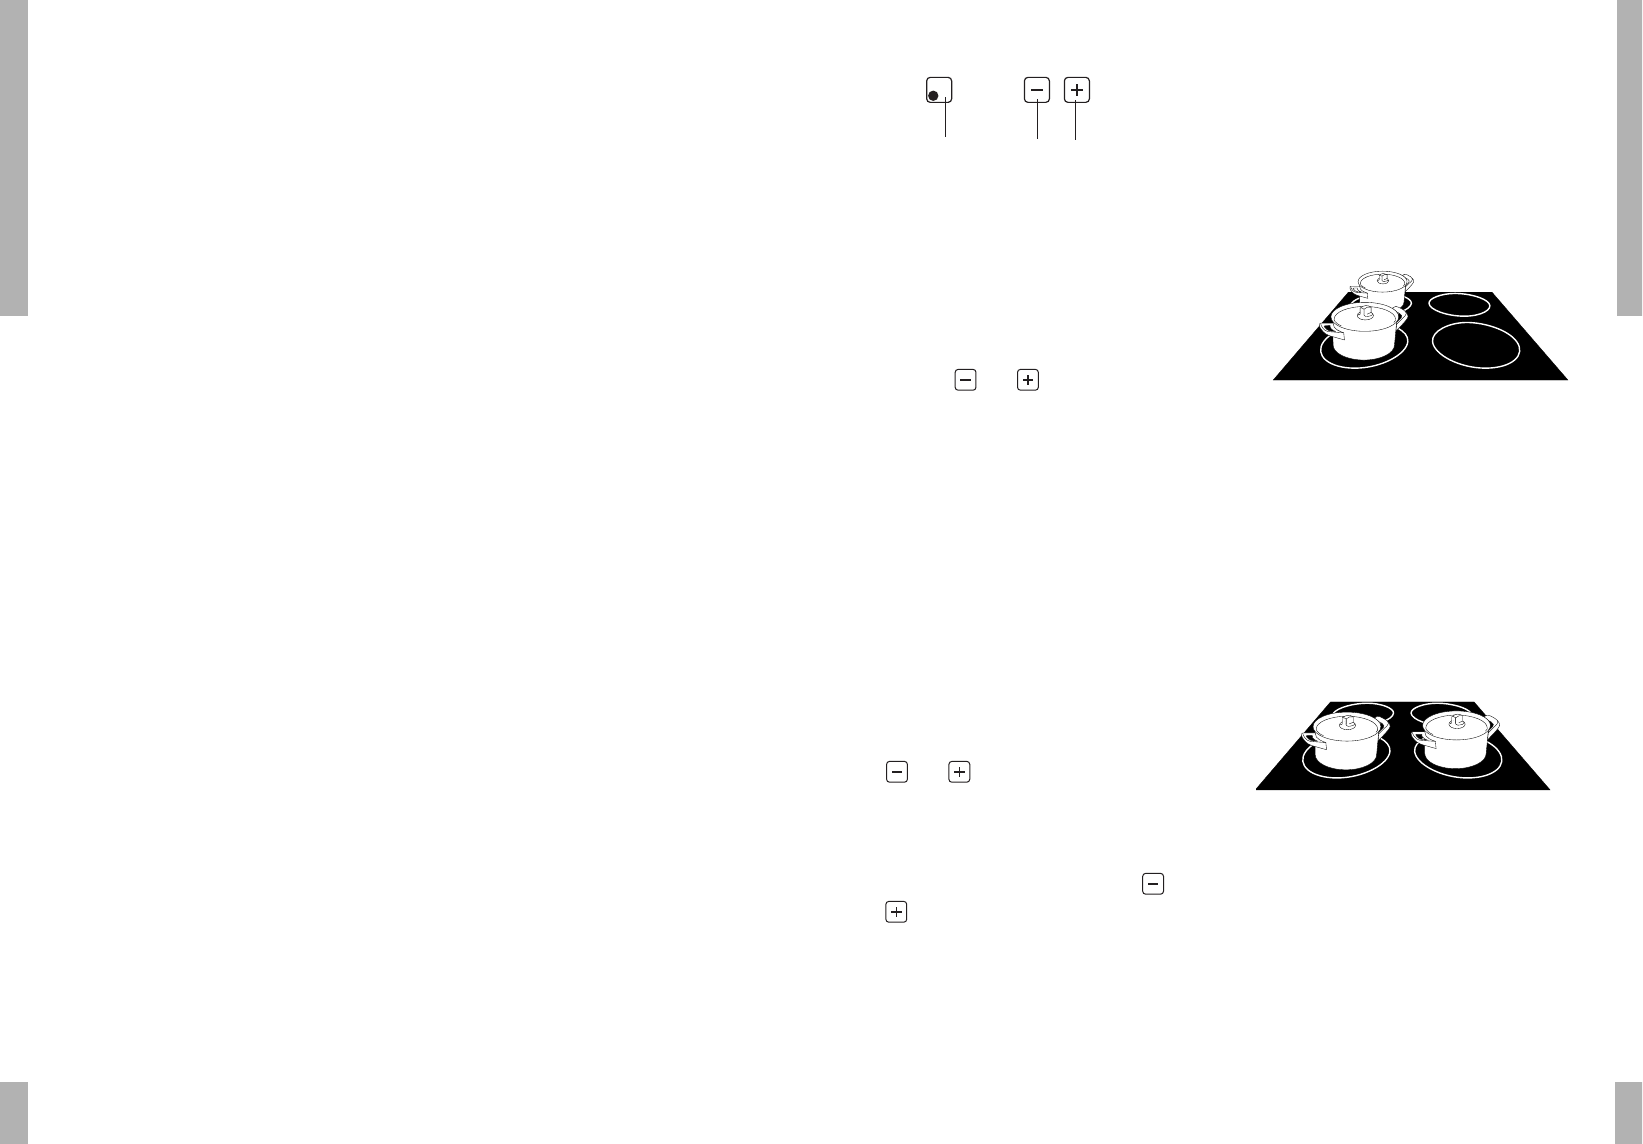
Two zones
Two zones, one behind the other, are
controlled by a single generator. The
advantage is that a high power can be
achieved for each zone. This is ideal when
bringing a dish quickly to the boil or for
sealing meat.
When both of two zones, one behind the other,
are switched on at the same time the power
will be shared between them automatically.
Up to setting 10 this has no effect. Suppose
you then switch a zone to position 11 or 12
then the other zone will be switched
automatically to setting 6 or 7.
Two zones next to each other will not
influence each other. Thus you can switch
them both to setting 12 at the same time. You
will hear a ticking noise if two zones, one
behind the other, are switched on at the same
time. This is caused by the hob switching to
an fro between the two zones.
Fig.. 6: Zones positioned adjacent to one another can be
simultaneously set to level 12.
Fig. 5: Zones positioned one behind each other
influence each other
Fig. 4: Control panel
OPERATION
18
19
Pans
Suitable
- Stainless steel pans made specially for
induction cooking
- Enamelled pans
- Enamelled cast iron pans
Not suitable
- Earthenware
- Aluminium
- Plastic
- Copper
- Ceramic/Porcelain
- Stainless steel
Induction cooking uses magnetism to
generate heat. The pan base must then
contain iron (be magnetic). With a magnet you
can check that the material of the bottom of a
pan is magnetic. If the magnet is attracted to
the bottom of the pan and the pan is suitable
for electric cooking, then it is suitable for
induction cooking.
While enamelled pressed steel pans are
certainly magnetic they can be damaged if
they are used for induction cooking. Enamel
has poorer heat conducting properties than
the aluminium contained in the bottoms of
stainless steel pans suitable for induction
cooking.
It is thus possible for:
■ enamel to break off (enamel that comes
loose from the steel) if, for example, you
put the pan when dry or nearly dry on a
high setting.
■ the pan bottom to warp due to, for example,
overheating through using a power that is
too high.
Use only pans with a thick (minimum 2.25 mm)
smooth base that is suitable for induction
cooking, possibly bearing the approval mark
"Class induction".
When pans with a warped base (warped
inward or outward) are used the overheating
protection system cannot work, as a
consequence the hob becomes too hot. This
can lead to breakage of the ceramic plate and
melting of the pan base.
During induction cooking you may hear a
rattling sound in the bottom of the pan. This
will damage neither the pan nor the hob. This
sound is caused by the high power of the
cooking zone acting on the bottom of the pan.
You can prevent the rattling sound by
selecting a lower setting.
Damage caused by the use of unsuitable pans
and by pans boiling dry is excluded from the
warranty.
Special points
The zones will only work if there is a suitable
pan on the zone. When there is no pan on the
zone (or an unsuitable pan) the display will
remain flashing. As soon as there is a
(suitable) pan on the zone the display will
show the heating setting.
PANS