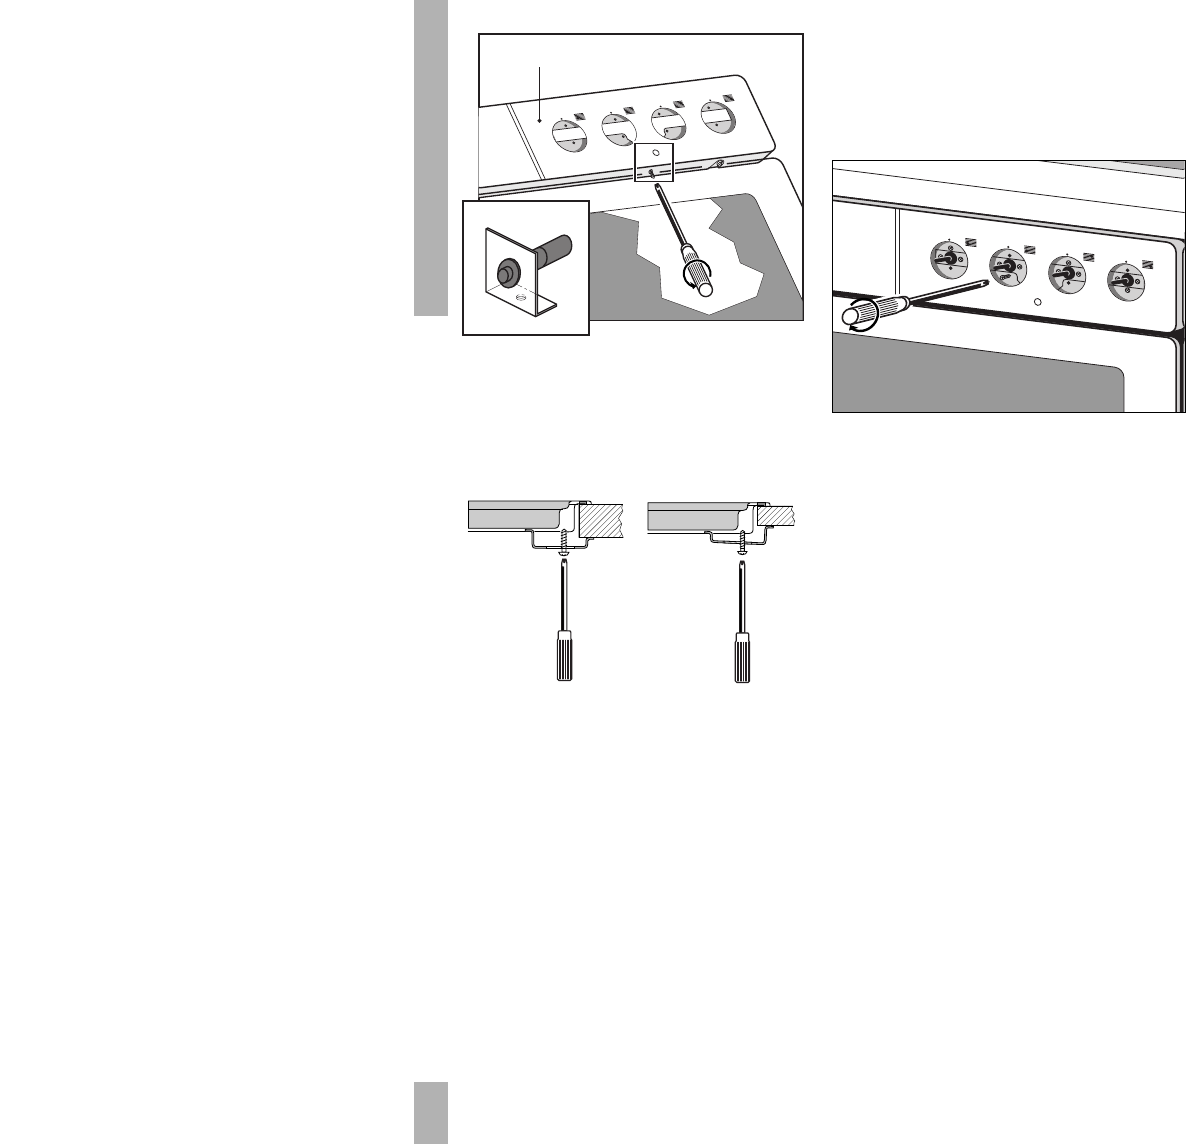
333428
19
Zoom out
Zoom in
Previous page
1/38
Next page
14
ASSEMBLY
Remove the bracket and the stopper
covering the hole for the spark switch in
the control panel (see fig. 8). (Only applies
to models with a spark switch.)
Install the hob, screw the assembly clamps
tight. If the unit is constructed from thin
material turn the assembly clamps round
(see fig. 9).
Connect the hob to the gas supply and test
to ensure that there are no gas leaks.
Insert the plug of the hob (if present) into
the wall socket.
After having inserted the plug of the oven
into the wall socket, the oven can be
inserted two-thirds of the way into the
cupboard.
Reattach the assembly plate to the control
panel (see fig. 10). Check to ensure that the
knob of the spark switch (if present) moves
easily.
Screw the oven to the kitchen cupboard.
Replace the control knobs.
After installation check that the appliance
and the burners are working properly; the
gas flames should be regular and stable
when full on and the burners should not go
out when turned to the lowest setting.
In combination with building-in oven
OST 940/943
Remove the saucepan supports and the
burner caps.
Remove the control knobs for the burners
on the control panel.
Unscrew the four cardan joints from the
control panel.
control panel
C
DETAIL C
fig. 8
fig. 9
fig. 10
19


Need help? Post your question in this forum.

Forumrules


Report abuse

Libble takes abuse of its services very seriously. We're committed to dealing with such abuse according to the laws in your country of residence. When you submit a report, we'll investigate it and take the appropriate action. We'll get back to you only if we require additional details or have more information to share.

Product:

For example, Anti-Semitic content, racist content, or material that could result in a violent physical act.

For example, a credit card number, a personal identification number, or an unlisted home address. Note that email addresses and full names are not considered private information.

Forumrules

To achieve meaningful questions, we apply the following rules:

Register

Register getting emails for Pelgrim gkb 205 at:


You will receive an email to register for one or both of the options.


Get your user manual by e-mail

Enter your email address to receive the manual of Pelgrim gkb 205 in the language / languages: English, German, Dutch, French as an attachment in your email.

The manual is 0,47 mb in size.


You will receive the manual in your email within minutes. If you have not received an email, then probably have entered the wrong email address or your mailbox is too full. In addition, it may be that your ISP may have a maximum size for emails to receive.

The manual is sent by email. Check your email

If you have not received an email with the manual within fifteen minutes, it may be that you have a entered a wrong email address or that your ISP has set a maximum size to receive email that is smaller than the size of the manual.

The email address you have provided is not correct.

Please check the email address and correct it.

Your question is posted on this page

Would you like to receive an email when new answers and questions are posted? Please enter your email address.


Info