12
GB IE
• This electric tool is not suitable
for cup brushes. Using the electric
tool in ways for which it is not intended
may cause hazards and injuries.
• This electric tool is not suitable
for cup wheels, mounted points
or grinding cones. Using the electric
tool in ways for which it is not intended
may cause hazards and injuries.
• This electric tool is not suitable
for polishing. Using the electric tool
in ways for which it is not intended may
cause hazards and injuries.
• Do not use any accessories that
recommended for this electric
tool by the manufacturer. Simply
because an accessory can be attached
to your electric tool does not guarantee
safe operation.
• The allowable rotation speed of
the attachment tools must be at
least as high as the highest rota-
tion speed indicated on the elec-
tric tool. Accessories that run faster
than the allowable speed can break
• The outside diameter and thick-
ness of the attachment tool must
correspond to the dimensions
indicated for your electric tool.
Attachment tools which are wrongly
shielded or controlled.
• Attachment tools with threaded
-
ing of the grinding spindle ex-
actly. For attachment tools which
the diameter of the hole in the
Attachment tools which cannot be pre-
cisely attached to the electric tool turn
unevenly, vibrate very strongly and can
ultimately lead to a loss of control.
• Never use damaged attachment
tools. Check attachment tools
such as grinding discs for chip-
ping or cracks, grinding plates
for cracks, wear or strong abra-
sion and wire brushes for loose
or broken wires before using
them. If the electric tool or the
attachment tool falls off, check
whether it is damaged or, use
an undamaged attachment tool.
If you have checked the at-
tachment tool and attached it,
keep yourself and any nearby
persons beyond the level of the
rotating attachment tool and al-
low the device to run for 1 min.
at the highest rotational speed.
Damaged tools usually break during this
test period.
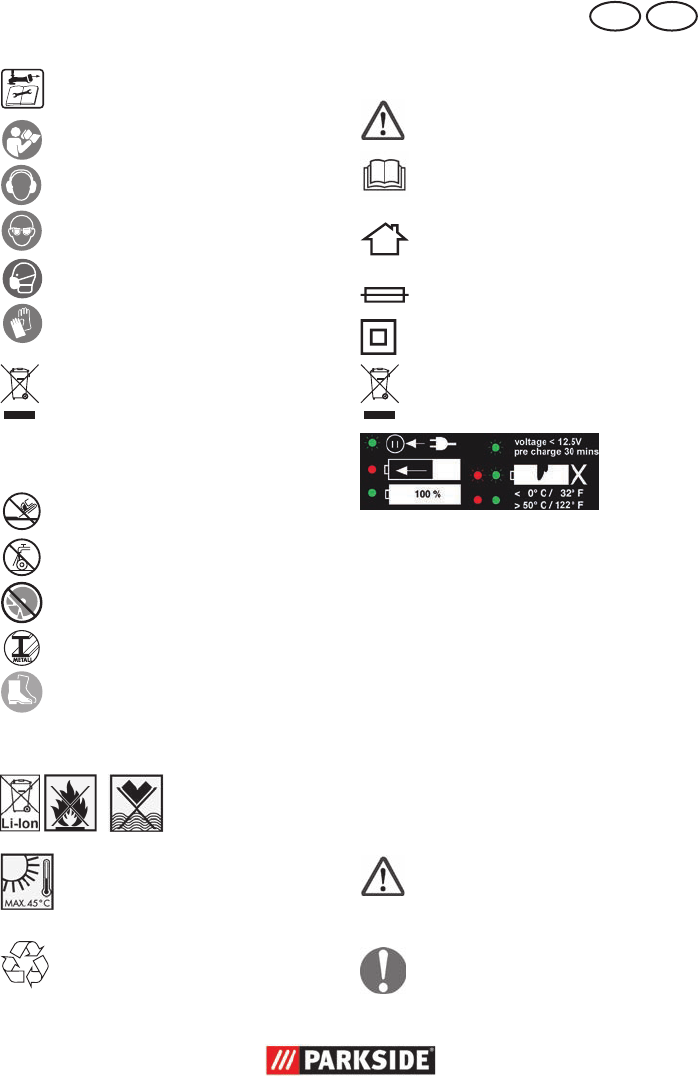
• Wear personal safety equip-
ment. Depending on the applica-
tion, use full face shields, eye
protection or safety goggles.
In so far as it is appropriate,
wear dust masks, ear protec-
tion, gloves or special aprons
which keep small grinding and
material particles away from
you. Eyes should be protected from the
foreign matter which can be caused to
that is created during operation. If you
are exposed to loud noise for a long
time, you may suffer hearing loss.
• Ensure that other people are at
a safe distance to your work-
ing area. Anyone who enters
the working area should wear
personal protective equipment.