Index
78
Inde
A
Accessories
Advanced
Analogue T
Aspect
Audio Description
Auto Gain Control
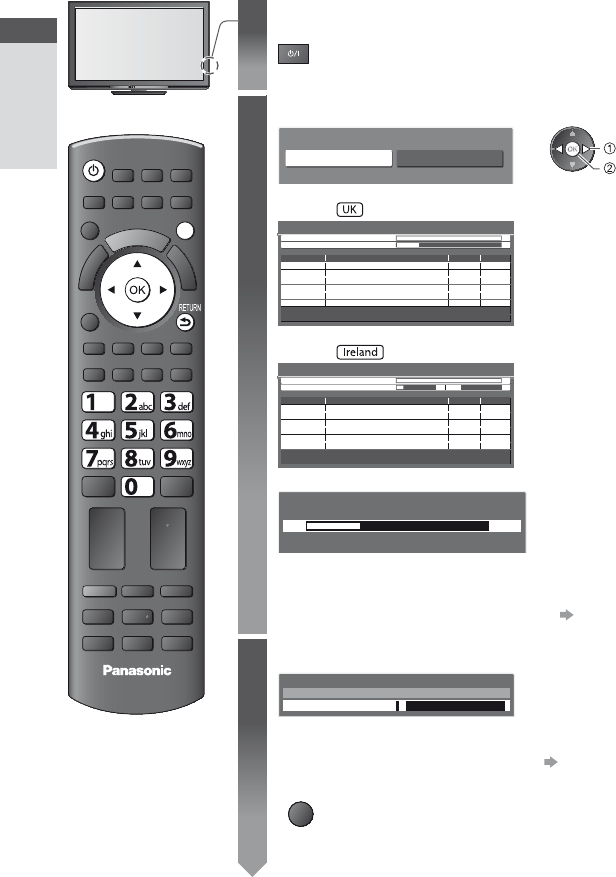
Auto Setup
Auto
A
B
Banner
C
Category
Channel List
Channel Sor
Child
Common
COMPONENT
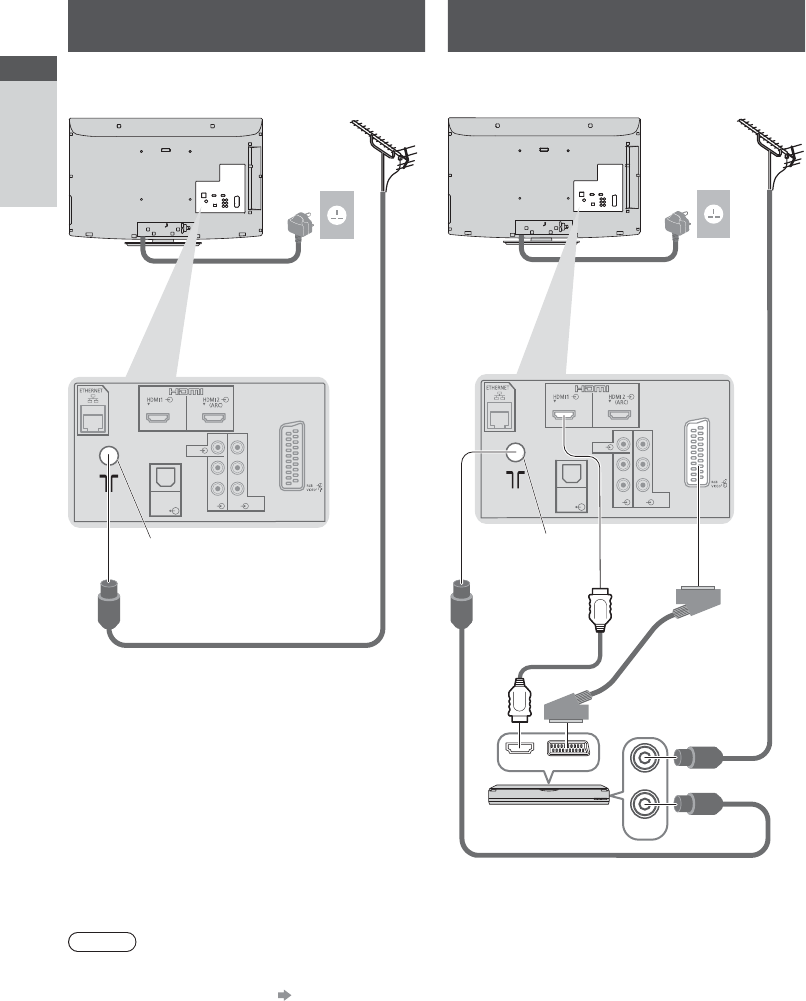
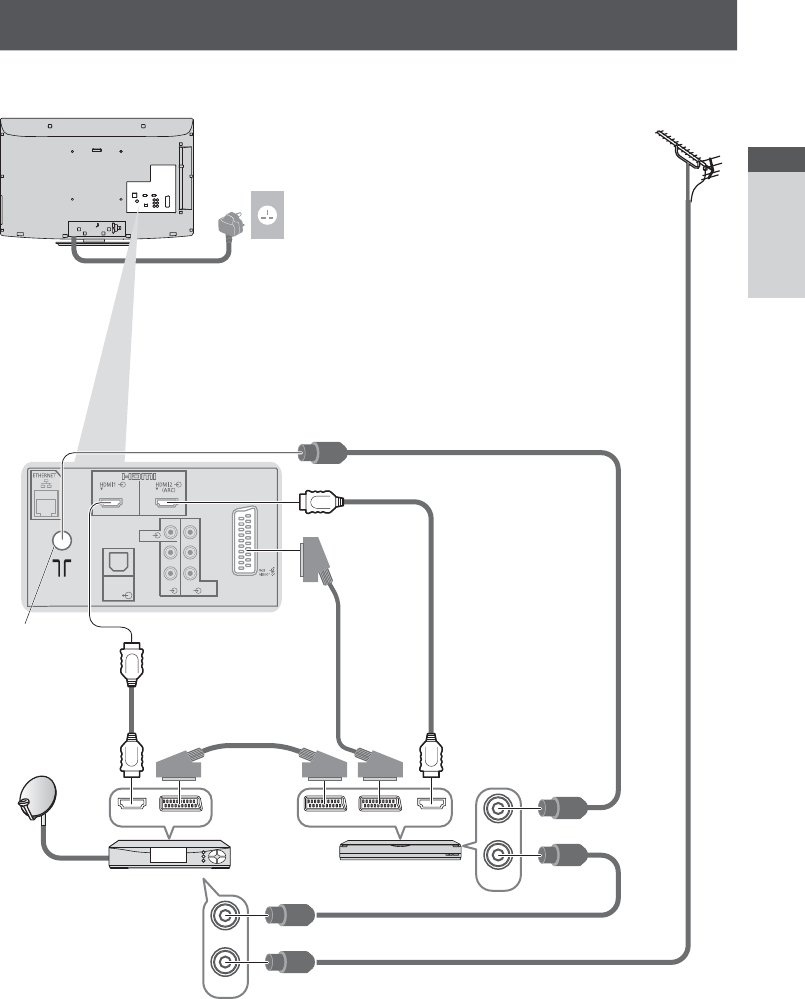
Connection
D
Direct
DTS
DVB 36-39
DVI
DVI Input Setting
DVD Recorder ·····················································
E
EPG
External equipment
External input ··········································································
F
F
F
Free input menu
G
Glossary
Guide link programming
H
HDMI
Hold
Home
I
Information
Input
Input
L
Last
Licence·······························································································
M
Mains
Mains power On / Off switch 9, 12
Maintenance
Manual
Media 51-57
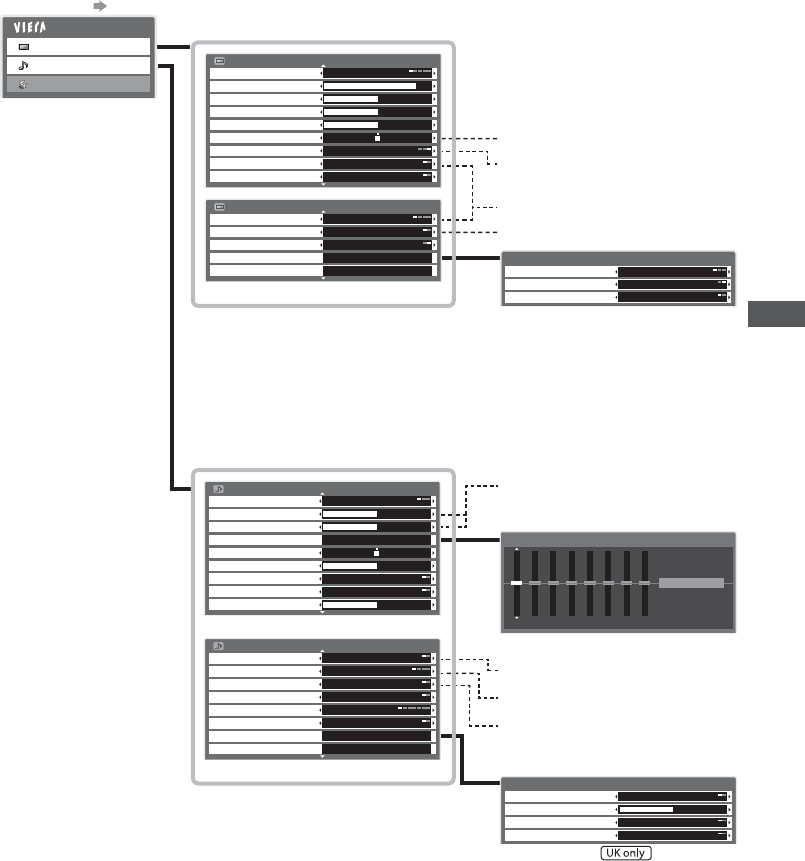
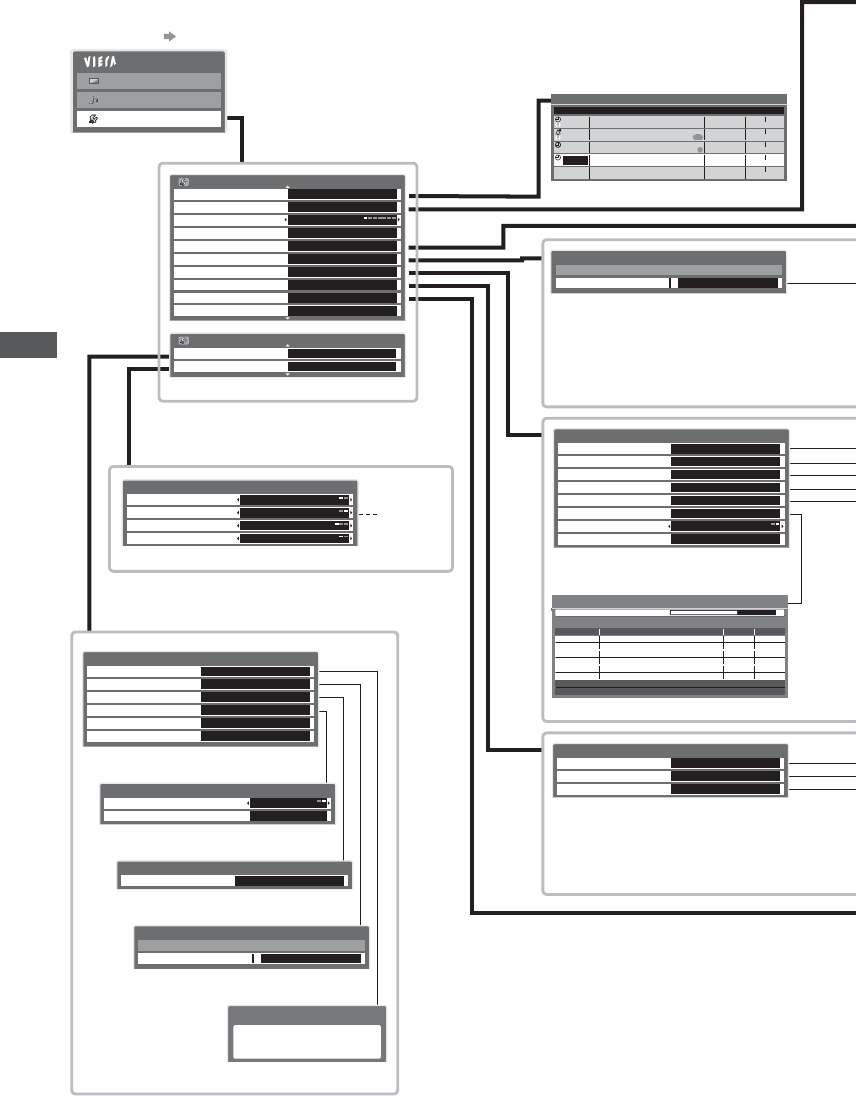
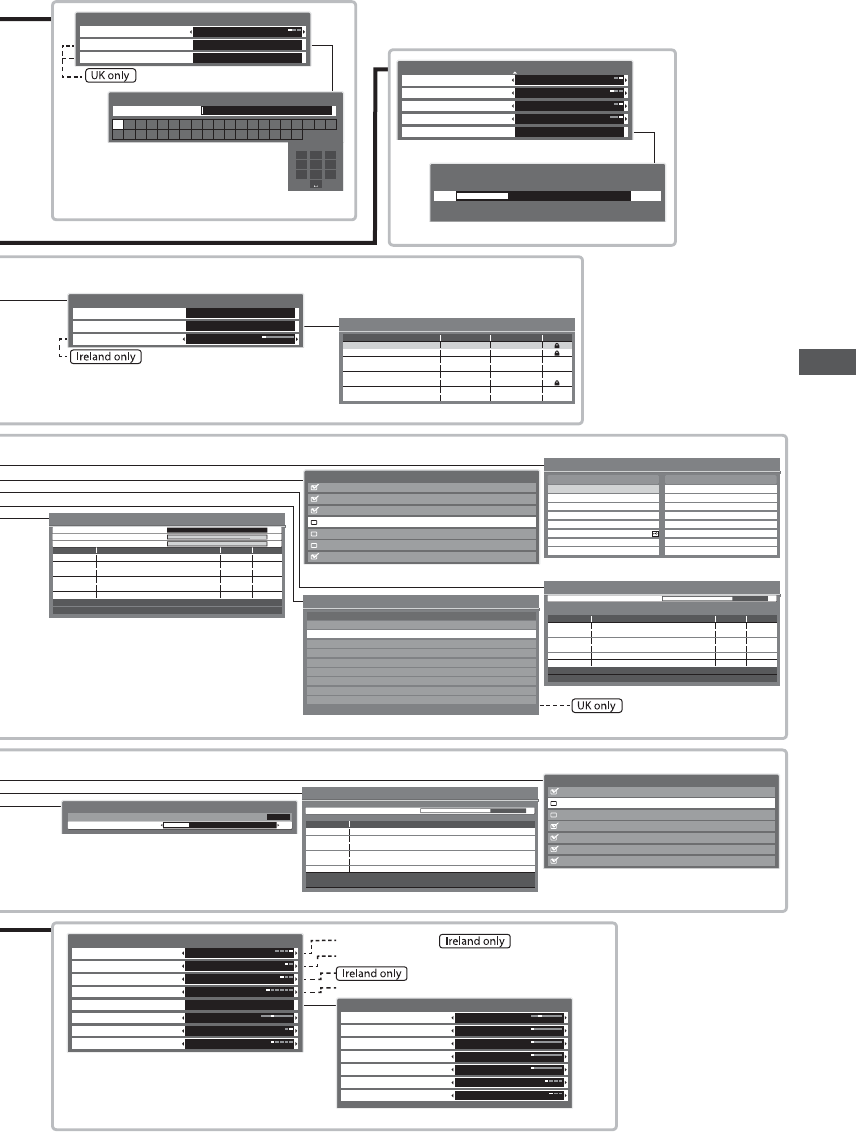
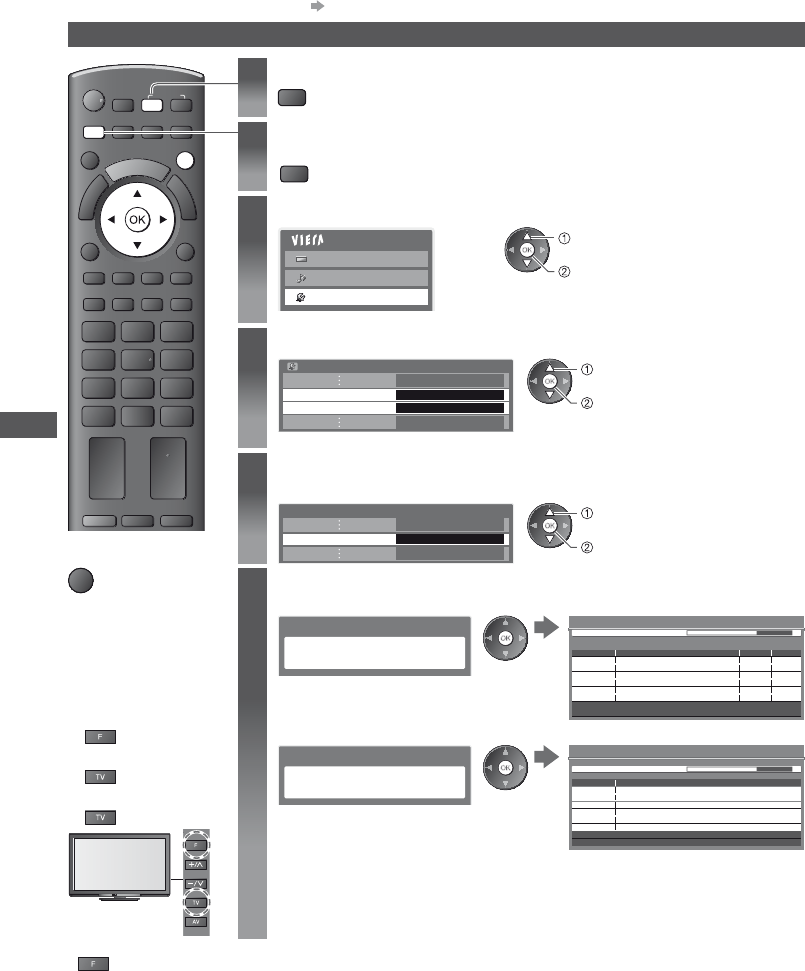
Menu 27-32
Mode
Monaural
Multi
Music
N
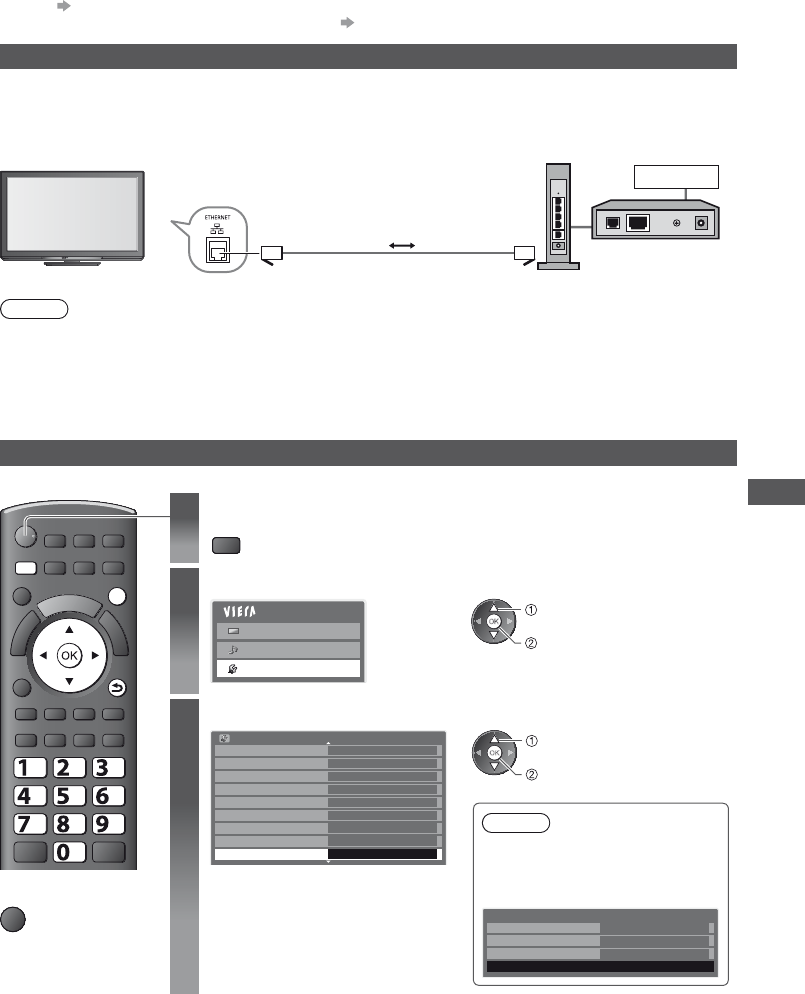
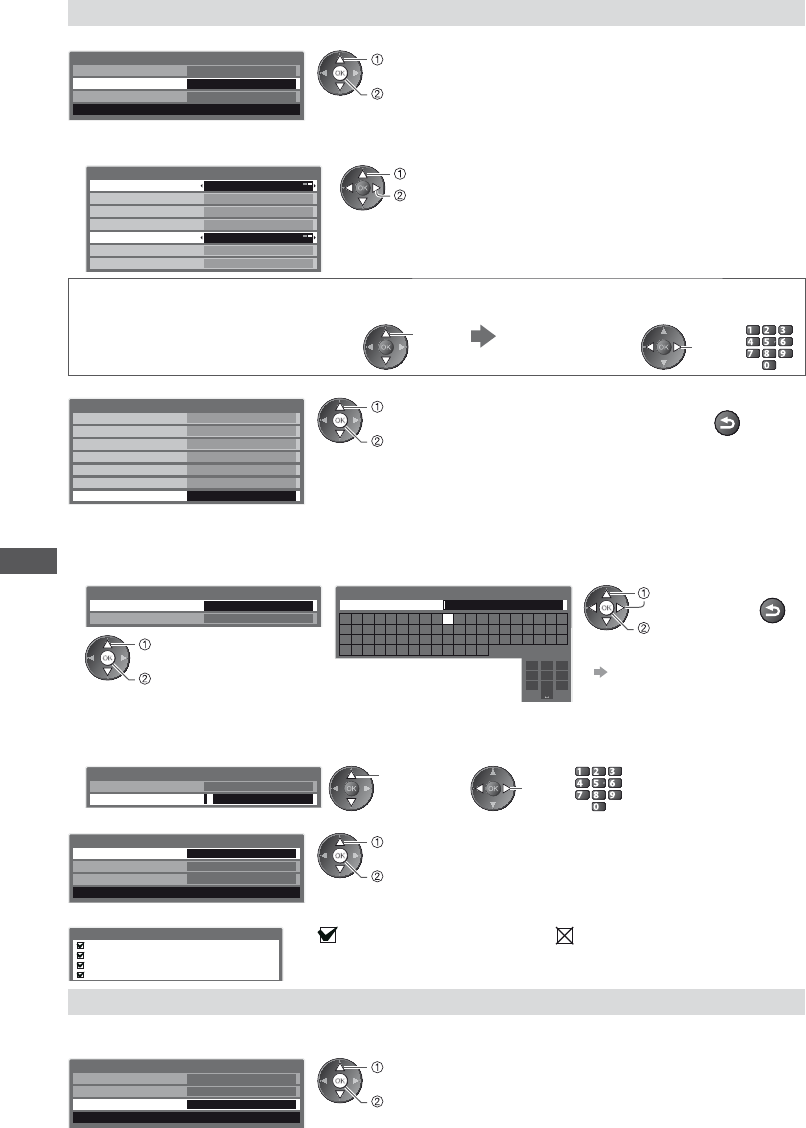
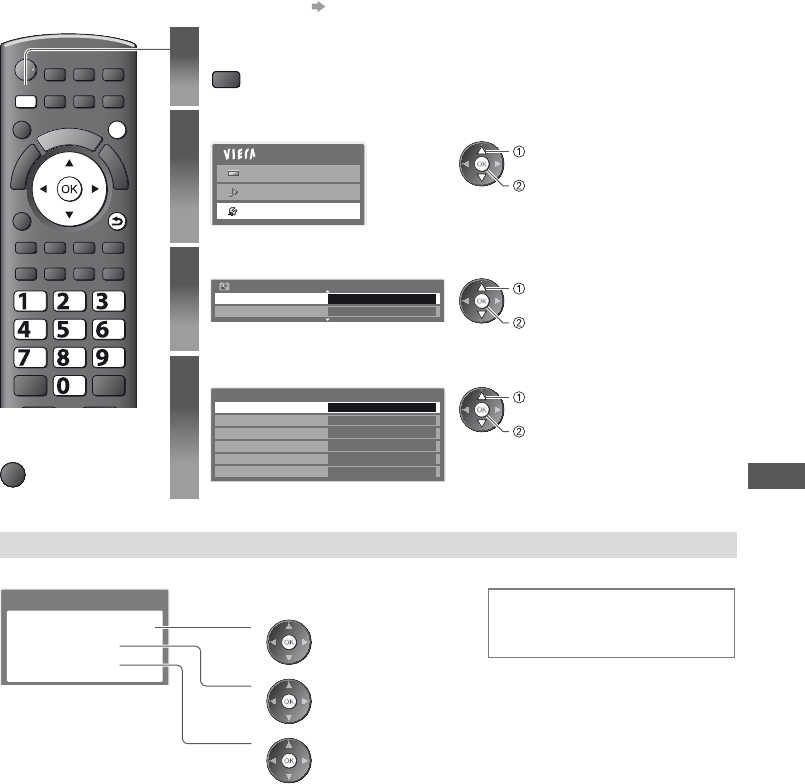
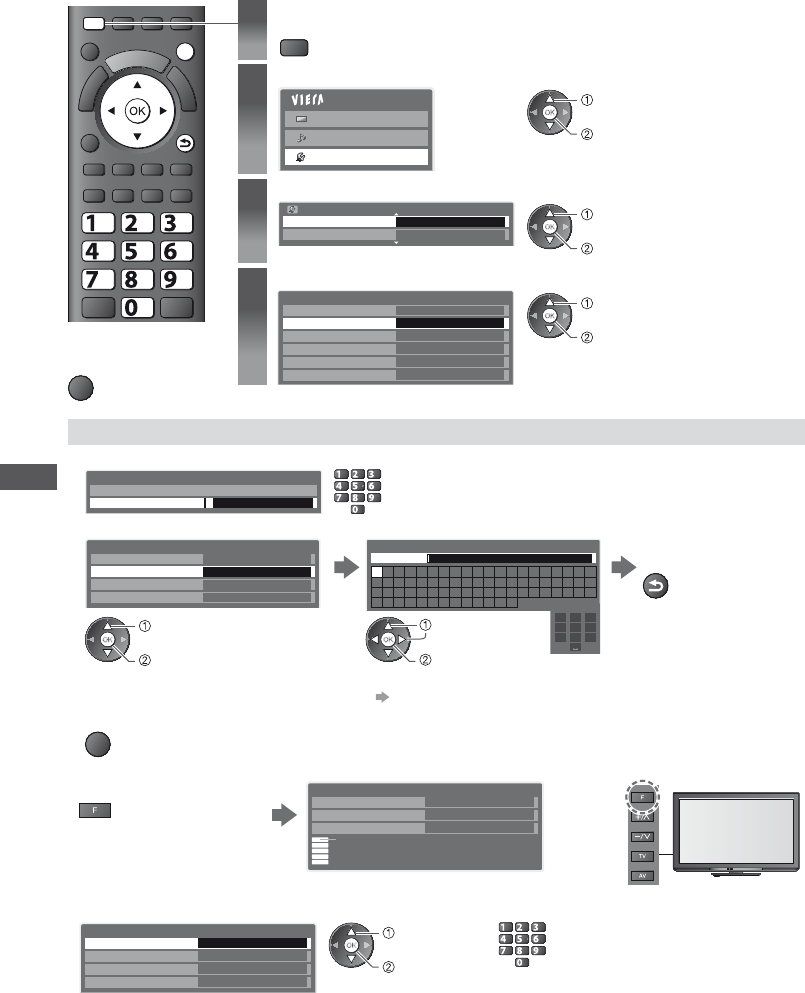
Network
Network
New Channel Message
NICAM
Normalise
NTSC
O
Off
Optional 6
Owner ID
P
P
Pedestal 7
Photo
PIN number
Playing
P-NR
Power and
Q
Q-Link
Q-Link Download····································································
Quick Star
R
Radio
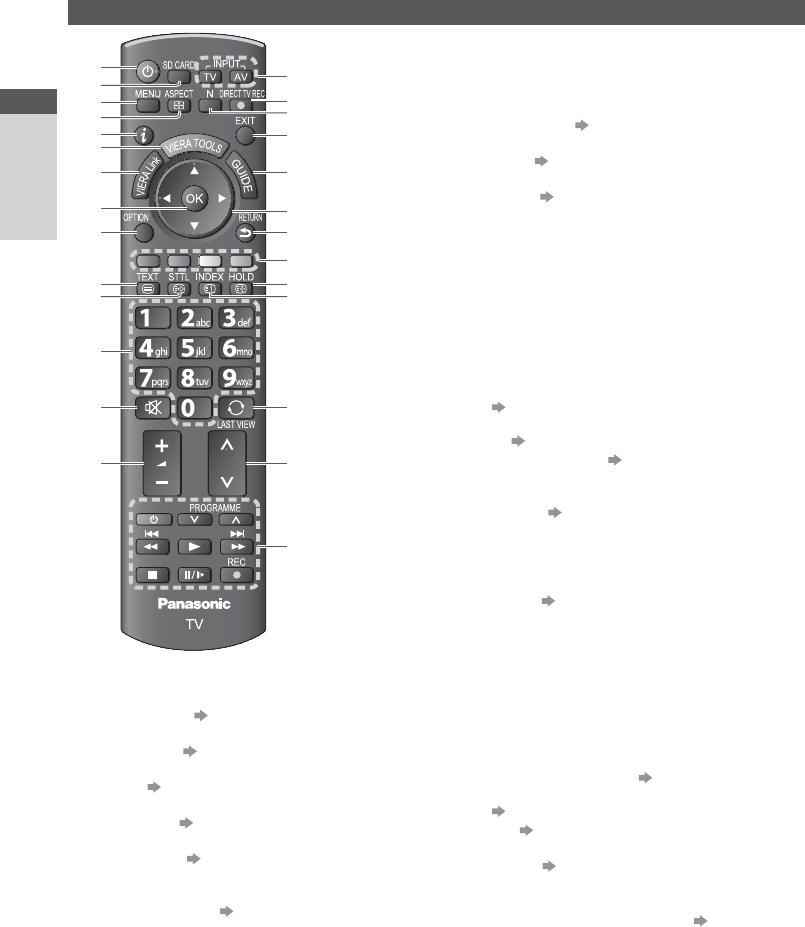
Remote control
Reset to Defaults
Resolution
RGB
S
Sales and Support Information
Satellite
SCART··························································································
SD Card
Search
Shipping
Signal
Slideshow
Soft
Specifications
Split
Subtitles
System
T
T 21-23
Timer Programming
T
T 18-20
T
U
Update Channel List
V
V-Audio······························································································
VCR
Video
VIERA Link···································································· 58, 59, 61-65
VIERA
Viewing
Vivid
Volume Corr
W
WSS
Z
Zoom