ªCautions for Storage
Before storing the Movie Camera, take the Cassette out
and detach the Battery.
Store all the components in a dry place with a relatively
stable temperature.
(Recommended Temperature:15 to 25oC, Recommended
Humidity:40 to 60%)
Movie Camera
≥Wrap it with a soft cloth to prevent dust from getting into the
Camera.
≥Do not leave the Movie Camera in places that expose it to
high temperature.
Battery
≥Extremely high temperatures or low temperatures will
shorten the life of the Battery.
≥If the Battery is kept in smoky or dusty places, the terminal
may rust and cause malfunctions.
≥Do not allow the Battery terminals to come in contact
with metal objects (such as necklaces, hairpins, etc.).
This can result in a short circuit or heat generation
and, if you touch the Battery in this condition, you may
be badly burned.
≥Store the Battery in a completely discharged state. To store
the Battery for a long period of time, we recommend you
charge it once every year and store it again after you
completely use up the charged capacity.
Cassette
≥Before storing it, rewind the tape to the beginning. If the
Cassette is left for more than 6 months with the tape
stopped midway, the tape sags (although it depends on the
storage condition). Be sure to rewind to the beginning.
≥Store the Cassette in its case. Dust, direct sunlight
(ultraviolet rays), or humidity may damage the tape. Dust
contains hard mineral particles, and dusty Cassettes
damage the heads of the Movie Camera and other
components. Develop a habit of returning the Cassette
back to its case.
≥Once every half year, wind the tape to the end and then
rewind it to the beginning. If the Cassette is left for 1 year or
longer without winding or rewinding, temperature and
humidity changes may cause the Cassette to deform due
to swelling, shrinking, and so forth. The wound tape may
stick to itself.
≥Do not place a Cassette near highly magnetic substances
or equipment.
≥The surface of tape is covered with extremely minute
magnetic particles, upon which signals are recorded.
Magnetic necklaces, toys, etc., have magnetic force that is
stronger than you may normally expect, and they may
erase the contents of a recording or may cause noise in
images and sounds.
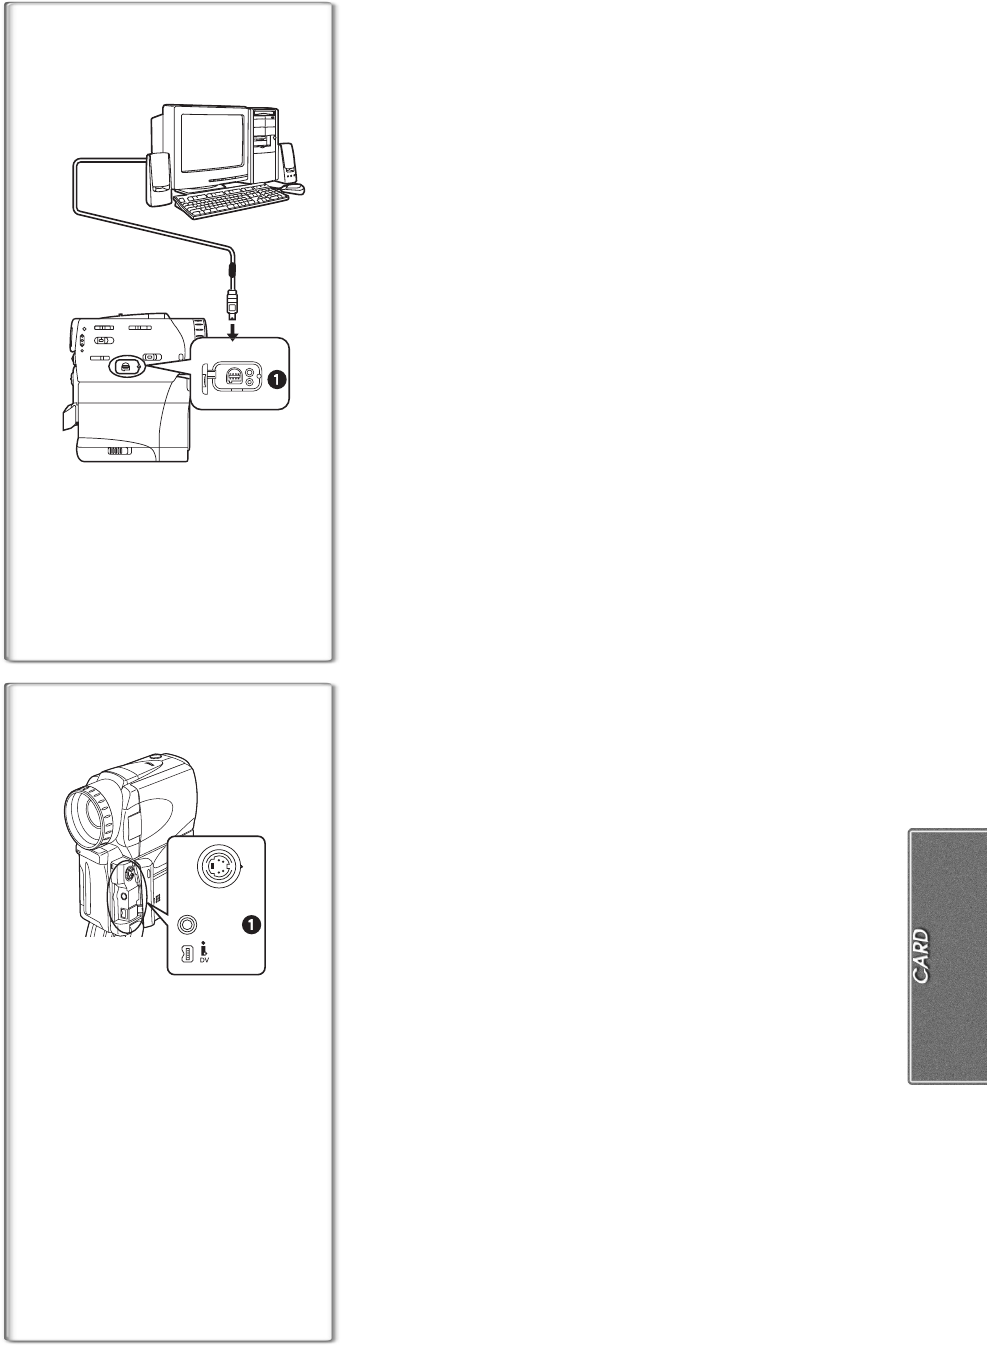
Card
≥When the Card is being read, do not remove the Card, turn
off the power, or subject it to vibration or impact.
≥Do not leave the Card in places where there is high
temperature or direct sunlight, or where electromagnetic
waves or static electricity are easily generated.
≥Do not bend or drop the Card. The Card or the recorded
content may be damaged.
≥After use, be sure to remove the Card from the Movie
Camera.
≥After use, store the supplied SD memory card in the
enclosed yellow bag.
≥Do not touch the terminals on the back of the Card with
your fingers. Do not allow dirt, dust or water to enter it.
ªLCD Monitor/Viewfinder/Lens Hood
LCD Monitor
≥In a place with drastic temperature changes, condensation
may form on the LCD Monitor. Wipe it with soft dry cloth.
≥If your Movie Camera is extremely cold when you turn its
power on, the image on the LCD Monitor is slightly darker
than usual at first. However, as the internal temperature
increases, it goes back to the normal brightness.
...............................................................................................
Extremely high precision technology is employed to produce
the LCD Monitor screen featuring a total of approximately
110,000 pixels. The result is more than 99.99% effective
pixels with a mere 0.01% of the pixels inactive or always lit.
However, this is not a malfunction and does not affect the
recorded picture.
...............................................................................................
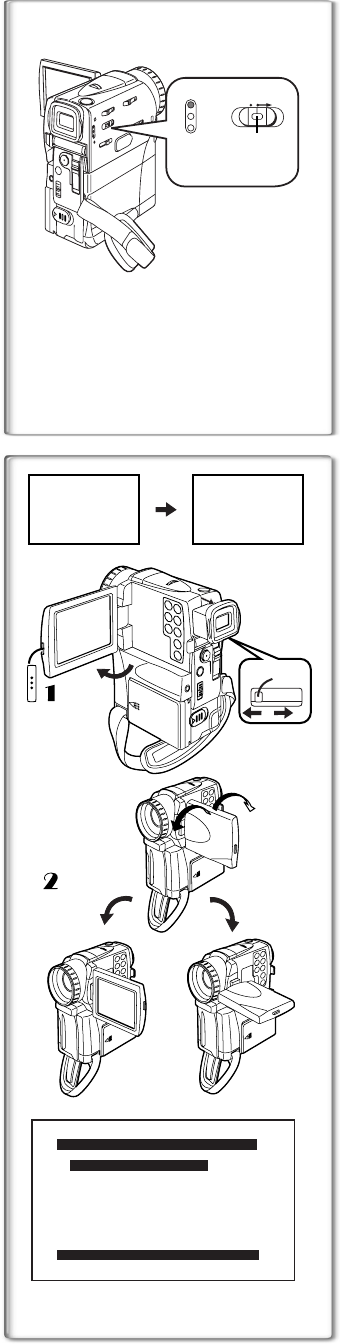
Viewfinder
≥Do not direct the Viewfinder or Lens to the sun. Internal
components may be seriously damaged.
≥When the Movie Camera is used with a large capacity
Battery attached to it, it is not practical to look in the
Viewfinder from behind the Battery. In this case, lift up the
Viewfinder to an easy-to-see angle.
...............................................................................................
Extremely high precision technology is employed to produce
the Viewfinder screen featuring a total of approximately
113,000 pixels. The result is more than 99.99% effective
pixels with a mere 0.01% of the pixels inactive or always lit.
However, this is not a malfunction and does not affect the
recorded picture.
...............................................................................................
Lens Hood
≥Do not attach other conversion lenses in front of the Lens
Hood; there is no mount to be used for the attachment.
≥When you want to attach the Tele Conversion Lens
(VW-LT3714ME; optional) or Wide Conversion Lens
(VW-LW3707ME; optional), first of all, turn the Lens Hood
counterclockwise. If the MC Protector (VW-LMC37E;
optional) or ND Filter (VW-LND37E; optional) is used, the
Lens Hood can be mounted on the filter.
≥If you push the [W/T] Lever toward [W] during recording
with the filter or conversion lens attached to the Movie
Camera, 4 corners of the image may become dark
(vignetting). For details, please refer to the operating
instructions of your accessories.
≥Be sure to keep the Lens Hood attached to the Movie
Camera so as to shut out unnecessary light.
≥Remove the Lens Hood attached to this Movie Camera first
before attaching the supplied Lens Hood for MEGA Still
Picture Recording.
~~~~~~~~~~~~~~~~~~~
Before Requesting Repair (Problems
and Solutions)
Power
1: The Movie Camera power cannot be turned on.
1-1: Is the power source connected correctly? (l 10)
1-2: Is Camera Unit well locked until it makes the click
sound? If Camera Unit is not completely installed power
won’t be on.
2: The Movie Camera power is turned off
automatically.
2: If you leave the Movie Camera in Recording Pause
Mode for more than 6 minutes, the power is turned off
automatically to protect the tape and to save the Battery
power. (l 18)
3: The Movie Camera power does not stay on long
enough.
3-1: Is the Battery low? Charge the Battery or attach a fully
charged Battery. (l 10)