622555
8
Zoom out
Zoom in
Previous page
1/100
Next page
Operating Instructions
Digital Video Camera
Model No. HC-V10
Before use, please read these instructions completely.
VQT4C38
until
2012/2/10
Model number suffix “EB” denotes UK model.
HC-V10EB_VQT4C38_mst.book 1 ページ 2012年1月24日 火曜日 午前9時35
2
VQT4C38
Dear Customer,
We would like to take this opportunity to
thank you for purchasing this Panasonic
Digital Video Camera. Please read these
Operating Instructions carefully and keep
them handy for future reference. Please
note that the actual controls and
components, menu items, etc. of your Digital
Video Camera may look somewhat different
from those shown in the illustrations in these
Operating Instructions.
Concerning the battery
EMC Electric and magnetic
compatibility
This symbol (CE) is located on the rating
plate.
Product identification marking
Information for Your Safety
WARNING:
To reduce the risk of fire, electric shock or
product damage,
Do not expose this unit to rain,
moisture, dripping or splashing.
Do not place objects filled with liquids,
such as vases, on this unit.
Use only the recommended
accessories.
Do not remove covers.
Do not repair this unit by yourself.
Refer servicing to qualified service
personnel.
CAUTION!
To reduce the risk of fire, electric shock or
product damage,
Do not install or place this unit in a
bookcase, built-in cabinet or in another
confined space. Ensure this unit is well
ventilated.
Do not obstruct this unit’s ventilation
openings with newspapers, tablecloths,
curtains, and similar items.
Do not place sources of naked flames,
such as lighted candles, on this unit.
Install this unit so that the AC adaptor can
be unplugged from the socket outlet
immediately if any problem occurs.
Warning
Risk of fire, explosion and burns. Do not
disassemble, heat above 60 oC or
incinerate.
CAUTION
Danger of explosion if battery is
incorrectly replaced. Replace only with
the type recommended by the
manufacturer.
When disposing the batteries, please
contact your local authorities or dealer
and ask for the correct method of
disposal.
Product Location
Digital Video
Camera
Bottom
AC adaptor Bottom
HC-V10EB_VQT4C38_mst.book 2 ページ 2012年1月24日 火曜日 午前9時35
3
VQT4C38
Information for Users on
Collection and Disposal of Old
Equipment and used Batteries
These symbols on the
products, packaging, and/
or accompanying
documents mean that used
electrical and electronic
products and batteries
should not be mixed with
general household waste.
For proper treatment, recovery and
recycling of old products and used
batteries, please take them to applicable
collection points, in accordance with your
national legislation and the Directives
2002/96/EC and 2006/66/EC.
By disposing of these products and
batteries correctly, you will help to save
valuable resources and prevent any
potential negative effects on human health
and the environment which could otherwise
arise from inappropriate waste handling.
For more information about collection and
recycling of old products and batteries,
please contact your local municipality,
your waste disposal service or the point of
sale where you purchased the items.
Penalties may be applicable for incorrect
disposal of this waste, in accordance with
national legislation.
For business users in the
European Union
If you wish to discard
electrical and electronic
equipment, please contact
your dealer or supplier for
further information.
[Information on Disposal in other
Countries outside the European
Union]
These symbols are only valid in the
European Union. If you wish to discard
these items, please contact your local
authorities or dealer and ask for the
correct method of disposal.
Note for the battery
symbol (bottom two
symbol examples):
This symbol might be used
in combination with a
chemical symbol. In this
case it complies with the
requirement set by the
Directive for the chemical
involved.
Cd
HC-V10EB_VQT4C38_mst.book 3 ページ 2012年1月24日 火曜日 午前9時35
4
VQT4C38
About the recording format for
recording motion pictures
The unit is an MP4 format (MPEG-4 AVC
file standard) camera for recording high-
definition motion pictures.
AVCHD and MPEG2 motion pictures are
different formats, and are not therefore
supported by the unit.
Indemnity about recorded
content
Panasonic does not accept any
responsibility for damages directly or
indirectly due to any type of problems that
result in loss of recording or edited content,
and does not guarantee any content if
recording or editing does not work properly.
Likewise, the above also applies in a case
where any type of repair is made to the unit.
About Condensation (When
the lens or the LCD monitor is
fogged up)
Condensation occurs when the ambient
temperature or humidity changes. Be careful
of condensation since it causes lens or LCD
monitor stains, fungus and camera
malfunction.
For more details about the cause and
action required for condensation, refer to
page 90.
Cards that you can use with
this unit
SD Memory Card, SDHC Memory Card
and SDXC Memory Card
4 GB or more Memory Cards that do not
have the SDHC logo or 48 GB or more
Memory Cards that do not have the SDXC
logo are not based on SD Memory Card
Specifications.
Refer to page 17 for more details on SD
cards.
HC-V10EB_VQT4C38_mst.book 4 ページ 2012年1月24日 火曜日 午前9時35
5
VQT4C38
For the purposes of these
operating instructions
SD Memory Card, SDHC Memory Card
and SDXC Memory Card are referred to
as the “SD card”.
Functions that can be used for motion
picture recording/motion picture playback
are indicated by in these
operating instructions.
Functions that can be used for still picture
recording/still picture playback are
indicated by in these operating
instructions.
Pages for reference are indicated by an
arrow, for example: l 00
HC-V10EB_VQT4C38_mst.book 5 ページ 2012年1月24日 火曜日 午前9時35
6
VQT4C38
Information for Your Safety......................2
Accessories...............................................9
Preparation
Names and Functions of Main Parts ..... 10
Power supply........................................... 13
Inserting/removing the battery........... 13
Charging the battery ......................... 14
Charging and recording time............. 16
Recording to a card ................................ 17
Cards that you can use with
this unit.............................................. 17
Inserting/removing an SD card.......... 18
Turning the unit on/off............................19
Selecting a mode .................................... 20
Setting date and time..............................21
Basic
Before recording ..................................... 22
Recording motion pictures .................... 23
Recording still pictures .......................... 25
Intelligent Auto Mode ............................. 26
Motion picture/Still picture playback ....28
Using the menu screen .......................... 31
Using the Setup Menu ............................32
Advanced (Recording)
Using the Zoom ...................................... 37
Optical image stabilizer function .......... 38
Recording functions of
operation icons ....................................... 39
Operation icons................................. 39
Recording functions of menus.............. 43
Manual recording.................................... 48
White Balance................................... 48
Manual shutter speed/
iris adjustment................................... 50
Recording with Manual Focus .......... 51
Advanced (Playback)
Playback Operations .............................. 52
Motion picture playback using
operation icon ................................... 52
Creating still picture from
motion picture ................................... 53
Repeat playback ............................... 53
Resuming the previous playback...... 54
Zooming in on a still picture during
playback (Playback zoom) ................ 54
Various playback functions ................... 55
Playing back motion pictures/
still pictures by date .......................... 55
Changing the playback settings and
playing back the slide show .............. 56
Deleting scenes/still pictures ................ 57
Dividing a scene to partially delete ... 59
Protecting scenes/still pictures ......... 60
Watching Video/Pictures on
your TV .................................................... 61
Connecting with a HDMI
mini cable.......................................... 63
Playback using VIERA Link ................... 64
Contents
HC-V10EB_VQT4C38_mst.book 6 ページ 2012年1月24日 火曜日 午前9時35
7
VQT4C38
PreparationBasicAdvanced
(Recording)
Copy/DubbingWith a PCOthers Advanced
(Playback)
Copy/Dubbing
Dubbing images onto other
video devices ..........................................66
With a PC
What you can do with a PC ....................67
End User License Agreement ........... 69
Operating environment .......................... 71
Installation ...............................................74
Connecting to a PC.................................75
About the PC display ........................ 77
Starting HD Writer HE 1.0 ....................... 78
Reading the operating instructions
of the software applications............... 78
If using Mac ............................................. 79
Others
Indications ............................................... 80
Messages................................................. 82
About recovery.................................. 82
Troubleshooting......................................83
Cautions for use......................................87
About copyright ...................................... 91
Recording modes/approximate
recordable time ....................................... 92
Approximate number of recordable
pictures ....................................................93
Optional accessories.............................. 94
Specifications.......................................... 95
Index ........................................................ 98
HC-V10EB_VQT4C38_mst.book 7 ページ 2012年1月24日 火曜日 午前9時35
8
VQT4C38
Sales and Support Information
Customer Communications Centre
For customers within the UK: 0844 844
3899
For customers within lreland: 01 289 8333
For further support on your product,
please visit our website:
www.panasonic.co.uk
Direct Sales at Panasonic UK
Order accessory and consumable items
for your product with ease and confidence
by phoning our Customer
Communications Centre Monday–
Thursday 9:00 a.m.–5:30 p.m., Friday
9:30 a.m.– 5:30 p.m. (Excluding public
holidays)
Or go on line through our Internet
Accessory ordering application at
www.pas-europe.com
.
Most major credit and debit cards
accepted.
All enquiries transactions and distribution
facilities are provided directly by
Panasonic UK.
It couldn’t be simpler!
Also available through our Internet is
direct shopping for a wide range of
finished products. Take a browse on our
website for further details.
HC-V10EB_VQT4C38_mst.book 8 ページ 2012年1月24日 火曜日 午前9時35
9
VQT4C38
Check the accessories before using this unit.
Keep the accessories out of reach of children to prevent swallowing.
Product numbers correct as of Jan. 2012. These may be subject to change.
Accessories
Battery pack
VW-VBL090
AC adaptor
VSK0784
AV cable
K2KYYYY00203
USB cable
K2KYYYY00202
CD-ROM
Software
HC-V10EB_VQT4C38_mst.book 9 ページ 2012年1月24日 火曜日 午前9時35
10
VQT4C38
1 LCD monitor
It can open up to 90o.
It can rotate up to 180o A towards the lens
or 90o B towards the opposite direction.
2 Intelligent auto/Manual button
[iA/MANUAL] (l 26, 48)
3 Optical image stabilizer button
[ O.I.S.] (l 38)
4 Power button [ ] (l 19)
5 Delete button [ ] (l 57)
6 Audio-video output terminal [A/V]
(l 61, 66)
Use the AV cable (only the supplied
cable).
7 USB terminal [ ] (l 14, 75)
8 Access lamp [ACCESS] (l 18)
9 SD card slot (l 18)
10 SD card cover [SD CARD] (l 18)
Preparation
Names and Functions of Main Parts
1 23
45 678
10
9
Due to limitations in LCD production
technology, there may be some tiny bright
or dark spots on the LCD monitor screen.
However, this is not a malfunction and
does not affect the recorded picture.

HC-V10EB_VQT4C38_mst.book 10 ページ 2012年1月24日 火曜日 午前9時35
11
VQT4C38
11 Lens cover
12 Lens
13 Lens cover opening/closing switch
When not using the unit, close the lens
cover to protect the lens.
Slide the opening/closing switch to
open/close the cover.
14 Internal stereo microphones
15 Menu button [MENU] (l 31)
16 Status indicator (l 19)
17 Mode switch (l 20)
18 Recording start/stop button (l 23)
19 Cursor button (l 28, 31, 39)
Use the cursor button to select the
recording functions and playback
operations, and to operate the menu
screen.
In these operating instructions, the cursor
button is denoted as shown below or as
3/4/2/1.
Example: For pressing the (down) button
20 Enter button [ENTER] (l 28, 31, 39)
21 Battery holder (l 13)
12
13
14
11
1715
18
212019
16
or Press 4
HC-V10EB_VQT4C38_mst.book 11 ページ 2012年1月24日 火曜日 午前9時35
12
VQT4C38
22 Battery release lever [BATTERY]
(l 13)
23 Tripod receptacle
If you attach a tripod which has a 5.5 mm
screw or larger, it may damage this unit.
24 Photoshot button [ ] (l 25)
25 Zoom lever [W/T] (In Recording
Mode) (l 37)
Thumbnail display switch [ / ]/
Volume lever [sVOLr] (In Playback
Mode) (l 29)
26 Speaker
27 Grip belt
Adjust the length of the grip belt so that it fits
your hand.
1 Flip the belt.
2 Adjust the length.
3 Replace the belt.
28 HDMI mini connector (l 61, 64)
22 23
2524
27
26
28
HC-V10EB_VQT4C38_mst.book 12 ページ 2012年1月24日 火曜日 午前9時35
13
VQT4C38
About batteries that you can use with this unit
The battery that can be used with this unit is VW-VBL090/VW-VBK180/VW-VBK360.
Inserting/removing the battery
Press the power button to turn off the unit. (l 19)
Install the battery by inserting it in the direction shown in the figure.
Preparation
Power supply
It has been found that counterfeit battery packs which look very similar to the
genuine product are made available to purchase in some markets. Some of these
battery packs are not adequately protected with internal protection to meet the
requirements of appropriate safety standards. There is a possibility that these
battery packs may lead to fire or explosion. Please be advised that we are not liable
for any accident or failure occurring as a result of use of a counterfeit battery pack.
To ensure that safe products are used we would recommend that a genuine
Panasonic battery pack is used.
Removing the battery
Be sure to hold down the power button until
the status indicator goes off. Then remove
the battery while supporting the unit to
prevent it from dropping.
Move the battery release lever in the
direction indicated by the arrow and
remove the battery when unlocked.
BATTERY
Insert the battery until it clicks and
locks.
HC-V10EB_VQT4C38_mst.book 13 ページ 2012年1月24日 火曜日 午前9時35
14
VQT4C38
Charging the battery
Charging with an AC adaptor.
The unit is in the standby condition when the AC adaptor is connected. The primary circuit is
always “live” as long as the AC adaptor is connected to an electrical outlet.
Important:
Be sure to use the supplied AC adaptor and USB cable. Do not use parts supplied
with other equipment.
The AC adaptor and USB cable are for use with this unit only. Do not use them with
other equipment. Similarly, do not use AC adaptors and USB cables from other
equipment with this unit.
The battery can also be charged using a battery charger (VW-BC10EB: optional).
The battery cannot be charged when the unit is turned on. Press the power button to
turn off the unit. (l 19)
It is recommended to charge the battery in a temperature between 10 oC and 30 oC.
(The battery temperature should also be the same.)
A USB terminal
B To the AC outlet
Insert the plugs as far as they will go.
1 Open the LCD monitor.
2 Connect the USB cable to the AC adaptor.
Check that the plug portion of the AC adaptor is not loose or misaligned.
Do not use any other AC adaptors except the supplied one.
Do not use any other USB cables except the supplied one. (Operation is not guaranteed
with any other USB cables.)
3 Plug the AC adaptor into the AC outlet.
4 Connect the USB cable to the unit.
The status indicator
C
will flash red
with approx. 2 seconds period (off for approx. 1 second, on for
approx. 1 second),
indicating that charging has begun.
It will turn off when the charging is completed.
When this unit is purchased, the battery is not charged. Charge the battery fully
before using this unit for the first time.
HC-V10EB_VQT4C38_mst.book 14 ページ 2012年1月24日 火曜日 午前9時35
15
VQT4C38
Connecting to the AC outlet
If you turn on the unit while connecting with the AC adaptor, you can use the unit with power
supplied from the outlet.
When recording for a long time, keep the AC adaptor connected and use it together with the battery.
Connecting to a PC and charging.
Charge the unit if you do not have the AC adaptor handy.
A USB cable (supplied)
Insert the plugs as far as they will go.
Press the power button and turn the unit off. (l 19)
1 Turn the power of the PC on.
2 Connect the USB cable
The status indicator
B
will flash red
with approx. 2 seconds period (off for approx. 1 second, on for
approx. 1 second),
indicating that charging has begun.
It will turn off when the charging is completed.
Do not use any other USB cables except the supplied one. (Operation is not guaranteed
with any other USB cables.)
Always connect directly to a PC.
You cannot charge when the status indicator flashes rapidly, or when it does not light at all.
Charge using the AC adaptor. (l 14)
It will take 2 or 3 times longer to charge compared to when using the AC adaptor.
If the status indicator flashes at a particularly fast or slow rate, refer to page 89.
If you do not intend to use the unit for an extended period, disconnect the USB cable from
the unit for safety.
Charging may not be possible depending on the operating environment of the PC being
used (such as custom-made PC).
Charging will stop when turning the power of the PC off or forcing it into sleep mode. Charging
will start again when turning the power of the PC on again, or waking from sleep mode.
When connected to a PC, an error message may be displayed at the top of the PC screen.
For more details, refer to page 86.
The unit will be charged if it is connected to a Panasonic Blu-ray disc recorder or DVD
recorder with a USB cable, even if the unit is turned off.
We recommend using Panasonic batteries (l 9, 16, 94).
If you use other batteries, we cannot guarantee the quality of this product.
Do not heat or expose to flame.
Do not leave the battery(ies) in a car exposed to direct sunlight for a long period of time
with doors and windows closed.
HC-V10EB_VQT4C38_mst.book 15 ページ 2012年1月24日 火曜日 午前9時35
16
VQT4C38
Charging and recording time
Charging/Recording time
Temperature: 25 oC/humidity: 60%RH
Time in the parenthesis is charging time when this unit is connected to a PC, Panasonic
Blu-ray disc recorder, or DVD recorder.
These times are approximations.
The indicated charging time is for when the battery has been discharged completely.
Charging time and recordable time vary depending on the usage conditions such as
high/low temperature.
The actual recordable time refers to the recordable time when repeatedly starting/stopping
recording, turning the unit on/off, moving the zoom lever etc.
The batteries heat up after use or charging. This is not a malfunction.
Battery model number
[Voltage/Capacity
(minimum)]
Charging
time
Recording
mode
Maximum
continuously
recordable
time
Actual
recordable
time
Supplied battery/
VW-VBL090 (optional)
[3.6 V/895 mAh]
2h10min
(3 h)
[1280k720/50p] 1 h 25 min 40 min
[iFrame]/
[640k480/50p]
1h40min 50min
VW-VBK180 (optional)
[3.6 V/1790 mAh]
2h50min
(5h20min)
[1280
k
720/50p]
3h10min 1h40min
[iFrame]/
[640
k
480/50p]
3h45min 1h55min
VW-VBK360 (optional)
[3.6 V/3580 mAh]
4h45min
(10 h)
[1280
k
720/50p]
6h30min 3h20min
[iFrame]/
[640
k
480/50p]
7h30min 3h55min
Battery capacity indication
The display changes as the battery capacity reduces.
####
When the charge runs out, flashes red.
HC-V10EB_VQT4C38_mst.book 16 ページ 2012年1月24日 火曜日 午前9時35
17
VQT4C38
Cards that you can use with this unit
Use SD cards conforming to Class 4 or higher of the SD Speed Class Rating* for
motion picture recording.
* SD Speed Class Rating is the speed
standard regarding continuous writing.
Check via the label on the card, etc.
Please confirm the latest information about SD Memory Cards/SDHC Memory Cards/
SDXC Memory Cards that can be used for motion picture recording on the following
website.
http://panasonic.jp/support/global/cs/e_cam
(This website is in English only.)
Operation of the SD Card 256 MB or less is not guaranteed. Also, the SD Card 32 MB or
less cannot be used for the motion picture recording.
4 GB or more Memory Cards that do not have the SDHC logo or 48 GB or more Memory
Cards that do not have the SDXC logo are not based on SD Memory Card Specifications.
The operation of Memory cards exceeding 64 GB cannot be guaranteed.
When the write-protect switch A on SD card is locked, no recording,
deletion or editing will be possible on the card.
Keep the memory card out of reach of children to prevent swallowing.
Preparation
Recording to a card
This unit (an SDXC compatible device) is compatible with SD Memory Cards, SDHC
Memory Cards and SDXC Memory Cards. When using an SDHC Memory Card/SDXC
Memory Card with other equipment, check the equipment is compatible with these
Memory Cards.
Card type Capacity
SD Memory Card 512 MB/1 GB/2 GB
SDHC Memory Card 4GB/6GB/8GB/12GB/16GB/24GB/32GB
SDXC Memory Card 48 GB/64 GB
e.g.:
32
HC-V10EB_VQT4C38_mst.book 17 ページ 2012年1月24日 火曜日 午前9時35
18
VQT4C38
Inserting/removing an SD card
Caution:
Check that the access lamp has gone off.
1 Open the LCD monitor.
2 Open the SD card cover and
insert (remove) the SD card
into (from) the card slot B.
Face the label side C in the direction
shown in the illustration and press it
straight in as far as it will go.
Press the centre of the SD card and then
pull it straight out.
3 Securely close the SD card
cover.
Securely close it until it clicks.
Do not touch the terminals on the back of
the SD card.
Do not apply strong shocks, bend, or drop
the SD card.
Electrical noise, static electricity or the
failure of this unit or the SD card may
damage or erase the data stored on the
SD card.
When the card access lamp is lit, do not:
jRemove the SD card
jTurn the unit off
jInsert and remove the USB cable
jExpose the unit to vibrations or shock
Performing the above while the lamp is on
may result in damage to data/SD card or
this unit.
Do not expose the terminals of the SD
card to water, dirt or dust.
Do not place SD cards in the following areas:
jIn direct sunlight
jIn very dusty or humid areas
jNear a heater
jLocations susceptible to significant
difference in temperature (condensation
can occur.)
jWhere static electricity or
electromagnetic waves occur
To protect SD cards, return them to their
cases when you are not using them.
About disposing of or giving away the SD
card. (l 90)
When using a non Panasonic SD card for the first time, or one which was previously used
on another equipment, it is necessary to format the SD card. (l 36) When the SD card is
formatted, all of the recorded data is deleted. Once the data is deleted, it cannot be
restored.
Access lamp [ACCESS] A
When this unit is accessing the SD
card, the access lamp lights up.
HC-V10EB_VQT4C38_mst.book 18 ページ 2012年1月24日 火曜日 午前9時35
19
VQT4C38
You can turn the unit on and off using the power button or by opening and closing the LCD
monitor.
Open the LCD monitor and press the power button to turn on the unit.
A The status indicator lights on.
Unit is turned on when the LCD monitor is opened, and unit is turned off when it is closed.
During normal use, opening and closing of the LCD monitor can be conveniently used
to turn the unit on/off.
To turn on the unit
A The status indicator lights on.
To turn off the unit
B The status indicator goes off.
The unit will not turn off while recording motion pictures even if the LCD monitor is closed.
In the following cases, opening the LCD monitor does not turn on the unit. Press the power
button to turn on the unit.
jWhen the unit is originally purchased
jWhen you have turned off the unit using the power button
Preparation
Turning the unit on/off
Turning the unit on and off with the power button
Turning the unit on and off with the LCD monitor
To turn off the unit
Hold down the power button until the status
indicator goes off.
HC-V10EB_VQT4C38_mst.book 19 ページ 2012年1月24日 火曜日 午前9時35
20
VQT4C38
Change the mode to recording or playback.
Operate the mode switch to change the mode to or .
Preparation
Selecting a mode
Recording Mode (l 23, 25)
Playback Mode (l 28, 52)
HC-V10EB_VQT4C38_mst.book 20 ページ 2012年1月24日 火曜日 午前9時35
21
VQT4C38
When the unit is turned on for the first time, a message asking you to set the date and time
will appear.
Select [YES] and perform
Step
s 2 to 3 below to set the date and time.
¬ Change the mode to .
1 Select the menu. (l 31)
2 Select the date or time using 2/1 and set the desired value using
3/4.
A Displaying the World time setting
(l 32):
[HOME]/ [DESTINATION]
The year can be set between 2000 and
2039.
The 24-hour system is used to display the
time.
3 Press the ENTER button.
A message prompting for World Time setting may be displayed. Perform the World Time
setting by pressing the ENTER button. (l 32)
Press the MENU button to complete the setting.
The date and time function is driven by a built-in lithium battery.
If the time display becomes [- -], the built-in lithium battery needs to be charged. To
recharge the built-in lithium battery, connect the AC adaptor or attach the battery to this
unit. Leave the unit as it is for approx. 24 hours and the battery will maintain the date and
time for approx. 4 months. (The battery is still being recharged even if the unit is off.)
Preparation
Setting date and time
: [SETUP] # [CLOCK SET]
WARNING
THE LITHIUM BATTERY IN THIS EQUIPMENT MUST ONLY BE REPLACED BY
QUALIFIED PERSONNEL. WHEN NECESSARY, CONTACT YOUR LOCAL PANASONIC
SUPPLIER.
HC-V10EB_VQT4C38_mst.book 21 ページ 2012年1月24日 火曜日 午前9時35
22
VQT4C38
Basic camera positioning
1 Hold the unit with both hands.
2 Put your hand through the grip belt.
When recording, make sure your footing is stable and there is no danger of colliding with
another person or object.
When you are outdoors, record pictures with the sunlight behind you. If the subject is
backlit, it will become dark in the recording.
Keep your arms near your body and separate your legs for better balance.
Do not cover the microphones with your hand etc.
Basic motion picture recording
The unit should normally be held steady when recording.
If you move the unit when recording, do so slowly, maintaining a constant speed.
The zoom operation is useful for recording subjects you cannot get close to, but overuse of
zoom in and zoom out can make the resulting motion picture less enjoyable to watch.
Recording yourself
Rotate the LCD monitor towards the lens side.
The image is horizontally flipped as if you see a mirror
image. (However the image recorded is the same as a
normal recording.)
Only some indications will appear on the screen. When
appears, return the direction of the LCD monitor to
normal position and check the warning/alarm indication.
(l 82)
Basic
Before recording
HC-V10EB_VQT4C38_mst.book 22 ページ 2012年1月24日 火曜日 午前9時35
23
VQT4C38
Open the lens cover before turning on the unit. (l 11)
1 Change the mode to and
open the LCD monitor.
2 Press the recording start/stop
button to start recording.
A When you begin recording, ; changes to ¥.
3 Press the recording start/stop button again to pause recording.
About the screen indications in the motion picture recording
Basic
Recording motion pictures
Recording mode
R 1h20m
Approximate remaining recordable time
When the remaining time is less than
1 minute, R 0h00m flashes red.
0h00m00s
Recording time elapsed
“h” is an abbreviation for hour, “m” for
minute and “s” for second.
Each time the unit is put into recording
pause, the counter display will be reset
to 0h00m00s.
0h00m00s0h00m00s0h00m00s
R 1h20mR 1h20mR 1h20m
HC-V10EB_VQT4C38_mst.book 23 ページ 2012年1月24日 火曜日 午前9時35
24
VQT4C38
The images recorded between pressing the recording start/stop button to start recording
and pressing it again to pause recording become one scene.
The scenes longer than approximately 20 minutes will be automatically divided. (Recording
will continue.)
Screen will pause momentarily when the recording is paused.
(Maximum recordable scenes on a single SD card)
Recordable scenes : Approx. 89100
Different dates (l 55) : Approx. 900
Maximum number of recordable scenes and maximum number of different dates will be
less than above table when there are both scenes and still pictures recorded on SD card.
While recording is in progress, the recording will not stop even if the LCD monitor is closed.
Please refer to page 92 for details about approximate recordable time.
About the compatibility of the recorded motion pictures
They are not compatible with devices other than those that support MP4. Images
cannot be played with equipment that does not support MP4. Confirm that your
equipment supports MP4 by referring to the operating instructions.
There are some cases where the recorded motion pictures cannot be played back,
even if the device supports MP4. In such a case, play back on this unit instead.
HC-V10EB_VQT4C38_mst.book 24 ページ 2012年1月24日 火曜日 午前9時35
25
VQT4C38
Open the lens cover before turning on the unit. (l 11)
1 Change the mode to and
open the LCD monitor.
2 Press the button.
About the screen indications in Still Picture Recording
During motion picture recording or when set to PRE-REC, you cannot record still pictures.
Using a tripod is recommended when recording still pictures in dark places because the
shutter speed becomes slow.
To print a picture, print using a PC or a printer.
The edges of still pictures recorded on this unit with a 16:9 aspect ratio may be cut at
printing. Check the printer or photo studio before printing.
Please refer to page 93 for details about the number of recordable pictures.
Basic
Recording still pictures
Quality of still pictures (l 47)
Size of still pictures (l 44)
R3000
Remaining number of still pictures
Flashes in red when [0] appears.
Still picture operation indicator (l 81)
0.9
M
R3000R3000R3000
0.9
M
HC-V10EB_VQT4C38_mst.book 25 ページ 2012年1月24日 火曜日 午前9時35
26
VQT4C38
The following modes (appropriate for the condition) are set just by pointing the unit to what
you want to record.
Depending on the recording conditions, the unit may not enter the desired mode.
In the Portrait, Spotlight and Low light mode, the face will be surrounded by white frame
when detected. In the Portrait mode, a subject that is bigger and close to centre of the
screen will be surrounded by an orange frame. (l 45)
Faces cannot be detected depending on the recording conditions, such as when faces are
of certain sizes or at certain tilts or when digital zoom is used.
Basic
Intelligent Auto Mode
Mode Effect
Portrait Faces are detected and focused automatically, and the
brightness is adjusted so it is recorded clearly.
Scenery The whole landscape will be recorded vividly without whiting
out the background sky, which may be very bright.
Spotlight Very bright object is recorded clearly.
Low light It can record very clearly even in a dark room or twilight.
Normal In modes other than those described above, the contrast is
adjusted to give a clear picture.
Intelligent auto/Manual button
Press this button to switch Intelligent Auto
Mode/Manual Mode.
Please refer to page 48 for details about Manual
Mode.
/MANUAL
HC-V10EB_VQT4C38_mst.book 26 ページ 2012年1月24日 火曜日 午前9時35
27
VQT4C38
Intelligent Auto Mode
When switching to Intelligent Auto Mode, the Auto White Balance and Auto Focus operate
and automatically adjust the colour balance and focusing.
Depending on the brightness of the subject etc., the aperture and shutter speed are
automatically adjusted for an optimum brightness.
Colour balance and focus may not be adjusted automatically depending on light sources or
scenes. If so, manually adjust these settings. (l 48, 51)
Automatic White Balance
The illustration shows the range over which Automatic White Balance functions.
1) The effective range of Automatic White Balance
adjustment on this unit
2) Blue sky
3) Cloudy sky (rain)
4) Sunlight
5) White fluorescent lamp
6) Halogen light bulb
7) Incandescent light bulb
8) Sunrise or sunset
9) Candlelight
If the Automatic White Balance is not functioning normally,
adjust the White Balance manually. (l 48)
Auto Focus
The unit focuses automatically.
Auto Focus does not work correctly in the following
situations. Record pictures in the Manual Focus Mode. (l 51)
jRecording distant and close-up objects at the same time
jRecording a subject behind dirty or dusty window
jRecording a subject that is surrounded by objects with glossy surfaces or by highly
reflective objects
4)
5)
6)
7)
8)
10 000K
9 000K
8 000K
7 000K
6 000K
5 000K
4 000K
3 000K
2 000K
2)
1)
3)
9)
HC-V10EB_VQT4C38_mst.book 27 ページ 2012年1月24日 火曜日 午前9時35
28
VQT4C38
1 Change the mode to .
2 Select the play mode select
icon A using 3/4/2 and
press the ENTER button.
3 Select the [VIDEO/PICTURE] you wish to play back, then press the
ENTER button.
Press the MENU button.
When a video item is selected, an icon will appear on the thumbnail display. ( ,
,)
4 Select the scene or the still
picture to be played back using
3/4/2/1, then press the
ENTER button.
When you select / and press the
ENTER button, the next (previous) page is
displayed.
Basic
Motion picture/Still picture playback
15 . 1 1 . 2012
0
h
00
m
15
s
HC-V10EB_VQT4C38_mst.book 28 ページ 2012年1月24日 火曜日 午前9時35
29
VQT4C38
5 Select the operation icon using
3/4/2/1.
B Operation icon
Press the ENTER button to display/not-display
the operation icon.
Change the thumbnail display
While the thumbnail is displayed, the thumbnail display changes in the following order if the
zoom lever is operated to side or side.
20 scenes () 9 scenes () 1 scene
9 scenes display returns if the unit is turned off or the mode is
changed.
Speaker volume adjustment
Operate the volume lever to adjust the
speaker volume during motion picture
playback.
Sound will be heard only during normal playback.
If pause play is continued for 5 minutes, the screen returns to the thumbnails.
The elapsed time for playback indication will be reset to 0h00m00s for each scene.
The image will pause momentarily and the screen may turn black when the scenes are
switching.
Motion picture playback Still picture playback
1/;: Playback/Pause
6: Rewind playback
5: Fast forward playback
: Stops the playback and shows
the thumbnails.
1/;: Slide show (playback of the still
pictures in numerical order)
start/pause.
2;: Plays back the previous picture.
;1: Plays back the next picture.
: Stops the playback and shows
the thumbnails.
Towards “r”: Increases the volume
Towards “s”: Decreases the volume
0h00m00s0h00m00s0h00m00s
HC-V10EB_VQT4C38_mst.book 29 ページ 2012年1月24日 火曜日 午前9時35
30
VQT4C38
Motion picture compatibility
The unit conforms to the MP4 format (MPEG-4 AVC file standard).
Motion pictures recorded on other MP4-compatible equipment may not play back
normally or may not play back at all on this unit. Similarly, motion pictures recorded on
this unit may not play back normally or may not play back at all on other MP4-
compatible equipment. ( is displayed for videos that cannot be played back with
this unit)
Still picture compatibility
This unit is compliant with the unified standard DCF (Design rule for Camera File
system) established by JEITA (Japan Electronics and Information Technology
Industries Association).
The file format of still pictures supported by this unit is JPEG. (Not all JPEG formatted
files will be played back.)
This unit may degrade or not play back still pictures recorded or created on other
products and other products may degrade or not play back still pictures recorded on
this unit.
HC-V10EB_VQT4C38_mst.book 30 ページ 2012年1月24日 火曜日 午前9時35
31
VQT4C38
1 Press the MENU button.
2 Press 3/4/2/1 to select the
top menu A, then press the
ENTER button.
3 Select the submenu B using
3/4 and press 1 or press the
ENTER button.
4 Select the desired item using
3/4, and press the ENTER
button to set.
To get back to the previous screen
Press 2 of the cursor button.
To exit the menu screen
Press the MENU button.
About the information display
Descriptions of the selected submenus and
items displayed in
Step
s 3 and 4, and
messages to confirm settings are displayed.
About the operation icons
/:
Select and then press the ENTER button
to switch the menu and thumbnail
display page.
:
Select and then press the ENTER button
to return to the previous screen in cases
such as menu setting, etc.
Basic
Using the menu screen
HC-V10EB_VQT4C38_mst.book 31 ページ 2012年1月24日 火曜日 午前9時35
32
VQT4C38
The items displayed differ depending on the position or settings of the mode switch.
Select the menu.
The screen display can be changed to [ON] (all information displayed) or [OFF] (a portion of
information displayed).
Please refer to page 63.
Please refer to page 21.
It is possible to display and record the time at the travel destination by selecting your home
region and the travel destination.
1 Select [SET WORLD TIME] and press the ENTER button.
If the clock is not set, adjust the clock to the current time. (l 21)
When the [HOME] (your home region) is not set, the message appears. Press the ENTER
button and proceed to
Step
3.
2 (Only when setting your home region)
Select [HOME] using 2/1and press the ENTER button.
3
(Only when setting your home region)
Select your home region using
2/1and press the ENTER button.
Press 3 to set daylight saving time.
appears and the summer time
setting is turned on; the time
difference from GMT is set forward by
one hour. Press 3 again to return to
the normal time setting.
4 (Only when setting the region of your
travel destination)
Select [DESTINATION] using 2/1 and press the ENTER button.
When the home region is set for the first time, the screen for selecting home/travel
destination appears after setting the home region successively. If the home region has
already been set once, execute the menu operation for Step 1.
Basic
Using the Setup Menu
: [SETUP] # desired setting
[DISPLAY]
[ON]/[OFF]
[EXT. DISPLAY]
[SIMPLE]/[DETAIL]/[OFF]
[CLOCK SET]
[SET WORLD TIME]
A The current time
B The time difference from GMT
(Greenwich Mean Time)
HC-V10EB_VQT4C38_mst.book 32 ページ 2012年1月24日 火曜日 午前9時35
33
VQT4C38
5 (Only when setting the region of your
travel destination)
Select your travel destination
using
2/1 and press the
ENTER button.
Press 3 to set daylight saving time.
appears and the summer
time setting is turned on. The travel
destination time and time difference
from the home region time are set
forward by one hour. Press 3 again
to return to the normal time setting.
Close the setting by pressing the
MENU button. appears and the
time of the travel destination is indicated.
To return the display to the home setting
Set the home region using
Step
1 to 3, and close the setting by pressing the MENU button.
If you cannot find your travel destination in the area shown on the screen, set it by using
the time difference from your home region.
It is possible to change the date and time display mode.
It is possible to change the date format.
When about 5 minutes have passed without any operation, this unit automatically turns off to
save battery life.
This unit will not automatically turn off even if [ECONOMY (BATT)] is set to [ON] in
following cases:
jUsing the AC adaptor
*
jUsing the USB cable for PC etc.
jPRE-REC is used
jDuring playback of the slide show
* When [ECONOMY (AC)] is activated, this unit automatically turns off.
[DATE/TIME]
[DATE]/[D/T]/[OFF]
[DATE FORMAT]
[Y/M/D]/[M/D/Y]/[D/M/Y]
[ECONOMY (BATT)]
[ON]/[OFF]
C The local time at the selected travel
destination
D The time difference between the
travel destination and the home
region
HC-V10EB_VQT4C38_mst.book 33 ページ 2012年1月24日 火曜日 午前9時35
34
VQT4C38
When about 30 minutes have passed without any operation while connecting AC adaptor
with this unit, this unit automatically turns off.
This unit will not automatically turn off even if the [ECONOMY (AC)] is set to [ON] in
following cases:
jUsing the USB cable for PC etc.
jPRE-REC is used
jDuring playback of the slide show
This unit is put into recording pause approx. 0.8 seconds after the LCD monitor is reopened.
When in Quick Start Standby Mode about 60% of the power used in recording pause
mode is being consumed, so the recording time will be reduced.
Quick Start will not work if there is no SD card inserted.
The LCD monitor cannot be closed when using the USB cable, so please disconnect it
from the unit.
Change the mode to .
1 Set [QUICK START] to [ON].
2 Close the LCD monitor.
The status indicator A flashes green and the unit
goes into Quick Start Standby Mode.
3 Open the LCD monitor.
The status indicator A lights red and the unit is put
into recording pause.
Quick Start Standby Mode is cancelled if
jabout 5 minutes have elapsed
jmode is set to
It may take some time for Automatic White Balance to adjust.
In the Quick Start Mode, the zoom magnification becomes approx. 1k.
When it has gone into Quick Start Standby Mode automatically with the [ECONOMY
(BATT)] (l 33)/[ECONOMY (AC)], close the LCD monitor once and open it again.
Turn the unit off using the power button.
[ECONOMY (AC)]
[ON]/[OFF]
[QUICK START]
[ON]/[OFF]
HC-V10EB_VQT4C38_mst.book 34 ページ 2012年1月24日 火曜日 午前9時35
35
VQT4C38
Starting and stopping of recording and unit on/off can be confirmed with this sound.
2 Beeps for 4 times
When an error occurs. Check the sentence displayed on the screen. (l 82)
This makes it easier to view the LCD monitor in bright places including outdoors.
These settings will not affect the images actually recorded.
When the AC adaptor is in use, the LCD monitor is set to automatically.
When the LCD monitor is bright, the recordable time with the battery will be shorter.
It adjusts brightness and colour density on the LCD monitor.
These settings will not affect the images actually recorded.
1 Select [LCD SET] and press the ENTER button.
2 Select the item using 3/4, and press the ENTER button to set.
3 Press 2/1 to adjust, and press the ENTER button.
Press the MENU button to exit the menu screen.
Please refer to page 63.
Please refer to page 64.
Please refer to page 63.
Set to [YES] for changing the menu settings back to the default condition.
(Only when the mode is at the position)
Settings for [CLOCK SET] and [LANGUAGE] will not be changed.
[ALERT SOUND]
/ /[OFF]
(Volume low)/ (Volume high)
[POWER LCD]
///
(Makes even brighter)/ (Makes brighter)/ (Normal)/ (Makes less bright)
[LCD SET]
[BRIGHTNESS]: Brightness of the LCD monitor
[COLOUR]: Colour level of the LCD monitor
[HDMI RESOLUTION]
[AUTO]/[720p]/[576p]
[VIERA Link]
[ON]/[OFF]
[TV ASPECT]
[16:9]/[4:3]
[INITIAL SET]
+2
+1
0
-
1
+2
+1
0
-
1
+1
HC-V10EB_VQT4C38_mst.book 35 ページ 2012年1月24日 火曜日 午前9時35
36
VQT4C38
Please be aware that if a medium is formatted, then all the data recorded on the medium will
be erased and cannot be restored. Back up important data on a PC, disc etc. (l 67)
When formatting is complete, press MENU button to exit the message screen.
Perform a physical formatting of the SD card when the SD card is to be disposed/
transferred. (l 90)
Do not turn this unit off or remove the SD card, while formatting. Do not expose the unit to
vibrations or shock.
The used space and remaining recordable time of the SD card can be checked.
When the mode switch is set to , remaining recordable time for the selected recording
mode is displayed.
Press the MENU button to close the indication.
The SD card requires some space to store information and manage system files, so the
actual usable space is slightly less than the indicated value. The usable space is generally
calculated as 1 GB=1,000,000,000 bytes. The capacities of this unit, PCs and software are
expressed as 1 GB=1,024k1,024k1,024=1,073,741,824 bytes. Therefore, the indicated
value of the capacity appears to be smaller.
This item is used to start the unit demonstration.
(Only when the mode is at the position)
If [DEMO MODE] is switched to [ON] and you press the MENU button when there is no SD
card inserted and while this unit is connected to the AC adaptor, the demonstration
automatically starts.
If any operation takes place, the demonstration is cancelled. However if no operations take
place for approx. 5 minutes, the demonstration automatically starts again. To stop the
demonstration, set [DEMO MODE] to [OFF] or insert an SD card.
This item is used to start the Optical Image Stabilizer demo.
(Only when the mode is at the position)
Select [O.I.S. DEMO] and press the ENTER button, the demonstration automatically starts.
When you press MENU button, the demonstration will be cancelled.
You can select the language on the screen display and the menu screen.
[FORMAT CARD]
Use this unit to format media.
Do not format an SD card using any other equipment such as a PC. Otherwise it
may not be possible to use the card on this unit.
[CARD STATUS]
[DEMO MODE]
[ON]/[OFF]
[O.I.S. DEMO]
[LANGUAGE]
HC-V10EB_VQT4C38_mst.book 36 ページ 2012年1月24日 火曜日 午前9時35
37
VQT4C38
¬ Change the mode to .
A Zoom bar
The zoom speed varies depending on the range over which the zoom lever is moved.
Maximum zoom magnification can be set with [D.ZOOM]. (l 44)
About Zoom bar
The zoom bar is displayed during the zoom operation.
If you take your finger off the zoom lever during zoom operation, the operation sound may
be recorded. When returning the zoom lever to the original position, move it quietly.
When the zoom magnification is 70k, the subjects are focused at about 1.5 m or more.
When the zoom magnification is 1k, this unit can focus on a subject approx. 2 cm away
from the lens.
Advanced (Recording)
Using the Zoom
Zoom lever
T side:
Close-up recording (zoom in)
W side:
Wide-angle recording (zoom out)
6
W
T
6
W
T
ヸヵ
ヷヰロ
T
W

B Optical Zoom
C Digital zoom (Blue)
HC-V10EB_VQT4C38_mst.book 37 ページ 2012年1月24日 火曜日 午前9時35
38
VQT4C38
Optical image stabilizer can stabilize the image without decreasing the image quality as
much.
¬ Change the mode to .
Stabilization may not be possible under strong shaking conditions.
Advanced (Recording)
Optical image stabilizer function
Optical image stabilizer button
Press the button to turn optical image stabilizer on/off.
(On) # setting cancelled
When you wish to record as you walk, we recommend
turnning the optical image stabilizer on.
When recording with a tripod, we recommend that you set
the optical image stabilizer off.
ヰハリハヴハ
HC-V10EB_VQT4C38_mst.book 38 ページ 2012年1月24日 火曜日 午前9時35
39
VQT4C38
Select the operation icons to add different effects to the images to be recorded.
¬ Change the mode to .
1 Press the ENTER button to
display the operation icons on
the screen.
The indication changes each time you
press 4 of the cursor button.
Press the ENTER button to display/not-
display the operation icon.
2 (e.g. Backlight Compensation)
Select an operation icon.
Select the operation icon again to cancel
the function.
Refer to the respective pages for
cancelling the following functions.
jHelp Mode (l 40)
jGuidelines (l 40)
Operation icons
*1 It is not displayed during recording.
*2 It is not displayed in the Intelligent Auto
Mode.
If you turn off the unit or change the mode
to , Backlight Compensation,
PRE-REC and Colour Night View
functions are cancelled.
If you turn off the unit, the Fade function is
cancelled.
It is possible to set from the menu.
(Except for the Help Mode and PRE-REC)
Advanced (Recording)
Recording functions of operation icons
1/2 1/2
ワユヹヵワユヹヵ
1/2
ワユヹヵ
1/2 1/2
ワユヹヵワユヹヵ
1/2
ワユヹヵ
Fade
Backlight Compensation
Help Mode
*1
Guidelines
PRE-REC
*1
Soft Skin Mode
*1,2
Intelligent Contrast Control
*2
Colour Night View
*1,2
HC-V10EB_VQT4C38_mst.book 39 ページ 2012年1月24日 火曜日 午前9時35
40
VQT4C38
When you start recording, the image/audio gradually
appears. (Fade in)
When you pause recording, the image/audio gradually
disappears. (Fade out)
The Fade setting is cancelled when the recording stops.
To select the colour for Fade in/out
The thumbnails of scenes recorded using fade in become black (or white).
If the recordable time runs out when you start recording, the recording fades out and stops
automatically.
This makes the image brighter to prevent darkening of a backlit subject.
Select the desired icon using the cursor
button to display an explanation on the
screen.
To exit the Help Mode
Press the MENU button or select [END].
You cannot record or set functions while in Help Mode.
You can check if the image is level while recording. The function can also be used to
estimate the balance of the composition.
It will switch every time the icon is selected.
# # #Setting cancelled
The guidelines do not appear on the images actually recorded.
Fade
:
[RECORD SETUP] # [FADE COLOUR] #
[WHITE] or [BLACK]
Backlight Compensation
Help Mode
Guidelines
(Fade in)
(Fade out)
HC-V10EB_VQT4C38_mst.book 40 ページ 2012年1月24日 火曜日 午前9時35
41
VQT4C38
This allows recording of the pictures and sound to start approximately 3 seconds
before the recording start/stop button is pressed.
appears on the screen.
Aim the unit at the subject beforehand.
There is no beep sound.
PRE-REC is cancelled in the following cases.
jIf you change the mode
jIf you remove the SD card
jIf you press the MENU button
jIf you turn the unit off
jIf you start recording
jAfter 3 hours have passed
After setting PRE-REC, if recording starts in less than 3 seconds, motion pictures taken
3 seconds before pressing the recording start/stop button cannot be recorded.
Images displayed on the thumbnail in Playback Mode will differ from the motion pictures
displayed at the start of playback.
This makes skin colours appear softer for a more attractive appearance.
This is more effective if you record a person closely from the torso up.
If the background or anything else in the scene has colours similar to the skin colour, they
will also be smoothed.
If the brightness is insufficient, the effect may not be clear.
If you record a person in the distance, the face may not be recorded clearly. In this case,
cancel Soft Skin Mode or zoom in on the face (close-up) to record.
PRE-REC
This prevents you from missing a shot.
Soft Skin Mode
PRE-REC
HC-V10EB_VQT4C38_mst.book 41 ページ 2012年1月24日 火曜日 午前9時35
42
VQT4C38
This brightens parts that are in shadow and difficult to see and suppresses white
saturation in bright parts at the same time. Both bright and dark parts can be recorded
clearly.
If there are extremely dark or bright parts or the brightness is insufficient, the effect may not
be clear.
This function allows you to record colour images in very low light situations.
(Minimum required illumination: approx. 1 lx)
Recorded scene is seen as if frames were missed.
If set in a bright place, the screen may become washed out for a while.
Bright dots that are usually invisible may be seen, but this is not a malfunction.
Using a tripod is recommended.
In darker areas, Auto Focus may focus a bit slower. This is normal.
Intelligent Contrast Control
Colour Night View
HC-V10EB_VQT4C38_mst.book 42 ページ 2012年1月24日 火曜日 午前9時35
43
VQT4C38
Change the mode to .
When you record images in different situations, this mode automatically sets optimum shutter
speeds and apertures.
(Sunset/Low light)
jThe shutter speed is 1/25 or more.
(Sunset/Fireworks/Scenery/Night scenery)
jImage may get blurry when close object is recorded.
(Sports)
jDuring normal playback, the image movement may not look smooth.
jColour and screen brightness may change under indoor lighting.
j
If the brightness is insufficient, the Sports Mode does not function. The display flashes.
(Portrait)
jColour and screen brightness may change under indoor lighting.
(Fireworks)
jThe shutter speed is 1/25.
jImage may get washed out when recorded in bright surrounding.
(Night scenery)
jUsing a tripod is recommended.
Advanced (Recording)
Recording functions of menus
[SCENE MODE]
: [RECORD SETUP] # [SCENE MODE] # desired setting
[OFF]: Cancel the setting
5Sports: To make fast moving scenes less shaky with slow playback
and pause of playback
Portrait: To make people stand out against the background
Spotlight: Improved quality when subject is brightly illuminated.
Snow: Improved image quality when shooting in snowy locations.
Beach: To make blue in the sea or sky vibrant
Sunset: To make red in the sunrise or sunset vibrant
Fireworks: To capture the fireworks in the night sky beautifully
Scenery: For spatial scenery
Night scenery: To capture the evening or night scenery beautifully.
Low light: For dark scenes, such as at dusk
HC-V10EB_VQT4C38_mst.book 43 ページ 2012年1月24日 火曜日 午前9時35
44
VQT4C38
Set the maximum zoom ratio.
The larger the digital zoom magnification, the more the image quality is degraded.
Switch the picture quality and recording format of the motion pictures to be recorded.
*1 Recording will have higher quality in the order of [1280k720/50p] and [640k480/50p].
*2 [iFrame] is a format suitable for Mac (iMovie’11). It is recommended for when using a
Mac.
About still picture recording size
The still picture recording size varies depending on the recording mode.
Recordable time using the battery (l 16)
This function’s default setting is [1280k720/50p] mode.
Please refer to page 92 about approximate recordable time.
Black bars will be displayed on the left and right in [640k480/50p] mode.
[D.ZOOM]
: [RECORD SETUP] # [D.ZOOM] # desired setting
[100k]: Digital zoom (Up to 100k)
[3500k]: Digital zoom (Up to 3500k)
[OFF]: Optical zoom only (Up to 70k)
[REC MODE]
: [RECORD SETUP] # [REC MODE] # desired setting
[1280k720/50p]/
[640k480/50p]
*1
: Set the recording mode to MP4.
[iFrame]
*2
: Set the recording mode to iFrame.
Recording mode Aspect ratio Picture size
[1280k720/50p]/
[iFrame]
16:9 1280k720
[640k480/50p]
4:3
640k480
0.9
M
0.3
M
HC-V10EB_VQT4C38_mst.book 44 ページ 2012年1月24日 火曜日 午前9時35
45
VQT4C38
Detected faces appear with frames.
Up to 15 frames are indicated. Larger faces and faces nearer to the centre of the screen
take preference over others.
Prioritised face framing
Prioritised face framing is displayed as orange frames. Focus and adjustment of brightness
will be performed against the prioritised face framing.
Prioritised face framing is only displayed with Portrait Mode in the Intelligent Auto Mode.
The white frame is for face detection only.
If the unit continues to be tilted upside down from the normal horizontal position while
recording motion pictures, it is automatically put into recording pause.
The AGS function may activate and cause the unit to pause the recording if you are
recording a subject right above or right below you.
You can record bright pictures even in dark places by slowing the shutter speed.
Switch to Manual Mode. (l 48)
The shutter speed is set to 1/25 or more depending on the surrounding brightness.
When the shutter speed becomes 1/25, the screen may be seen as if frames are missed
and afterimages may appear.
[FACE FRAMING]
: [RECORD SETUP] # [FACE FRAMING] # desired setting
[PRIMARY]:
Only the prioritised face framing is displayed.
[ALL]:
All face detection framings are displayed.
[OFF]:
Cancel the setting.
[AGS]
: [RECORD SETUP] # [AGS] # [ON]
[AUTO SLOW SHTR]
: [RECORD SETUP] # [AUTO SLOW SHTR] # [ON]
HC-V10EB_VQT4C38_mst.book 45 ページ 2012年1月24日 火曜日 午前9時35
46
VQT4C38
This is for reducing the wind noise coming into the built-in microphones.
Switch to Manual Mode. (l 48)
This function’s default setting is [OFF].
When switching to Intelligent Auto Mode, [WIND CUT] is set to [OFF], and the setting
cannot be changed.
You may not see the full effect depending on the recording conditions.
When recording, the input level from the built-in microphones can be adjusted.
Switch to Manual Mode. (l 48)
1 Select the menu.
2
(When [SETr ]/[SET] is selected)
Press 2/1 to adjust.
Adjust the microphone input level so that the
last 2 bars of the gain value are not red.
(Otherwise, the sound is distorted.) Select a
lower setting for microphone input level.
3 Press the ENTER button to determine
the microphone input level and then
press the MENU button.
(Microphone input level meter)
appears on the screen.
In Intelligent Auto Mode this setting is set to [AUTO] and cannot be changed.
The microphone input level meter shows the larger of the inputs from the 2 built-in
microphones.
You cannot record with the audio completely muted.
[WIND CUT]
: [RECORD SETUP] # [WIND CUT] # [ON]
[MIC LEVEL]
: [RECORD SETUP] # [MIC LEVEL] # desired setting
[AUTO]: AGC is activated, and the recording level is adjusted
automatically.
[SETr ]: The desired recording level can be set.
AGC is activated, reducing noise.
[SET]: The desired recording level can be set.
You will be able to record natural-sounding audio.
A Left
B Right
C Microphone input level
HC-V10EB_VQT4C38_mst.book 46 ページ 2012年1月24日 火曜日 午前9時35
47
VQT4C38
Selecting the picture quality.
You can add a shutter sound when recording still pictures.
[QUALITY]
: [PICTURE] # [QUALITY] # desired setting
: Still pictures with a high picture quality are recorded.
: Priority is given to the number of still pictures recorded. Still pictures are recorded
in normal picture quality.
[SHTR SOUND]
: [PICTURE] # [SHTR SOUND] # desired setting
: Volume low
: Volume high
[OFF]: Cancel the setting.
HC-V10EB_VQT4C38_mst.book 47 ページ 2012年1月24日 火曜日 午前9時35
48
VQT4C38
¬ Change the mode to .
Press the iA/MANUAL button to switch to Manual Mode.
appears on the screen.
Press the ENTER button to display/not-display the manual icon.
The page changes with each press of 4.
White Balance
Automatic White Balance function may not reproduce natural colours depending on the
scenes or lighting conditions. If so, you can adjust the White Balance manually.
Press the iA/MANUAL button to switch to Manual Mode.
1 Select [WB] using the cursor button.
2 Press 2/1 to select White Balance
Mode.
Select the optimal mode by confirming the colour
on the screen.
Advanced (Recording)
Manual recording
MNL
4/5 NEXT
4/5 NEXT
4/5 NEXT
5/5 NEXT
5/5 NEXT
5/5 NEXT
/MANUAL
White Balance
Manual Shutter Speed (l 50)
Iris Adjustment (l 50)
Focus (l 51)
BACKBACKBACK
HC-V10EB_VQT4C38_mst.book 48 ページ 2012年1月24日 火曜日 午前9時35
49
VQT4C38
To return to auto setting, select or press the iA/MANUAL button.
To set the White Balance manually
1Press 2/1 to select , and fill the screen
with a white subject.
2Press 3 to set.
When the display stops flashing and then lights
constantly, the setting is complete.
If the display continues flashing, the White
Balance cannot be set. In this case, use other White
Balance Modes.
If you turn on the unit with the lens cover closed, the Auto White Balance will not be
performed correctly. Always open the lens cover before turning on the unit.
When the display flashes, the Manual White Balance previously adjusted is stored.
Whenever recording conditions change, re-set the White Balance.
When setting both the White Balance and the iris/gain, set the White Balance first.
is not displayed on the screen when is being set.
Icon Mode/Recording conditions
Auto White Balance adjustment
Sunny mode: Outdoors under a clear sky
Cloudy mode: Outdoors under cloudy sky
Indoor mode 1: Incandescent light, video lights like in the studio, etc.
Indoor mode 2: Colour fluorescent lamps, sodium lamps in gymnasiums etc.
Manual adjustment mode:
Mercury-vapor lamps, sodium lamps, some fluorescent lights
Lights used for wedding receptions at hotels, stage spotlights in theaters
Sunrise, sunset, etc.
AWB
AWB
BACKBACKBACK
AWB
AWB
HC-V10EB_VQT4C38_mst.book 49 ページ 2012年1月24日 火曜日 午前9時35
50
VQT4C38
Manual shutter speed/iris adjustment
Shutter Speed:
Adjust it when recording fast-moving subjects.
Iris:
Adjust it when the screen is too bright or too dark.
Press the iA/MANUAL button to switch to Manual Mode. (l 48)
1 Select [SHTR] or [IRIS] using the cursor button.
2 Press 2/1 to adjust settings.
A : Shutter speed:
1/50 to 1/8000
If [AUTO SLOW SHTR] is set to [ON], the
shutter speed will be set between 1/25 and
1/8000.
The shutter speed closer to 1/8000 is faster.
B : Iris/Gain value:
CLOSE
!#
(F16 to F2.0)
!#
OPEN
!#
(0dB to 18dB)
Value closer to CLOSE darken the image.
Value closer to 18dB brighten the image.
When the iris value is adjusted to brighter than OPEN, it changes to the gain value.
To return to auto setting, press the iA/MANUAL button.
When setting both the shutter speed and the iris/gain value, set the shutter speed and then
set the iris/gain value.
Manual shutter speed adjustment
You may see a band of light around an object that is shining very bright, or highly reflective.
During normal playback, image movement may not look smooth.
If you record an extremely bright object or record under indoor lighting, colour and screen
brightness may change or a horizontal line may appear on the screen. In this case, record
in the Intelligent Auto Mode or set the shutter speed to 1/100 in areas where the power
supply frequency is 50 Hz, or 1/125 in areas of 60 Hz.
Manual iris/gain adjustment
If the gain value is increased, the noise on the screen increases.
Depending on the zoom magnification, there are iris values that are not displayed.
OPENOPEN
1/100100
BACKBACKBACK
IRISIRISIRISIRISIRISIRIS
HC-V10EB_VQT4C38_mst.book 50 ページ 2012年1月24日 火曜日 午前9時35
51
VQT4C38
Recording with Manual Focus
If auto focusing is difficult due to the conditions, then use Manual Focus.
Press the iA/MANUAL button to switch to Manual Mode. (l 48)
1 Press 4 to switch the manual icon.
2 Select [MF] using the cursor button to change to Manual Focus.
MF appears on the screen.
3 Press 2/1 to adjust the focus.
To restore Auto Focus, select [AF] or press the iA/MANUAL button.
: To focus on a close subject
: To focus on a faraway subject
MFMF
5/5 NEXT5/5 NEXT5/5 NEXT
MF
MF
HC-V10EB_VQT4C38_mst.book 51 ページ 2012年1月24日 火曜日 午前9時35
52
VQT4C38
Motion picture playback using operation icon
For details on the basic playback operations, refer to page 28.
Advanced (Playback)
Playback Operations
Playback
operation
Cursor button/
Playback display
Operating steps
Fast
forward/
rewind
playback
During Playback
Press 1 of the cursor button during
playback to fast forward.
(Press 2 to rewind.)
Press again to speed up fast forward/rewind
(the screen display will change from 5 to
).
Normal playback is restored when you press
3
.
Slow-
motion
playback
During Pause
With the playback paused, press and hold 1
of the cursor button.
(Press and hold 2 for slow rewind playback)
Slow-motion playback will continue over the
period that the button is pressed.
Normal playback is restored when you press
3
.
When slow-motion pictures are played back in
reverse, they will be shown continuously at
approximately 2/5 the speed of normal
playback. (MP4)
When slow-motion pictures are played back in
reverse, they will be shown continuously at
approximately 2/3
rd
the speed of normal
playback. (iFrame)
Frame-by-
frame
playback
The motion
picture is
advanced
one frame
at a time.
With the playback paused, press 1 of the
cursor button.
(Press 2 to advance the frames one at a time
in the reverse direction.)
Normal playback is restored when you press
3.
When the frames are advanced one at a time
in the reverse direction, they will be shown in
intervals of 0.5 seconds (MP4).
When the frames are advanced one at a time
in the reverse direction, they will be shown in
intervals of 1 second (iFrame).
HC-V10EB_VQT4C38_mst.book 52 ページ 2012年1月24日 火曜日 午前9時35
53
VQT4C38
Creating still picture from motion picture
A single frame from the recorded motion picture can be saved as a still picture.
Picture size of the still picture to be created will differ depending on the recording mode of the
recorded motion picture.
Press the button at the location to be saved as a still picture during
the playback.
It is convenient to use Pause, Slow-motion Playback and Frame-by-frame Playback.
Date the motion picture was recorded will be registered as date of the still picture.
Quality will be different from the normal still picture.
Repeat playback
Playback of the first scene starts after playback of the last scene finishes.
The indication appears on the full screen views.
All the scenes are played back repeatedly. (When playing back motion pictures by date, all
the scenes on the selected date are played back repeatedly.)
Recording mode Aspect ratio Picture size after creating still picture
[1280k720/50p]
16:9
1280k720
[iFrame] 960k540
[640k480/50p]
4:3 640k480
: [VIDEO SETUP] # [REPEAT PLAY] # [ON]
0.9
M
0.5
M
0.3
M
HC-V10EB_VQT4C38_mst.book 53 ページ 2012年1月24日 火曜日 午前9時35
54
VQT4C38
Resuming the previous playback
If playback of a scene was stopped halfway, the playback can be resumed from where it was
stopped.
If playback of a motion picture is stopped, appears on the thumbnail view of the stopped
scene.
The memorised resume position is cleared if you turn off the unit or change the mode. (The
setting of [RESUME PLAY] does not change.)
Zooming in on a still picture during playback
(Playback zoom)
You can zoom in on still pictures during playback.
1 Move the zoom lever to side.
You can zoom to a maximum of 4a. (k1 # k2 # k4)
2 Shift the position of the zoomed
portion using the cursor button.
The location of the zoom displays for about
1 second when zooming in (zooming out) or
moving the displayed location.
The more picture is enlarged, the more its
quality deteriorates.
Zooming out from the zoomed still picture
Move the zoom lever to side to zoom out. (k4 # k2 # k1)
: [VIDEO SETUP] # [RESUME PLAY] # [ON]
ReturnReturnReturn
A Displayed location of
the zoom
HC-V10EB_VQT4C38_mst.book 54 ページ 2012年1月24日 火曜日 午前9時35
55
VQT4C38
Playing back motion pictures/still pictures by date
The scenes or the still pictures recorded on the same day can be played back in succession.
1 Select the date select icon
using the cursor button, then
press the ENTER button.
2 Select the playback date, then press the ENTER button.
The scenes or the still pictures recorded on the date selected are displayed as thumbnails.
3 Select the scene or the still picture to be played back, then press the
ENTER button.
Playing back of all the scenes or the still pictures returns if the unit is turned off or the mode
is changed.
Even if the scenes have been recorded on the same day, they will be displayed separately
in the following cases. -1, -2 ... are added after the date displayed on the list by date.
jWhen the number of scenes exceeds 99
jWhen the number of recorded still pictures exceeds 999
Scenes recorded on the same day are displayed separately if the recording mode has
been changed between recording them. The icon that appears behind the date on the list
by date changes as follows.
j : Scenes recorded using the [1280k720/50p] recording mode.
j : Scenes recorded using the [iFrame] recording mode.
j : Scenes recorded using the [640k480/50p] recording mode.
is displayed after the date in the list by date for the still pictures created from the motion
picture. (l 53)
Advanced (Playback)
Various playback functions
A Date select icon
HC-V10EB_VQT4C38_mst.book 55 ページ 2012年1月24日 火曜日 午前9時35
56
VQT4C38
Changing the playback settings and playing back the
slide show
1 Select using the cursor button,
then press the ENTER button.
2 (Only when you would like to change the settings)
Select the desired item and press the ENTER button.
3 (When [DATE SETUP] is selected)
Select the playback date, then
press the ENTER button.
(When [SLIDES INTERVAL] is selected)
Select the desired item and press the ENTER button.
(When [MUSIC SELECT] is selected)
Select the desired sound and
press the ENTER button.
4 Select [START] and press the
ENTER button.
5 Select the playback operation. (l 28)
When the playback is finished or stopped, the screen to select [REPLAY],
[SELECT AGAIN] or [EXIT] is displayed. Select the desired item and press the ENTER
button.
To adjust the volume of music during playback of the slide show, operate the volume lever.
(l 29)
[DATE SETUP]: Select the date to be played back.
[SLIDES INTERVAL]: Selects the interval between still pictures at playback.
[MUSIC SELECT]: Select the music to be played on playback.
[SHORT]: Approx. 1 second
[NORMAL]: Approx. 5 seconds
[LONG]: Approx. 15 seconds
HC-V10EB_VQT4C38_mst.book 56 ページ 2012年1月24日 火曜日 午前9時35
57
VQT4C38
¬ Change the mode to .
To delete scenes or still pictures from the thumbnail display
1 Press the button while the thumbnail view screen is displayed.
2 Select [ALL SCENES] or [SELECT]
using the cursor button, then
press the ENTER button.
All the scenes or still pictures displayed as
thumbnails will be deleted by selecting
[ALL SCENES].
(In case of playing back scenes or still pictures by date, all the scenes or still pictures on
the selected date will be deleted.)
Protected scenes/still pictures cannot be deleted.
3 (When [SELECT] is selected in
Step
2)
Select the scene/still picture to be deleted, then press the ENTER
button.
The scene/still picture is selected and the indication appears on the thumbnail. Press
the ENTER button again to cancel the operation.
Up to 99 scenes can be selected to be deleted.
4
(When [SELECT] is selected in
Step
2)
Select [Delete], and press the ENTER button, or the button.
To continuously delete other scenes/still pictures, repeat
Step
s 3-4.
When you stop deleting halfway
Press the MENU button while deleting.
The scenes or still pictures that have already been deleted when the deletion is cancelled
cannot be restored.
Advanced (Playback)
Deleting scenes/still pictures
Deleted scenes/still pictures cannot be restored, so perform appropriate
confirmation of the contents before proceeding with deletion.
To delete the scene or still picture
being played back
Press the button while scenes or still
pictures to be deleted are being played back.
HC-V10EB_VQT4C38_mst.book 57 ページ 2012年1月24日 火曜日 午前9時35
58
VQT4C38
To complete editing
Press the MENU button.
You can also delete scenes by pressing the MENU button, selecting [EDIT SCENE] #
[DELETE] # [ALL SCENES] or [SELECT].
You can also delete still pictures by pressing the MENU button, selecting [PHOTO SETUP]
# [DELETE] # [ALL SCENES] or [SELECT].
Scenes which cannot be played back (the thumbnails are displayed as ) cannot be
deleted.
In case of [ALL SCENES], the deletion may take time if there are many scenes or still
pictures.
If you delete scenes recorded on other products or still pictures conforming to DCF
standard with this unit, all the data related to the scenes/still pictures may be deleted.
When still pictures recorded on an SD card by other products are deleted, a still picture
(other than JPEG) that cannot be played back on this unit may be erased.
HC-V10EB_VQT4C38_mst.book 58 ページ 2012年1月24日 火曜日 午前9時35
59
VQT4C38
Dividing a scene to partially delete
This divides the recorded scenes in two and deletes the front half or back half.
The scenes that were deleted after division cannot be recovered.
Change the mode to .
1 Select the menu.
2 Select the scene you wish to divide using the cursor button and
press the ENTER button.
3 Select to set the dividing point.
It is convenient to use Slow-motion Playback and
Frame-by-frame Playback. (l 52)
Set to at least 2 seconds for the portions to be
deleted and at least 3 seconds for the portion that
is to remain.
4 Select the part for deletion, then press the ENTER button.
5 Select [YES] and press the ENTER button to confirm (play back) the
part for deletion.
A confirmation message appears when [NO] is selected.
Proceed to
Step
7.
6 Stop the playback.
A confirmation message appears.
7 Select [YES] and press the ENTER button.
To continue dividing and deleting other scenes, repeat
Step
s 2-7.
To complete dividing
Press the MENU button.
It may not be possible to divide scenes with a short recording time.
The actual division may slightly slip off the previously designated dividing point.
: [EDIT SCENE] # [SPLIT&DELETE]
0h00m15s0h00m15s0h00m15s
HC-V10EB_VQT4C38_mst.book 59 ページ 2012年1月24日 火曜日 午前9時35
60
VQT4C38
Protecting scenes/still pictures
Scenes/still pictures can be protected so that they are not deleted by mistake.
(Even if you protect some scenes/still pictures, formatting the media will delete them.)
Change the mode to .
1 Select the menu.
2 Select the scene/still picture to be protected using the cursor button,
then press the ENTER button.
The scene/still picture is selected and the indication appears on the thumbnail. Press
the ENTER button again to cancel the operation.
Press the MENU button to complete the settings.
: [VIDEO SETUP] or [PHOTO SETUP] # [SCENE PROTECT]
HC-V10EB_VQT4C38_mst.book 60 ページ 2012年1月24日 火曜日 午前9時35
61
VQT4C38
HDMI is the interface for digital devices. If you connect this unit to an HDMI compatible
high definition TV and then play back the recorded high definition images, you can enjoy
them in high resolution with high quality sound.
1 Connect this unit to a TV.
Check that the plugs are inserted as far as they go.
Always use a genuine Panasonic HDMI mini cable (RP-CDHM15, RP-CDHM30: optional).
Do not use any other AV cables except the supplied one.
Advanced (Playback)
Watching Video/Pictures on your TV
Confirm the terminals on your TV and use a cable compatible with the terminals.
Image quality may vary with the connected terminals.
A High quality
1 HDMI terminal
2 Video terminal
A HDMI mini cable
(optional)
Be sure to connect to the
HDMI terminal.
B AV cable (supplied)
If your TV is not equipped
with AV Input Sockets, the
21-pin Adaptor C (optional)
is necessary. Consult your
dealer.
Picture quality
1 High definition images
when connecting to HDMI
terminal
2 Standard images when
connecting to video
terminal
HC-V10EB_VQT4C38_mst.book 61 ページ 2012年1月24日 火曜日 午前9時35
62
VQT4C38
2 Select the video input on the TV.
Example:
Select the [HDMI] channel with a HDMI mini cable.
Select the [Video 2] channel with an AV cable.
(The name of the channel may differ depending on the connected TV.)
Check the input setting (input switch) and the audio input setting on the TV. (For more
information, please read the operating instructions for the TV.)
3 Change the mode to to play back.
When connected to a television, the unit does not output sound in playback mode. Also,
the volume cannot be adjusted on the unit, so please make volume adjustments on your
television.
Operation icon will disappear when connected with an HDMI mini cable. Press the ENTER
button to display operation icon.
If the HDMI mini cable and AV cable are connected at the same time, output will be
prioritised in order of the HDMI mini cable, AV cable.
No audio will be played on the TV during recording mode.
Cables Reference items
A HDMI mini cable (optional) Connecting with a HDMI mini cable (l 63)
Playback using VIERA Link (l 64)
HC-V10EB_VQT4C38_mst.book 62 ページ 2012年1月24日 火曜日 午前9時35
63
VQT4C38
To watch images on a regular
TV (4:3) or when both sides of
the images do not appear on
the screen
Change the menu setting to display the
images correctly. (Check the TV setting.)
When this setting is set to [4:3] and the
unit is connected to a television using the
AV cable, the image may appear in a
shrunken form.
Example of images with a [16:9] aspect
ratio on a regular TV (4:3)
If a wide-screen TV is connected, adjust
the aspect setting on the TV. (Refer to the
operating instructions of the TV for
details.)
To display the on-screen
information on the TV
When the menu setting is changed, the
information displayed on the screen
(operation icon and time code etc.) can be
displayed/not displayed on the TV.
* This setting is only available in recording
mode.
Connecting with a HDMI mini cable
Select the desired method of HDMI output.
[AUTO] determines the output resolution automatically based on information from the
connected TV.
If the images are not output on the TV when the setting is [AUTO], switch to the method
[720p] or [576p] which enables the images to be displayed on your TV. (Please read the
operating instructions for the TV.)
When [REC MODE] is set to [640k480/50p] mode, video will be output in 576p, even if
[HDMI RESOLUTION] is set to [720p].
(the menu display will turn to [AUTO] or [576p])
: [SETUP] # [TV ASPECT] # [4:3]
[TV ASPECT] setting
[16:9] [4:3]
: [SETUP] # [EXT. DISPLAY] #
desired setting
[SIMPLE]*: Information partially
displayed
[DETAIL]: All information
displayed
[OFF]: Not displayed
Refer to the following support site for information about the Panasonic TVs that you
can directly insert an SD card into the SD card slot on the TV and then play it back.
http://panasonic.net/
For details on how to play back, please read the operating instructions for the TV.
: [SETUP] # [HDMI RESOLUTION] # [AUTO]/[720p]/[576p]
HC-V10EB_VQT4C38_mst.book 63 ページ 2012年1月24日 火曜日 午前9時35
64
VQT4C38
¬ Change the mode to .
1 Select the menu.
If you are not using VIERA Link, set to [OFF].
2 Connect this unit to a Panasonic TV compatible with VIERA Link
with a HDMI mini cable.
A HDMI mini cable (optional)
B Panasonic TV compatible with VIERA Link
It is recommended to connect this unit to an HDMI terminal other than the HDMI1 if there
are 2 or more HDMI input terminals on the TV.
VIERA Link must be activated on the connected TV. (Read the operating instructions of the
TV for how to set etc.)
Always use a genuine Panasonic HDMI mini cable (RP-CDHM15, RP-CDHM30: optional).
Advanced (Playback)
Playback using VIERA Link
What is the VIERA Link (HDAVI Control
)?
This function allows you to use your remote control for the Panasonic TV for easy
operations when this unit has been connected to a VIERA Link compatible device using
an HDMI mini cable (optional) for automatic linked operations. (Not all operations are
possible.)
VIERA Link is a unique Panasonic function built on an HDMI control function using the
standard HDMI CEC (Consumer Electronics Control) specification. Linked operations
with HDMI CEC compatible devices made by other companies are not guaranteed.
When using devices made by other companies that are compatible with VIERA Link,
refer to the operating instructions for the respective devices.
This unit is compatible with VIERA Link Ver.5. VIERA Link Ver.5 is the newest
Panasonic version and is also compatible with existing Panasonic VIERA Link devices.
(As of Nov. 2011)
: [SETUP] # [VIERA Link] # [ON]
HDMI IN
HC-V10EB_VQT4C38_mst.book 64 ページ 2012年1月24日 火曜日 午前9時35
65
VQT4C38
3 Operate with the remote control for the TV.
1) Press the button up, down, left or right to select a scene or still picture to be played back,
and then press the button in the centre to set it.
2) Activate the operation icons that are displayed on TV screen with the remote control for
the TV.
A Operation icons
B Display operation icons
C Cancel operation icons
D Display/Cancel operation icons
The following operations are available by pressing the colour buttons on the remote control.
jGreen: Switching the number of scenes/still pictures in thumbnail display
(9 thumbnails > 20 thumbnails > 9 thumbnails...)
Zoom in on still picture
jYellow: Deleting scenes/still pictures
jRed: Zoom out from still picture
Other linked operations
Turning the unit off:
If you use the remote control for the TV to turn off the power, this unit also turns off.
Automatic input switching:
If you connect with an HDMI mini cable and then turn on this unit, the input channel on the TV
automatically switches to this unit’s screen. If the TV’s power is in standby status, it will turn
on automatically (if [Set] has been selected for the TV’s [Power on link] setting).
Depending on the HDMI terminal on the TV, the input channel may not switch
automatically. In this case, use the remote control for the TV to switch the input channel.
If you are unsure whether or not the TV and AV amplifier you are using are compatible with
VIERA Link, read the operating instructions for the devices.
Available linked operations between this unit and a Panasonic TV is different depending on
the types of Panasonic TVs even if they are compatible with VIERA Link. Refer to the
operating instructions of the TV for the operations that support on the TV.
Operation is not possible with a cable that is not based on the HDMI standard.

1)
2)
15. 11 . 2011
0
h
00
m
15
s
HC-V10EB_VQT4C38_mst.book 65 ページ 2012年1月24日 火曜日 午前9時35
66
VQT4C38
You can dub by connecting an AV cable.
Images are dubbed in standard quality.
Use the AC adaptor to free you from worrying about the battery running down.
Change the mode to .
1 Connect this unit to a video device and start playback on this unit.
2 Start recording on the connected device.
To stop recording (dubbing), stop playback on this unit after stopping recording on the
recorder.
If the date and time display and function indication are not wanted, cancel them before
dubbing. (l 32, 63)
Turn off the operation icon by pressing the ENTER button when dubbing (l 29).
Copy/Dubbing
Dubbing images onto other video devices
Change the video input on the video
device and TV that this unit is
connected to.
The channel set will differ depending on the
terminal to which the unit is connected.
See the operating instructions of the video
device for details.
Insert the plugs as far as they will go.
Do not use any other AV cables except the
supplied one.
A AV cable (supplied)
If your recorder is not equipped with AV Input
Sockets, the 21-pin Adaptor B (optional) is
necessary. Consult your dealer.
If the dubbed images are played back on a wide-screen TV, the images may be stretched
vertically.
In this case, refer to the operating instruction of the device you are connecting to or read
the operating instructions of the wide-screen TV and set the aspect ratio to 16:9.
A/V
HC-V10EB_VQT4C38_mst.book 66 ページ 2012年1月24日 火曜日 午前9時35
67
VQT4C38
HD Writer HE 1.0
You can copy the motion/still picture data to the HDD of PCs or write to media like Blu-ray
discs, DVD discs or SD cards using HD Writer HE 1.0, the software installed in the supplied
CD-ROM.
Refer to the operating instructions of HD Writer HE 1.0 (PDF file) for details on how to use it.
Smart wizard
The Smart wizard screen is automatically displayed when you connect this unit to a PC with
HD Writer HE 1.0 installed. (l 75)
Copy to PC:
You can copy motion/still picture data to the HDD of PCs.
Copy to disc:
You can copy to disc in high definition picture quality or conventional standard picture quality
(MPEG2 format).
Select the function you wish to use and follow the on-screen instructions for easy copying.
With a PC
What you can do with a PC
What can be done with the HD Writer HE 1.0 Data type
Copying data to a PC
Motion
picture and
still picture
Copying to a Blu-ray disc
Motion pictures recorded using iFrame cannot be copied.
Copying in DVD-Video format:
Converted to conventional standard quality (MPEG2 format).
Motion
picture
Editing:
Editing motion picture data copied on an HDD of a PC
Title, Transition, Delete partially, Dividing
Converting part of motion picture into still picture
Online sharing:
You can upload motion pictures on the Internet and share them with your
family and friends.
Playing back on a PC:
Play back the motion picture data in high definition picture quality on a PC.
Motion
picture and
still picture
Formatting discs:
Depending on the type of disc that you use, formatting is necessary.
Motion
picture
HC-V10EB_VQT4C38_mst.book 67 ページ 2012年1月24日 火曜日 午前9時35
68
VQT4C38
It is possible to play back still picture on a PC using an image viewer standard to Windows
or commercially available image browsing software, and copy still pictures to a PC using
Windows Explorer.
Please refer to page 79 for details about using a Mac.
Data cannot be written from a PC to the unit.
Motion pictures that have been recorded on another device cannot be written to the
software supplied with this unit. To write motion picture data recorded with the
Panasonic Video Camera sold previously, use the HD Writer supplied with the unit.
When motion picture data is written to and read from the SD card, correct operation of the
unit cannot be guaranteed if software other than that supplied with the unit is used.
Do not start the software supplied with this unit and other software at the same time. Close
any other software if you start the software supplied with this unit and close the software
supplied with this unit if you start any other software.
Important Notice
When using an SDXC Memory Card, check the following support site.
http://panasonic.net/avc/sdcard/information/SDXC.html
When inserting a disc containing recorded motion pictures into other devices, a
message prompting you to format the disc may be displayed. Do not format the
disc, since deleted data cannot be restored later.
HC-V10EB_VQT4C38_mst.book 68 ページ 2012年1月24日 火曜日 午前9時35
69
VQT4C38
End User License Agreement
Before opening the CD-ROM package, please read the following.
You (“Licensee”) are granted a license for
the Software defined in this End User
License Agreement (“Agreement”) on
condition that you agree to the terms and
conditions of this Agreement.
Article 1 License
Licensee is granted the right to use the
software, including the information recorded
or described on the CD-ROM, instruction
manuals, and any other media provided to
Licensee (collectively “Software”), but all
applicable rights to patents, copyrights,
trademarks and trade secrets in the
Software are not transferred to Licensee.
Article 2 Use by a Third Party
Licensee may not use, copy, modify,
transfer, rent, lease, lend or allow any third
party, whether free of charge or not, to use,
copy or modify the Software, except as
expressly provided for in this Agreement.
Article 3 Restrictions on Copying the
Software
Licensee may make a single copy of the
Software in whole or a part solely for back-
up purpose.
Article 4 Computer
Licensee may use the Software only on one
computer, and may not use it on more than
one computer. Further, Licensee may not
use the Software for commercial software
hosting services.
Article 5 Reverse Engineering,
Decompiling or Disassembly
Licensee may not reverse engineer,
decompile, or disassemble the Software,
except to the extent either of them is
permitted under law or regulation of the
country where Licensee resides. Panasonic,
or its distributors will not be responsible for
any defects in the Software or damage to
Licensee caused by Licensee’s reverse
engineering, decompiling, or disassembly of
the Software.
Article 6 Indemnification
The Software is provided “AS-IS” without
warranty of any kind, either expressed or
implied, including, but not limited to,
warranties of non-infringement,
merchantability and/or fitness for a particular
purpose. Further, Panasonic does not
warrant that the operation of the Software
will be uninterrupted or error free. Panasonic
or any of its distributors will not be liable for
any damage suffered by Licensee arising
from or in connection with Licensee’s use of
the Software.
Article 7 Export Control
Licensee agrees not to export or re-export to
any country the Software in any form without
the appropriate export licenses under
regulations of the country where Licensee
resides, if necessary.
Article 8 Termination of License
The right granted to Licensee hereunder will
be automatically terminated if Licensee
contravenes any of the terms and conditions
of this Agreement. In this event, Licensee
must destroy the Software and related
documentation together with all the copies
thereof at Licensee’s own expense.
HC-V10EB_VQT4C38_mst.book 69 ページ 2012年1月24日 火曜日 午前9時35
70
VQT4C38
Article 9 With regard to MICROSOFT SQL
SERVER COMPACT 3.5 produced by
Microsoft Corporation
(1) Licensee shall use the MICROSOFT
SQL SERVER COMPACT 3.5 only when
included in the Software, and shall not use
the MICROSOFT SQL SERVER COMPACT
3.5 in any other configuration or method.
Licensee shall not publish the MICROSOFT
SQL SERVER COMPACT 3.5 or work
around any technical limitations in the
MICROSOFT SQL SERVER COMPACT
3.5.
(2) Licensee shall not use, copy, distribute,
regrant for use or otherwise handle the
Software in any way beyond the range of
use granted under Article 9 (1), and shall not
conduct operations such as reverse
engineering, decompilation, disassembling,
etc. of the MICROSOFT SQL SERVER
COMPACT 3.5.
(3) All rights, including copyright, patent
rights etc. relating to the MICROSOFT SQL
SERVER COMPACT 3.5 shall belong to
Microsoft Corporation. Licensee shall not
claim any rights related to the MICROSOFT
SQL SERVER COMPACT 3.5 whatsoever.
HC-V10EB_VQT4C38_mst.book 70 ページ 2012年1月24日 火曜日 午前9時35
71
VQT4C38
Even if the system requirements mentioned in these operating instructions are fulfilled,
some PCs cannot be used.
A CD-ROM drive is necessary to install the supplied software applications. (A compatible
Blu-ray disc/DVD writer drive and media are necessary for writing to a Blu-ray disc/DVD.)
Operation is not guaranteed in the following cases.
jWhen 2 or more USB devices are connected to a PC, or when devices are connected
through USB hubs or by using extension cables.
jOperation on an upgraded OS.
jOperation on an OS other than the one pre-installed.
This software is not compatible with Microsoft Windows 3.1, Windows 95, Windows 98,
Windows 98SE, Windows Me, Windows NT and Windows 2000.
Operating environment for HD Writer HE 1.0
With a PC
Operating environment
PC IBM PC/AT compatible PC
OS Windows 7 (32 bit/64 bit) Starter/Home Basic/Home Premium/
Professional/Ultimate (SP1)
Windows Vista (32 bit) Home Basic/Home Premium/Business/
Ultimate (SP2)
Windows XP (32 bit) (SP3)
CPU Intel Pentium 4 2.8 GHz or higher (including compatible CPU)
Intel Core 2 Duo 2.16 GHz or higher or AMD Athlon 64 X2 Dual-
Core 5200+ or higher is recommended when using playback
function.
Intel Core 2 Quad 2.6 GHz or higher is recommended when using
the editing function.
Intel Core i7 2.8 GHz or higher is recommended when copying
Blu-ray discs.
RAM Windows 7: 1 GB or more (32 bit)/2 GB or more (64 bit)
Windows Vista: 1 GB or more
Windows XP: 512 MB or more (1 GB or more recommended)
Display High Colour (16 bit) or more (32 bit or more recommended)
Desktop resolution of 1024k768 pixels or more (1920k1080 pixels
or more recommended)
Windows 7/Windows Vista: DirectX 9.0c compatible video card
(DirectX 10 recommended)
Windows XP: DirectX 9.0c compatible video card
Compatible with DirectDraw overlay
PCI Express
k16 compatible recommended
Video memory of 256 MB or more recommended
HC-V10EB_VQT4C38_mst.book 71 ページ 2012年1月24日 火曜日 午前9時35
72
VQT4C38
Supplied CD-ROM is available for Windows only.
Input is not supported in languages other than English, German, French, Simplified
Chinese and Russian.
Operation cannot be guaranteed on all Blu-ray disc/DVD drives.
Operation is not guaranteed on Microsoft Windows Vista Enterprise, Windows XP
Media Center Edition, Tablet PC Edition and Windows 7 Enterprise.
This software is not compatible with a multi-boot environment.
This software is not compatible with a multi-monitor environment.
If using Windows XP, only an administrative account user can use this software. If using
Windows Vista/Windows 7, only administrative and standard account users can use this
software. (An administrative account user should install and uninstall this software.)
To use the HD Writer HE 1.0
You will need a high performance PC depending on the functions to be used. It may not
properly play back or properly operate depending on the environment of the PC used. Refer
to the operating environment and notes.
Operation during the playback may become slow if the CPU or memory is not fulfilling the
requirements of the operating environment.
Always use the most current driver for the video card.
Always make sure there is enough capacity on the HDD in the PC. It may become
inoperable or the operation may stop suddenly if the capacity gets low.
Free hard disk
drive space
Ultra DMA — 100 or more
450 MB or more (for installing the software)
When writing to a DVD/Blu-ray disc/SD, the twice amount of free
space as the disc is necessary.
Sound DirectSound Support
Interface USB port [Hi-Speed USB (USB 2.0)]
Other
requirements
Mouse or equivalent pointing device
Internet connection
HC-V10EB_VQT4C38_mst.book 72 ページ 2012年1月24日 火曜日 午前9時35
73
VQT4C38
Operating environment for the card reader function (mass storage)
The USB equipment operates with the driver installed as standard in the OS.
PC IBM PC/AT compatible PC
OS Windows 7 (32 bit/64 bit) or SP1
Windows Vista (32 bit) (SP2)
Windows XP (32 bit) (SP3)
CPU Windows 7/Windows Vista: 1 GHz or higher
32-bit (k86) or 64-bit (k64) processor (including compatible CPU)
Windows XP: Intel Pentium
III 450 MHz or higher or Intel Celeron
400 MHz or higher
RAM Windows 7: 1 GB or more (32 bit)/2 GB or more (64 bit)
Windows Vista Home Basic: 512 MB or more
Windows Vista Home Premium/Business/Ultimate/Enterprise:
1GB or more
Windows XP: 512 MB or more (1 GB or more recommended)
Interface USB port
Other
requirements
Mouse or equivalent pointing device
HC-V10EB_VQT4C38_mst.book 73 ページ 2012年1月24日 火曜日 午前9時35
74
VQT4C38
When installing the software, log on to your computer as the Administrator or with a user
name with equivalent authorization. (If you do not have authorization to do this, consult your
manager.)
Before starting the installation, close all applications that are running.
Do not perform any other operations on your PC while the software is being installed.
Explanation of operations is based on Windows 7.
1 Insert the CD-ROM into the PC.
The [AutoPlay] screen is displayed automatically. Click [Run setup.exe] # [Yes].
If Windows 7 is in use or the [AutoPlay] screen is not displayed automatically, select [Start]
# [Computer] (or double-click on [Computer] on the desktop), and then double-click
[Panasonic].
2 Click [Yes].
Operate following the instruction on the screen.
If the country or region cannot be selected, select [PAL Area].
Uninstalling HD Writer HE 1.0
Follow the steps below to uninstall any software applications that you no longer require.
1 Select [Start] # [Control Panel] # [Uninstall a program].
2 Select [HD Writer HE 1.0], then click [Uninstall].
Proceed with the uninstallation by following the on-screen instructions.
After uninstalling the software, be sure to reboot the PC.
With a PC
Installation
The PC must be rebooted for the application to work.
HC-V10EB_VQT4C38_mst.book 74 ページ 2012年1月24日 火曜日 午前9時35
75
VQT4C38
Connect this unit to the PC after the software applications are installed.
Remove the supplied CD-ROM from your PC.
A USB cable (supplied)
Insert the plugs as far as they will go.
When the USB cable is connected to other equipment, the AC adaptor cannot be
used. Please ensure that the battery is sufficiently charged.
1 Turn on the unit.
This function is available in all modes.
2 Connect this unit to a PC.
The USB function selection screen will appear.
3 Select [PC] using the cursor button on the unit and press the ENTER
button.
The Smart wizard screen is automatically displayed when HD Writer HE 1.0 is installed.
This unit is automatically recognised as an external drive of the PC. (l 77)
When you select an option other than [PC], reconnect the USB cable.
The LCD monitor turns off after about 5 seconds. Press the cursor button to turn the LCD
monitor on.
Do not use any other USB cables except the supplied one. (Operation is not guaranteed
with any other USB cables.)
When this unit is connected to a PC using a USB cable while the unit is turned on, power is
also supplied from the PC to this unit.
When the unit is connected to a PC, it cannot be turned off.
Disconnect the USB cable, before turning this unit off.
When performing reading/writing between a PC and an SD card, be aware that some SD
card slots built into PCs and some SD card readers are not compatible with the SDHC
Memory Card or SDXC Memory Card.
When using an SDXC Memory Card, check the following support site.
http://panasonic.net/avc/sdcard/information/SDXC.html
With a PC
Connecting to a PC
HC-V10EB_VQT4C38_mst.book 75 ページ 2012年1月24日 火曜日 午前9時35
76
VQT4C38
To disconnect USB cable safely
Select the icon in task tray displayed on the PC, and then click [Eject Panasonic
Camcorder].
Depending on your PC’s settings, this icon may not be displayed.
About the screen indication of the unit
Do not disconnect the USB cable or the battery while the access lamp is on or card
access icon ( ) appears on the unit screen.
If the screen does not change when the unit is operated while connected to a PC,
disconnect the battery, wait approximately 1 minute, reconnect the battery, wait
approximately 1 minute again, and then turn the unit back on. (Data may be destroyed
when above operation is performed while accessing the SD card.)
HC-V10EB_VQT4C38_mst.book 76 ページ 2012年1月24日 火曜日 午前9時35
77
VQT4C38
About the PC display
When the unit is connected to a PC, it is recognised as an external drive.
Removable disk (Example: ) is displayed in [Computer].
Example folder structure of an SD card:
The following data will be recorded.
1 Up to 999 still pictures in JPEG
format ([S1000001.JPG] etc.)
2 [1280k720/50p] format motion
picture files ([S1000001.MP4] etc.)
3 [iFrame] format motion picture files
([S1000001.MP4] etc.)
4 [640k480/50p] format motion picture
files ([S1000001.MP4] etc.)
5 JPEG format still pictures created
from the motion picture
Copying your still pictures to
your PC
Card reader function (mass storage)
Still pictures recorded with this unit can be
copied to the PC with Explorer or other
programmes.
1 Double click the folder that contains
the still pictures. ([DCIM] #
[100CDPFQ] etc.)
2 Drag and drop the still pictures onto
the destination folder (on the PC’s
HDD).
Do not delete the SD card’s folders. Doing
so may make the SD card unusable in this
unit.
When data not supported by this unit has
been recorded on a PC, it will not be
recognised by this unit.
Always use this unit to format SD cards.
We recommend using HD Writer HE 1.0
to copy motion picture data.
Using Windows Explorer or other
programmes on the PC to copy, move or
rename files and folders recorded with
this unit will result in them being unusable
with HD Writer HE 1.0.
DCIM
CAM_SD
100CDPFQ
101XBPBH
102UDPHH
103VBPBH
104CDPFS
HC-V10EB_VQT4C38_mst.book 77 ページ 2012年1月24日 火曜日 午前9時35
78
VQT4C38
To use the software, log on as an Administrator or as user name for standard user account
(only for Windows 7/Windows Vista).
The software cannot be used with the user name for a guest account.
(On the PC)
Select [Start] # [All Programs] # [Panasonic] # [HD Writer HE 1.0] #
[HD Writer HE].
For details on how to use the software applications, read the PDF operating instructions of
the software.
Reading the operating instructions of the software
applications
You will need Adobe Acrobat Reader 5.0 or later or Adobe Reader 7.0 or later to read the
PDF operating instructions.
Select [Start] # [All Programs] # [Panasonic] # [HD Writer HE 1.0] #
[Operating Instructions].
With a PC
Starting HD Writer HE 1.0
HC-V10EB_VQT4C38_mst.book 78 ページ 2012年1月24日 火曜日 午前9時35
79
VQT4C38
HD Writer HE 1.0 is not available for Mac.
iMovie’11 supported. For details about iMovie’11, please contact Apple Inc.
Operating environment
Even if the system requirements mentioned in these operating instructions are fulfilled,
some PCs cannot be used.
The USB equipment operates with the driver installed as standard in the OS.
Supplied CD-ROM is available for Windows only.
Copying still pictures on PC
1 Connect this unit to a PC via the supplied USB cable.
When the USB cable is connected to other equipment, the AC adaptor cannot be
used. Please ensure that the battery is sufficiently charged.
The USB function selection screen will appear.
2 Select [PC] using the cursor button on the unit and press the ENTER
button.
This unit is automatically recognised as an external drive of Mac.
When you select an option other than [PC], reconnect the USB cable.
The LCD monitor turns off after about 5 seconds. Press the cursor button to turn the LCD
monitor on.
3 Double-click [CAM_SD] displayed on the desktop.
Files are stored in [100CDPFQ] folder etc. in the [DCIM] folder.
4
Using a drag-and-drop operation, move the pictures you want to acquire
or the folder storing those pictures to any different folder on the PC.
To disconnect USB cable safely
Drag [CAM_SD] disk icon to the [Trash], and then disconnect the USB cable.
Do not use any other USB cables except the supplied one. (Operation is not guaranteed
with any other USB cables.)
With a PC
If using Mac
PC Mac
OS Mac OS X 10.7.2
CPU Intel Core 2 Duo or better
RAM 2GB or more
Interface USB port
Other requirements Mouse or equivalent pointing device
HC-V10EB_VQT4C38_mst.book 79 ページ 2012年1月24日 火曜日 午前9時35
80
VQT4C38
Recording indications
Others
Indications
A
////
Intelligent Auto Mode (l 26)
Manual Mode (l 48)
////////
/
Scene Mode (l 43)
//
Power LCD (l 35)
¥/; (Red) Recording
; (Green) Recording pause
0h00m00s Elapsed recording time
(l 23)
(“h” is an abbreviation for hour, “m” for
minute and “s” for second.)
Image Stabilizer (l 38)
Remaining battery power
(l 16)
OPEN
0dB
0h00m00s
1
/
100
MF
R 1h20m
R 3000
15. 11. 2012 12:34
0.9
M
+1
PRE-REC
MNL
+2
+1
-
1
MF Manual Focus (l 51)
(White) Card recording possible
status (motion picture)
(Green) Recognising the card (motion
picture)
//
Recording Mode (l 44)
R 1h20m Remaining time for motion
picture recording (l 23)
Wind cut (l 46)
Backlight Compensation
(l 40)
B
// / / /
White Balance (l 48)
PRE-REC (l 41)
1/100 Shutter Speed (l 50)
OPEN/F2.0 Iris value (l 50)
0dB Gain value (l 50)
Microphone Level (l 46)
Soft Skin Mode (l 41)
/ Fade (White), Fade (Black)
(l 40)
Colour Night View function
(l 42)
Intelligent Contrast Control
(l 42)
AWB
PRE-REC
HC-V10EB_VQT4C38_mst.book 80 ページ 2012年1月24日 火曜日 午前9時35
81
VQT4C38
Playback indications
Indication of connection to
other devices
Confirmatory indications
C
(White) Card recording possible
status (still picture)
(Green) Recognising the card (still
picture)
/ Picture Quality (l 47)
// Number of recording pixels
for still pictures (l 25, 44,
53)
In Playback Mode, the picture size is not
displayed for still pictures recorded with
other products that have different picture
sizes from the sizes shown above.
R3000 Remaining number of still
pictures (l 25)
(White) Still picture recording icon
(Red) Recording still picture
World time setting (l 32)
15. 11. 2012 Date indication (l 21)
12:34 Time indication (l 21)
0.9
M
0.5
M
0.3
M
1/;/5/6///7/8/D/E/;1/
2;
Display during playback (l 28, 52)
0h00m00s Playback Time (l 28)
No.10 Scene Number
Repeat Playback (l 53)
Resume Playback (l 54)
100-0001 Still picture folder/file name
Protected motion pictures/
still pictures (l 60)
1280k720p recorded scene
(l 28)
iFrame recorded scene
(l 28)
640k480p recorded scene
(l 28)
Accessing the card (l 76)
– (Time
display)
The built-in battery is low.
(l 21)
Warning for recording yourself
(l 22)
SD card is not inserted or is
non-compatible.
HC-V10EB_VQT4C38_mst.book 81 ページ 2012年1月24日 火曜日 午前9時35
82
VQT4C38
Major confirmation/error messages to be indicated on the screen in text.
About recovery
If faulty management information is found, the messages may appear and a repair is
performed. (Repairing may take time depending on the error.)
is displayed when abnormal management information is detected when the scenes
are displayed in thumbnail.
If the unit is turned off during video recording, scenes of less than 30 seconds are not
recorded.
Use a sufficiently charged battery or the AC adaptor.
Depending on the condition of the data, it may not be possible to completely repair the
data.
If recovery fails, it will not be possible to play back scenes recorded before the unit turned
off.
When data recorded on another device is recovered, it may not be possible to play back
the data on this unit or the other device.
If recovery fails, turn the unit off and on again after waiting a while. If recovery fails
repeatedly, format a media on the unit. Please be aware that if a media is formatted, then
all the data recorded on the media will be erased.
If the thumbnail information is recovered, displaying the thumbnails may become slower.
Others
Messages
CHECK CARD.
This card is not compatible or it cannot be recognised by the unit.
If this message appears even though motion pictures and still pictures are recorded on an
SD card, the card may be unstable. Reinsert the SD card, then turn the unit off and then
on again.
HC-V10EB_VQT4C38_mst.book 82 ページ 2012年1月24日 火曜日 午前9時35
83
VQT4C38
It is not a malfunction in following cases
Others
Troubleshooting
A clicking sound is heard
when the unit is shaken.
This is the sound of the lens moving and is not a defect.
This sound will no longer be heard when the unit is turned
on and change the mode to .
Object seems to be
warped.
Object seems to be warped slightly when the object moves
across the image very fast, but this is because the unit is
using MOS for the image sensor. This is not a malfunction.
Power
Problem Check points
This unit cannot be
turned on.
This unit does not stay
on long enough.
Battery runs down
quickly.
Charge the battery again to ensure it is sufficiently
charged. (l 14)
In cold places, the battery using time becomes shorter.
The battery has a limited life. If the operating time is still
too short even after the battery is fully charged, the
battery has worn out and needs to be replaced.
This unit is turned off
automatically.
If the unit turns off when you turn off the power to the TV
using the TV remote control, the VIERA Link is at work. If
you are not using the VIERA Link, set [VIERA Link] to
[OFF]. (l 64)
This unit cannot be
operated though it is
turned on.
This unit does not
operate normally.
Remove the battery or AC adaptor, wait about 1 minute
and then reconnect the battery or AC adaptor. Then
about 1 minute later, turn on the unit again. (Conducting
the above operation while the media is being accessed
may damage the data on the media.)
If normal operation is still not restored, detach the power
connected, and consult the dealer who you purchased
this unit from.
“ERROR OCCURRED.
PLEASE TURN UNIT
OFF, THEN TURN ON
AGAIN.” is displayed.
The unit has automatically detected an error. Restart the
unit by turning the unit off and on.
The unit will be turned off in about 1 minute if the unit is
not turned off and on.
Repair is needed if it is repeatedly displayed even if it is
restarted. Detach the power connected, and consult the
dealer who you purchased this unit from. Do not attempt
to repair the unit by yourself.
HC-V10EB_VQT4C38_mst.book 83 ページ 2012年1月24日 火曜日 午前9時35
84
VQT4C38
Indication
Problem Check points
The remaining time
indication or the elapsed
time indication is not
shown.
[DISPLAY] of the [SETUP] is [OFF]. (l 32)
Recording
Problem Check points
The unit arbitrarily stops
recording.
Use an SD card that can be used for motion picture
recording. (l 17)
The recordable time may have shortened due to the
deterioration of the data writing speed or repeated
recording and deletion. Using the unit, format the SD
card. (l 36)
If [AGS] is [ON], record in the normal horizontal position
or set [AGS] to [OFF]. (l 45)
Auto Focus function
does not work.
Switch to Intelligent Auto Mode.
If you are trying to record a scene which is hard to bring
into focus in Auto Focus Mode, use the Manual Focus
Mode to adjust the focus. (l 27, 51)
“CONDITION TOO
DARK, OR OPEN LENS
COVER.” is displayed.
Before turning on the unit, open the lens cover.
This message may also be displayed when recording in a
very dark location.
Colour balance of
images is strange when
recording in a place
such as a gymnasium.
In a place with multiple light sources, such as a
gymnasium or a hall, set the White Balance setting to
(Indoor mode 2). If you cannot record clearly with the
(Indoor mode 2), set it to (Manual adjustment
mode). (l 48)
Colour or brightness of
the image changes, or
you may see horizontal
bars in the image.
The LCD monitor flickers
indoors.
Colour or brightness of the image may change, or you
may see horizontal bars in the image when the object is
recorded under fluorescent light, mercury light or sodium
light, etc., but this is not a malfunction.
Record in Intelligent Auto Mode or set the shutter speed
to 1/100 in areas where the power supply frequency is
50 Hz, or 1/125 in areas of 60 Hz.
HC-V10EB_VQT4C38_mst.book 84 ページ 2012年1月24日 火曜日 午前9時35
85
VQT4C38
Playback
Problem Check points
Scenes/still pictures
cannot be played back.
Any scenes/still pictures where the thumbnails are
displayed as cannot be played back.
Motion pictures recorded with other devices may not be
possible to play back on this unit. ( is displayed.)
Scenes cannot be
deleted.
Release the protect setting. (l 60)
Any scenes/still pictures where the thumbnails are displayed
as cannot be deleted. If the scenes/still pictures are
unnecessary, format the media to erase the data. (
l
36)
Please be aware that if a media is formatted then all the data
recorded on the media is erased and cannot be recovered.
Back up important data on a PC, disc etc.
With other products
Problem Check points
Video or audio is not
output even though it is
connected to TV
correctly.
The images are
squeezed horizontally.
Please read the operating instructions of your TV and
select the channel that matches the input used for the
connection.
Change the [TV ASPECT] setting to match the aspect
ratio of the TV. (l 63)
Change the setting of the unit depending on the cable
connecting to the TV. (l 63)
No audio will be played on the TV during recording mode.
When connected to a television, the unit does not output
sound in playback mode. Also, the volume cannot be
adjusted on the unit, so please make volume adjustments
on your television.
If the SD card is inserted
in another device, it is
not recognised.
Check that the device is compatible with the capacity or
type of SD card (SD Memory Card/SDHC Memory Card/
SDXC Memory Card) that you inserted. Refer to the
operating instructions of the device for details.
VIERA Link does not
work.
(Setting on this unit)
Connect with a HDMI mini cable (optional). (l 64)
Set [VIERA Link] to [ON]. (l 64)
Turn the unit off and then back on again.
(Setting on other devices)
If the TV input does not switch automatically, switch the
input using the TV remote control.
Check the VIERA Link setting on the connected device.
Please refer to the operating instructions of the
connected device.
HC-V10EB_VQT4C38_mst.book 85 ページ 2012年1月24日 火曜日 午前9時35
86
VQT4C38
With a PC
Problem Check points
When connected by the
USB cable and charging
the battery, an error
message will appear on
the PC.
After removing the USB cable, turn the unit on and
connect the cable again. The unit will be recognised by
the PC. To charge the battery, after safely removing the
USB cable, turn the unit off and connect the USB cable
again.
When connected by the
USB cable, this unit is
not detected by the PC.
After re-inserting the SD card into the unit, reconnect the
supplied USB cable.
Select another USB terminal on the PC.
Check the operating environment. (l 71, 79)
Connect the supplied USB cable again after restarting the
PC and turning on this unit again.
When the USB cable is
disconnected, an error
message will appear on
the PC.
To disconnect the USB cable safely, double-click the
icon in the task tray and follow the instructions on the
screen.
Cannot see the PDF
operating instructions
for HD Writer HE 1.0.
You will need Adobe Acrobat Reader 5.0 or later or
Adobe Reader 7.0 or later to read the PDF operating
instructions for HD Writer HE 1.0.
Others
Problem Check points
If the SD card is inserted
in this unit, it is not
recognised.
If the SD card is formatted on a PC, it may not be
recognised by this unit. Use this unit to format SD cards.
(l 36)
HC-V10EB_VQT4C38_mst.book 86 ページ 2012年1月24日 火曜日 午前9時35
87
VQT4C38
Keep this unit as far away as possible from
electromagnetic equipment (such as
microwave ovens, TVs, video games etc.).
If you use this unit on top of or near a TV,
the pictures and/or sound on this unit may
be disrupted by electromagnetic wave
radiation.
Do not use this unit near cell phones
because doing so may result in noise
adversely affecting the pictures and/or
sound.
Recorded data may be damaged, or
pictures may be distorted, by strong
magnetic fields created by speakers or
large motors.
Electromagnetic wave radiation generated
by microprocessors may adversely affect
this unit, disturbing the pictures and/or
sound.
If this unit is adversely affected by
electromagnetic equipment and stops
functioning properly, turn this unit off and
remove the battery or disconnect AC
adaptor. Then reinsert the battery or
reconnect AC adaptor and turn this unit on.
Do not use this unit near radio
transmitters or high-voltage lines.
If you record near radio transmitters or
high-voltage lines, the recorded pictures
and/or sound may be adversely affected.
Make sure to use the supplied cords and
cables. If you use optional accessories,
use the cords and the cables supplied
with them.
Do not extend the cords and the cables.
Do not spray insecticides or volatile
chemicals onto the unit.
If the unit is sprayed with such chemicals,
its body may be marred and the surface
finish may peel off.
Do not leave rubber or plastic products in
contact with the unit for a long time.
When you use the unit in a sandy or
dusty place such as a beach, do not let
sand or fine dust get into the body and
terminals of the unit.
Also, keep the unit away from sea water.
Sand or dust may damage the unit. (Care
should be taken when inserting and
removing a card.)
If sea water splashes onto the unit, wipe
off the water with a well wrung cloth. Then
wipe the unit again with a dry cloth.
When carrying the unit, do not drop or
bump it.
A strong impact can break the unit’s
casing, causing it to malfunction.
Cleaning
Before cleaning, detach the battery or pull
the AC adaptor from the AC outlet, and
then wipe the unit with a soft, dry cloth.
If the unit is very dirty, dip a cloth in water
and squeeze firmly, and then wipe the unit
with the damp cloth. Next, dry the unit with
a dry cloth.
Use of benzine, paint thinner, alcohol, or
dishwashing liquid may alter the camera
body or peel the surface finish. Do not use
these solvents.
When using a chemical dust cloth, follow
the instructions that came with the cloth.
Others
Cautions for use
About this unit
The unit and the SD card become
warm during use. This is not a
malfunction.
HC-V10EB_VQT4C38_mst.book 87 ページ 2012年1月24日 火曜日 午前9時35
88
VQT4C38
Do not use the unit for surveillance
purposes or other business uses.
This unit was designed for consumer
intermittent use. It was not intended for
continuous use, or for any industrial or
commercial application resulting in
prolonged use.
In certain situations, continuous use could
cause the unit to overheat and cause a
malfunction. Such use is strongly
discouraged.
When you are not going to use the unit
for an extended time
When storing the unit in a cupboard or
cabinet, it is recommended that you place
a desiccant (silica gel) in with it.
The battery used in this unit is a
rechargeable lithium-ion battery. It is
susceptible to humidity and temperature and
the effect increases the more the
temperature rises or falls. In cold areas, the
full charge indication may not appear or the
low battery indication may appear about
5 minutes after starting use. At high
temperatures, the protection function may
be triggered, making it impossible to use the
unit.
Be sure to detach the battery after use.
If the battery is left attached, a minute
amount of current continues to flow even if
the unit is off. Keeping the unit in this state
may result in over discharge of the battery.
This may result in you not being able to
use the battery even after it is charged.
The battery should be stored in the vinyl
bag so metal does not come into contact
with the terminals.
The battery should be stored in a cool
place free from humidity, with as constant
temperature as possible. (Recommended
temperature: 15 oC to 25 oC,
Recommended humidity: 40%RH to
60%RH)
Extremely high temperatures or low
temperatures will shorten the life of the
battery.
If the battery is kept in high-temperature,
high-humidity, or oily-smoky places, the
terminals may rust and cause
malfunctions.
To store the battery for a long period of
time, we recommend you charge it once
every year and store it again after you
have completely used up the charged
capacity.
Dust and other matter attached to the
battery terminals should be removed.
Prepare spare batteries when going out
for recording.
Prepare batteries enough to last for 3 to 4
times the period you are planning to
record for. Cold places such as a ski resort
can shorten recording time.
If you drop the battery accidentally,
check to see if the terminals are
damaged.
Inserting a battery with damaged terminals
can damage the unit.
Do not throw old battery into fire.
Heating a battery or throwing it into a fire
may result in an explosion.
If the operating time is very short even
after the battery has been recharged, the
battery has worn out. Please purchase a
new battery.
About the battery
HC-V10EB_VQT4C38_mst.book 88 ページ 2012年1月24日 火曜日 午前9時35
89
VQT4C38
If the temperature of the battery is
extremely high or extremely low, charging
may take time or the battery may not be
charged.
If you use the AC adaptor near a radio,
radio reception may be disturbed. Keep
the AC adaptor 1 m or more away from
the radio.
When using the AC adaptor, it may
generate whirring sounds. However, this is
normal.
After use, be sure to disconnect the AC
adaptor. (If it is left connected, a minute
amount of current is consumed.)
Always keep the electrodes of the AC
adaptor and battery clean.
When the status indicator is flashing at a
particularly fast or slow rate, the
following should be considered.
Flashing with approx. 4 second period
(off for approx. 2 seconds, on for approx.
2 seconds):
When the battery is over discharged or the
temperature of the battery is too high or
low. It can be charged, but it may take a
few hours to complete the charging
normally.
It will flash in approx. 2 second intervals
when normal charging resumes. Even in
such cases, it may start flashing in approx.
4 second intervals until charging is
completed depending on the conditions of
use.
Flashing with approx. 0.5 second period
(off for approx. 0.25 second, on for
approx. 0.25 second):
The battery is not charged. Remove the
battery from the unit, and try charging
again.
Check that the terminals of the unit or
battery are not dirty or covered with a
foreign object, and connect the battery
correctly once again. If a foreign object or
dirt is present, turn off the unit before
removing.
The battery or environment is at an
extremely high or low temperature. Wait
until the temperature has returned to an
appropriate level and try charging again. If
you are still unable to charge, there may
be a fault in the unit, battery or AC
adaptor.
Off:
Charging has finished.
If the status indicator stays off despite the
charging being unfinished, there may be a
fault in the unit, battery or AC adaptor.
Refer to page 88 for details on the battery.
About the AC adaptor About status indicator during
charging
HC-V10EB_VQT4C38_mst.book 89 ページ 2012年1月24日 火曜日 午前9時35
90
VQT4C38
When disposing of or giving away the SD
card, note that:
Formatting and deletion of this unit or
computer only changes the file
management information and does not
completely delete the data in the SD card.
It is recommended that the SD card is
physically destroyed or the SD card is
physically formatted using this unit when
disposing of or giving away the SD card.
To physically format an SD card, connect
the unit via the AC adaptor, select
[SETUP] # [FORMAT CARD] from the
menu, and then press and hold the delete
button on the screen below for about
3 seconds. When the SD card data
deletion screen appears, select [YES],
and then follow the on-screen instructions.
The customer is responsible for the
management of the data in the SD card.
When the LCD monitor gets dirty, wipe it
with a soft cloth, such as eye glass
cleaner.
In a place with drastic temperature
changes, condensation may form on the
LCD monitor. Wipe it with a soft cloth,
such as eye glass cleaner.
When the unit has become very cold, for
example due to storage in a cold area, its
LCD monitor will be slightly darker than
usual immediately after the unit is turned
on. The normal brightness will be restored
when the unit’s internal temperature rises.
When condensation forms on the unit, the
lens will cloud up and the unit may not work
properly. Make every effort to ensure that
condensation does not form. If it does form,
take the actions described below.
Causes of condensation
Condensation takes place when the
ambient temperature or humidity is
changed as follows.
When this unit is brought inside from the
cold (e.g. a ski slope) to a warm room.
When this unit is moved from an
air-conditioned car to outside.
When a cold room has been warmed up
quickly.
When cool wind from an air conditioner is
directly blown onto this unit.
After rain showers.
When this unit is in a very humid place
where the air is thick with steam. (e.g. a
heated swimming pool)
Helpful hint
If, for example, you have used this unit for
recording on a ski slope and are taking it into
a heated room, place the unit inside a plastic
bag, remove as much of the air from inside
the bag as possible, then seal the bag.
Leave the unit for about an hour in the room
so the temperature of the unit is close to the
ambient temperature of the room, then use
it.
About the SD card
LCD monitor
Extremely high precision technology is
employed to produce the LCD Monitor
screen featuring a total of approximately
230,000 dots. The result is more than
99.99% effective dots with a mere 0.01%
of the dots inactive or always lit.
However, this is not a malfunction and
does not affect the recorded picture.
About condensation
HC-V10EB_VQT4C38_mst.book 90 ページ 2012年1月24日 火曜日 午前9時35
91
VQT4C38
Carefully observe copyright
laws
Recording of pre-recorded tapes or discs
or other published or broadcast material
for purposes other than your own private
use may infringe copyright laws. Even for
the purpose of private use, recording of
certain material may be restricted.
Licenses
SDXC Logo is a trademark of SD-3C,
LLC.
HDMI, the HDMI Logo, and High-
Definition Multimedia Interface are
trademarks or registered trademarks of
HDMI Licensing LLC in the United States
and other countries.
HDAVI Control
is a trademark of
Panasonic Corporation.
Microsoft
®
, Windows
®
and
Windows
Vista
®
are either registered trademarks or
trademarks of Microsoft Corporation in the
United States and/or other countries.
Microsoft product screen shot(s) reprinted
with permission from Microsoft
Corporation.
IBM and PC/AT are registered trademarks
of International Business Machines
Corporation of the U.S.
Intel
®
, Pentium
®
, Celeron
®
and
Intel
®
Core
are trademarks of Intel
Corporation in the U.S. and/or other
countries.
AMD Athlon
is a trademark of Advanced
Micro Devices, Inc.
iMovie, Mac and Mac OS are trademarks
of Apple Inc. registered in the U.S. and
other countries.
Other names of systems and products
mentioned in these instructions are
usually the registered trademarks or
trademarks of the manufacturers who
developed the system or product
concerned.
This product is licensed under the AVC
patent portfolio license for the personal and
non-commercial use of a consumer to (i)
encode video in compliance with the AVC
Standard (“AVC Video”) and/or (ii) decode
AVC Video that was encoded by a consumer
engaged in a personal and non-commercial
activity and/or was obtained from a video
provider licensed to provide AVC Video. No
license is granted or shall be implied for any
other use. Additional information may be
obtained from MPEG LA, LLC.
See http://www.mpegla.com
.
Others
About copyright
HC-V10EB_VQT4C38_mst.book 91 ページ 2012年1月24日 火曜日 午前9時35
92
VQT4C38
SD cards are only mentioned with their main memory size. The stated times are the
approximate recordable times for continuous recording.
A Favours image quality
B Favours recording time
If recording for long periods, prepare batteries for 3 or 4 times the period you wish to record
for. (l 16)
The default setting is [1280k720/50p] mode.
Maximum continuously recordable time for one scene: 6 hours
The recording is paused once when the recording time for one scene exceeds 6 hours, and
the recording will automatically resume after a few seconds.
The recordable time may be reduced if recording with a lot of action is recorded or
recording of short scene is repeated.
Others
Recording modes/approximate
recordable time
Recording mode [1280k720/50p] [640k480/50p]
Picture size/frame rate 1280k720/50p 640k480/50p
SD card
4GB 30 min 1 h
16 GB 2h 4h
64 GB 8h 16h
Recording mode [iFrame]
Picture size/frame rate 960k540/25p
SD card
4GB 19 min
16 GB 1h20min
64 GB 5h20min
HC-V10EB_VQT4C38_mst.book 92 ページ 2012年1月24日 火曜日 午前9時35
93
VQT4C38
SD cards are only mentioned with their main memory size. The stated number is the
approximate number of recordable pictures.
(When [QUALITY] is set to )
When [QUALITY] is set to , the numbers of recordable pictures are larger than the
numbers shown in the table above.
The number of recordable pictures depends on whether and are used
together and on the subject being recorded.
Maximum number of recordable pictures that can be displayed is 99999.
If the number of recordable pictures exceeds 99999, the number will not change when the
picture is taken until the number of recordable pictures gets less than 99999.
The memory capacity indicated on the label of an SD card is the total of the capacity for
copyright protection and management and the capacity which can be used on the unit, a
PC etc.
Others
Approximate number of recordable
pictures
Picture size
1280k720 640k480
Aspect ratio 16:9 4:3
SD card
4GB 7500 28000
16 GB 32000 118000
64 GB 129000 475000
0.9
M
0.3
M
HC-V10EB_VQT4C38_mst.book 93 ページ 2012年1月24日 火曜日 午前9時35
94
VQT4C38
Product numbers correct as of Jan. 2012. These may be subject to change.
Some optional accessories may not be available in some countries.
Others
Optional accessories
Battery charger (VW-BC10EB)
Battery pack (lithium/VW-VBL090)
Battery pack (lithium/VW-VBK180)
Battery pack (lithium/VW-VBK360)
HDMI mini cable (RP-CDHM15,
RP-CDHM30)
Video DC light (VW-LDC103E)
*
Light bulb for video DC light (VZ-LL10E)
Shoe adaptor (VW-SK12E)
Accessory kit (VW-ACK180EB)
SD/SDHC/SDXC Memory Card
(Refer to page 17)
* To use the VW-LDC103E, the shoe
adaptor/VW-SK12E and the battery
pack/VW-VBG130, VW-VBG260 are
required. To charge the battery pack/
VW-VBG130, VW-VBG260, the AC
adaptor/VW-AD21EB-K, VW-AD20EB-K
is required.
HC-V10EB_VQT4C38_mst.book 94 ページ 2012年1月24日 火曜日 午前9時35
95
VQT4C38
Digital Video Camera
Information for your safety
Others
Specifications
Power source:
Power consumption:
DC 5.0 V (When using AC adaptor)
DC 3.6 V (When using battery)
Recording;
2.7 W
Charging;
5.3 W
Motion picture recording format:
MPEG-4 AVC file format compliant (.MP4)
Motion picture compression:
MPEG-4 AVC/H.264
Audio compression:
AAC/2 ch
Recording mode and transfer rate:
[1280k720/50p]; Average 15 Mbps (VBR)
[iFrame]; Maximum 28 Mbps (VBR)
[640k480/50p]; Average 6 Mbps (VBR)
For picture size and recordable time of a motion picture, refer to page 92.
Still picture recording format:
JPEG (Design rule for Camera File system, based on Exif 2.2 standard)
Refer to page 93 for the number of recordable pictures.
Recording media:
SD Memory Card (FAT12 and FAT16 system compliant)
SDHC Memory Card (FAT32 system compliant)
SDXC Memory Card (exFAT system compliant)
Refer to page 17 for details on SD cards usable in this unit.
Image sensor:
1/5.8 type (1/5.8z) 1MOS image sensor
Total; 1500 K
Effective pixels;
Motion picture/Still picture; 560 K to 440 K (16:9)
Lens:
Auto Iris, 63k Optical Zoom, F1.9 to F5.7
Focal length;
1.5 mm to 94.5 mm
Macro (Full range AF)
35 mm equivalent;
Motion picture/Still picture; 31.6 mm to 2262 mm (16:9), 31.6 mm to 2254 mm (4:3)
Minimum focus distance;
Approx. 2 cm (Wide)/Approx. 1.5 m (Tele)
HC-V10EB_VQT4C38_mst.book 95 ページ 2012年1月24日 火曜日 午前9時35
96
VQT4C38
Zoom:
70k Enhanced optical zoom, 100k/3500k Digital Zoom
Image stabilizer function:
Optical (Active mode)
Monitor:
6.7 cm (2.7z) wide LCD monitor (Approx. 230 K dots)
Microphone:
Stereo
Speaker:
1 round speaker, dynamic type
White balance adjustment:
Auto tracking white balance system
Standard illumination:
1,400 lx
Minimum required illumination:
Approx. 4 lx (1/25 with Low Light mode in the Scene Mode)
Approx. 1 lx with the Colour Night View function
AV connector video output level:
1.0 Vp-p, 75 h, PAL system
HDMI mini connector video output level:
HDMI
720p/576p
AV connector audio output level (Line):
316 mV, 600 h, 2 ch
HDMI mini connector audio output level:
Linear PCM
USB:
Reader function
SD card; Read only (No copyright protection support)
Hi-Speed USB (USB 2.0), USB terminal Type Mini B
Battery charging function (Charges from USB terminal when the main unit is off)
Dimensions:
55 mm (W)k64.5 mm (H)k109.5 mm (D)
(including projecting parts)
Mass:
Approx. 212
g
[without battery (supplied) and an SD card (optional)]
Mass in operation:
Approx. 239
g
[with battery (supplied) and an SD card (optional)]
Operating temperature:
0 oCto40oC
Operating humidity:
10%RH to 80%RH
Battery operation time:
See page 16
HC-V10EB_VQT4C38_mst.book 96 ページ 2012年1月24日 火曜日 午前9時35
97
VQT4C38
AC adaptor
Information for your safety
Power source:
Power consumption:
DC output:
AC 110 V to 240 V, 50/60 Hz
7W
DC 5.0V, 1.0A
Dimensions:
49.7 mm (W)k49.0 mm (H)k80.9 mm (D)
Mass:
Approx. 64
g
HC-V10EB_VQT4C38_mst.book 97 ページ 2012年1月24日 火曜日 午前9時35
98
VQT4C38
Index
A
A/V terminal . . . . . . . . . . . . . . 10, 61, 66
AC adaptor . . . . . . . . . . . . . . . . . . 14, 89
Alert sound . . . . . . . . . . . . . . . . . . . . . 35
Anti-Ground-Shooting . . . . . . . . . . . . . 45
Approximate number of recordable
pictures
. . . . . . . . . . . . . . . . . . . . . . . . 93
Auto focus . . . . . . . . . . . . . . . . . . . . . . 27
Auto slow shutter . . . . . . . . . . . . . . . . . 45
Automatic face framing . . . . . . . . . . . . 45
Automatic white balance . . . . . . . . . . . 27
B
Backlight compensation . . . . . . . . . . . . 40
Battery . . . . . . . . . . . . . . . . . . . . . 13, 88
Battery capacity indication . . . . . . . . . . 16
C
Card . . . . . . . . . . . . . . . . . . . . . . . . . . 17
Card status . . . . . . . . . . . . . . . . . . . . . 36
Changing the display style . . . . . . . . . . 33
Charging time . . . . . . . . . . . . . . . . . . . 16
Cleaning . . . . . . . . . . . . . . . . . . . . . . . 87
Colour night view . . . . . . . . . . . . . . . . . 42
Creating still picture from
motion picture . . . . . . . . . . . . . . . . . . . 53
D
Date and time display . . . . . . . . . . . . . 33
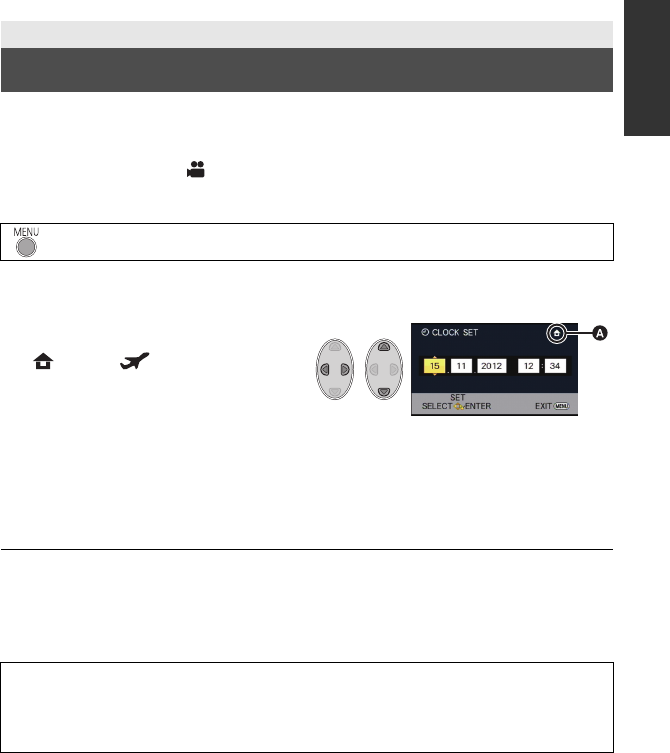
Date and time setting . . . . . . . . . . . . . . 21
Delete . . . . . . . . . . . . . . . . . . . . . . . . . 57
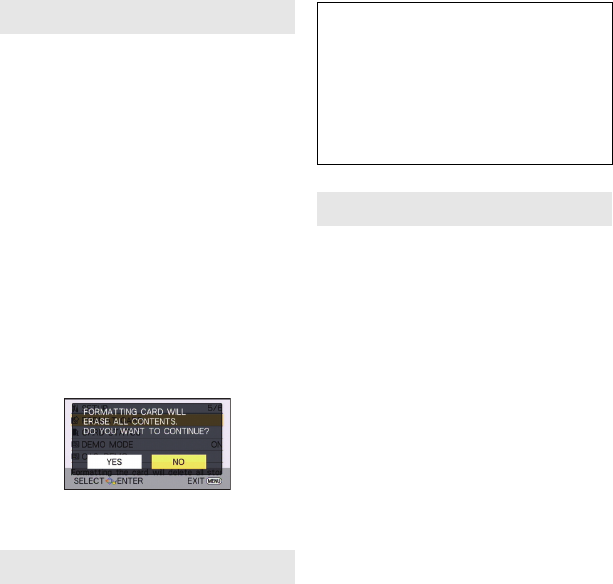
Demo mode . . . . . . . . . . . . . . . . . . . . 36
Digital zoom . . . . . . . . . . . . . . . . . . . . 44
Display . . . . . . . . . . . . . . . . . . . . . . . . 32
Dividing a scene to partially delete . . . . 59
Dubbing . . . . . . . . . . . . . . . . . . . . . . . 66
E
Economy(AC) . . . . . . . . . . . . . . . . . . . 34
Economy(BATT) . . . . . . . . . . . . . . . . . 33
F
Fade . . . . . . . . . . . . . . . . . . . . . . . . . . 40
Fade colour . . . . . . . . . . . . . . . . . . . . . 40
Focus . . . . . . . . . . . . . . . . . . . . . . . . . 51
Formatting . . . . . . . . . . . . . . . . . . . . . . 36
Frame-by-frame playback . . . . . . . . . . 52
G
Gain . . . . . . . . . . . . . . . . . . . . . . . . . . 50
Grip belt . . . . . . . . . . . . . . . . . . . . . . . 12
Guideline . . . . . . . . . . . . . . . . . . . . . . . 40
H
HD Writer HE 1.0 . . . . . . . . . . . . . .67, 78
HDMI mini connector . . . . . . . .12, 61, 64
HDMI resolution . . . . . . . . . . . . . . . . . .63
Help mode . . . . . . . . . . . . . . . . . . . . . .40
I
Indications . . . . . . . . . . . . . . . . . . . . . .80
Initial setting . . . . . . . . . . . . . . . . . . . . .35
Intelligent Auto Mode . . . . . . . . . . . . . .26
Intelligent contrast control . . . . . . . . . . .42
Iris . . . . . . . . . . . . . . . . . . . . . . . . . . . .50
L
Language . . . . . . . . . . . . . . . . . . . . . .36
LCD monitor . . . . . . . . . . . . . . . . .10, 90
LCD set . . . . . . . . . . . . . . . . . . . . . . . .35
M
Manual focus . . . . . . . . . . . . . . . . . . . .51
Manual recording . . . . . . . . . . . . . . . . .48
Menu . . . . . . . . . . . . . . . . . . . . . . . . . .31
Microphone level . . . . . . . . . . . . . . . . .46
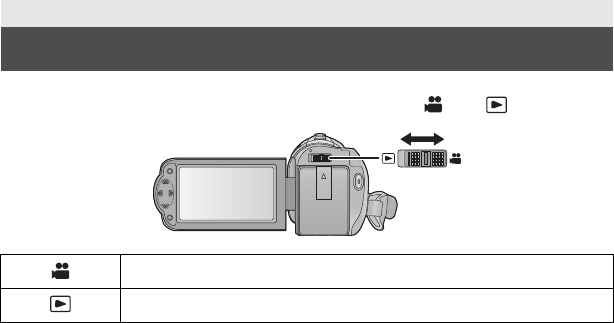
Mode switch . . . . . . . . . . . . . . . . . . . . .20
Motion picture compatibility . . . . . . . . . .30
O
Operation icons . . . . . . . . . . . . . . . . . .39
Optical image stabilizer demo . . . . . . . .36
Optical image stabilizer function . . . . . .38
P
Picture quality . . . . . . . . . . . . . . . . . . .47
Playback Operations . . . . . . . . . . . . . .52
Playback zoom . . . . . . . . . . . . . . . . . .54
Playing back motion pictures/
still pictures by date
. . . . . . . . . . . . . . .55
Power button . . . . . . . . . . . . . . . . . . . .19
Power LCD . . . . . . . . . . . . . . . . . . . . .35
PRE-REC . . . . . . . . . . . . . . . . . . . . . .41
Protect . . . . . . . . . . . . . . . . . . . . . . . . .60
Q
Quick start . . . . . . . . . . . . . . . . . . . . . .34
R
Recordable time . . . . . . . . . . . . . . .16, 92
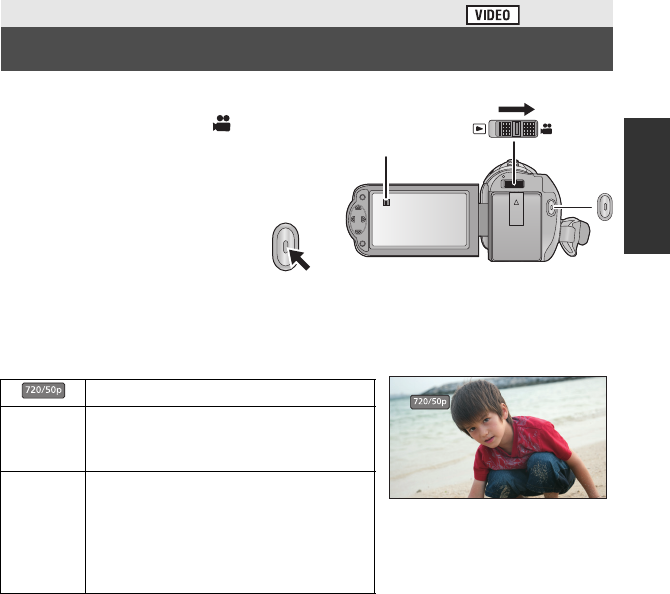
Recording format . . . . . . . . . . . . . . .4, 44
Recording modes . . . . . . . . . . . . . . . . .44
Recording time elapsed . . . . . . . . . . . .23
Recovery . . . . . . . . . . . . . . . . . . . . . . .82
Remaining number of still pictures . . . . .25
Remaining time left for recording . . . . . .23
Repeat playback . . . . . . . . . . . . . . . . .53
Resume playback . . . . . . . . . . . . . . . . .54
HC-V10EB_VQT4C38_mst.book 98 ページ 2012年1月24日 火曜日 午前9時35
99
VQT4C38
S
Scene mode . . . . . . . . . . . . . . . . . . . . 43
Scene protect . . . . . . . . . . . . . . . . . . . 60
SD Memory Card . . . . . . . . . . . . . . . . . 17
SD Speed Class Rating . . . . . . . . . . . . 17
SDHC Memory Card . . . . . . . . . . . . . . 17
SDXC Memory Card . . . . . . . . . . . . . . 17
Self-recording . . . . . . . . . . . . . . . . . . . 22
Shutter sound . . . . . . . . . . . . . . . . . . . 47
Shutter speed . . . . . . . . . . . . . . . . . . . 50
Slide show . . . . . . . . . . . . . . . . . . 29, 56
Slow-motion playback . . . . . . . . . . . . . 52
Soft skin mode . . . . . . . . . . . . . . . . . . . 41
Still picture compatibility . . . . . . . . . . . . 30
T
Tripod receptacle . . . . . . . . . . . . . . . . . 12
TV aspect . . . . . . . . . . . . . . . . . . . . . . 63
V
VIERA Link . . . . . . . . . . . . . . . . . . . . . 64
Volume adjustment . . . . . . . . . . . . . . . 29
W
White balance . . . . . . . . . . . . . . . . . . . 48
Wind cut . . . . . . . . . . . . . . . . . . . . . . . 46
World time setting . . . . . . . . . . . . . . . . 32
Z
Zoom . . . . . . . . . . . . . . . . . . . . . . . . . 37
HC-V10EB_VQT4C38_mst.book 99 ページ 2012年1月24日 火曜日 午前9時35
Pursuant to at the directive 2004/108/EC, article 9(2)
Panasonic Testing Centre
Panasonic Marketing Europe GmbH
Winsbergring 15, 22525 Hamburg, Germany
Panasonic Corporation
Web site: http://panasonic.net
© Panasonic Corporation 2012
B
VQT4C38
F0112AS0
EU
HC-V10EB_VQT4C38_mst.book 100 ページ 2012年1月24日 火曜日 午前9時35
8


Need help? Post your question in this forum.

Forumrules


Report abuse

Libble takes abuse of its services very seriously. We're committed to dealing with such abuse according to the laws in your country of residence. When you submit a report, we'll investigate it and take the appropriate action. We'll get back to you only if we require additional details or have more information to share.

Product:

For example, Anti-Semitic content, racist content, or material that could result in a violent physical act.

For example, a credit card number, a personal identification number, or an unlisted home address. Note that email addresses and full names are not considered private information.

Forumrules

To achieve meaningful questions, we apply the following rules:

Register

Register getting emails for Panasonic HC-V10 at:


You will receive an email to register for one or both of the options.


Get your user manual by e-mail

Enter your email address to receive the manual of Panasonic HC-V10 in the language / languages: English as an attachment in your email.

The manual is 6,54 mb in size.


You will receive the manual in your email within minutes. If you have not received an email, then probably have entered the wrong email address or your mailbox is too full. In addition, it may be that your ISP may have a maximum size for emails to receive.

Others manual(s) of Panasonic HC-V10

Panasonic HC-V10 User Manual - English - 90 pages

Panasonic HC-V10 Quick start guide - English - 27 pages

Panasonic HC-V10 User Manual - German - 90 pages

Panasonic HC-V10 Quick start guide - German - 27 pages

Panasonic HC-V10 User Manual - Dutch - 90 pages

Panasonic HC-V10 Quick start guide - Dutch - 27 pages

Panasonic HC-V10 Quick start guide - Danish - 26 pages

Panasonic HC-V10 User Manual - Danish - 90 pages

Panasonic HC-V10 User Manual - French - 90 pages

Panasonic HC-V10 Quick start guide - French - 28 pages

Panasonic HC-V10 User Manual - Italian - 90 pages

Panasonic HC-V10 Quick start guide - Italian - 27 pages

Panasonic HC-V10 User Manual - Polish - 90 pages

Panasonic HC-V10 Quick start guide - Polish - 27 pages

Panasonic HC-V10 User Manual - Portuguese - 90 pages

Panasonic HC-V10 Quick start guide - Portuguese - 27 pages

Panasonic HC-V10 User Manual - Swedish - 90 pages

Panasonic HC-V10 User Manual - Swedish - 27 pages

Panasonic HC-V10 User Manual - Turkish - 90 pages

Panasonic HC-V10 User Manual - Turkish - 27 pages

Panasonic HC-V10 User Manual - Spanish - 90 pages

Panasonic HC-V10 Quick start guide - Spanish - 27 pages

Panasonic HC-V10 User Manual - Finnish - 90 pages

Panasonic HC-V10 Quick start guide - Finnish - 29 pages


The manual is sent by email. Check your email

If you have not received an email with the manual within fifteen minutes, it may be that you have a entered a wrong email address or that your ISP has set a maximum size to receive email that is smaller than the size of the manual.

The email address you have provided is not correct.

Please check the email address and correct it.

Your question is posted on this page

Would you like to receive an email when new answers and questions are posted? Please enter your email address.


Info