-
5
-
Read “the Safety Instructions” booklet
and the following before using.
I
.
ADDITIONAL SAFETY
RULES
1) Wear ear protectors when using the
tool for extended periods.
2) Be aware that this tool is always in an
operating condition, since it does not
have to be plugged into an electrical
outlet.
3)When screwing or driving into walls,
floors, etc., “live” electrical wires may
be encountered. DO NOT TOUCH THE
HEX QUICK CHUCK OR ANY FRONT
METAL PARTS OF THE TOOL! Hold
the tool only by the plastic handle to
prevent electric shock in case you
screw or drive into a “live” wire.
4) If the screw driver does not rotate
anymore, immediately turn the trigger
switch off for a longer period to prevent
an overload, which can damage the
battery pack or motor.
Use reverse motion to loosen jammed
bits.
5) Do NOT operate the Forward/Reverse
lever when the trigger switch is on.
The battery will discharge rapidly and
damage to the unit may occur.
6)During charging, the charger may
become slightly warm. This is normal.
Do NOT charge the battery for a long
period.
7) When storing or carrying the tool,
set the Forward/Reverse lever to the
center position (switch lock).
8) Do not strain the tool by holding the
trigger switch halfway (speed control
mode) so that the motor stops.
II
.
ASSEMBLY
NOTE:
When attaching or removing a bit or
socket, disconnect battery pack from
tool or place the trigger switch in the
center position (switch lock).
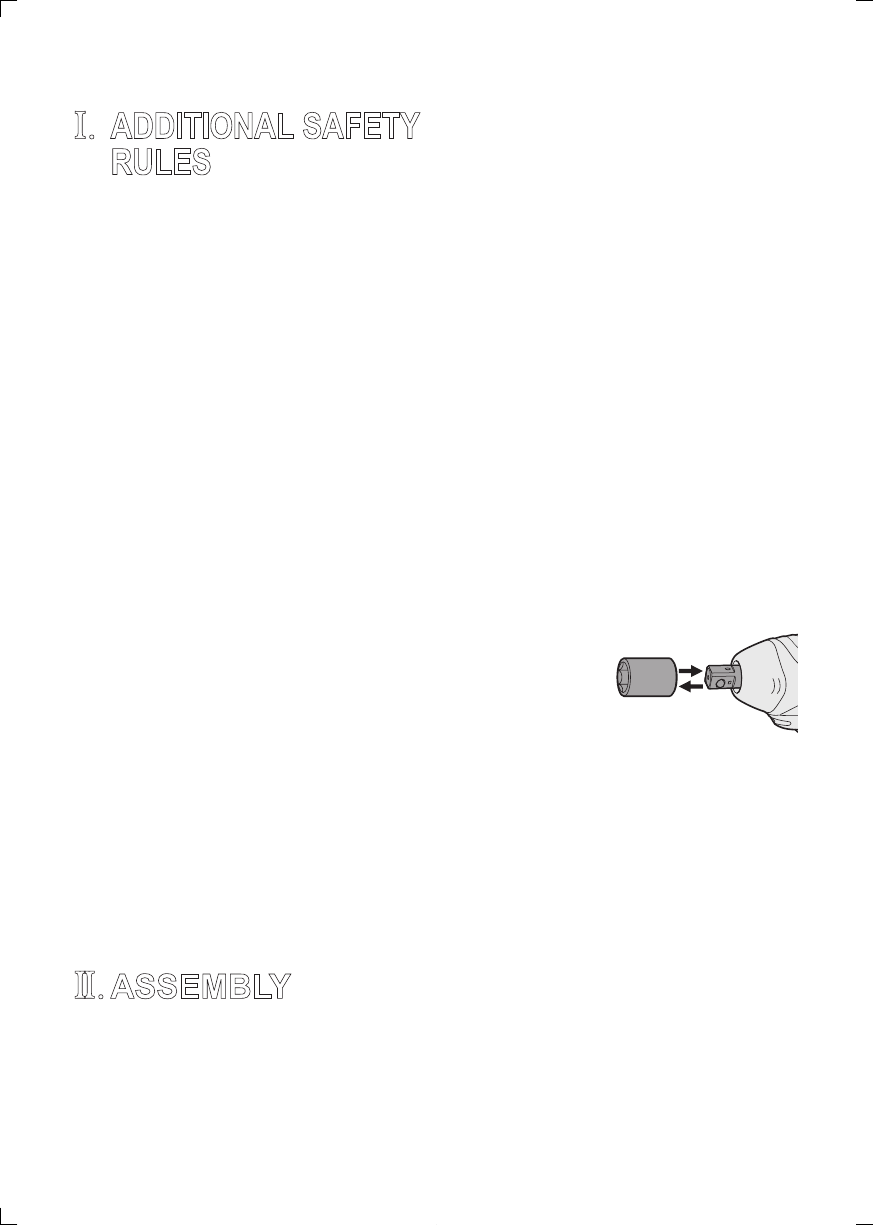
Attaching or Removing Bit
(EY7270)
1. Hold the collar of the quick connect
chuck and push it outwards.
2. Insert the bit into the chuck.
3. The collar will return to its original
position when it is released.
4. Pull the bit to make sure it does not
come out.
5. To remove the bit, pull back on the
collar in the same way.
CAUTION:
If the collar does not return to its
original position or the bit comes out
when pulled on, the bit has not been
properly attached. Make sure the bit
is properly attached before use.
Attaching or Removing
Socket (EY7271)
1. Attaching Socket
Attach the socket by sliding the female
detent on the bottom of the socket to
the square drive on the body.
Make sure the
socket is firm-
ly connected
to the body.
2. Removing Socket
Pull out the socket.
NOTE:
Attaching or Removing Original
Options and Sockets
Keep the body above freezing point
(0°C 32°F) when attach or detach
original options and sockets to
the square drive on the body. The
cushion rubber in the square drive to
push up the ball may get hard under
freezing point. This requires extra
force in detaching and attaching
sockets.