536739
58
Zoom out
Zoom in
Previous page
1/62
Next page
EN-1
CONTENTS
Usage Notice .....................................................................................2
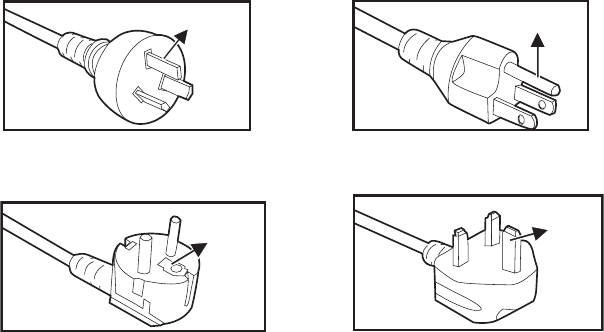
Safety Instructions ................................................................................................................. 2
Introduction .......................................................................................5
Projector Features ................................................................................................................. 5
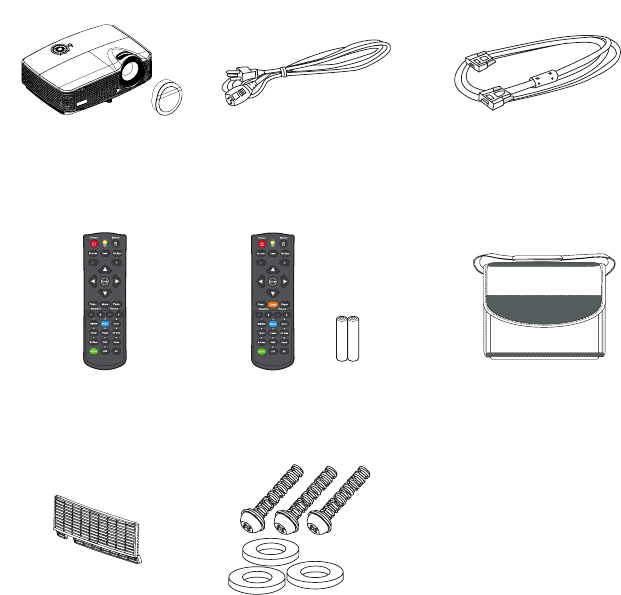
Package Contents ................................................................................................................. 6
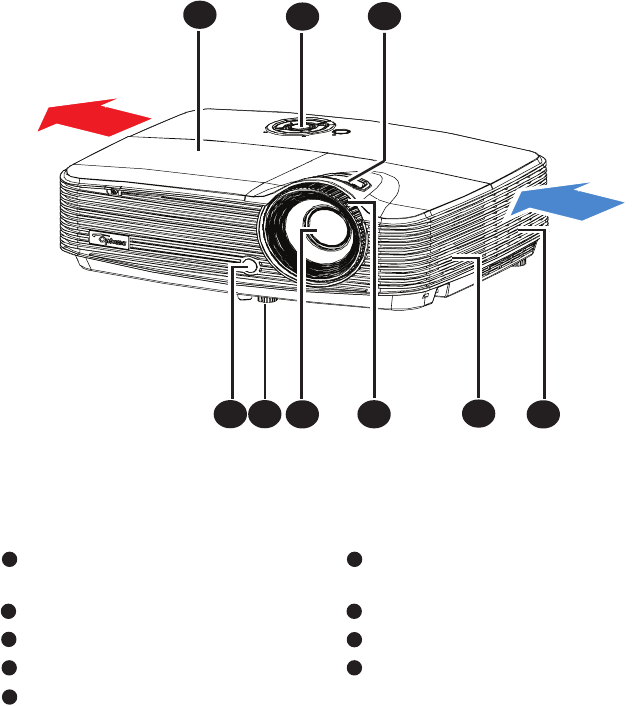
Projector Overview ................................................................................................................ 7
Using the Product .............................................................................9
Control Panel ......................................................................................................................... 9
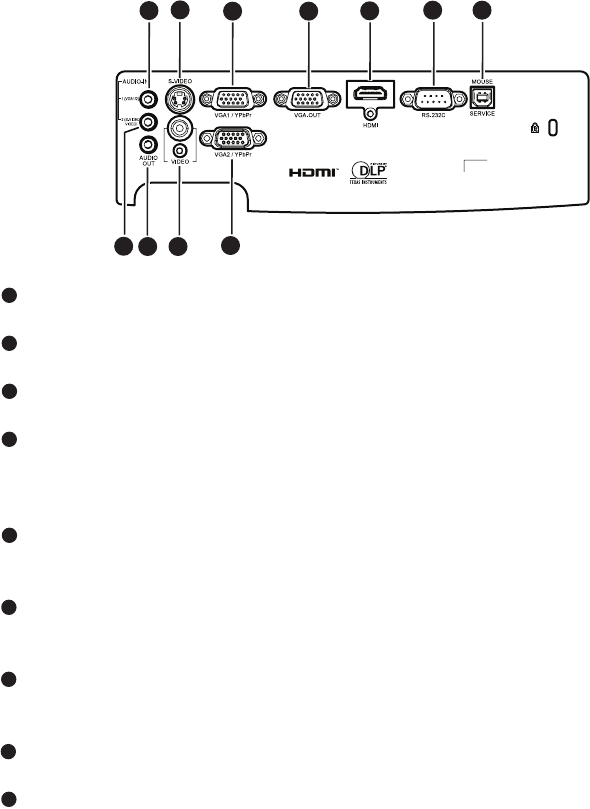
Connection Ports ................................................................................................................. 10
Remote Control ................................................................................................................... 12
Installing the Batteries ......................................................................................................... 15
Remote Control Operation ................................................................................................... 16
Connection ......................................................................................17
Connecting a computer or monitor ...................................................................................... 18
Connecting Video source devices ....................................................................................... 20
Operation .........................................................................................23
Powering On/Off the Projector ............................................................................................. 23
Adjusting the Projector Height ............................................................................................. 24
Adjusting the Projector Zoom and Focus ............................................................................ 24
Adjusting Projection Image Size .......................................................................................... 25
Menu Operation ................................................................................................................... 26
Appendix ..........................................................................................42
Installing the Dust Filter ....................................................................................................... 42
Replacing the Lamp .............................................................................................................43
Ceiling mount installation .....................................................................................................45
Compatibility Modes ............................................................................................................46
RS232 Commands and Protocol Function List .................................................................... 50
Troubleshooting ................................................................................................................... 56
Optoma Global Offices ........................................................................................................ 58
Regulation & Safety Notices ................................................................................................ 61
EN-2
Usage Notice
Safety Instructions
Read all of these instructions before you operate your projector and save for future reference.
1. Read instructions
All the safety and operating instructions should be read before the
appliance is operated.
2. Notes and warnings
All notes and warnings in the operating instructions should be adhered
to.
3. Cleaning
Unplug the projector from the wall socket before cleaning. Use a damp
cloth for cleaning the projector housing. Do not use liquid or aerosol
cleaners.
4. Accessories
Do not place this product on an unstable cart, stand, or table. The product
may fall,
causing serious damage to the product.
Keep the plastic packing materials (from the projector, accessories and
optional parts) out of the reach of children as these bags may result in
death by suffocation. Be particularly careful around the small children.
5. Ventilation
The projector is equipped with ventilation holes (intake) and ventilation holes
(exhaust).
Do not block or place anything near these slots, or internal heat
build-up may occur,
causing picture degradation or damage to the
projector.
6. Power sources
Check that the operating voltage of your unit is identical with the voltage of
your local
power supply.
7. Servicing
Do not attempt to service this projector yourself. Refer all servicing to
qualified service personnel.
8. Replacement parts
When replacement parts are required, be sure that the replacement
parts are
specified by the manufacture. Unauthorized substitutions may
result in fire, electric
shock or other hazards.
EN-3
9. Moisture Condensation
Never operate this projector immediately after moving it from a cold
location to a warm one. When the projector is exposed to such a
change in temperature, moisture may condense on the lens and the
crucial internal parts. To prevent the unit from possible damage, do not
use the projector for at least 2 hours when there is an extreme or
sudden change in temperature.
EN-4
Notes on the AC Power Cord
AC Power Cord must meet the requirement of countries where you use this projector. Please
confirm your AC plug type with the graphics below and ensure that the proper AC Power Cord is
used. If the supplied AC Power Cord does not match your AC outlet, please contact your sales
dealer. This projector is equipped with a grounding type AC line plug. Please ensure that your
outlet fits the plug. Do not defeat the safety purpose of this grounding type plug. We highly
recommend using a video source device also equipped with a grounding type AC line plug to
prevent signal interference due to voltage fluctuations.
For Australia and
Mainland China
For the U.S.A. and Canada
For the U.K.
Ground
For Continental Europe
Ground
Ground
Ground
EN-5
Introduction
Projector Features
The projector integrates high-performance optical engine projection and a user
- friendly
design to deliver high reliability and ease of use.
The projector offers the following features:
Single chip 0.55" Texas Instruments DLP
®
technology (SVGA/XGA
model)
Single chip 0.65" Texas Instruments DLP
®
technology (WXGA model)
SVGA (800 x 600 pixels)
XGA (1024 x 768 pixels)
WXGA (1280 x 800 pixels)
Compatibility with Macintosh
®
computers
Compatibility with NTSC, PAL, SECAM and HDTV
D-Sub 15-pin terminal for analog video connectivity
User-friendly, multi-language on-screen display
Advanced electronic keystone correction
RS-232 connector for serial control
Quick Resume feature
Eco
+
mode for more economic usage
Full 3D
Note
The information in this manual is subject to change without notices.
The reproduction, transfer or copy of all or any part of this document is not permitted without
express written consent.
EN-6
Package Contents
When you unpack the projector, make sure you have all these components:
Note
For European warranty information please visit www.optomaeurope.com
Due to the difference in applications for each country, some regions may have different
accessories.
Contact your dealer immediately if any items are missing, appear damaged, or if the unit does
not work
.
Save the original shipping carton and packaging material; they will come in handy if you ever
need to ship your unit. For maximum protection, repack your unit as it was originally packed
at the factory.
Projector
(Lens Cap depending on
region)
AC Power Cord VGA Cable (D-SUB to D-SUB)
Remote Control (IR) or Remote Control with Laser
Pointer (depending on region) & batteries (AAA *2
PCS)
Carry Bag (optional for certain
models)
Dust filter (depending on
region)
Screw & Washer
(depending on region)
Documentation:
5User's Manual
5Warranty Card
5Quick Start Card
5WEEE Card
(for EMEA only)
EN-7
Projector Overview
Front View
Front IR remote control sen-
sor
Ventilation holes
Elevator foot Zoom ring
Projection lens Control panel
Focus ring Lamp cover
Speaker
3
2
5
1
6
4
7
8
9
Airflow Out
Airflow In
1 6
2 7
3
8
4 9
5
EN-8
Rear View
AC power socket
Connection ports
Kensington lock
Bottom View
Security bar
Ceiling mount holes
Note
This projector can be used with a ceiling mount for support. The ceiling mount is not included
in the package.
Contact your dealer for information to mount the projector on a ceiling.
1
2
3
1
2
3
Without HDMI models HDMI models
1
2
2
3
1
2
1
2
2
EN-9
Using the Product
Control Panel
Keystone ( / )
Manually correct distorted images resulting from an angled projection.
TEMP (Temp LED indicator)
Refer to “LED Indicator Messages” on page 57.
SOURCE
Switch between input signals.
POWER (Power LED indicator)
Refer to “LED Indicator Messages” on page 57.
Power
Turn the projector on or off.
HELP
Display Help menu.
LAMP (Lamp LED indicator)
Refer to “LED Indicator Messages” on page 57.
ENTER
Confirm your item selection.
Re-SYNC
Automatically synchronize the projector to the input source.
Four directional buttons
Use four directional buttons to select items or make adjustments to your
selection.
MENU
Display or exit the on-screen display menus.
7
8
9
1
1
2
3
4
10
11
5
6
1
2
3
4
5
6
7
8
9
10
11
EN-10
Connection Ports
AUDIO-IN 1
Connect an audio output from a computer to this jack connector.
S-VIDEO
Connect S-Video output from video equipment to this jack.
VGA1/YPbPr
Connect image input signal (analog RGB or component) to this jack.
VGA-OUT
Connect to an external monitor.
In Eco mode (Standby), VGA-OUT is disabled.
In Active mode (Standby), VGA-OUT is enabled.
HDMI
Connect HDMI output from video equipment to this jack.
(This function is only available for products with HDMI input jack.)
RS-232C
When operating the projector via a computer, connect this to the
controlling computer's RS-232C port.
Service/Mouse
This connector supports firmware update, remote mouse and page up/
down.
VGA2-IN/YPbPr
Connect image input signal (analog RGB or component) to this jack.
VIDEO
Connect composite video output from video equipment to this jack.
1
2
3
5
4
6
7
10
9
11
8
1
2
3
4
5
6
7
8
9
EN-58
Optoma Global Offices
For service or support please contact your local office.
USA
3178 Laurelview Ct.
Fremont, CA 94538, USA 888-289-6786
www.optomausa.com services@optoma.com
Canada
3178 Laurelview Ct.
Fremont, CA 94538, USA 888-289-6786
www.optomausa.com services@optoma.com
Europe
42 Caxton Way, The Watford Business
Park
Watford, Hertfordshire,
WD18 8QZ, UK +44 (0) 1923 691 800
www.optoma.eu +44 (0) 1923 691 888
Service Tel : +44 (0)1923 691865 service@tsc-europe.com
France
Batiment E +33 1 41 46 12 20
81-83 avenue Edouard Vaillant +33 1 41 46 94 35
92100 Boulogne Billancourt, France savoptoma@optoma.fr
Spain
C/ Jose Hierro,36 Of. 1C +34 91 499 06 06
28522 Rivas VaciaMadrid, +34 91 670 08 32
Spain
Deutschland
Wiesenstrasse 21 W +49 (0) 211 506 6670
D40549 Dusseldorf, +49 (0) 211 506 66799
Germany info@optoma.de
58


Need help? Post your question in this forum.

Forumrules


Report abuse

Libble takes abuse of its services very seriously. We're committed to dealing with such abuse according to the laws in your country of residence. When you submit a report, we'll investigate it and take the appropriate action. We'll get back to you only if we require additional details or have more information to share.

Product:

For example, Anti-Semitic content, racist content, or material that could result in a violent physical act.

For example, a credit card number, a personal identification number, or an unlisted home address. Note that email addresses and full names are not considered private information.

Forumrules

To achieve meaningful questions, we apply the following rules:

Register

Register getting emails for Optoma X302 at:


You will receive an email to register for one or both of the options.


Get your user manual by e-mail

Enter your email address to receive the manual of Optoma X302 in the language / languages: English as an attachment in your email.

The manual is 4,73 mb in size.


You will receive the manual in your email within minutes. If you have not received an email, then probably have entered the wrong email address or your mailbox is too full. In addition, it may be that your ISP may have a maximum size for emails to receive.

Others manual(s) of Optoma X302

Optoma X302 User Manual - German - 62 pages

Optoma X302 User Manual - Dutch - 62 pages

Optoma X302 User Manual - Danish - 62 pages

Optoma X302 User Manual - French - 62 pages

Optoma X302 User Manual - Italian - 62 pages

Optoma X302 User Manual - Polish - 62 pages

Optoma X302 User Manual - Portuguese - 62 pages

Optoma X302 User Manual - Swedish - 62 pages

Optoma X302 User Manual - Turkish - 62 pages

Optoma X302 User Manual - Spanish - 62 pages

Optoma X302 Quick start guide - All languages - 2 pages


The manual is sent by email. Check your email

If you have not received an email with the manual within fifteen minutes, it may be that you have a entered a wrong email address or that your ISP has set a maximum size to receive email that is smaller than the size of the manual.

The email address you have provided is not correct.

Please check the email address and correct it.

Your question is posted on this page

Would you like to receive an email when new answers and questions are posted? Please enter your email address.


Info