665194
23
Zoom out
Zoom in
Previous page
1/210
Next page
ES3640e MFP User’s Guide
Preface > 2
Preface
ES3640e MFP User’s Guide
P/N 59376401, Revision 1.2
May, 2006
Every effort has been made to ensure that the information in this document is
complete, accurate, and up-to-date. Oki assumes no responsibility for the results of
errors beyond its control. Oki also cannot guarantee that changes in software and
equipment made by other manufacturers and referred to in this guide will not affect
the applicability of the information in it. Mention of software products manufactured
by other companies does not necessarily constitute endorsement by Oki.
While all reasonable efforts have been made to make this document as accurate and
helpful as possible, we make no warranty of any kind, expressed or implied, as to
the accuracy or completeness of the information contained herein.
The most up-to-date drivers and manuals are available from the Oki web site:
http://www.okiprintingsolutions.com
Copyright © 2006 Oki Data Americas, Inc.
Oki and Microline are registered trademarks of Oki Electric Industry Company, Ltd.
ENERGY STAR is a trademark of the United States Environmental Protection Agency.
Microsoft, MS-DOS and Windows are either registered trademarks or trademarks of
MIcrosoft Corporation in the United States and/or other countries.
Other product names and brand names are registered trademarks or trademarks of
their proprietors.
As an ENERGY STAR Program Participant, the manufacturer has
determined that this product meets the ENERGY STAR guidelines
for energy efficiency.
This product complies with the requirements of the Council
Directives 89/336/EEC (EMC), 73/23/EEC (LVD) and 1999/5/EC
(R&TTE), as amended where applicable, on the approximation of
the laws of the member states relating to Electromagnetic
Compatibility, Low Voltage and Radio & Telecommunications
Terminal Equipment.
ES3640e MFP User’s Guide
Warning > 3
Important safety warnings follow.
Be sure to read and observe all
safety warnings in this User’s Guide.
ES3640e MFP User’s Guide
Contents > 4
Contents
Preface . . . . . . . . . . . . . . . . . . . . . . . . . . . . . . . . . . 2
Introduction . . . . . . . . . . . . . . . . . . . . . . . . . . . . . . 9
Features . . . . . . . . . . . . . . . . . . . . . . . . . . . . . . . 9
About this guide . . . . . . . . . . . . . . . . . . . . . . . . . 10
Online usage . . . . . . . . . . . . . . . . . . . . . . . . . 11
Printing pages . . . . . . . . . . . . . . . . . . . . . . . . 12
MFP Overview . . . . . . . . . . . . . . . . . . . . . . . . . . . . 13
Identifying system units . . . . . . . . . . . . . . . . . . . 13
Opening and closing the printer unit top cover . . . . 14
Identifying major components . . . . . . . . . . . . . . . 17
Printer unit . . . . . . . . . . . . . . . . . . . . . . . . . . 17
Scanner unit . . . . . . . . . . . . . . . . . . . . . . . . . 23
Software supplied . . . . . . . . . . . . . . . . . . . . . . . . 25
Printer unit . . . . . . . . . . . . . . . . . . . . . . . . . . . . 25
Paper recommendations . . . . . . . . . . . . . . . . . 25
Paper input and output information . . . . . . . . . 26
Trays and stackers . . . . . . . . . . . . . . . . . . . . . 27
Tray and stacker examples . . . . . . . . . . . . . . . 29
Using the stackers . . . . . . . . . . . . . . . . . . . 34
Scanner unit . . . . . . . . . . . . . . . . . . . . . . . . . . . 36
Paper recommendations . . . . . . . . . . . . . . . . . 36
Loading the document glass (flatbed). . . . . . 38
Control panels . . . . . . . . . . . . . . . . . . . . . . . . . . . . 39
Printer unit control panel . . . . . . . . . . . . . . . . . . . 39
Buttons and lights. . . . . . . . . . . . . . . . . . . . . . . . 40
Display Panel messages . . . . . . . . . . . . . . . . . . . 41
Status information . . . . . . . . . . . . . . . . . . . . . 41
Menu (Functions) information . . . . . . . . . . . . . 42
Configuration information . . . . . . . . . . . . . . . . 42
Help mode. . . . . . . . . . . . . . . . . . . . . . . . . . . 43
Display Panel messages . . . . . . . . . . . . . . . . . . . 43
Using the menus . . . . . . . . . . . . . . . . . . . . . . . . 43
Scanner unit control panel . . . . . . . . . . . . . . . . . . 44
Getting started . . . . . . . . . . . . . . . . . . . . . . . . . . . 47
ES3640e MFP User’s Guide
Contents > 5
Turning Off/On . . . . . . . . . . . . . . . . . . . . . . . . . . 47
Turning Off . . . . . . . . . . . . . . . . . . . . . . . . . . 47
Turning On . . . . . . . . . . . . . . . . . . . . . . . . . . 49
Checking current settings . . . . . . . . . . . . . . . . . . 50
Interfaces and connection . . . . . . . . . . . . . . . . . . 50
Connecting the parallel interface . . . . . . . . . . . 51
Connecting the USB interface . . . . . . . . . . . . . 52
Connecting the network interface . . . . . . . . . . . 52
Using the Drivers CD. . . . . . . . . . . . . . . . . . . . . . 54
Printing . . . . . . . . . . . . . . . . . . . . . . . . . . . . . . . . . 55
Scanner unit operating information . . . . . . . . . . . 56
Access control . . . . . . . . . . . . . . . . . . . . . . . . . . 56
Logging in . . . . . . . . . . . . . . . . . . . . . . . . . . . . . 56
Logging out . . . . . . . . . . . . . . . . . . . . . . . . . . . . 57
Status monitoring . . . . . . . . . . . . . . . . . . . . . . . . 58
Using the Help facility . . . . . . . . . . . . . . . . . . . . . 59
Avoiding incompatibility situations . . . . . . . . . . . . 60
Copying . . . . . . . . . . . . . . . . . . . . . . . . . . . . . . . . . 61
Basic Settings tab. . . . . . . . . . . . . . . . . . . . . . . . 62
Details tab . . . . . . . . . . . . . . . . . . . . . . . . . . . . . 64
Image Quality tab. . . . . . . . . . . . . . . . . . . . . . . . 66
Finishing tab . . . . . . . . . . . . . . . . . . . . . . . . . . . 68
Scanning . . . . . . . . . . . . . . . . . . . . . . . . . . . . . . . . 69
E-mail send mode. . . . . . . . . . . . . . . . . . . . . . . . 69
Confirming e-mail transmission . . . . . . . . . . . . 79
Network send mode – scan to FTP . . . . . . . . . . . . 79
Confirming FTP transmission . . . . . . . . . . . . . . 86
Remote scan mode . . . . . . . . . . . . . . . . . . . . . . . 87
Mailbox send mode . . . . . . . . . . . . . . . . . . . . . . . 88
Consumables and maintenance – printer unit . . 100
Checking consumable/maintenance item usage . . 100
Replacement indications . . . . . . . . . . . . . . . . . . 100
Consumable item order information . . . . . . . . . . 101
Maintenance item order details. . . . . . . . . . . . . . 101
Replacing consumables/maintenance items . . . . . 102
ES3640e MFP User’s Guide
Contents > 6
Cleaning the LED heads. . . . . . . . . . . . . . . . . . . 102
Cleaning the paper feed rollers. . . . . . . . . . . . . . 106
Cleaning the printer unit casing . . . . . . . . . . . . . 110
Emptying the punch chip box
(Punch unit optional accessory) . . . . . . . . . . . . 111
Maintenance – scanner unit . . . . . . . . . . . . . . . . 114
Cleaning the ADF . . . . . . . . . . . . . . . . . . . . . . . 114
Cleaning the Touch Screen Display . . . . . . . . . . . 116
Cleaning the document glass . . . . . . . . . . . . . . . 117
Replacing the snap-in pad module . . . . . . . . . . . 118
Removing the snap-in pad module . . . . . . . . . 118
Inserting a new snap-in pad module. . . . . . . . 119
Optional accessories . . . . . . . . . . . . . . . . . . . . . . 121
Accessory order information. . . . . . . . . . . . . . . . 121
Installing accessories . . . . . . . . . . . . . . . . . . . . 121
Troubleshooting . . . . . . . . . . . . . . . . . . . . . . . . . 122
General . . . . . . . . . . . . . . . . . . . . . . . . . . . . . . 122
Networking . . . . . . . . . . . . . . . . . . . . . . . . . . . 122
Paper jams . . . . . . . . . . . . . . . . . . . . . . . . . . . 122
Paper jams – printer unit. . . . . . . . . . . . . . . . . . 122
Open cover, paper jam, side cover . . . . . . . . . 125
Open cover, paper jam, top cover . . . . . . . . . 127
Paper jams – duplex unit . . . . . . . . . . . . . . . . . . 135
Check duplex unit, paper jam . . . . . . . . . . . . 135
Paper jams – Finisher (optional accessory) . . . . . 140
Check Finisher, paper jam/paper remains . . . . 140
591, 592, 593, 599/ 643, 645
(paper jam around Finisher) . . . . . . . . . . . . 140
594, 597, 598/ 644, 646 (paper jam in Finisher)143
590 (paper jam in Finisher/Punch unit) . . . . . . 148
Check Inverter, paper jam . . . . . . . . . . . . . . 150
Avoiding printer unit paper jams . . . . . . . . . . . . 156
Dealing with unsatisfactory printing . . . . . . . . . . 157
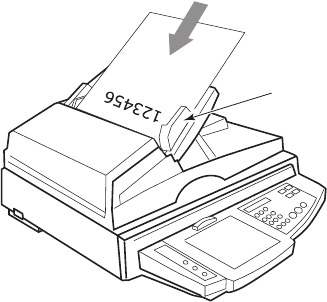
Paper jams – ADF . . . . . . . . . . . . . . . . . . . . . . . 159
Dealing with unsatisfactory copying results . . . . . 159
Staple jams – Finisher (optional accessory) . . . . . 160
ES3640e MFP User’s Guide
Contents > 7
Check Finisher, Staple Jam . . . . . . . . . . . . . . 160
Specifications . . . . . . . . . . . . . . . . . . . . . . . . . . . 165
Printer unit . . . . . . . . . . . . . . . . . . . . . . . . . . . 165
Scanner unit . . . . . . . . . . . . . . . . . . . . . . . . . . 166
Appendix A – Display Panel Messages
(Printer unit). . . . . . . . . . . . . . . . . . . . . . . . . . . 167
Appendix B – Menu system (Printer unit). . . . . . 169
Configuration . . . . . . . . . . . . . . . . . . . . . . . . . . 170
Print Page Count . . . . . . . . . . . . . . . . . . . . . 170
Finisher Count . . . . . . . . . . . . . . . . . . . . . . . 170
Supplies Life . . . . . . . . . . . . . . . . . . . . . . . . 170
Network . . . . . . . . . . . . . . . . . . . . . . . . . . . 171
Paper Size in Tray . . . . . . . . . . . . . . . . . . . . 172
System . . . . . . . . . . . . . . . . . . . . . . . . . . . . 172
Configuration example – monochrome
pages printed. . . . . . . . . . . . . . . . . . . . . . . 173
Print Pages . . . . . . . . . . . . . . . . . . . . . . . . . . . 174
Print Information example – demonstration
page . . . . . . . . . . . . . . . . . . . . . . . . . . . . . 175
Print Secure Job . . . . . . . . . . . . . . . . . . . . . . . . 176
Menus . . . . . . . . . . . . . . . . . . . . . . . . . . . . . . . 176
Tray Configuration . . . . . . . . . . . . . . . . . . . . 176
System Adjust . . . . . . . . . . . . . . . . . . . . . . . 181
Menus example 1 – Tray 1 transparencies. . . . 184
Menus example 2 – MP Tray paper size. . . . . . 186
Appendix C – Scanner Unit Status . . . . . . . . . . . 187
Appendix D – Media support information . . . . . . 188
Input locations . . . . . . . . . . . . . . . . . . . . . . . . . 190
Printer unit output locations. . . . . . . . . . . . . . . . 192
Finisher unit output locations . . . . . . . . . . . . . . . 194
Appendix E – Auto detection paper sizes . . . . . . 196
Flatbed (document glass) . . . . . . . . . . . . . . . . . 196
ADF . . . . . . . . . . . . . . . . . . . . . . . . . . . . . . . . 197
Appendix F – Scanner unit setup details. . . . . . . 198
Setting up address books . . . . . . . . . . . . . . . . . 198
ES3640e MFP User’s Guide
Contents > 8
Setting up mailboxes . . . . . . . . . . . . . . . . . . . . 199
Setting up machine parameters . . . . . . . . . . . . . 199
Setting up copying parameters. . . . . . . . . . . . . . 199
Setting up scan properties . . . . . . . . . . . . . . . . . 200
Administrator setup . . . . . . . . . . . . . . . . . . . . . 201
Generating reports . . . . . . . . . . . . . . . . . . . . . . 203
Scanner unit counter readings . . . . . . . . . . . . . . 204
Setup complete . . . . . . . . . . . . . . . . . . . . . . . . 204
Appendix G– Troubleshooting (network) . . . . . . 205
Cannot send e-mail. . . . . . . . . . . . . . . . . . . . . . 205
Cannot search on LDAP server . . . . . . . . . . . . . . 205
Appendix H – Touch screen setup. . . . . . . . . . . . 207
Index. . . . . . . . . . . . . . . . . . . . . . . . . . . . . . . . . . 209
ES3640e MFP User’s Guide
Introduction > 9
Introduction
Congratulations on buying an Oki multifunction product (MFP)
which can be used for:
> local printing
> network printing
> copying
> network scanning
The MFP models described in this user’s guide are:
> ES3640e MFP
> ES3640e MFP GA
where GA denotes Graphic Arts capability.
Features
> space-saving, integrated multifunction system
> easy-to-use control panels
> high speed printing, copying and scanning
> EFI Fiery print control and job management software
> Graphic Arts capability with full suite of EFI utilities
including Spot-On and Hot Folder support (ES3640e MFP
GA only)
Additionally, the following optional accessories are available:
> Finisher for stapling or saddle stitching printer output
> Punch unit (to extend Finisher functionality)
> EFI Color Profiler Kit
ES3640e MFP User’s Guide
Introduction > 10
About this guide
NOTE
Images used in this manual may include optional features that
your printer does not have installed. Also, they may omit
features not essential to the description of a particular
function.
This manual is your user’s guide (check the web site,
my.okidata.com, for the most up-to-date version) for your
printer and forms part of the overall user support listed below:
> Software Utitilies guide: to provide an overview of
drivers and utilities provided
This is an electronic document stored on the
Documentation CD.
> This User’s Guide: to help you to become familiar with
your MFP and make the best use of its many features.
Also included are guidelines for troubleshooting and
maintenance to ensure that it performs at its best.
Additionally, information is provided for adding optional
accessories as your needs evolve.
This is an electronic document stored on the
Documentation CD.
> Printing Guide for Windows users and Mac users: to help
you operate your printer unit effectively and efficiently as
a network printer
This is an electronic document stored on the
Documentation CD.
> Configuration Guide: to provide machine configuration
and network configuration information
This is an electronic document stored on the
Documentation CD.
> EFI Fiery documentation suite
These are electronic documents stored on the EFI Utilities
CD.
> Installation Guides: accompany consumable items and
optional accessories to describe how to install them
ES3640e MFP User’s Guide
Introduction > 11
These are paper documents that are packaged with the
consumables and optional accessories.
> Online Help: online information accessible from the
control panels, printer driver and utility software
Online usage
This guide is intended to be read on screen using an Adobe
Acrobat Reader. Use the navigation and viewing tools provided in
Acrobat.
You can access specific information in two ways:
> In the list of bookmarks down the left hand side of your
screen, click on the topic of interest to jump to the
required topic. (If the bookmarks are not available, use
the “Contents” on page 15.)
> In the list of bookmarks, click on Index to jump to the
Index. (If the bookmarks are not available, use the
“Contents” on page 15.) Find the term of interest in the
alphabetically arranged index and click on the associated
page number to jump to the page containing the term.
ES3640e MFP User’s Guide
Introduction > 12
Printing pages
The whole manual, individual pages, or sections may be printed.
The procedure is:
1. From the toolbar, select [File], then [Print] (or press the
Ctrl + P keys).
2. Choose which pages you wish to print:
(a) [All pages], (1), for the entire manual.
(b) [Current page], (2), for the page at which you are
looking.
(c) [Pages from] and [to], (3), for the range of pages
you specify by entering their page numbers.
3. Click on [OK].
1
2
3
ES3640e MFP User’s Guide
MFP Overview > 13
MFP Overview
Identifying system units
1. Printer unit (with high capacity feeder (HCF))
2. Scanner stand
3. Scanner unit
4. Finisher unit (optional accessory)
1
2
3
4
ES3640e MFP User’s Guide
MFP Overview > 14
Opening and closing the printer unit top cover
1. Place one hand firmly on the front handle (1) of the scan-
ner shelf, then carefully press the release handle (2) so
that the shelf lifts out of the way.
The stand includes hydraulics for moving the scanner shelf up
and down. Use extreme caution.
NEVER ATTEMPT TO RAISE OR LOWER THE SHELF WITHOUT
THE SCANNER BOLTED TO IT. WITHOUT THE WEIGHT OF
THE SCANNER ON IT, THE SHELF COULD RISE RAPIDLY
WHEN RELEASED, POTENTIALLY CAUSING SEVERE INJURY.
ES3640e MFP User’s Guide
MFP Overview > 15
2. To open the top cover, squeeze the top cover handle (1) to
release the catch and raise the cover.
3. To close the top cover,
push gently (1) until the cover
stops midway and then push harder (2) to close the cover
completely. Ensure that the cover is securely closed.
1
ES3640e MFP User’s Guide
MFP Overview > 16
4. Place one hand firmly on the front handle of the scanner
shelf, then press the release handle and carefully lower
the scanner shelf, making sure it locks in place.
TO PREVENT ANY POSSIBLE CRUSHING OF FINGERS, KEEP
YOUR HANDS AWAY FROM THE POSTS AT THE BACK OF THE
SCANNER STAND WHEN MOVING THE SCANNER SHELF
DOWN.
ES3640e MFP User’s Guide
MFP Overview > 17
Identifying major components
Printer unit
The major components of your printer unit are identified in the
graphics below.
1. Paper holding arm
2. Top cover (face-down stacker)
3. MP Tray (multi-purpose tray)
4. Tray 1 side cover
5. Paper size label
6. Paper gauge
7. Tray 1 (paper tray)
8. Control panel
9. Top c ove r hand le
10. Face-down stacker
1
2
3
4
5
6
7
8
9
ES3640e MFP User’s Guide
MFP Overview > 18
11. Power (on/off) switch
12. Face-up stacker
13. Duplex unit
14. Interface unit
10
12
11
13
ES3640e MFP User’s Guide
MFP Overview > 19
15. Network interface connector
16. Parallel interface connector
17. USB interface connector
NOTE
The three connectors at 17a are for printer unit to scanner unit
interconnection.
18. Power connector
19. Ventilation openings
20. Image drum cartridge and toner cartridge (Cyan)
14
15
16
17
18
19
17a
ES3640e MFP User’s Guide
MFP Overview > 20
21. Image drum cartridge and toner cartridge (Magenta)
22. Image drum cartridge and toner cartridge (Yellow)
23. Image drum cartridge and toner cartridge (Black)
24. Toner cartridge
25. Image drum cartridge
26. Fuser unit
27. LED heads
28. Belt unit
26
20
21
22
23
24
25
27
ES3640e MFP User’s Guide
MFP Overview > 21
29. Drum basket handle
30. Drum basket
28
29
30
ES3640e MFP User’s Guide
MFP Overview > 22
31. High capacity Feeder (HCF) 3 trays
31
ES3640e MFP User’s Guide
MFP Overview > 23
Scanner unit
The major components of your scanner unit are identified in the
graphics below.
Front view
1. Automatic document feeder (ADF) front cover
2. ADF paper tray
3. ADF paper support
4. Document cover
5. Control panel
6. Touch screen display
1
2
3
4
5
6
ES3640e MFP User’s Guide
MFP Overview > 24
Back view
1. ADF paper tray, for multi-page documents
2. ADF cable, to connect the ADF to the main unit
3. Display port, to connect to printer unit
4. Control port, to connect to printer unit
5. ADF port, to connect the ADF cable
6. Data port, to connect to printer unit
7. Power jack, to connect to a power source
8. Power switch, to turn the scanner on/off
1
2
3
4
5
6
7
8
ES3640e MFP User’s Guide
MFP Overview > 25
Software supplied
CDs:
> Drivers
Contains PCL and PS drivers, utilities and productivity
software for the PCL driver.
> Documentation
Contains documentation in electronic form to describe how
to use the printer for day-to-day tasks.
> EFI Utilities
Contains all the EFI utility software.
Printer unit
Paper recommendations
Your printer unit will handle a variety of print media, including a
range of paper weights and sizes, transparencies and envelopes.
This section provides general advice on choice of media, and
explains how to use each type.
The best performance will be obtained when using standard
weight 20 – 24 lb (75 – 90 g/m²) paper designed for use in
copiers and laser printers. Suitable types are:
> OKI® Bright White, 32 lb US Bond
> HammerMill® Laser Print Radiant, White, 24 lb US Bond
> Xerox® 4024, 20lb US Bond
Use of heavily embossed or very rough textured paper is not
recommended.
Pre-printed stationery can be used, but the ink must not offset
when exposed to the high fuser temperatures used in the printing
process.
Envelopes should be free from twist, curl or other deformations.
They should also be of the rectangular flap type, with glue that
remains intact when subjected to hot roll pressure fusing used in
this type of printer. Window envelopes are not suitable.
Transparencies should be of the type designed for use in
copiers and laser printers. In particular, avoid office
ES3640e MFP User’s Guide
MFP Overview > 26
transparencies designed for use by hand with marker pens.
These will melt in the fuser and cause damage.
Labels should also be of the type recommended for use in
copiers and laser printers, in which the base carrier page is
entirely covered by labels. Other types of label stock may
damage the printer due to the labels peeling off during the
printing process. Suitable types are:
> Avery White Laser Label types 7162, 7664, 7666 (A4), or
5161 (Letter)
Paper input and output information
The following table relates paper parameters to input trays
(Tray 1 to Tray 4 (numbering from the top) and MP Tray) and to
output areas (Face-down stacker and Face-up stacker).
Type Size Weight input/output
Plain paper A3, A3 Nobi, A3 Wide,
A4, A5, A6, B4, B5,
Letter, Legal 13,
Legal 13.5, Legal 14,
Executive, Tabloid,
Tab l oi d E xt ra
17 – 57 lb Any Tray
Any Stacker
Custom
W: 3.94 – 12.91 in
L: 5.82 – 18 in
17 – 57 lb Any Tray
Face-up Stacker
Custom
W: 3.12 – 12.91 in
L: 3.54 – 18 in
17 – 71 lb MP Tray
Face-up Stacker
Banner
W: Letter width
L: 18 – 48 in
34 lb
recommended
MP Tray
Face-up Stacker
Index card:
3 x 5 in
17 – 71 lb MP Tray
Face-up Stacker
Postcard Tray 1 or MP Tray
Face-up Stacker
ES3640e MFP User’s Guide
MFP Overview > 27
Trays and stackers
Trays 1 to 4
Tray 1 is the standard blank paper input tray and can hold up to
530 sheets of 20 lb (75 g/m²) paper. Trays 2 to 4 result in a total
tray capacity of 2120 sheets of 20 lb (75 g/m²) paper.
If you have identical paper stock loaded in another tray (for
example Tray 2 or the MP Tray), you can have the printer
automatically switch to that other tray when the current tray runs
out of paper. This function can be enabled by driver settings
when printing from a Windows application or by a menu setting
when printing from other applications.
MP Tray
The multi-purpose tray is used for media sizes additional to those
of the standard trays, heavier media weights and special media.
The multi-purpose tray can handle the same sizes as the
standard trays but in weights up to 71.3 lb (268 g/m²). For very
heavy paper stock use the face-up paper stacker. This ensures
that the paper path through the printer is almost straight.
Envelope 4.72 x 9.25 in
3.54 x 8.07 in
9.25 x 4.72 in
9.25 x 4.13 in
9.45 x 13.07 in
8.50 x 10.91 in
4.69 x 7.76 in
8.27 x 11.69 in
23 lb MP Tray
Face-up Stacker
12.76 x 9.02 in
9.02 x 6.38 in
8.66 x 4.33 in
8.88 x 3.88 in
9.5 x 4.13 in
7.5 x 3.88 in
Based on
24 lb paper
Labels A4, Letter, B5 0.004 –
0.008 in
MP Tray
Face-up Stacker
Transparencies
Glossy paper
A4, Letter 0.004 in Tray 1 or MP Tray
Face-up Stacker
Type Size Weight input/output
ES3640e MFP User’s Guide
MFP Overview > 28
The multi-purpose tray can feed paper widths as small as 3in
(76.2 mm) and lengths up to 47.24 in (1200 mm). For banner
printing, recommended sizes are Letter wide, 35.43 in and
47.24 in long and weight 34 lb (128 g/m²).
Use the multi-purpose tray for printing on envelopes and
transparencies. Up to 100 sheets of transparencies or 25
envelopes can be loaded at one time, subject to a maximum
stacking depth of 1 in.
Paper or transparencies should be loaded print side up and top
edge into the printer. Do not use the duplex (two-sided printing)
function for transparencies.
Face-down stacker
The face-down stacker on the top of the printer can hold up to
500 sheets of 20 lb (80 g/m²) standard paper, and can handle
paper stocks from 17 – 57 lb (64 – 216 g/m²). Pages printed in
reading order (page 1 first) will be sorted in reading order (last
page on top, facing down).
Face-up stacker
The face-up stacker should be opened and the tray extension
pulled out when required for use. (With the face-up stacker either
open or closed, the driver setting of Face Down will successfully
direct prints to the Face-Down stacker.)
The face-up stacker can hold up to 250 sheets of 20 lb (80 g/m²)
standard paper and can handle stocks up to 71.3 lb (268 g/m²).
Always use this stacker and the multi-purpose feeder for paper
stocks heavier than 57 lb (216 g/m²).
Duplex unit
This unit provides automatic two-sided printing on plain paper
fed from Trays 1 – 4 or the MP Tray. Applicable paper sizes are
A6, A5, B5, B5LEF, Executive, A4, A4LEF, Letter, LetterLEF,
Legal 13 in, Legal 13.5 in, Legal 14 in, B4, Tabloid, Tabloid Extra,
A3, A3 Wide, A3 Nobi, Custom size (3.9 – 12.9 in wide, 5.8 –
18 in long), using paper stocks in the range 20 – 32 lb (75 –
120 g/m²).
ES3640e MFP User’s Guide
MFP Overview > 29
Tray and stacker examples
Loading Trays 1 to 4
Tray 1 is used in the following example.
1. Pull out the tray.
2. Press the paper rear stopper tab (1) and adjust the tab to
the required paper size.
3. Fan the paper to be loaded then tap the edges of the stack
on a flat surface to make it flush.
4. Load the paper (face down and top edge towards the right
for letterhead paper), press the tab (2) on the paper guide
and adjust the guides (3) for a snug fit to the paper.
To avoid paper jams:
1
ES3640e MFP User’s Guide
MFP Overview > 30
> Do not leave space between the paper and the guides
and rear stopper.
> Do not overfill the paper tray. Capacity depends on the
paper type.
> Do not load damaged paper.
> Do not load paper of different sizes or types at the
same time.
5. Gently push the tray back into the printer.
2
3
ES3640e MFP User’s Guide
MFP Overview > 31
Using the MP Tray
1. Squeeze the handle (1) and open the multi-purpose tray.
2. Fold out the paper support section and swivel out the
extension supports (2).
3. Adjust the paper guides (3) to the size of the paper being
used.
1
2
3
ES3640e MFP User’s Guide
MFP Overview > 32
4. Fan the paper to be loaded then tap the edges of the stack
on a flat surface to make it flush.
5. Load the paper.
> For single-sided printing on letterhead, load the paper
into the multi-purpose tray with pre-printed side up
and top edge into the printer unit.
> For two-sided (duplex) printing on letterhead, load the
paper with pre-printed side down and top edge away
from the printer unit.
> Envelopes should be loaded face-up with long edge
into the printer. Do not select duplex printing on
envelopes.
> Do not leave space between the paper and the guides.
ES3640e MFP User’s Guide
MFP Overview > 33
> Do not exceed the paper capacity of approximately 230
sheets, 100 transparencies or 25 envelopes. Maximum
stacking depth is 1in.
ES3640e MFP User’s Guide
MFP Overview > 34
Using the stackers
Face-down stacker
When the face-up stacker (1) on the left side of the printer is
closed (its normal position), paper is ejected to the face-down
stacker on the top of the printer unit.
Face-up stacker
The face-up exit path is used for heavy paper (cardstock etc.),
envelopes, transparencies, and labels.
1. Open the stacker (1).
1
1
ES3640e MFP User’s Guide
MFP Overview > 35
2. Flip out the paper support (2).
3. Swivel out the paper support extension (3).
2
3
ES3640e MFP User’s Guide
MFP Overview > 36
Scanner unit
Paper recommendations
The ADF can handle up to 50 sheets of 11.8 in x 17 in paper, of
weight 16 – 28 lb (60 – 105 g/m²).
The glass can handle paper sizes up to 11.8 in x 17 in and the
document cover can be left open to accommodate book
thickness.
Use the glass and not the ADF for scanning documents that:
have a smooth surface e.g. photographic, coated or glossy
paper
are folded, creased, curled or otherwise deformed
are not rectangular
have labels attached or have other surface unevenness
are less then 100mm in width or less than 180mm in
length. Such documents may cause feed errors or skew in
the ADF.
Loading the ADF
For documents of size Letter, the following orientation is
recommended:
> Copy Mode: document face up, top of the document away
from the user
> Scan to E-Mail, Scan to FTP, Scan to Mailbox, Scan to Hold
Queue, Remote Tool: document face up, top of document
to left of user
1. Ensure your document is free of staples and clips and has
no ragged edges.
2. If you are loading multiple pages (up to a maximum of
50), fan the pages to avoid potential paper jams then tap
the edges of the stack on a flat surface to make it flush.
ES3640e MFP User’s Guide
MFP Overview > 37
3. With the text face up, introduce the document far enough
into the ADF to be able to adjust the paper guide (1) to
center the document in the ADF.
4. Release the document gently into the ADF.
1
ES3640e MFP User’s Guide
MFP Overview > 38
Loading the document glass (flatbed)
For documents of size Letter, the following orientation is
recommended:
> Copy Mode: document face down, top of the document
toward the user
> Scan to E-Mail, Scan to FTP, Scan to Mailbox, Scan to Hold
Queue, Remote Tool: document face down, top of
document to left of user
1. Open the document cover to reveal the glass.
2. Place your document with text face down on the glass,
aligning it to the upper left corner of the glass.
3. Close the document cover.
ES3640e MFP User’s Guide
Control panels > 39
Control panels
Control of your MFP is via two control panels, one located on the
printer unit and the other on the scanner unit. The two control
panels are complementary to each other and work together as
component parts of the overall system. For example, a message
on the scanner unit control panel will redirect you to the printer
control panel if the situation requires it.
Printer unit control panel
The control panel can be swivelled to 90° (maximum) upwards
from its base position (1) as required for ease of use.
1
ES3640e MFP User’s Guide
Control panels > 40
Buttons and lights
The parts of the control panel are identified and briefly explained
below:
1. Shutdown/Restart button
Press and hold down for a soft shutdown. You can then
press this button again for a restart or use the Power
switch to turn off the printer completely.
2. Ready light
On: indicates ready to print
Flashing: indicates processing print data
Off: indicates unable to receive data (offline)
3. Attention light
Off: indicates normal operation
Flashing: indicates error(s) present but printing can
continue
On: indicates error(s) present and printing cannot continue
4. Display panel
Displays status and setup information for the printer and
user help information in your chosen language
5. Up-arrow button
Enters menu mode and enables upward movement
through the displayed list of menu items
ES3640e MFP User’s Guide
Control panels > 41
6. Down-arrow button
Enters menu mode and enables downward movement
through the displayed list of menu items
7. Back button
Returns to the previous higher level menu item
8. Enter button
Enters menu mode and selects the menu item highlighted
in the display panel
9. Online button
Switches between online (printer unit ready to receive
data) and offline (printer unit not ready to receive data)
10. Cancel button
Cancels current print job
11. Help button
Provides additional textual or image data to supplement
what is displayed on the display panel
Display Panel messages
There are four types of display panel message:
> Status information
> Menu (functions) information
> Configuration information
> Help information
Status information
Status information is associated with three printer unit states:
In the Information state, such as idling or printing, the
printer unit is able to process print jobs.
In the Warning state, the printer unit has encountered
some minor problem but is still able to process print jobs.
ES3640e MFP User’s Guide
Control panels > 42
In the Error state, the printer unit has encountered a
problem and cannot continue printing until the user has
intervened and removed the cause of the trouble.
The top two lines of the display panel show the printer unit
status. The bottom of the display panel normally shows a bar
chart of the toner usage.
Menu (Functions) information
There are three types of menu (functions) information:
User menus: accessed by pressing the Enter button, Up-
arrow or Down-arrow button on the control panel. These
menus are available to the general user to make various
settings that are used in the running of the printer unit.
Administrator menu: accessed by pressing the Enter
button for more than 2 seconds while turning on the printer
power supply (including Restart). Available to
administrator level users. Restricts the changes that
general users can make via the user menus.
System maintenance menu: accessed by pressing the Up-
arrow and Down-arrow buttons together for more than
2 seconds while turning on the printer unit power supply
(including Restart). Available to support staff to allow
printer unit configurations and special functions to be set.
Configuration information
Configuration information displays printer unit
configuration information such as internal firmware
versions.
Menu options at each level can be scrolled through by moving the
highlight with the Up-arrow/Down-arrow buttons and a
highlighted option at that level can be selected by pressing the
Enter button. When the lowest level menu has been selected,
you can change the setting for that menu by selecting the
required highlighted value from a list or by entering a numeric
value. In other cases, you can display or print configuration
information.
ES3640e MFP User’s Guide
Control panels > 43
Help mode
When an error has occurred, press the Help button. Information
displays that will help you correct the error.
Display Panel messages
The display panel messages, supplemented by the Help
messages where appropriate, are intended to be self-
explanatory. More information on typical messages is provided in
“Appendix A – Display Panel Messages (Printer unit)” on
page 167.
Using the menus
NOTE
Menu details are given in “Appendix B – Menu system (Printer
unit)” on page 169 for reference.
The Enter, Up-arrow, Down-arrow and Back buttons are used
to move through the printer menus. You can adjust settings (e.g.
set the paper size for Tray 1) or view information (e.g. how much
is left of a selected consumable).
Many of these menu settings can be, and often are, overridden
by settings in the Windows printer drivers. However, several of
the driver settings can be left at "Printer Setting," which will then
default to the settings entered in these printer menus.
The steps involved in using the menus are typically as follows:
1. Ensure that the display panel indicates that the printer
unit is ready to print.
2. Enter User menu mode by pressing either the Enter
button or the Up-arrow or Down-arrow button and
press the latter two repeatedly until the desired menu is
highlighted in the displayed list.
3. Press the Enter button to select this menu.
4. Press the Up-arrow or Down-arrow buttons repeatedly
until the desired Item is highlighted.
5. Press the Enter button to select this Item.
6. Press the Up-arrow or Down-arrow buttons repeatedly
until the desired Value is highlighted.
ES3640e MFP User’s Guide
Control panels > 44
7. Press the Enter button to select this Value. (If you are
setting a parameter, ensure that an asterisk (*) appears
beside the selected parameter Value.)
8. Press the Online button to exit menu mode and return to
the ready to print status.
Refer to the section entitled “Getting started” on page 47 and
“Appendix B – Menu system (Printer unit)” on page 169 for
examples of using the menus.
Scanner unit control panel
The parts of the control panel are identified and briefly explained
below:
1. Menu button
Starts/ends an LCD image adjustment feature OSD menu
to adjust brightness, contrast, image position etc. For
further details, refer to “Appendix H – Touch screen setup”
on page 207.
2. Up-arrow button
Lets you step through the LCD image features until a
required feature is reached. When the feature is selected
by pressing the Menu button, this button enables you to
increment the value of the feature. Pressing the Menu
button confirms and sets the new value.
3. Down-arrow button
Lets you step through the LCD image features until a
required feature is reached. When the feature is selected
by pressing the Menu button, this button enables you to
2
1
3
45678910
13
14
15
16
17
18
1920
11
12
4a
4b
ES3640e MFP User’s Guide
Control panels > 45
decrement the value of the feature. Pressing the Menu
button confirms and sets the new value.
4. Touch screen display
Enables you to make selections associated with the
copying and scanning functions by touching the screen to
press selected buttons. The screen can be tilted up for ease
of viewing by pulling on handle (4a) and it locks in position.
Use the release control (4b) to enable downward
adjustments.
Be careful not to scratch the display with sharp or pointed
objects e.g. a ballpoint pen as this may impair the display.
5. COPY button
Pressing this button selects copy mode on the touch
screen.
6. SCAN TO E-MAIL button
Pressing this button selects e-mail send mode on the touch
screen.
7. SCAN TO NETWORK button
Pressing this button selects network send mode on the
touch screen for scan to FTP and remote scan functions.
8. SCAN TO MAILBOX button
Pressing this button selects mailbox send mode on the
touch screen for scanning to a mailbox or to a hold queue.
9. INTERRUPT button
Pressing this button switches interrupt mode on or off, its
LED being illuminated when interrupt mode is on. Use this
button to interrupt a print job and carry out a scan.
10. POWER SAVE button
Pressing this button switches the scanner unit power save
mode on or off, its LED being illuminated when power save
mode is on.
ES3640e MFP User’s Guide
Control panels > 46
11. SETUP button
Pressing this button selects setup mode for address books
or reports, for example. (See “Appendix F – Scanner unit
setup details” on page 198.)
12. HELP button
Pressing this button displays help information on the touch
screen.
13. ATTENTION light
Flashes when operator attention is required e.g after a
paper jam has occurred.
14. POWER light
Is illuminated when the scanner unit is on.
15. RESET button
Pressing this button returns all settings of a selected
function to their default values, but does not stop jobs in
progress.
16. STOP button
Pressing this button stops the scanning process.
17. START button
Pressing this button starts the scanning process.
18. Clear button
Pressing this button clears all text in a selected text box on
the touch panel.
19. Numeric buttons (0 – 9)
Use these buttons to enter number of copies, e-mail
address, scale of copy for example.
20. Period button
Use this button to enter decimal values or in e-mail
addresses.
ES3640e MFP User’s Guide
Getting started > 47
Getting started
This section provides information to help you get started with
using your MFP.
Turning Off/On
Turning Off
1. Printer unit
Press and hold down the Shutdown/Restart button (1)
on the control panel to start the shutdown process.
2. Scanner unit
1
ES3640e MFP User’s Guide
Getting started > 48
When the scanner unit display shows that shut down has
been completed, turn off the scanner unit at the power
switch (1).
3. Use the On/Off switch to turn off the printer unit. Please
wait as this may take a short time.
1
ES3640e MFP User’s Guide
Getting started > 49
Turning On
1. Scanner unit
Turn on the scanner unit at the power switch (1).
NOTE
If the display panel shows that you can either turn off or
restart the printer, press Shutdown/Restart to turn on the
printer.
2. If the printer is turned off (no power), use the On/Off
switch to turn on the printer. Please wait as this may take
a short time.
1
ES3640e MFP User’s Guide
Getting started > 50
3. Even if you are using your MFP only for printing, please
ensure that the scanner unit is turned on.
Checking current settings
Carry out the following steps to generate a Configuration report
(Menu Map) to confirm that your printer unit is correctly
configured.
1. Ensure that there is Letter paper in Tray 1 (to be used in
this operation).
2. Ensure that the display panel indicates that the printer is
ready to print.
3. Press the Up-arrow or Down-arrow buttons repeatedly
until Print Pages is highlighted.
4. Press the Enter button to select Print Pages.
5. Press the Up-arrow or Down-arrow buttons repeatedly
until Configuration is highlighted.
6. Press the Enter button to select Configuration.
7. Press the Enter button to execute the command and a
Configuration document is printed.
8. After printing the configuration document, the printer unit
returns to the ready to print status.
9. You can use this document to check your printer unit
configuration. System values and installed accessories are
listed at the top of the first page while status values and
settings follow.
Interfaces and connection
Your printer unit is equipped with a selection of data interfaces:
> Parallel – For direct connection to a PC. This port
requires a bi-directional (IEEE 1284 compliant) parallel
cable.
> USB – For connection to a PC running Windows 98 or
above (not Windows 95 upgraded to Windows 98) or
Macintosh. This port requires a cable conforming to USB
version 2.0 or above.
ES3640e MFP User’s Guide
Getting started > 51
The printer unit may not work if a USB-compatible device
is connected concurrently with other USB-compatible
machines.
When connecting multiple printer units of the same type,
they appear as *****, ***** (2), ***** (3), etc. These
numbers depend on the order of connecting or turning on
each printer unit.
> Ethernet – For network cable connection.
NOTE
Interface cables are not supplied with your printer unit.
Connecting the parallel interface
1. Turn off the printer unit and the computer.
2. Connect a parallel cable between the printer unit and
computer.
3. Turn on the printer unit and then the computer.
ES3640e MFP User’s Guide
Getting started > 52
Connecting the USB interface
Do not connect the USB cable at this time. You will be instructed
when to connect the USB cable when you run the Drivers CD.
If you are connecting your printer unit directly to a stand alone
computer proceed to the section entitled “Using the Drivers CD”.
Connecting the network interface
1. Turn off the printer unit and the computer.
2. Remove the protective cover from the network connector
on the printer unit.
ES3640e MFP User’s Guide
Getting started > 53
3. Connect an Ethernet cable between the printer unit and
an Ethernet hub.
4. Turn on the printer unit and then the computer.
If your printer unit is to be installed as a network printer, please
refer to the relevant section in the Software Installation Guide
and Configuration Guide for further details on how to configure
the network connection before installing the printer drivers.
NOTE
Administrator’s authority is required when installing a network
connection.
ES3640e MFP User’s Guide
Getting started > 54
Using the Drivers CD
For instructions on installing the drivers and other software, refer
to the Software Installation booklet.
ES3640e MFP User’s Guide
Printing > 55
Printing
For full details of how to use the printer unit and any optional
accessories to print jobs efficiently and effectively, please refer to
the Printing Guide.
ES3640e MFP User’s Guide
Scanner unit operating information > 56
Scanner unit operating information
Access control
If your Administrator has enabled access control on your scanner,
it will automatically start up in access control mode. You will not
be able to use it until you have provided a valid PIN and logged
in. After using it, you will be expected to log out, leaving the
scanner unit in access control mode, unable to be used by
unauthorised users.
NOTE
The PIN is associated with using the Job Accounting Utility and
is the last four digits of the ID used for Job Accounting.
Logging in
1. At the access control screen, use the numeric keys on the
scanner unit to enter your PIN.
1
ES3640e MFP User’s Guide
Scanner unit operating information > 57
2. Press the Login button (1) and the default Copy Mode
screen appears, the scanner unit now being available to
use.
Logging out
1. When you have finished using the scanner unit, press the
Logout button (1) to return to the access control screen.
1
ES3640e MFP User’s Guide
Scanner unit operating information > 58
Status monitoring
See also “Appendix C – Scanner Unit Status” on page 187.
The Status button (1) changes color depending on the status of
the MFP:
> Blue: ready status
> Orange: warning status
> Red: Alarm status
1
ES3640e MFP User’s Guide
Scanner unit operating information > 59
1. For detailed status information, press the Status button to
display the status window.
2. Press the Close button to close the status window.
Using the Help facility
To obtain help, press the HELP button on the scanner unit control
panel.
1. Select a topic and then press the Go To button (1).
2. Navigate and read the help information you need.
1
1
ES3640e MFP User’s Guide
Scanner unit operating information > 60
3. At any time you can press the Maintenance button (1) to
show the Dealer’s Information screen for dealer contact
information, then press the Close button to return to the
Help screen.
4. Press the Close button (2) to leave the Help screen.
Avoiding incompatibility situations
It is possible to request your MFP to carry out instructions that
would involve media incompatibilities e.g. if you are copying an
A4 original with the Reduce/Enlarge setting at 141% (A4 to A3)
and the (printer unit) Tray Selection set at Tray 1 containing A4
media. The MFP will detect such situations and issue a message
to indicate that your request has been cancelled referring you to
this guide.
To avoid an incompatibility such as the above, make sure that
your chosen image size fits on the media size in the selected
printer unit tray.
Other incompatibilities can arise in connection with punching and
stapling requests and information to help you avoid such
requests is presented in “Appendix D – Media support
information” on page 188.
Information about document sizes that can be scanned either on
the document glass or in the ADF when using the default Auto
setting is provided in “Appendix E – Auto detection paper sizes”
on page 196.
2
1
ES3640e MFP User’s Guide
Copying > 61
Copying
Documents to be copied are scanned in the scanner unit
(document glass or ADF) and copies are automatically printed in
the printer unit.
Carry out the following steps:
1. Copy Mode is the default function of the MFP. If required,
press the COPY button on the scanner unit control panel
to show the Copy Mode screen.
2. Place the document to be copied on the scanner unit glass
or ADF.
3. Make your selections from the Copy Mode touch screen
tabs (detailed below).
4. Press the START button to produce your copies.
ES3640e MFP User’s Guide
Copying > 62
Basic Settings tab
1
234
5
67
No Feature Options Description
1 Copies 1-999 Allows you to specify
the number of copies to
be made. The maximum
number of copies that
can be set per job is
999.
2 Original Size Auto, 5.5x8.5,
5.5x8.5R, 8.5x11,
8.5x11R, 8.5x13,
8.5x14, 11x17, A5,
A5R, A4, A4R, A3, B5,
B5R, B4, Custom
Allows you to select the
paper size to match the
document size.
3 Tray Selection Auto, Tray 1, Tray 2,
Tray 3, Tray 4, M P Tray
Allows you to define the
paper tray for printing.
Auto - Allows for
automatic tray selection
based on the document
image size and/or
scaling setting defined.
4Reduce/
Enlarge
Auto, Preset,
25% – 400% by 1%,
Select
Allows you to scale the
copy.
ES3640e MFP User’s Guide
Copying > 66
Image Quality tab
No Feature Options Description
1 Sharpness -5 to +5 by 1 Allows you to enhance
the image's outline,
letters, lines when
printing.
2 Background
Removal
OFF, 1 to 10 by 1 Allows you to block out
the color background of
the image (assuming
document has a color
background) - such that
the background color is
not printed.
3 Contrast Auto, -5 to +5 by 1 Allows you to adjust the
contrast levels for
scanning and printing.
This is not applied
(disabled) if Auto is set
to ON.
24
135
6
ES3640e MFP User’s Guide
Copying > 67
4Color
Saturation
-5 to +5 by 1 Allows you to adjust the
overall color saturation
(neutrally across all
colors) of the image.
Color Saturation is not
available where Color
Mode is set to B&W or
Color Presets is set to
Vivid.
5 Resolution Normal, High Quality Allows you to select an
appropriate balance
between speed
(normal) and quality
(high quality).
6 Color Presets Normal, Vivid, Warm,
Cool
Allows you to select
pre-defined color mode
settings (affects the
overall color tone).
Vivid - increased overall
color saturation.
Warm - increased
overall reddish hue
saturation.
Cool - increased overall
bluish hue saturation.
No Feature Options Description
ES3640e MFP User’s Guide
Copying > 68
Finishing tab
No Feature Options Description
1 Staple OFF / Left Position /
Right Position
Allows you to select the
staple options (and sub-
options) that will be
applied to the
document.
2 Punch OFF / Left Position /
Right Position
Allows you to select the
punching options (and
sub-options) that will be
applied to the
document.
3 Face up/down Face up, Face down Allows you to select the
output placement and
stacking order.
4 Collate Collate, Group Collate prints 1 entire
copy/set of the multiple
copy document at a
time (e.g. pages
1,2,3,1,2,3,1,2,3,…)
Group batch prints the
multiple copy document
page by page (e.g.
pages
1,1,1,2,2,2,3,3,3,…)
2
134
ES3640e MFP User’s Guide
Scanning > 69
Scanning
Your MFP can carry out the following scanning functions:
> E-mail send mode (SCAN TO E-MAIL button)
Scan to e-mail: An original document is scanned and the
data is sent by e-mail as an attachment.
> Network send mode (SCAN TO NETWORK button)
Scan to FTP: An original document is scanned and the data
is sent to an FTP server.
PC remote scan: Under remote control, an original
document is scanned and the data is sent to a host PC.
> Mailbox send mode (SCAN TO MAILBOX button)
Scan to Mailbox: An original document is scanned and the
data is saved in a mailbox.
Scan to Hold Queue: An original document is scanned and
the data is saved in the hold queue.
NOTE
Additional features involving, for example the Fiery Remote
Scan tool or Web Scan Tool for accessing files in the mailbox
are described in the Fiery documentation.
The TIFF file format supported is compliant with the TIFF v6
specification with additional qualifiers for supporting JPEG
compressed images within the TIFF file. Single and multiple
page files are supported. The following TIFF viewers are
recommended: ACD Systems ACDSee, Adobe Photoshop.
E-mail send mode
The main steps in summary are:
(a) Press the SCAN TO E-MAIL button.
(b) On the Address tab, enter address and subject
details.
(c) On the Message Text tab, enter your e-mail
message.
(d) On the Attachments tab, define your attachment
properties, using the Advanced Settings features as
required.
ES3640e MFP User’s Guide
Scanning > 70
(e) Set your document on the scanner unit and press
START.
These steps are expanded below.
1. Press the SCAN TO E-MAIL button to display the E-mail
Send Mode screen at the Address tab
2. Press the To button (1) and enter an e-mail address via
one of the following buttons:
> Address Book (2)
> LDAP (3)
> Soft Keyboard (4)
> Fax Gateway (5)
2
3
4
5
1
ES3640e MFP User’s Guide
Scanning > 71
Address Book
(a) Touch on an e-mail address to select it.
(b) Press the Add button (1) to add this address to the
list.
(c) Repeat (a) and (b) as required to create the address
list.
(d) Press the OK button (2) to place the list of addresses
in the To destination field.
1 2
ES3640e MFP User’s Guide
Scanning > 72
LDAP
(a) Press the User ID button (1) and enter your user ID
via the soft keyboard then press the OK button.
(b) Press the Password button (2) and enter your
password via the soft keyboard then press the OK
button.
1
2
3
ES3640e MFP User’s Guide
Scanning > 73
(c) Press the Next button (3).
(d) Press either the User Name (1) or Mail button (2) to
enter your search value via the soft keyboard, then
press the OK button.
(e) Press the Next button (3).
1
2
3
12
ES3640e MFP User’s Guide
Scanning > 74
(f) Select an address from the list displayed and press
the Add button (1) to add this address to your
destination list.
(g) Repeat (f) as required to create a destination list.
(h) Press the Complete button (2) to place the list of
addresses in the To destination field.
Soft Keyboard
(a) Enter an address via the soft keyboard.
(b) Press the Add button (1) to add this address to the
list.
(c) Repeat (a) and (b) as required to create the address
list.
(d) Press the OK button (2) to place the list of addresses
in the To destination field.
12
ES3640e MFP User’s Guide
Scanning > 75
Fax Gateway
(a) Press the Fax Number button (1), enter a fax
number via the soft keyboard, then press the OK
button.
(b) Press the Recipient Name button (2), enter a
recipient name via the soft keyboard, then press the
OK button.
(c) Press the OK button (3).
3. Repeat Step 2 as required with the cc and Bcc buttons on
the Address tab.
4. Press the Subject button on the Address tab and use the
soft keyboard to enter the subject of your e-mail, then
press the OK button.
1
2
3
ES3640e MFP User’s Guide
Scanning > 76
5. Touch the Message Text tab, press the Edit Message
button (1), enter your e-mail message via the soft
keyboard and press the OK button.
6. Touch the Attachments tab.
1
1
23457
6
ES3640e MFP User’s Guide
Scanning > 77
(a) Press the File Name button (1) and enter a name for
your scanned file via the soft keyboard then press
the OK button.
(b) Use the following features as required:
Resolution (2) (150, 200, 300, 400, 600dpi)
Color Mode (3) (Color, Grayscale, B/W)
File Format (4) (JPEG, PDF, TIFF)
Sides (5) (Single, Top/Top, Top/Bottom)
Allows you to define simplex or duplex and the
duplex orientation of front and back sides of a page
for scanning.
URL Link (6) (On, Off)
Select Off to send the scanned image as an
attachment. Select On to send the scanned image as
a URL.
(c) To access advanced settings, press the Advanced
Settings button (7):
45
12 3 6
7
ES3640e MFP User’s Guide
Scanning > 78
Select from the following features as required:
NO Feature Options Description
1 Original Size Auto, 5.5x8.5,
5.5x8.5R, 8.5x11,
8.5x11R, 8.5x13,
8.5x14, 11x17, A5,
A5R, A4, A4R, A3, B5,
B5R, B4
Allows you to select the
scanned document size.
2 Original Type Mixed, Text, Photo Allows you to specify
the type of images on
the document. This
allows automatic (pre-
set) optimization of
image quality settings.
3 Exposure -5 to +5 by 1 Allows you to select
Brightness level and
Contrast level.
4 Job Build OFF / ON Allows you to construct
a single copy job or
scan job from multiple
individual sheets or
originals.
5 Edge/Center
Erase
OFF / Edge
Metric: 0-50mm in
1mm increments
Inch: 0" – 2.0" in 0.1"
increments
Allows you to block out
the peripheral areas of
the document where
spurious shadows and
borders may arise when
scanning with the
document cover open
(such as with books and
magazines) or for other
purposes.
Center
Metric: 0-50mm in
1mm increments
Inch: 0" – 2.0" in 0.1"
increments
Allows you to block out
a centered rectangular
area of the document
where spurious
shadows and borders
may arise when
scanning bound
originals (books,
magazines) with the
center spread layout.
6File
Compression
Level
Off, 1 to 10 by 1 Allows you to select
compression level.
ES3640e MFP User’s Guide
Scanning > 79
7. Place the document to be scanned on the scanner unit
glass or ADF.
8. Press the START button.
Confirming e-mail transmission
You can check the transmission status of e-mails from:
> Job Log screen: Press the Job Log button to display this
screen.
> E-mail Log Report: To print this report, press the SETUP
button on the scanner unit control panel then press the
Report button followed by the Print button associated with
E-mail Log.
Network send mode – scan to FTP
The main steps in summary are:
(a) Press the SCAN TO NETWORK button.
(b) Press the FTP Server button (set by default).
(c) On the FTP Server tab, enter the FTP Server name.
(d) On the Attachments tab, define your attachment
properties, using the Advanced Settings features as
required.
(e) Set your document on the scanner unit and press
START.
These steps are expanded below.
7 Background
Removal
OFF, 1 to 10 by 1 Allows you to block out
the color background of
the image (assuming
document has a color
background) - such that
the background color is
not displayed.
NO Feature Options Description
ES3640e MFP User’s Guide
Scanning > 80
1. Press the SCAN TO NETWORK button to display the Net-
work Send Mode screen.
2. Press the FTP Server button (1) (set by default) and enter
an FTP server name via one of the following buttons:
> Server List (2)
> Soft keyboard (3)
2
3
1
ES3640e MFP User’s Guide
Scanning > 81
Server List
(a) Touch on an FTP server name to select it.
(b) Press the OK button (1) to place the name in the FTP
Server Name box on the FTP Server tab.
1
ES3640e MFP User’s Guide
Scanning > 82
Soft Keyboard
Use the soft keyboard and respective buttons to enter the
following host information:
(a) Basic Information tab: Server name (1), Path (2),
User Name (3), Password (4)
1
2
3
4
1
3
2
4
ES3640e MFP User’s Guide
Scanning > 83
(b) Extensions tab: Port Number (1), Timeout (2),
Retries (3), Interval (4)
(c) Proxy Information tab: Server Name (1), User Name
(2), Password (3), Port Number (4)
(d) Press the OK button (5) to enter the data and place
the name in the FTP Server Name box on the FTP
Server tab.
1
2
3
4
5
ES3640e MFP User’s Guide
Scanning > 84
3. Touch the Attachments tab.
(a) Press the File Name button (1) and enter a name for
your scanned file via the soft keyboard then press
the OK button.
(b) Use the following features as required:
Resolution (2)(150, 200, 300, 400, 600dpi)
Color Mode (3)(Color, Grayscale, B/W)
File Format (4)(JPEG, PDF, TIFF)
Sides (5) (Single, Top/Top, Top/Bottom)
Allows you to define simplex or duplex and the
duplex orientation of front and back sides of a page
for scanning.
2345 6
1
ES3640e MFP User’s Guide
Scanning > 85
(c) To access advanced settings, press the Advanced
Settings button (6):
Select from the following features as required:
No Feature Options Description
1 Original Size Auto, 5.5x8.5,
5.5x8.5R, 8.5x11,
8.5x11R, 8.5x13,
8.5x14, 11x17, A5,
A5R, A4, A4R, A3, B5,
B5R, B4
Allows you to select the
scanned document size.
2 Original Type Mixed, Text, Photo Allows you to specify
the type of images on
the document. This
allows automatic (pre-
set) optimization of
image quality settings.
3 Exposure -5 to +5 by 1 Allows you to select
Brightness level and
Contrast level.
4 Job Build OFF / ON Allows you to construct
a single copy job or
scan job from multiple
individual sheets or
originals.
45
12 3 6
7
ES3640e MFP User’s Guide
Scanning > 86
4. Place the document to be scanned on the scanner unit
glass or ADF.
5. Press the START button.
Confirming FTP transmission
You can check FTP transmission status from:
> Job Log screen: Press the Job Log button to display this
screen.
> FTP Report: To print this report, press the SETUP button
on the scanner unit control panel then press the Report
button followed by the Print button associated with FTP
Report.
5 Edge/Center
Erase
OFF / Edge
Metric: 0-50mm in
1mm increments
Inch: 0" – 2.0" in 0.1"
increments
Allows you to block out
the peripheral areas of
the document where
spurious shadows and
borders may arise when
scanning with the
document cover open
(such as with books and
magazines) or for other
purposes.
Center
Metric: 0-50mm in
1mm increments
Inch: 0" – 2.0" in 0.1"
increments
Allows you to block out
a centered rectangular
area of the document
where spurious
shadows and borders
may arise when
scanning bound
originals (books,
magazines) with the
center spread layout.
6File
Compression
Level
Off, 1 to 10 by 1 Allows you to select
compression level.
7 Background
Removal
OFF, 1 to 10 by 1 Allows you to block out
the color background of
the image (assuming
document has a color
background) - such that
the background color is
not displayed.
No Feature Options Description
ES3640e MFP User’s Guide
Scanning > 90
Mailbox List
(a) Press the Mailbox List button.
(b) Touch a mailbox name to select it.
(c) Press the OK button (1) to begin to enter the name
in the Mailbox Name box on the mailbox tab.
(d) To see a list of the files in the selected mailbox, press
the File List button (2).
(e) Enter the password for the selected mailbox on the
password authentication pop-up screen and press
the OK button.
21
ES3640e MFP User’s Guide
Scanning > 91
Direct Search
(a) Press the Direct Search button.
(b) Use the soft keyboard to enter a mailbox name then
press the OK button (1).
(c) Use the soft keyboard to enter the associated
mailbox password button then press the OK button.
1
ES3640e MFP User’s Guide
Scanning > 92
New Mailbox
(a) Press the New Mailbox button.
(b) Press the Mailbox Name button (1), enter a name for
the new mailbox via the soft keyboard then press
the OK button.
(c) Press the Password button (2), enter a password for
the new mailbox via the soft keyboard then press
the OK button.
(d) Press the OK button (3).
4. If you wish to check the list of files already stored in your
selected mailbox, press the File List button, view the list
then press the OK button.
1
2
3
ES3640e MFP User’s Guide
Scanning > 93
5. Touch the Attachments tab.
(a) Press the File Name button (1) and enter a name for
your scanned file via the soft keyboard then press
the OK button.
(b) Use the following features as required:
Resolution (2) (150, 200, 300, 400, 600dpi)
Color Mode (3) (Color, Grayscale, B/W)
Sides (4) (Single, Top/Top, Top/Bottom)
Allows you to define simplex or duplex and the
duplex orientation of front and back sides of a page
for scanning.
1
23 45
ES3640e MFP User’s Guide
Scanning > 94
(c) To access advanced settings, press the Advanced
Settings button (5):
Select from the following features as required:
No Feature Options Description
1 Original Size Auto, 5.5x8.5,
5.5x8.5R, 8.5x11,
8.5x11R, 8.5x13,
8.5x14, 11x17, A5,
A5R, A4, A4R, A3, B5,
B5R, B4
Allows you to select the
scanned document size.
2 Original Type Mixed, Text, Photo Allows you to specify
the type of images on
the document. This
allows automatic (pre-
set) optimization of
image quality settings.
3 Exposure -5 to +5 by 1 Allows you to select
Brightness level and
Contrast level.
4 Job Build OFF / ON Allows you to construct
a single copy job or
scan job from multiple
individual sheets or
originals.
45
12 3 6
7
ES3640e MFP User’s Guide
Scanning > 95
6. Place the document to be scanned on the scanner unit
glass or ADF.
7. Press the START button.
5 Edge/Center
Erase
OFF / Edge
Metric: 0-50mm in
1mm increments
Inch: 0" – 2.0" in 0.1"
increments
Allows you to block out
the peripheral areas of
the document where
spurious shadows and
borders may arise when
scanning with the
document cover open
(such as with books and
magazines) or for other
purposes.
Center
Metric: 0-50mm in
1mm increments
Inch: 0" – 2.0" in 0.1"
increments
Allows you to block out
a centered rectangular
area of the document
where spurious
shadows and borders
may arise when
scanning bound
originals (books,
magazines) with the
center spread layout.
6File
Compression
Level
Off, 1 to 10 by 1 Allows you to select
compression level.
7 Background
Removal
OFF, 1 to 10 by 1 Allows you to block out
the color background of
the image (assuming
document has a color
background) - such that
the background color is
not displayed.
No Feature Options Description
ES3640e MFP User’s Guide
Scanning > 96
Mailbox send mode – scan to Hold Queue
The main steps in summary are:
(a) Press the SCAN TO MAILBOX button.
(b) Press the Hold Queue button.
(c) On the Attachments tab, define your attachment
properties, using the Advanced setting features as
required.
(d) Set your document on the scanner unit.
(e) Press the START button on the Scanner Unit control
panel.
These steps are expanded below.
1. Press the SCAN TO MAILBOX button to display the Mail-
box Send Mode screen.
2. Press the Hold Queue button (1).
3. On the Hold Queue tab (2), check the displayed settings
for your scanned file.
1
2
ES3640e MFP User’s Guide
Scanning > 97
4. Touch the Attachments tab.
(a) Press the File Name button (1) and enter a name for
your scanned file via the soft keyboard then press
the OK button.
(b) Use the following features as required:
Resolution (2) (150, 200, 300, 400, 600dpi)
Color Mode (3) (Color, Grayscale, B/W)
Sides (4) (Single, Top/Top, Top/Bottom)
Allows you to define simplex or duplex and the
duplex orientation of front and back sides of a page
for scanning.
1
23 45
ES3640e MFP User’s Guide
Scanning > 98
(c) To access advanced settings, press the Advanced
Settings button (5):
Select from the following features as required:
No Feature Options Description
1 Original Size Auto, 5.5x8.5,
5.5x8.5R, 8.5x11,
8.5x11R, 8.5x13,
8.5x14, 11x17, A5,
A5R, A4, A4R, A3, B5,
B5R, B4
Allows you to select the
scanned document size.
2 Original Type Mixed, Text, Photo Allows you to specify
the type of images on
the document. This
allows automatic (pre-
set) optimization of
image quality settings.
3 Exposure -5 to +5 by 1 Allows you to select
Brightness level and
Contrast level.
4 Job Build OFF / ON Allows you to construct
a single copy job or
scan job from multiple
individual sheets or
originals.
45
12 3 6
7
ES3640e MFP User’s Guide
Scanning > 99
5. Place the document to be scanned on the scanner unit
glass or ADF.
6. Press the START button.
5 Edge/Center
Erase
OFF / Edge
Metric: 0-50mm in
1mm increments
Inch: 0" – 2.0" in 0.1"
increments
Allows you to block out
the peripheral areas of
the document where
spurious shadows and
borders may arise when
scanning with the
document cover open
(such as with books and
magazines) or for other
purposes.
Center
Metric: 0-50mm in
1mm increments
Inch: 0" – 2.0" in 0.1"
increments
Allows you to block out
a centered rectangular
area of the document
where spurious
shadows and borders
may arise when
scanning bound
originals (books,
magazines) with the
center spread layout.
6 File
Compression
Level
OFF, 1 to 10 by 1 Allows you to select
compression level.
7Background
Removal
OFF, 1 to 10 by 1 Allows you to block out
the color background of
the image (assuming
document has a color
background) - such that
the background color is
not displayed.
No Feature Options Description
ES3640e MFP User’s Guide
Consumables and maintenance – printer unit > 100
Consumables and maintenance – printer
unit
This section explains how to replace consumable and
maintenance items when due. As a guide, the life expectancy of
these items is:
> Toner — estimated 15,000 Letter pages at 5% coverage.
The printer unit is shipped with sufficient toner for 7,500
Letter pages in the print cartridges.
> Image drum — estimated 30,000 Letter pages at 3 pages
per job — will vary depending on the number of printed
pages per job.
> Transfer belt — Approximately 100,000 Letter pages
> Fuser — Approximately 100,000 Letter pages
Checking consumable/maintenance item usage
At any time, you can check how much of each consumable/
maintenance item is left by using the appropriate menus. For
example, enter the menu system and follow the path:
Configuration>Supplies Life>Cyan Toner
The percentage of Cyan Toner remaining is displayed on the
display panel and the printer unit then returns to the ready to
print status.
Replacement indications
The display panel provides messages to the effect that
consumables/maintenance items are running low or nearing end
of life followed some time later by a message that replacement is
required. You should replace the item as soon as possible after
this message is displayed to avoid the possibility of print quality
being compromised.
The paper feed rollers and the multi-purpose (MP) tray feed
rollers do not have any replacement warning messages.
Recommended replacement: after approximately 120,000 Letter
sheets.
ES3640e MFP User’s Guide
Consumables and maintenance – printer unit > 102
Replacing consumables/maintenance items
Each consumable or maintenance item comes complete with its
own installation details which give full instructions on
replacement. You are advised to follow these instructions
carefully.
Cleaning the LED heads
You are advised to clean the LED heads:
> any time you replace a toner cartridge (a LED lens cleaner
is enclosed with each replacement toner cartridge)
> if printing is showing signs of faded images, white stripes
or blurred letters
You can use a LED lens cleaner or dry, soft cloth for cleaning the
LED heads.
IMPORTANT!
Only use genuine Oki Original consumables to ensure
the best quality and performance from your hardware.
Non-Oki Original products may damage your printer
unit’s performance and invalidate your warranty.
ES3640e MFP User’s Guide
Consumables and maintenance – printer unit > 103
1. Place one hand firmly on the front handle (1) of the scan-
ner shelf, then carefully press the release handle (2) so
that the shelf lifts out of the way.
The stand includes hydraulics for moving the scanner shelf up
and down. Use extreme caution.
NEVER ATTEMPT TO RAISE OR LOWER THE SHELF WITHOUT
THE SCANNER BOLTED TO IT. WITHOUT THE WEIGHT OF
THE SCANNER ON IT, THE SHELF COULD RISE RAPIDLY
WHEN RELEASED, POTENTIALLY CAUSING SEVERE INJURY.
ES3640e MFP User’s Guide
Consumables and maintenance – printer unit > 104
2. With an LED lens cleaner or soft cloth, gently wipe each of
the four heads (1). Move the cleaner as shown, using a
clean section of the cleaner with each pass. Be careful not
to damage the guards (2).
ES3640e MFP User’s Guide
Consumables and maintenance – printer unit > 110
Cleaning the printer unit casing
1. Turn the printer unit off by using the Shutdown/Restart
button followed by the On/Off switch.
2. Wipe the printer unit surface with a soft cloth moistened
sparingly with water or neutral detergent.
3. Use a soft dry cloth to dry the printer unit surface.
ES3640e MFP User’s Guide
Maintenance – scanner unit - 117
Cleaning the document glass
The document glass needs to be cleaned occasionally to ensure
optimum image quality and performance.
Clean the glass as follows.
1. Open the document cover (1).
2. Moisten a soft, clean cloth with isopropyl alcohol (95%).
3. Gently wipe the document glass (2) and the white sheet
(3) on the lower side of the document cover to remove
dust or any toner particles.
4. Close the document cover (1).
Your machine is now ready for use.
1
2
3
ES3640e MFP User’s Guide
Maintenance – scanner unit - 118
Replacing the snap-in pad module
After scanning approximately 100,000 pages through the ADF,
the pad may become worn and you may experience problems
with document feeding. In this case, you are recommended to
replace the pad module by a new one.
Replace the pad module as follows.
Removing the snap-in pad module
1. Press down the ADF release button (1) and open the ADF
front cover (2).
1
2
ES3640e MFP User’s Guide
Optional accessories - 121
Optional accessories
This section describes optional accessory equipment for your
MFP. The following accessories are available:
> Finisher (for stapling or saddle stitching printer output)
> Punch unit (to extend Finisher functionality)
Accessory order information
Installing accessories
NOTE
The Finisher and Punch unit must be installed by an authorized
engineer.
For the following accessories, you have to make the appropriate
setting in your printer driver(s):
> Punch unit
> Finisher
Refer to the Printing Guide for driver setting details.
Item Order number
Finisher:
4-tray 42940201
Finisher Punch Unit:
2-3 hole 42872902
ES3640e MFP User’s Guide
Troubleshooting - 122
Troubleshooting
General
If the printer unit display panel does not display anything or is
still in standby mode 10 minutes after switching on, follow the
printer unit shutdown sequence to switch it off. Check all cable
connections before restarting the printer unit. If the problem
persists, contact your dealer.
Networking
The majority of networking troubleshooting is dealt with in the
Fiery Configuration Guide. For specific troubleshooting on e-mail
and LDAP server problems, refer to “Appendix G–
Troubleshooting (network)” on page 205.
Paper jams
This section provides information to help you deal with problems
that may arise when using the MFP. The following paragraphs
describe actions to take in the event of a paper jam and how to
deal with unsatisfactory print results. Display panel messages
about paper jams and relevant actions are given in this section
while a list of other typical messages and suggested responses is
given in “Appendix A – Display Panel Messages (Printer unit)” on
page 167.
Paper jams – printer unit
If a paper jam occurs, a message appears on the display panel in
the printer unit Control Panel. You can press the Help button to
display guidance on how to clear the jam.
For full details of clearing jams, refer to the following paragraphs,
which correspond to the paper jam messages.
ES3640e MFP User’s Guide
Troubleshooting - 123
Open cover, paper jam, tttttt side cover
Tray 1, or any one of Tray 2 to Tray 4, can appear in place of the
tttttt characters in the display panel message. In this example
Tray 1 is used, the procedure being similar for all other trays.
1. Squeeze the catch (1) on Tray 1 side cover and open the
cover.
2. Holding it by the tab (2), turn the paper guide outward.
1
2
ES3640e MFP User’s Guide
Troubleshooting - 124
3. Carefully remove the jammed paper.
4. Put the paper guide back into position and close Tray 1
side cover.
23


Need help? Post your question in this forum.

Forumrules


Report abuse

Libble takes abuse of its services very seriously. We're committed to dealing with such abuse according to the laws in your country of residence. When you submit a report, we'll investigate it and take the appropriate action. We'll get back to you only if we require additional details or have more information to share.

Product:

For example, Anti-Semitic content, racist content, or material that could result in a violent physical act.

For example, a credit card number, a personal identification number, or an unlisted home address. Note that email addresses and full names are not considered private information.

Forumrules

To achieve meaningful questions, we apply the following rules:

Register

Register getting emails for Oki ES3640e at:


You will receive an email to register for one or both of the options.


Get your user manual by e-mail

Enter your email address to receive the manual of Oki ES3640e in the language / languages: English as an attachment in your email.

The manual is 9,04 mb in size.


You will receive the manual in your email within minutes. If you have not received an email, then probably have entered the wrong email address or your mailbox is too full. In addition, it may be that your ISP may have a maximum size for emails to receive.

The manual is sent by email. Check your email

If you have not received an email with the manual within fifteen minutes, it may be that you have a entered a wrong email address or that your ISP has set a maximum size to receive email that is smaller than the size of the manual.

The email address you have provided is not correct.

Please check the email address and correct it.

Your question is posted on this page

Would you like to receive an email when new answers and questions are posted? Please enter your email address.


Info