Index > 190
I
NDEX
A
About RGB and CMYK colour .....50
B
Belt
how to replace
.....................161
life expectancy .....................151
life remaining .......................138
Black printing (black
generation)
...............................38
Blacks and Greys.......................36
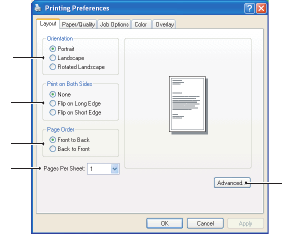
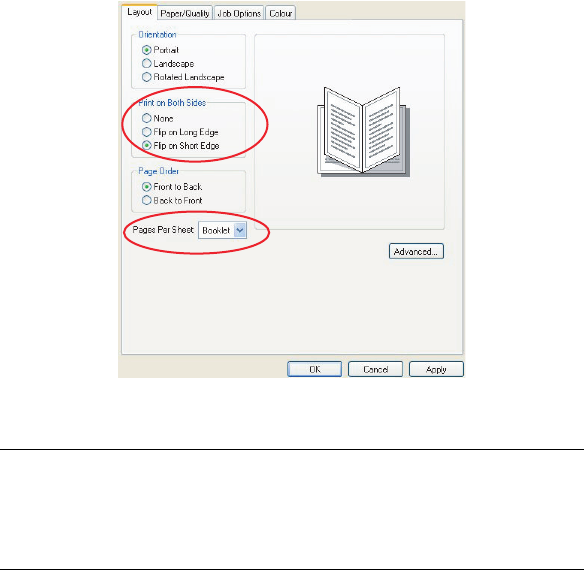
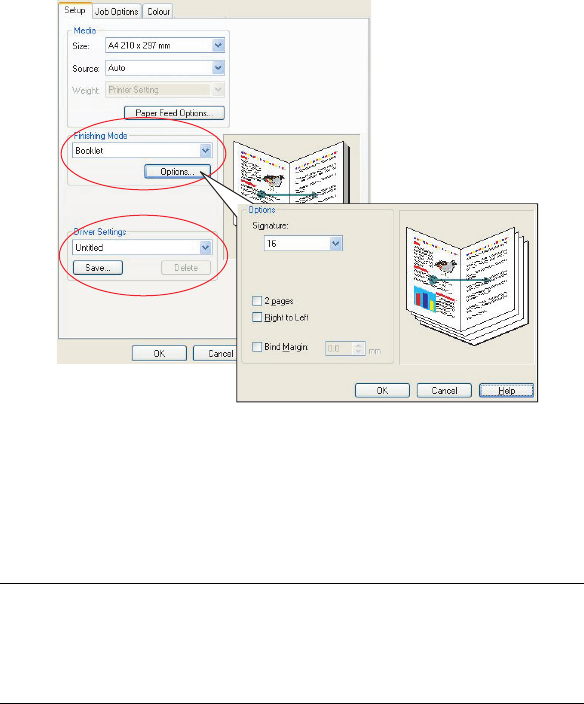
Booklet printing
PCL emulation
........................23
PostScript emulation ..............22
Booklets, printing
Windows PS
............................90
C
Changing the application’s driver
settings
.....................................31
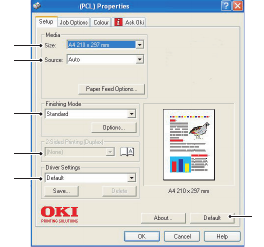
Changing the driver defaults .....31
Cleaning the LED head ............166
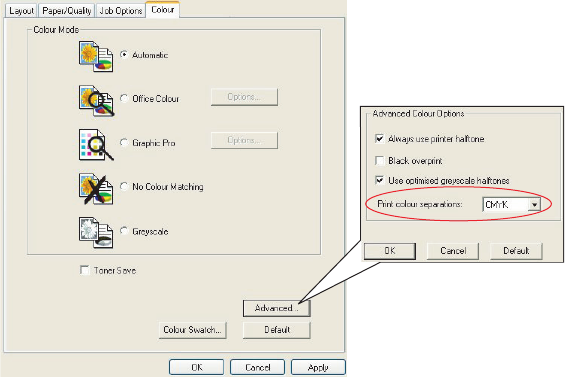
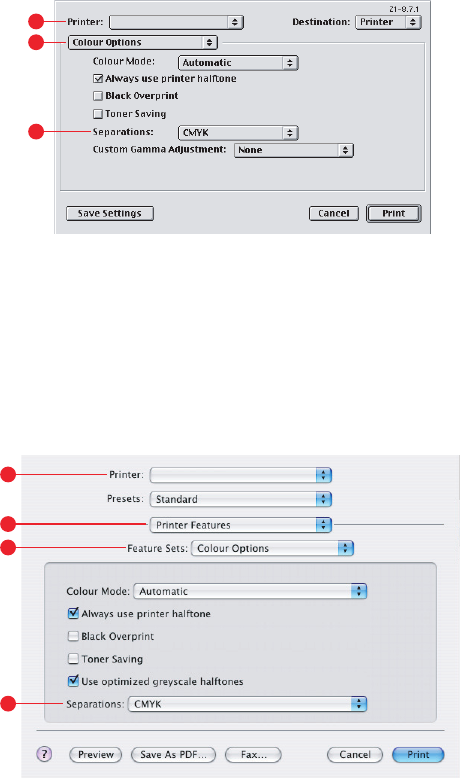
CMYK ink simulations - CMYK
source data
..............................77
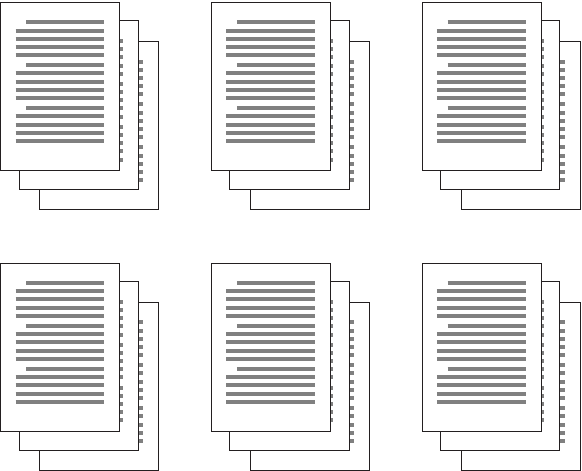
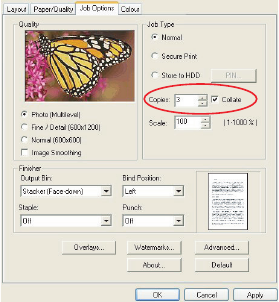
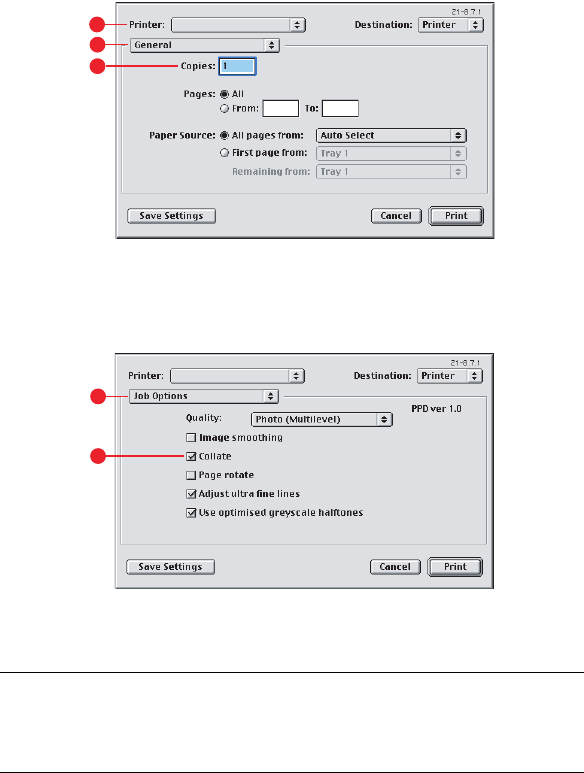
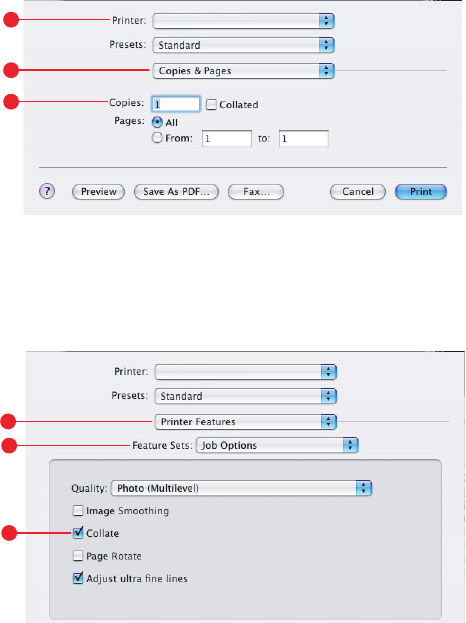
Collating
Windows
.................................92
Colour
adjusting
..............................127
Colour match precision..............84
Colour matching ........................47
application..............................47
basics .....................................47
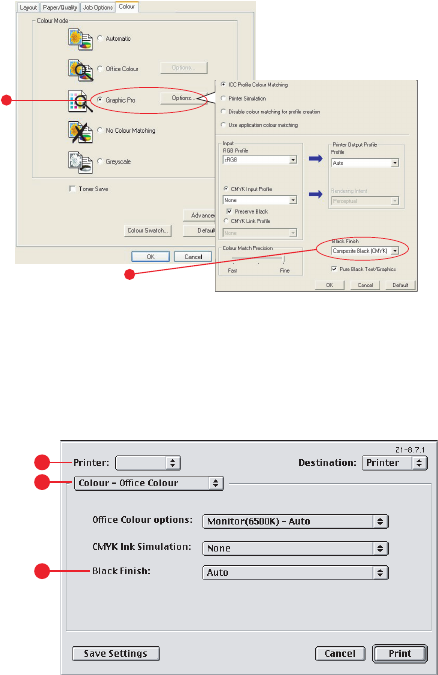
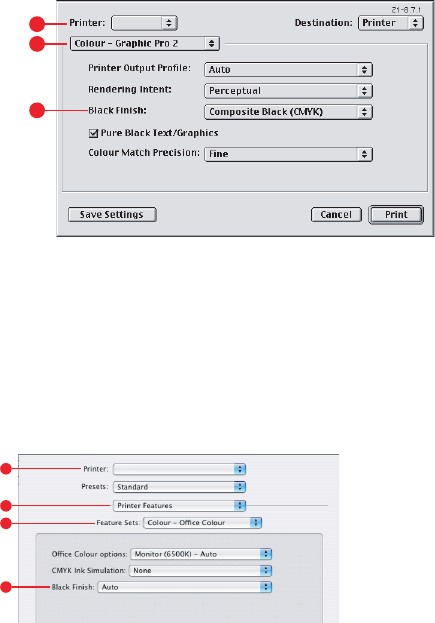
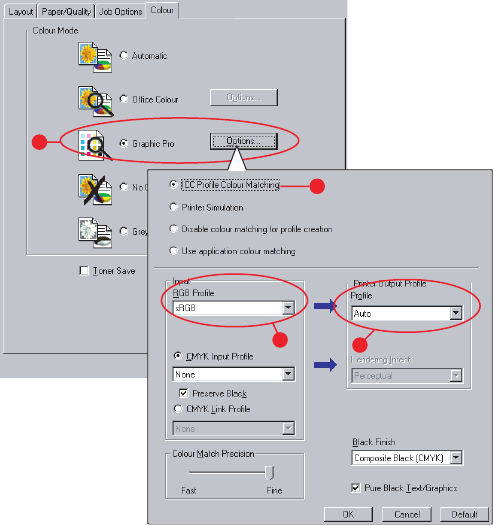
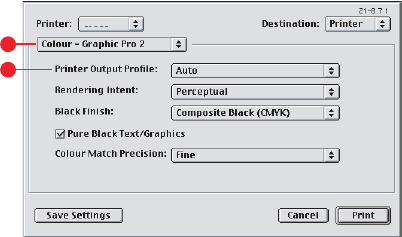
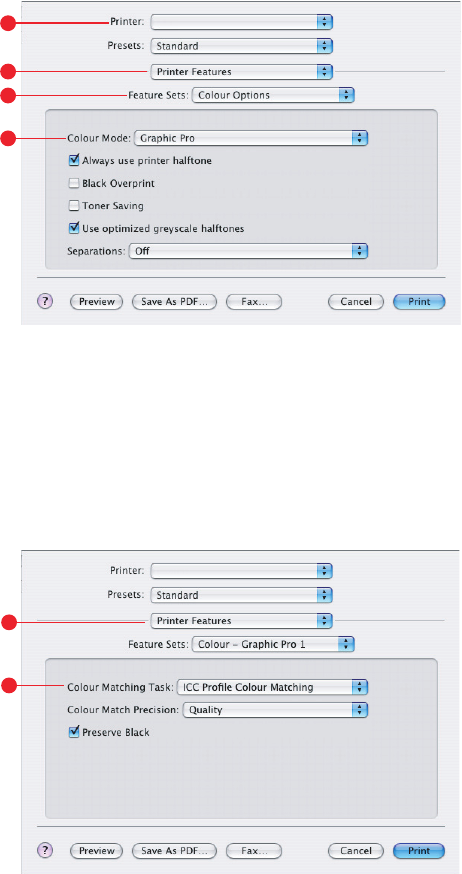
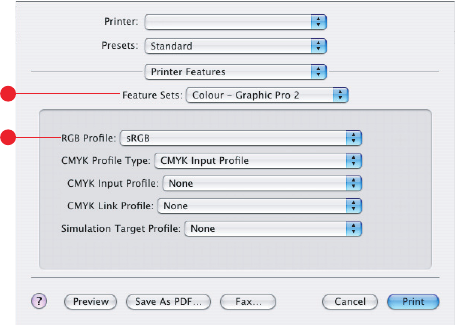
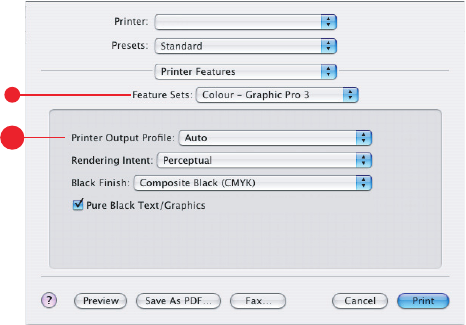
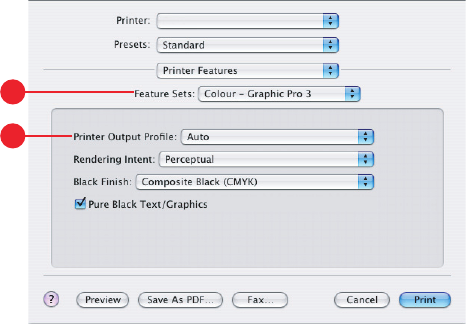
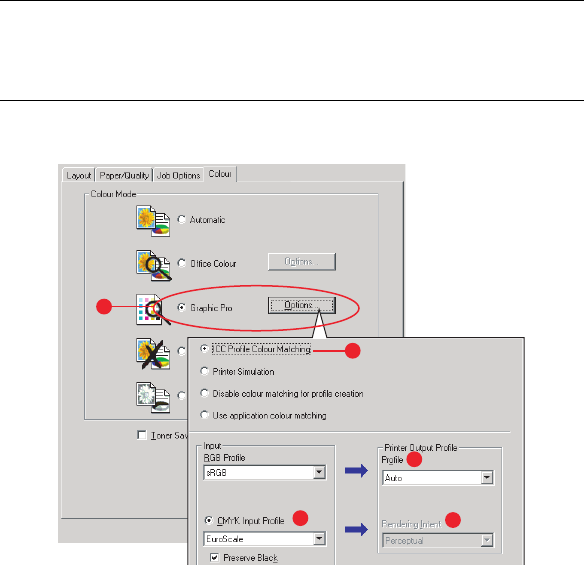
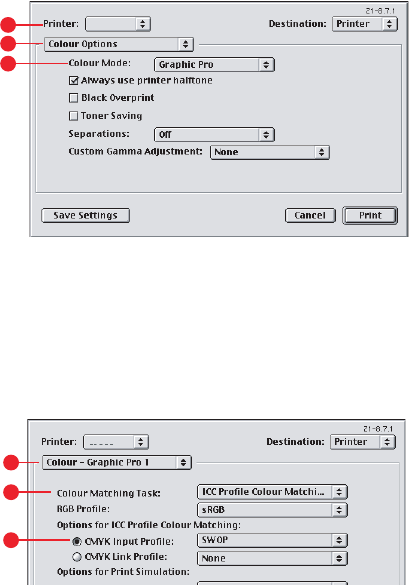
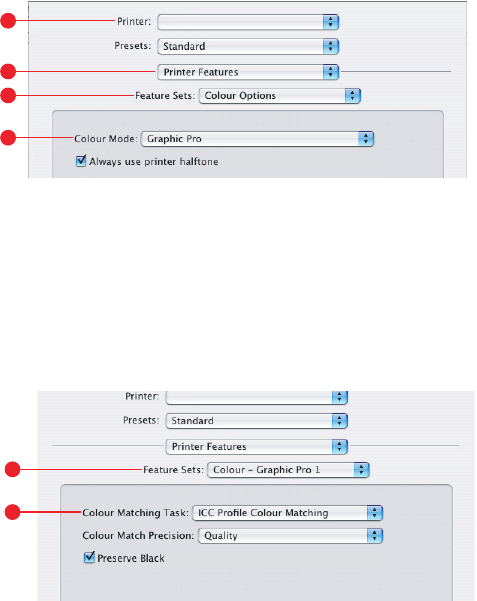
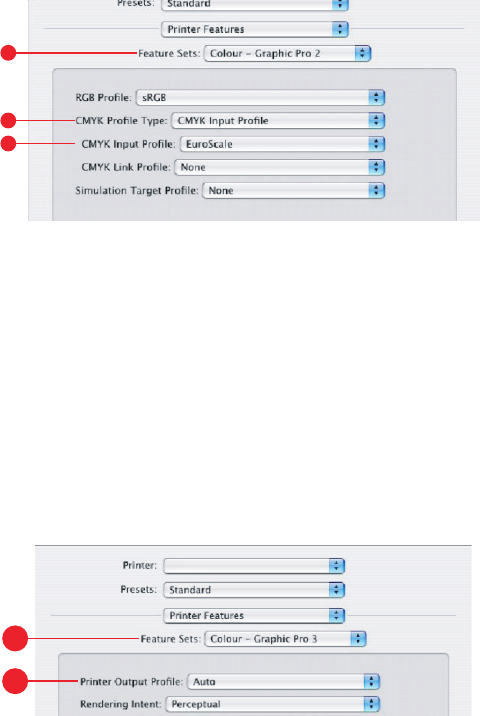
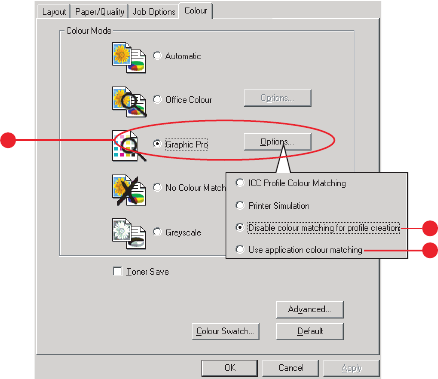
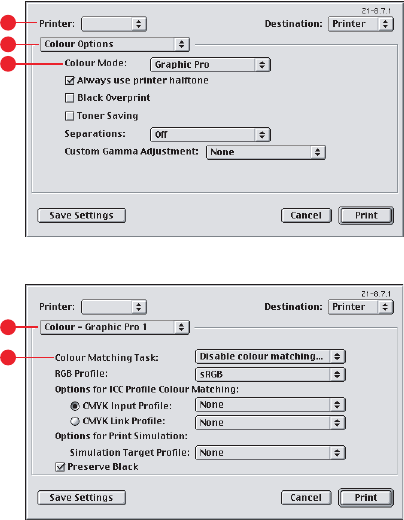
Graphic Pro ............................49
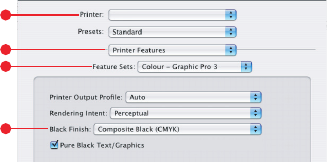
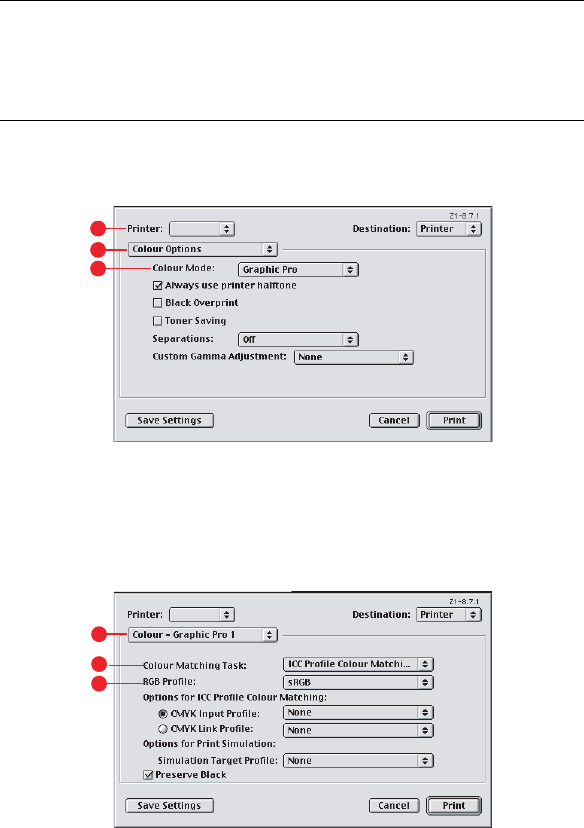
Graphics Pro...........................56
ICC profiles ............................58
operating system ...................47
printer ............................ 48, 49
RGB ........................................50
Configuring hardware options from
chooser
.....................................34
Configuring hardware options from
the desktop
..............................34
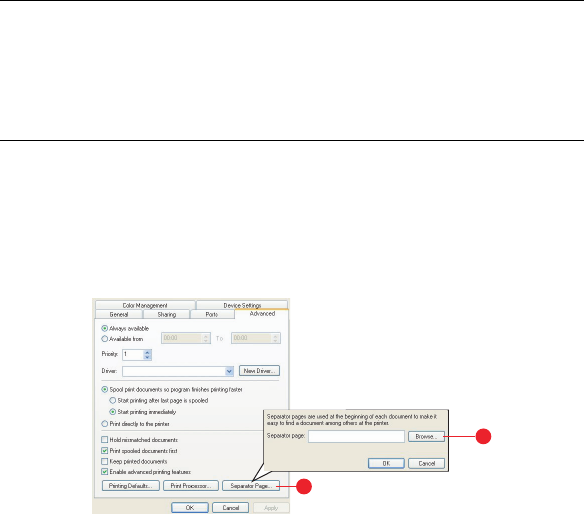
Cover page ................................98
Windows PCL........................100
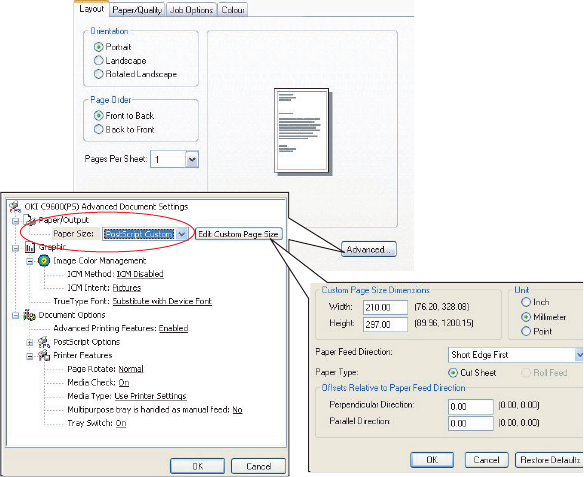
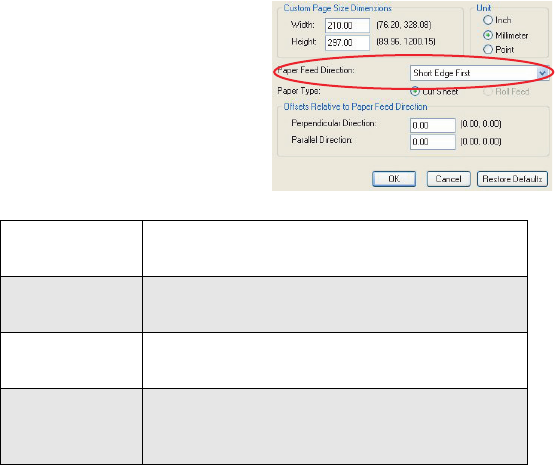
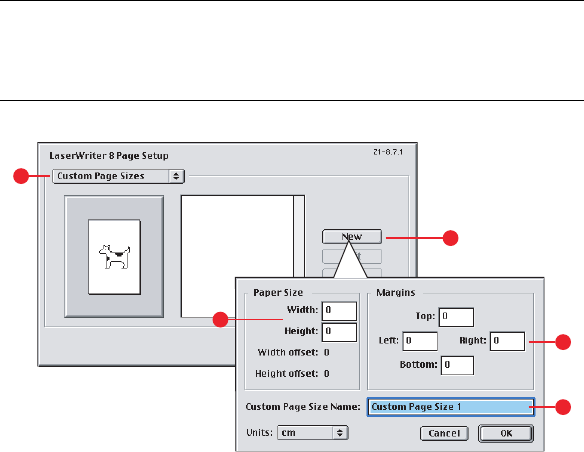
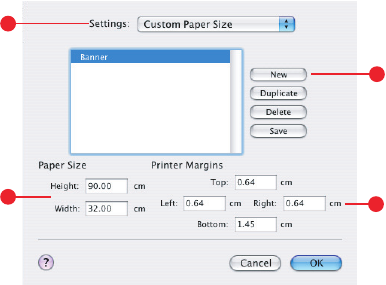
Custom page size
Windows XP/2000 PCL
.........104
Windows XP/2000 PS...........102
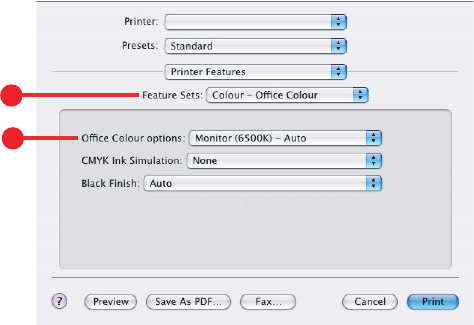
Customising RGB office colour ..56
D
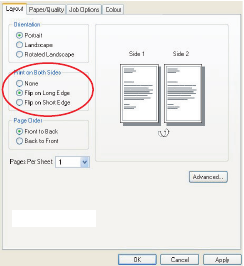
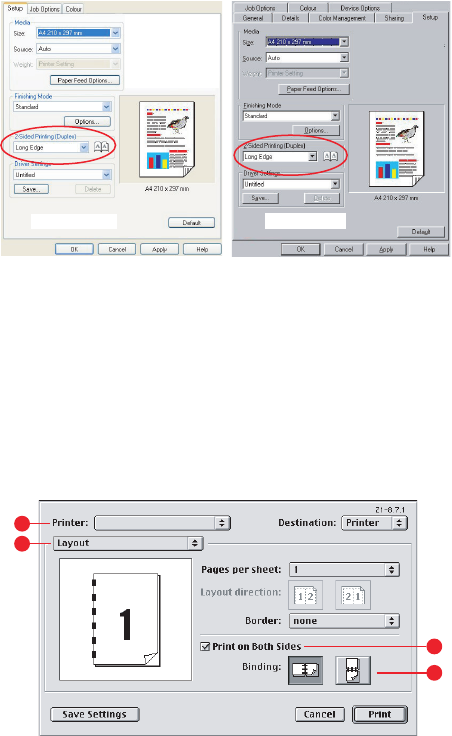
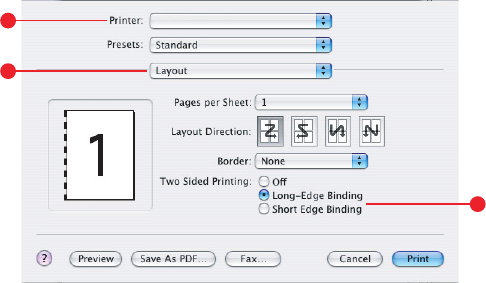
Duplex
how to install
........................167
paper size and weight limits ..15
selecting in Windows...... 22, 23
E
Envelopes
loading
...................................20
F
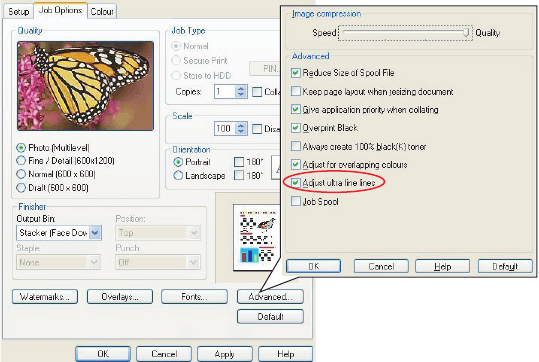
Fine lines enhancement.............42
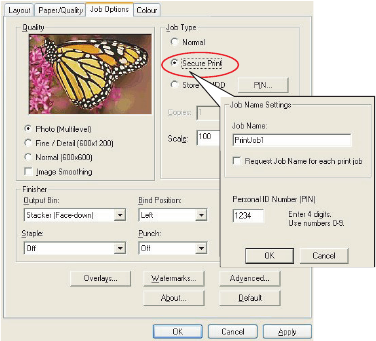
Finishing options .......................88
Collating .................................92
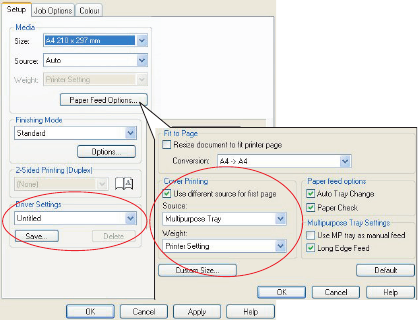
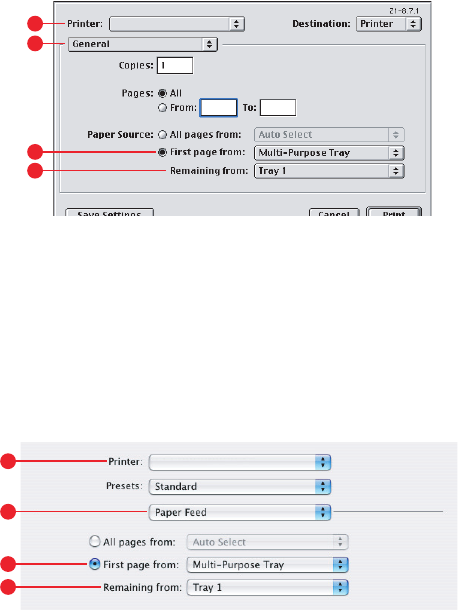
Cover print ...........................100
Custom page size.................102
Duplex (double-sided)
printing
...............................107
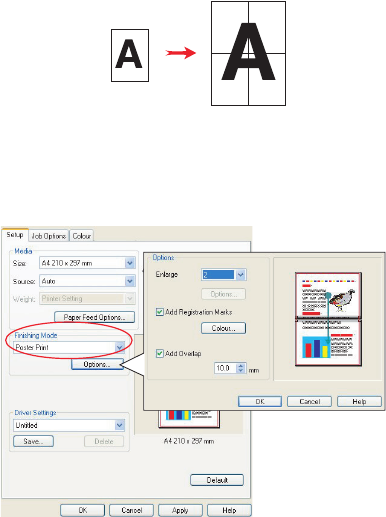
Poster printing......................113
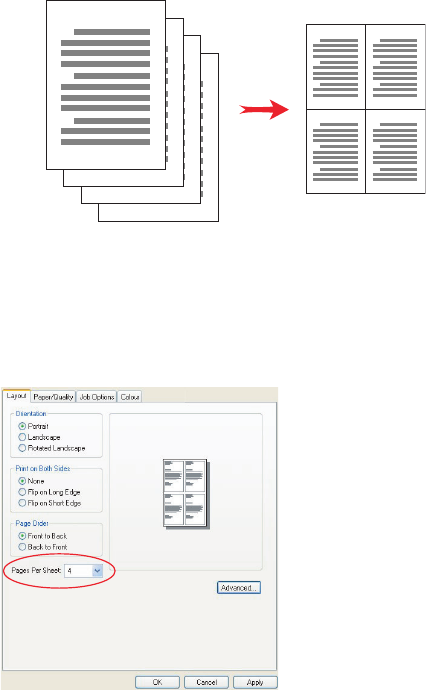
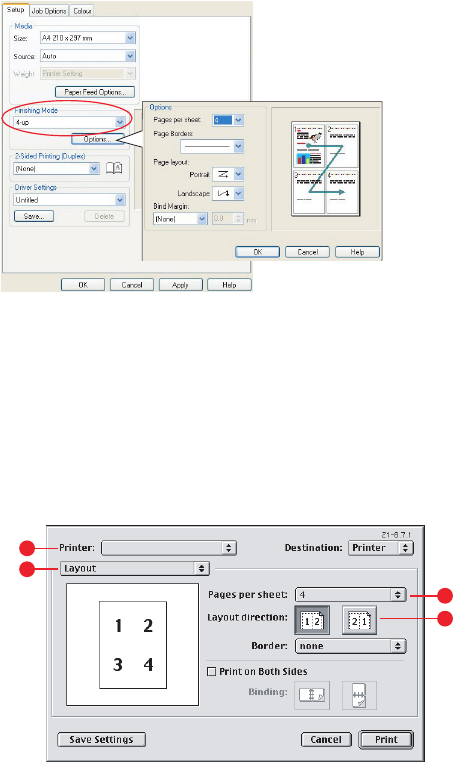
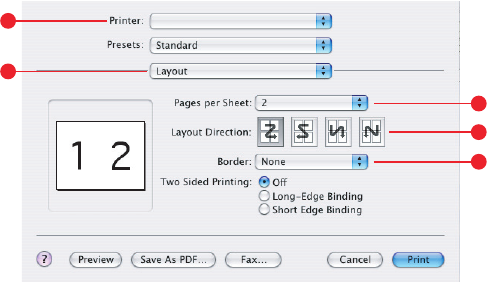
Printing multiple pages on one
sheet (N-up)
.......................110
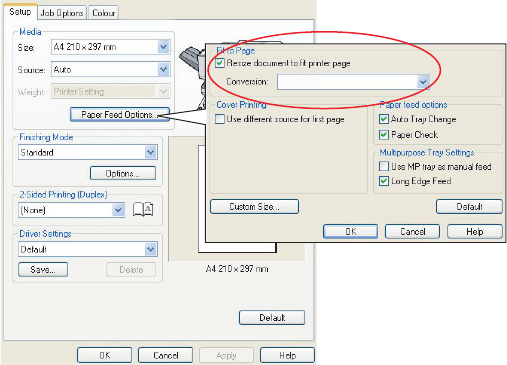
Scale to page .......................114
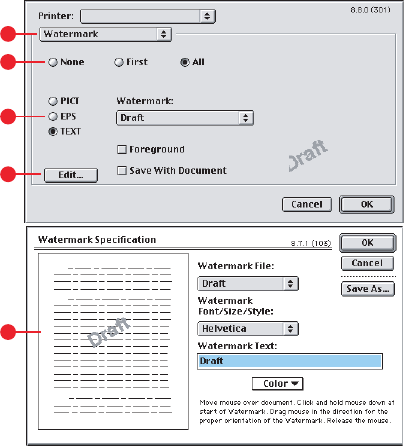
Watermarks .........................115
Fonts
printing a list
........................119