Index > 33
I
NDEX
C
Cancelling a print job ...................... 7
E
Error
fault indication ......................... 30
indications .............................. 29
H
http//www.okiprintingsolutions.com..... 2
I
Image drum
capacity .................................. 32
Resetting counter ..................... 28
L
LED
error indications....................... 29
fault indication ......................... 30
M
Menus
Adjust .................................... 25
Administration ......................... 27
FX.......................................... 24
Information ............................. 20
Maintenance ............................ 26
Memory .................................. 25
Network.................................. 25
Parallel ................................... 24
PCL ........................................ 22
PPR ........................................ 23
Print....................................... 20
System Configuration .......... 21, 22
Usage..................................... 26
USB ....................................... 24
User ....................................... 21
P
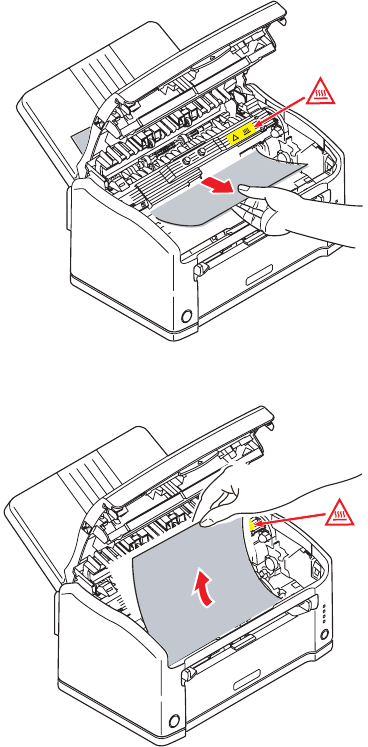
Paper
curling ...................................... 9
jam indication.......................... 29
loading manual feeder .............. 11
loading paper tray ...................... 9
output tray capacity ................... 6
storage ..................................... 8
tray capacity ......................... 6, 9
types to avoid............................ 8
types to use .............................. 8
weights and measures .............. 31
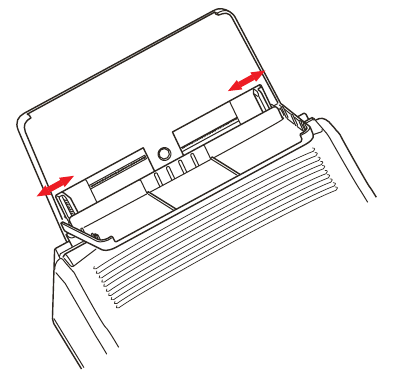
Paper feed guides
main tray .................................. 9
manual ................................... 10
manual feeder ........................... 7
Print
resolution ................................31
speed ......................................31
S
Status lights .................................. 7
T
Toner
capacity...................................32
Transparencies
recommended type ...................11