When a mark is removed; this source does not appear
in the OSD when you press the “SOURCE” button of
the remote control.
Note: Once you have connected optional equipment systems
to your TV, you should select the required input to view
pictures from that source.
Note: YPbPr mode can be use only when you connect a
device that has a YPbPr output through the PC input with
YPbPr to PC cable (YPbPr cable is not supplied).
PC Mode Menu System
See “Connecting the LCD TV to a PC” section for
connecting a PC to the TV set.
For switching to PC source, press “SOURCE” button
on your remote control and select PC input. You can
also use “Source” menu to switch to PC mode.
Note that PC mode menu settings are available only while
the TV is in PC source.
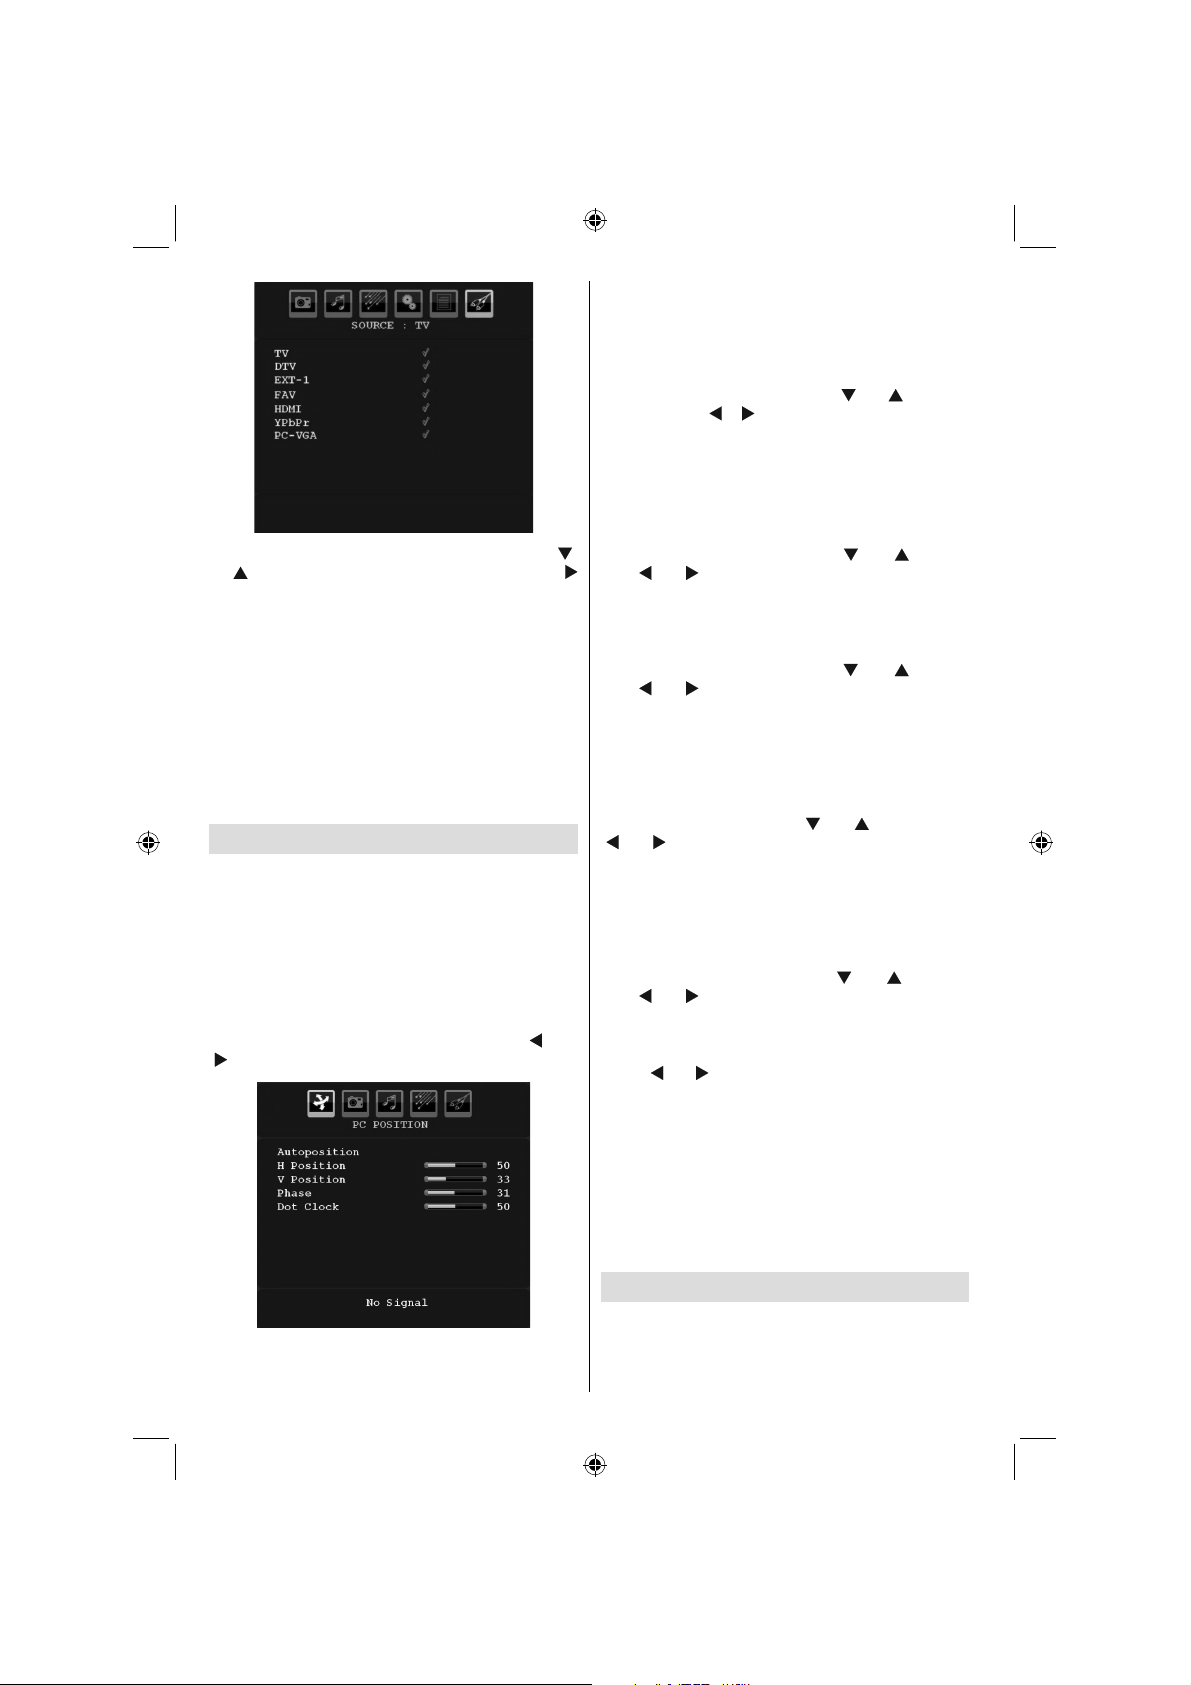
PC Position Menu
Select the first icon by pressing “” or
“” button. PC Position menu appears on the screen:
Autoposition
If you shift the picture horizontally or vertically to an
unwanted position, use this item to put the picture
into correct place automatically. This setting therefore
automatically optimizes the display.
Select Autoposition item by using “” or “” buttons.
Press “OK” or “”, “” button.
Warning: Please ensure auto adjustment is performed
with a full screen image to ensure best results.
H (Horizontal) Position
This item shifts the image horizontally to right hand
side or left hand side of the screen.
Select H Position item by using “” or “” button.
Use “” or “” button to adjust the value.
V (Vertical) Position
This item shifts the image vertically towards the top
or bottom of the screen.
Select V Position item by using “” or “” button.
Use “” or “” button to adjust the value.
Phase
Depending on the resolution and scan frequency that
you input to the TV set, you may see a hazy or noisy
picture on the screen. In such a case you can use this
item to get a clear picture by trial and error method.
Select Phase item by using “” or “” buttons. Use
“” or “” button to adjust the value.
Dot Clock
Dot Clock adjustments correct the interference
that appear as vertical banding in dot intensive
presentations like spreadsheets or paragraphs or
text in smaller fonts.
Select Dot Clock item by using “” or “” buttons.
Use “” or “” button to adjust the value.
PC Picture Menu
For adjusting PC picture items, do the following:
Press “” or “” button to select the second icon. PC
Picture menu appears on the screen.
Contrast, Brightness, Colour andColour
Temperature settings in this menu are identical to
settings de ned in TV picture menu under “Analogue
TV Menu System”.
Note: If you set Colour Temp as User, you can de ne R, G,
B settings manually.
Sound, Featureand Sourcesettings are identical to the
settings explained in Analog Tv menu system.
Displaying TV Information
Programme Number, Programme Name, Sound
Indicator and Zoom Mode information is displayed
on the screen when a new programme is entered or
“INFO” button is pressed.
MB45_[GB]_3902UK_IDTV_BRONZE11_22920W_LED_POWER SAVE MODE_10068917_50168693.indd 24MB45_[GB]_3902UK_IDTV_BRONZE11_22920W_LED_POWER SAVE MODE_10068917_50168693.indd 2404.06.2010 17:15:0504.06.2010 17:15:05
Libble takes abuse of its services very seriously. We're committed to dealing with such abuse according to the laws in your country of residence. When you submit a report, we'll investigate it and take the appropriate action. We'll get back to you only if we require additional details or have more information to share.
Product:
Forumrules
To achieve meaningful questions, we apply the following rules:
First, read the manual;
Check if your question has been asked previously;
Try to ask your question as clearly as possible;
Did you already try to solve the problem? Please mention this;
Is your problem solved by a visitor then let him/her know in this forum;
To give a response to a question or answer, do not use this form but click on the button 'reply to this question';
Your question will be posted here and emailed to our subscribers. Therefore, avoid filling in personal details.
Register
Register getting emails for Nutech 22920 FHD at:
new questions and answers
new manuals
You will receive an email to register for one or both of the options.
Get your user manual by e-mail
Enter your email address to receive the manual of Nutech 22920 FHD in the language / languages: English as an attachment in your email.
The manual is 3,7 mb in size.
You will receive the manual in your email within minutes. If you have not received an email, then probably have entered the wrong email address or your mailbox is too full. In addition, it may be that your ISP may have a maximum size for emails to receive.
The manual is sent by email. Check your email
If you have not received an email with the manual within fifteen minutes, it may be that you have a entered a wrong email address or that your ISP has set a maximum size to receive email that is smaller than the size of the manual.
The email address you have provided is not correct.
Please check the email address and correct it.
Your question is posted on this page
Would you like to receive an email when new answers and questions are posted? Please enter your email address.