below. Note that cables shown in the illustration are
not supplied.
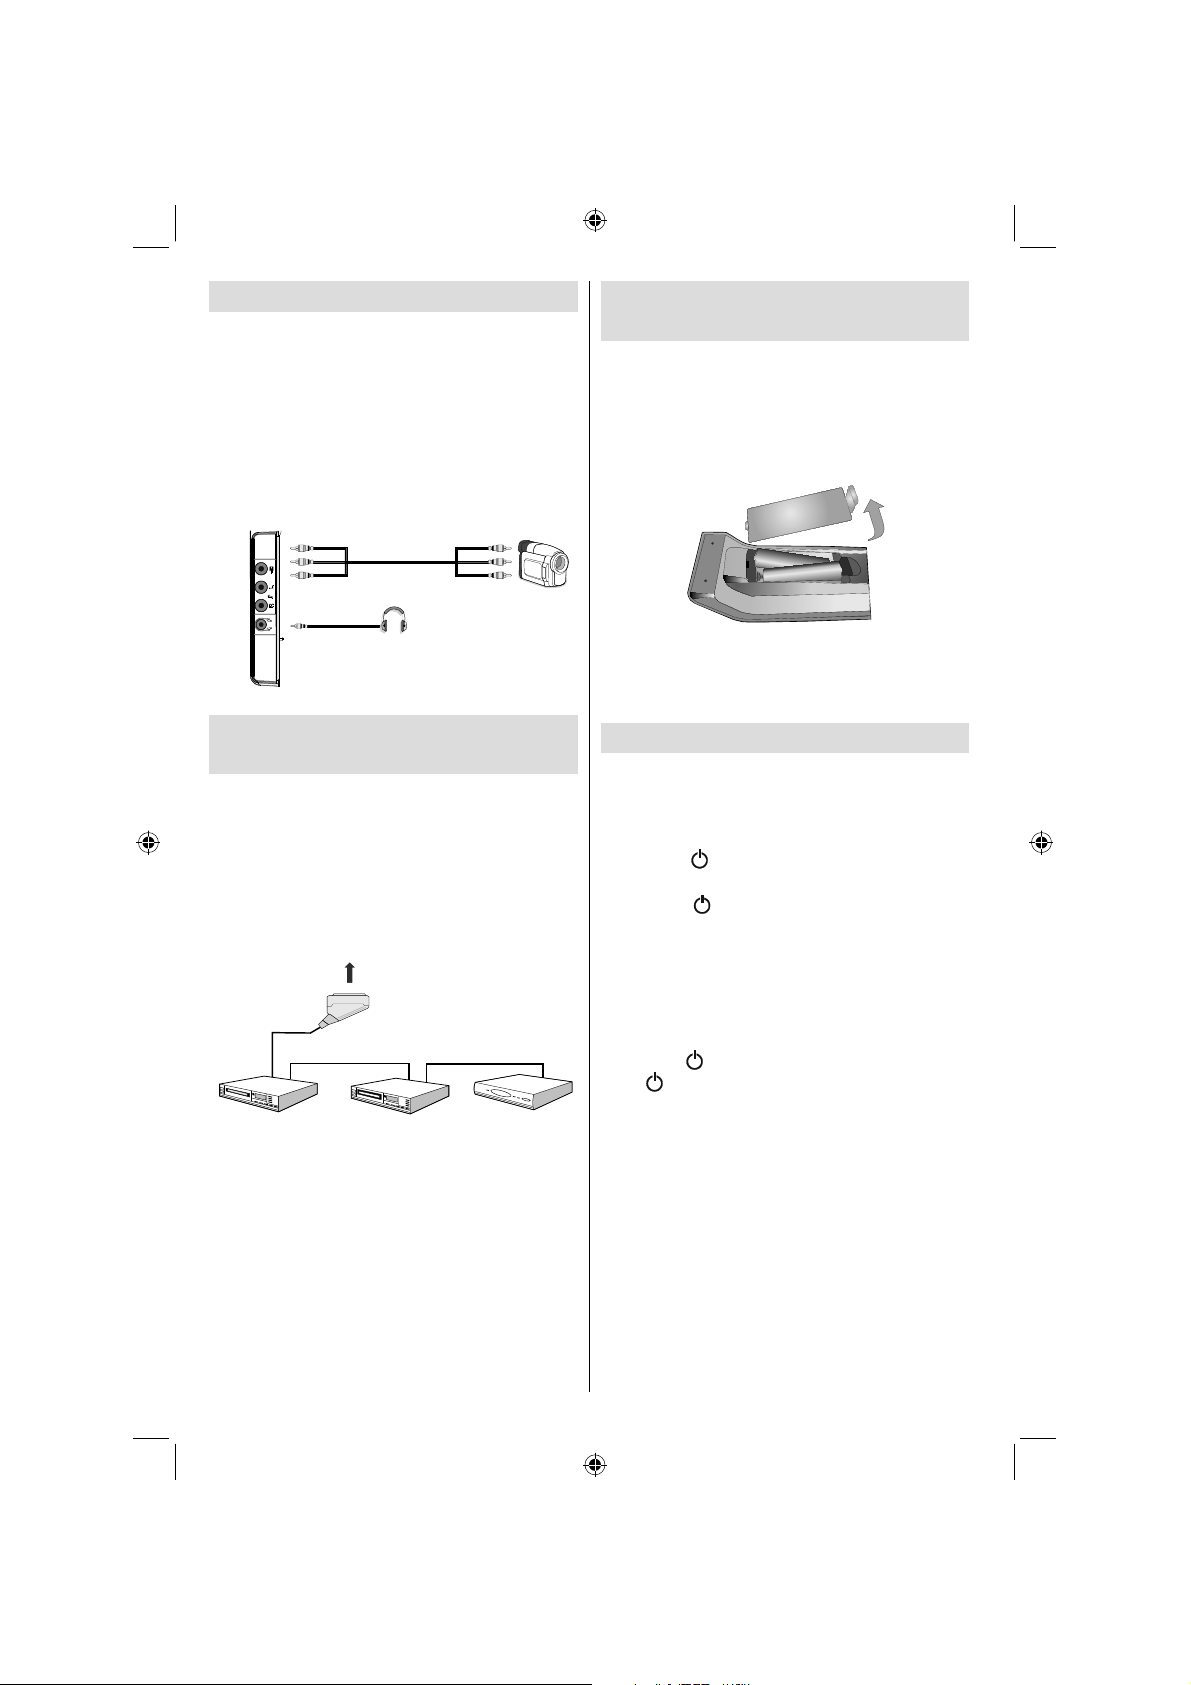
• For connecting a camcorder, connect to the VIDEO
IN socket and the AUDIO SOCKETS. For selecting
the related source, see the section “Input selection”
in the following parts.
• To listen the TV sound from headphones, connect
to the HEADPHONE jack of theTV
Headphone
Connecting Other Equipment
via Scart
Most devices support SCART connection. You can
connect a; DVD recorder, a VCR or a decoder to
your LCD TV by using the SCART socket. Note that
cables shown in the illustration are not supplied.
Power off both the TV and the devices before making
any connections.
For more information, refer to your device’s own
instruction book.
SCARTsocket
Decoder
DVD RecorderVideo Recorder
Inserting Batteries into the
Remote Control
• Remove the battery cover located on the back of
the remote control by gently pulling backwards from
the indicated part.
• Insert x2 AAA/R3 or equivalent type batteries into the
remote control. Please ensure the correct polarity is
observed and replace the battery cover.
+
+
--
Note: Remove the battery from remote control when it is not
to be used for a long period. Otherwise it can be damaged
due to any leakage of batteries.
Switching the TV On/Off
To Switch the TV On
• Connect the power cord to the 220-240V AC 50 Hz.
Then the standby LED lights up.
• To switch on the TV from standby mode either:
• Press the “” button, P+ / P- or a numeric button
on the remote control.
• Press the “” button, -P/CH or P/CH+button on
the TV. The TV will then switch on.
Note: If you switch on your TV via standby button on the
remote control, the programme/source that you were
watching last will be reselected.
By either method the TV will switch on.
To Switch the TV Off
• Press the “” button on the remote control or press
the “” switch on the TV, so the TV will switch to
standby mode.
• To power down the TV completely, unplug the
power cord from the mains socket.
Note: When the TV is switched to standby mode, standby LED
can blink to indicate that features such as Standby Search,
Over Air Download or Timer is active.
MB45_[GB]_3902UK_IDTV_BRONZE11_22920W_LED_POWER SAVE MODE_10068917_50168693.indd 10MB45_[GB]_3902UK_IDTV_BRONZE11_22920W_LED_POWER SAVE MODE_10068917_50168693.indd 1004.06.2010 17:14:5804.06.2010 17:14:58
Libble takes abuse of its services very seriously. We're committed to dealing with such abuse according to the laws in your country of residence. When you submit a report, we'll investigate it and take the appropriate action. We'll get back to you only if we require additional details or have more information to share.
Product:
Forumrules
To achieve meaningful questions, we apply the following rules:
First, read the manual;
Check if your question has been asked previously;
Try to ask your question as clearly as possible;
Did you already try to solve the problem? Please mention this;
Is your problem solved by a visitor then let him/her know in this forum;
To give a response to a question or answer, do not use this form but click on the button 'reply to this question';
Your question will be posted here and emailed to our subscribers. Therefore, avoid filling in personal details.
Register
Register getting emails for Nutech 22920 FHD at:
new questions and answers
new manuals
You will receive an email to register for one or both of the options.
Get your user manual by e-mail
Enter your email address to receive the manual of Nutech 22920 FHD in the language / languages: English as an attachment in your email.
The manual is 3,7 mb in size.
You will receive the manual in your email within minutes. If you have not received an email, then probably have entered the wrong email address or your mailbox is too full. In addition, it may be that your ISP may have a maximum size for emails to receive.
The manual is sent by email. Check your email
If you have not received an email with the manual within fifteen minutes, it may be that you have a entered a wrong email address or that your ISP has set a maximum size to receive email that is smaller than the size of the manual.
The email address you have provided is not correct.
Please check the email address and correct it.
Your question is posted on this page
Would you like to receive an email when new answers and questions are posted? Please enter your email address.