204 205
No
En
Jp
Fr
Es
Pt
Ru
Se
Nl
De
It
Dk
Pl
Hu
Cz
Fi
Ro
No
En
Jp
Fr
Es
Pt
Ru
Se
Nl
De
It
Dk
Pl
Hu
Cz
Fi
Ro
Sammendrag av bruk
Forsiktig: Bruk a
utførelse av pr
som beskrives her
farlig stråling.
1.
batteri)
2. Diopterjustering
Juster diopteret slik at du får et klar
skjermen.
Roter først diopterjusteringsringen mot urviseren til
den stopper helt opp. Slå der
å aktivere L
laseravstandsmåleren. Roter diopt
med urviseren til displayet kommer i fokus.
Hvis diopteret ik
ditt syn, vil du kanskje ik
objektet.
3. Måle
Før du for
innstillingen av enheten.
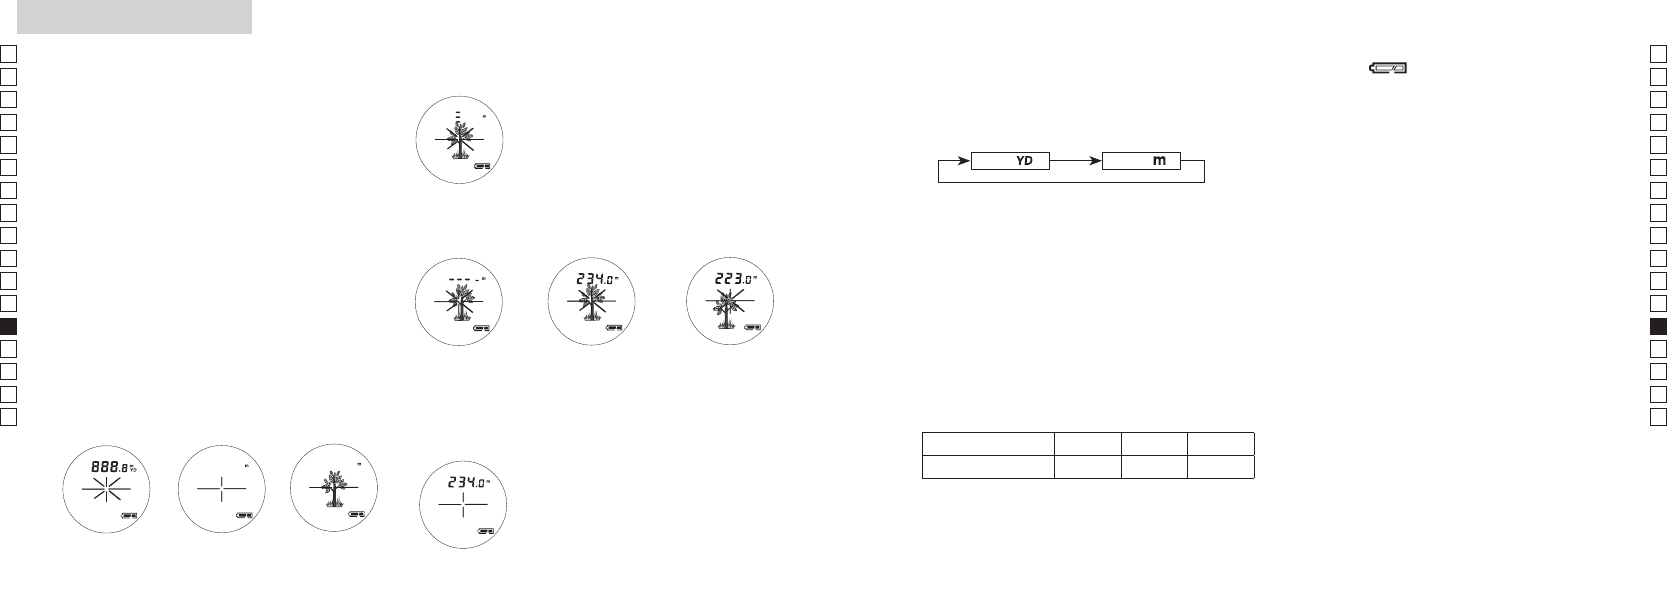
Measurement
1. Press the POWER button for power-on.
(Power turns off 8 seconds after the last
operation.)
Immediately after power-on.
(Initializing)
Stand-by. Target focusing.
2. Aim at the target
.
3. Press POWER button once to start
continuous measurement for 8 seconds.
(Single measurement mode is not
available with this laser rangefinder.)
Measuring.
4. For 8 seconds, the internal display shows “distance” and “fail to measure” indicator alternately.
(Laser irradiation mark is blinking.)
Failure to measure or
unable to measure distance.
Displays the measured
figure. (Target 1)
Displays the measured
figure. (Target 2)
5. After continuous measurement, the measured results are displayed for 8 seconds, then power
turns off.
If you press the POWER button during power-on (while the internal display is lit), another
8-second measurement starts.
1.
for å slå på strømmen.
2. Sikt på målet.
Umiddelbart etter
at strømmen er slått
på.(Initialiserer)
Standby Målfokusering.
3.
i 8 sekunder
laseravstandsmåleren.)
Måler
4. I 8 sekunder viser det interne displayet vekselvis symbolet f
og mislykket måling. (Laserstrålemerket blinker
Mislyktes i å måle eller
Viser den målte
avstanden. (Mål 1)
Viser den målte
avstanden. (Mål 2)
Measurement
1. Press the POWER button for power-on.
(Power turns off 8 seconds after the last
operation.)
Immediately after power-on.
(Initializing)
Stand-by. Target focusing.
2. Aim at the target
.
3. Press POWER button once to start
continuous measurement for 8 seconds.
(Single measurement mode is not
available with this laser rangefinder.)
Measuring.
4. For 8 seconds, the internal display shows “distance” and “fail to measure” indicator alternately.
(Laser irradiation mark is blinking.)
Failure to measure or
unable to measure distance.
Displays the measured
figure. (Target 1)
Displays the measured
figure. (Target 2)
5. After continuous measurement, the measured results are displayed for 8 seconds, then power
turns off.
If you press the POWER button during power-on (while the internal display is lit), another
8-second measurement starts.
5. Etter kontinuerlig måling vises de målte resultatene i 8 sekunder
deretter slås strømmen av
strømmen er på (mens det interne displayet er aktivt), starter en
ny 8-sekunders måling.
Hvis du for eksempel måler avstanden til et flagg på golfbanen,
søker du etter flagget under målingen for å for
Hvis det ikke er noen objekter mellom deg og flagget, er det
korteste resultatet avstanden til flagget.
4. V(standardinnstilling er yar
1.
2.
lenger).
3.
knappen.
4.
vist i den måleenheten du har valgt.
Meter [ ]Ya [ ]
6. Symbol for svakt ba
Blinkende viser at batteriet er svakt og at det
bør skiftes. (Se Sk
7. Bakgrunnslys
Bruk bakgrunnslyset for å se L
mørkt.
Du kan slå bakgrunnslyset på eller av ved å tryk
kort på modusk
mens strømmen er på. Bakgrunnslyset kan også
slås av ved å slå av lasera
gjør det, vil bakgrunnslyset være a
laseravstandsmåleren igjen.
5. Av
COOLSHO
mål. Hvis det innhentes forskjellige r
enkelt måling, vil den vise avstanden til nærmeste mål
på L
Eks.:
115 m (avstand til treet) vises
Dette er nyttig hvis du spiller golf
Tr Gjer Hus
Avstand til mål 115 m 123 m 128 m