92 93
It
En
Jp
Fr
Es
Pt
Ru
Se
Nl
De
Dk
Pl
Hu
Cz
Fi
No
Ro
It
En
Jp
Fr
Es
Pt
Ru
Se
Nl
De
Dk
Pl
Hu
Cz
Fi
No
Ro
Sommario del funzionamento
Attenzione: l'uso di c
procedure div
presente manuale può causare l'
radiazioni pericolose
1.
"Sostituzione delle batterie").
2. Regolazione diottrica
Effettuare una regolazione diottrica in modo da
ottenere un'immagine nitida sul displa
Prima, ruotare l'anello di regolazione diottrica
in senso antiorario finché non si arresta. Quindi
accendere (on) l'unità per attivar
guardando attrav
Ruotare l'anello di regolazione diottrica in senso
orario finché il display non è a fuoco
Se non si effettua la regolazione diottrica in modo
da adeguarla alla propria vista, è possibile non
riuscire a puntare corr
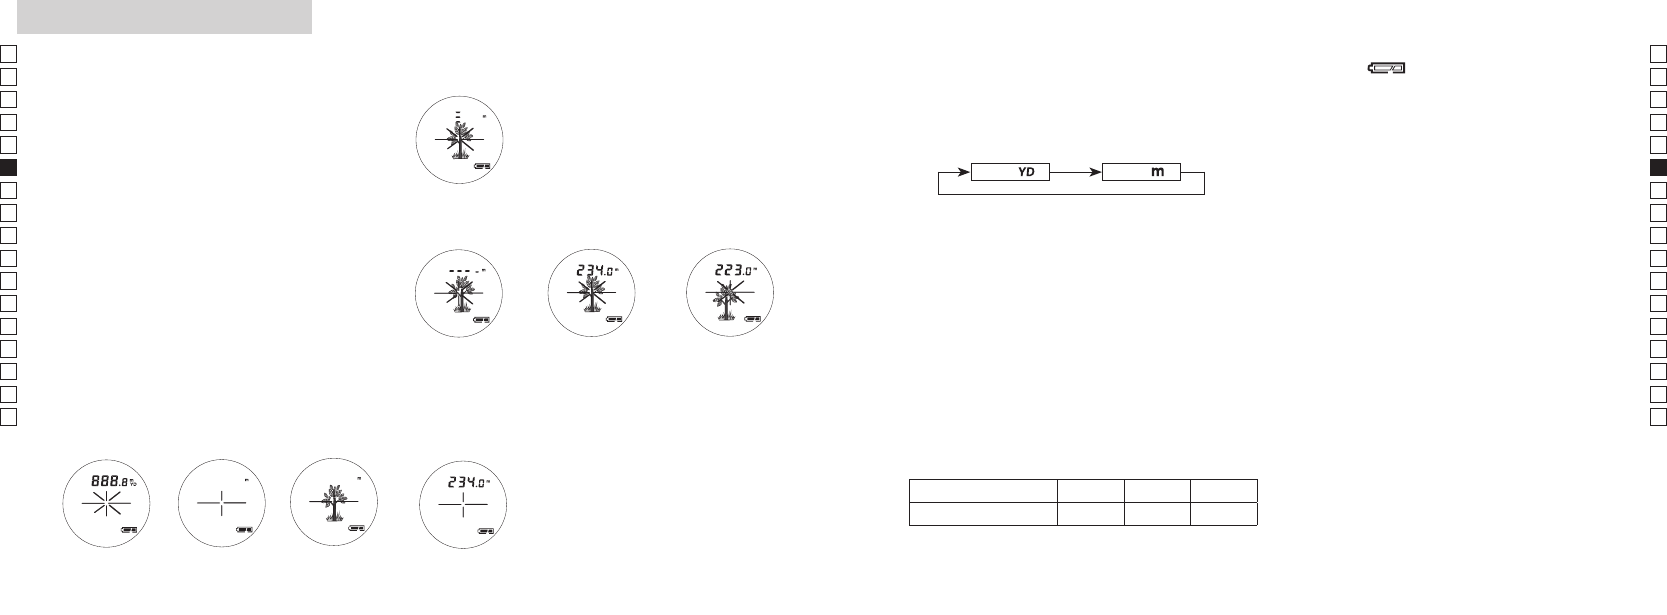
3. Misurazione
Prima di effettuare la misurazione, c
l'impostazione dell'unità di misura.
Measurement
1. Press the POWER button for power-on.
(Power turns off 8 seconds after the last
operation.)
Immediately after power-on.
(Initializing)
Stand-by. Target focusing.
2. Aim at the target
.
3. Press POWER button once to start
continuous measurement for 8 seconds.
(Single measurement mode is not
available with this laser rangefinder.)
Measuring.
4. For 8 seconds, the internal display shows “distance” and “fail to measure” indicator alternately.
(Laser irradiation mark is blinking.)
Failure to measure or
unable to measure distance.
Displays the measured
figure. (Target 1)
Displays the measured
figure. (Target 2)
5. After continuous measurement, the measured results are displayed for 8 seconds, then power
turns off.
If you press the POWER button during power-on (while the internal display is lit), another
8-second measurement starts.
1. Premere il tast
per accendere l'unità. 2. Mirare al bersaglio.
Immediatamente
dopo l'accensione
(inizializzazione).
Stand-by Puntamento del
bersaglio.
3. Premere il pulsan
continua per 8 secondi (la modalità a singola misurazione non è
disponibile su questo telemetro laser).
Misurazione in corso.
4. Per 8 secondi, il displa
di "distanza" e "misurazione non riuscita" (il simbolo di emissione laser
lampeggia).
Misurazione non riuscita
o impossibile effettuare
la misurazione della
distanza.
Visualizza il
valore misurato
(bersaglio 1)
Visualizza il valore
misurato
(bersaglio 2)
Measurement
1. Press the POWER button for power-on.
(Power turns off 8 seconds after the last
operation.)
Immediately after power-on.
(Initializing)
Stand-by. Target focusing.
2. Aim at the target
.
3. Press POWER button once to start
continuous measurement for 8 seconds.
(Single measurement mode is not
available with this laser rangefinder.)
Measuring.
4. For 8 seconds, the internal display shows “distance” and “fail to measure” indicator alternately.
(Laser irradiation mark is blinking.)
Failure to measure or
unable to measure distance.
Displays the measured
figure. (Target 1)
Displays the measured
figure. (Target 2)
5. After continuous measurement, the measured results are displayed for 8 seconds, then power
turns off.
If you press the POWER button during power-on (while the internal display is lit), another
8-second measurement starts.
5. Dopo la misurazione continua, i risultati misurati verranno
visualizzati per 8 secondi, quindi l'unità si spegnerà. Pr
tasto POWER durante l'accensione (cacceso),
verrà avviata una nuova misurazione per 8 secondi.
Se ad esempio si misura la distanza da un'asticella segnabuca in
un campo di golf, scansionar
per facilitare la misura. Se non vi sono oggetti tra l'utente e
l'asticella segnabuca, il risultato inferiore è la distanza dall'astic
segnabuca.
4. Selezione dell'unità di misura di visualizzazione
(l'impostazione predefinita è iarde)
1.
2.
più).
3.
visualizzazione, rilasciare il tasto MODE.
4.
risultati verranno conv
misura selezionata.
Metri [ ]Iarde [ ]
6. Indicatore di carica bassa della batteria
Il simbolo lampeggiante indica che il
livello di carica della batteria è basso e che occorre
sostituire la batteria (veder
della batteria").
7. Retroilluminazione
Utilizzare la retroilluminazione per v
L
Premendo il tast
quando lo strumento è acceso
o disattivare la retr
disattivare la retr
il telemetro laser
sarà disattiva alla successiva ac
strumento
5.
Il COOLSHO
vicino (First
Quando si ottengono due risultati diversi da un'unica
operazione di misurazione, il telemetr
distanza dal bersaglio più vicino sul pannello L
Ad es., misurazione della distanza di un alber
fronte a una casa;
verrà visualizzato il valor
Questa funzione è utile per il golf.
Albero Recinto Casa
Distanza dal bersaglio 115 m 123 m 128