This file contains Original Code and/or Modifications of Original Code as defined in and
that are subject to the Apple Public Source License Version 2.0 (the ‘License’). You may
not use this file except in compliance with the License.
Please obtain a copy of the License at http://www.opensource.apple.com/apsl/ and
read it before using this file.
The Original Code and all software distributed under the License are distributed on an
‘AS IS’ basis, WITHOUT WARRANTY OF ANY KIND, EITHER EXPRESS OR IMPLIED, AND
APPLE HEREBY DISCLAIMS ALL SUCH WARRANTIES, INCLUDING WITHOUT LIMITATION,
ANY WARRANTIES OF MERCHANTABILITY, FITNESS FOR A PARTICULAR PURPOSE, QUIET
ENJOYMENT OR NON-INFRINGEMENT. Please see the License for the specific language
governing rights and limitations under the License.
i
Introduction
First Steps
A
Basic Photography and Playback:
Auto Mode
B
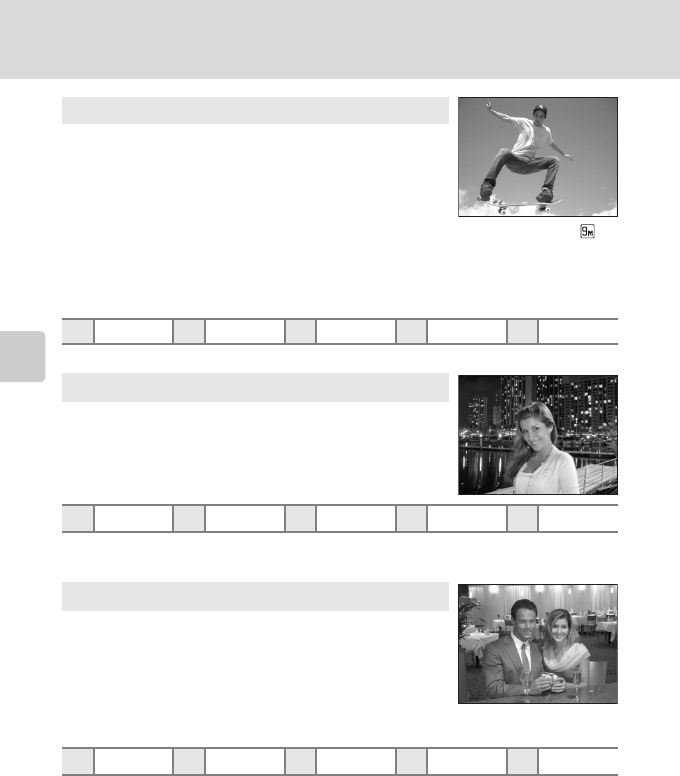
High-Sensitivity Shooting Mode
C
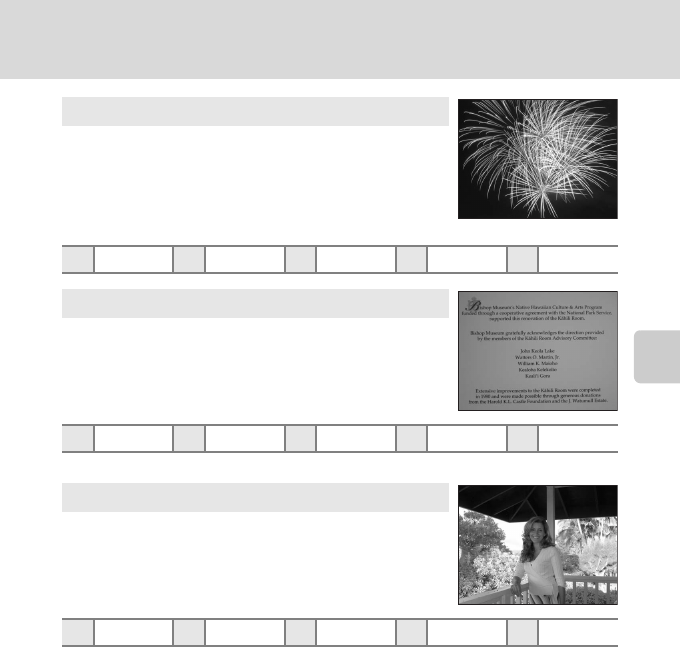
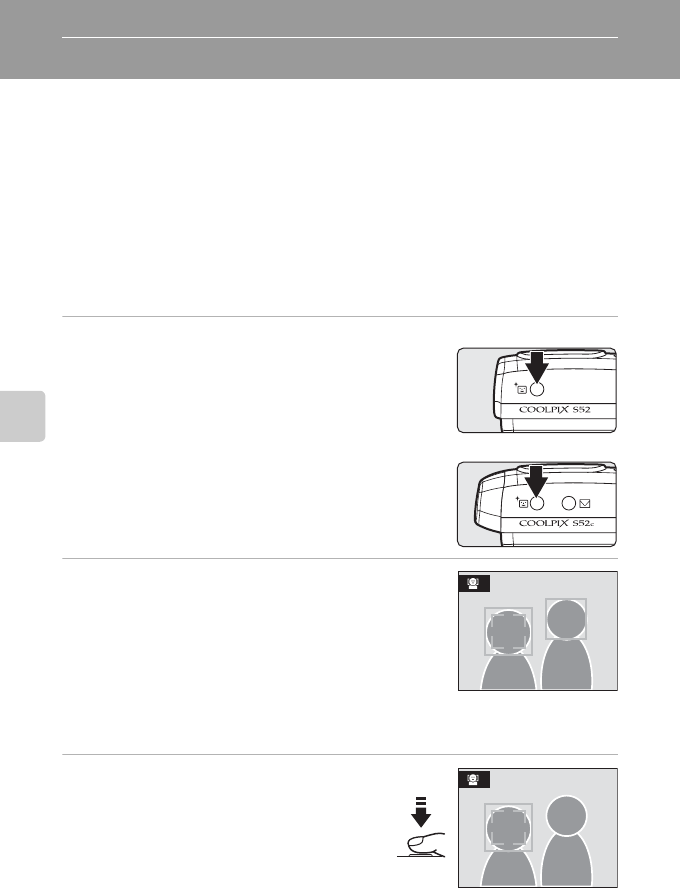
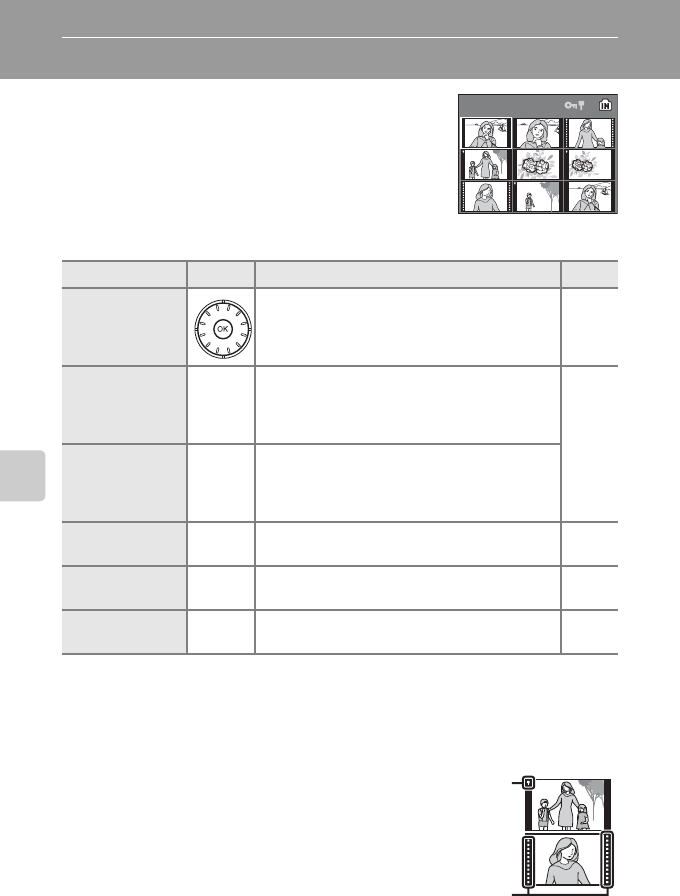
Shooting Suited for the Scene
b
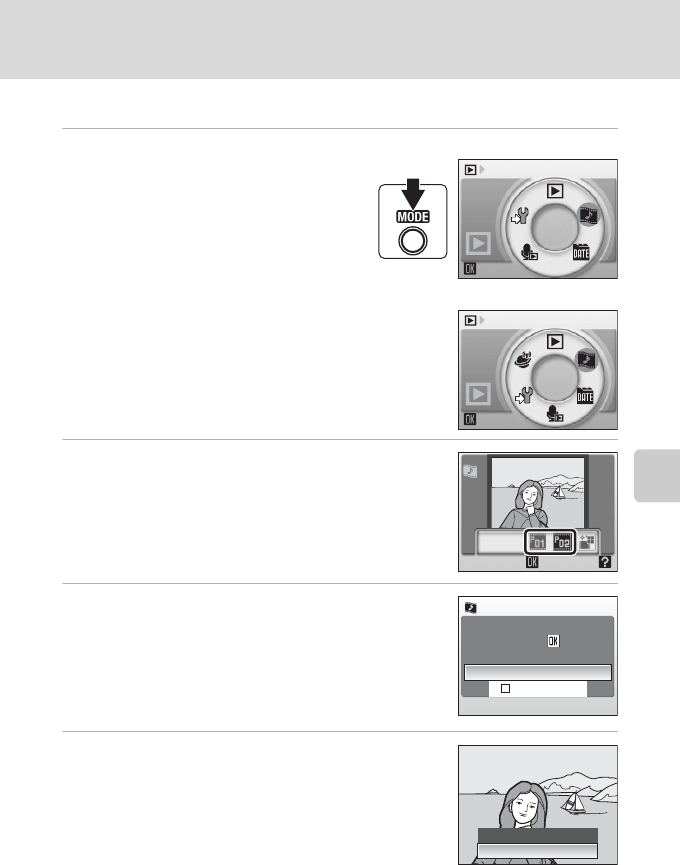
Shooting in One-Touch Portrait Mode
c
More on Playback
D
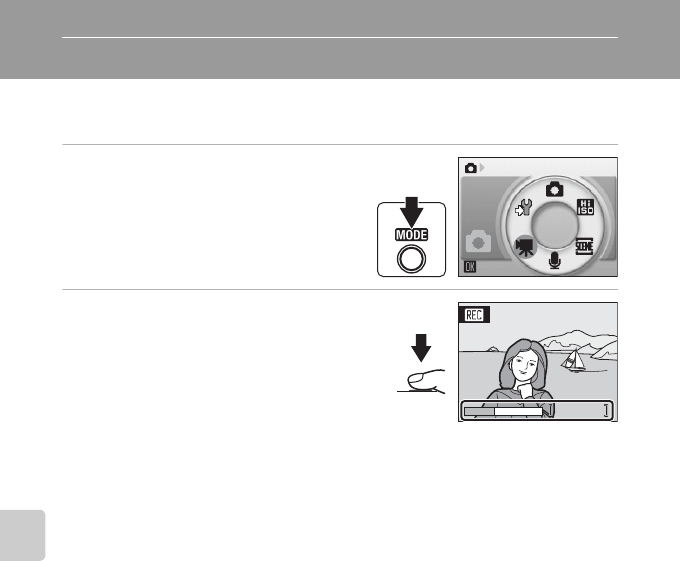
Movies
E
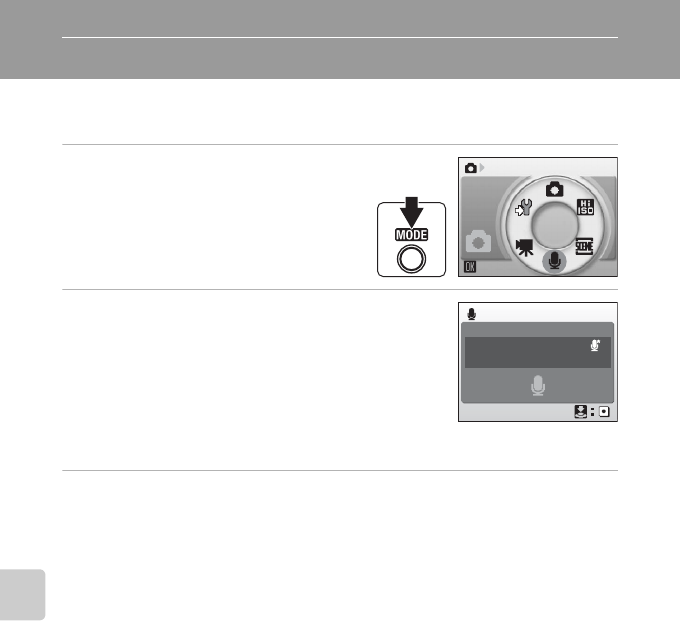
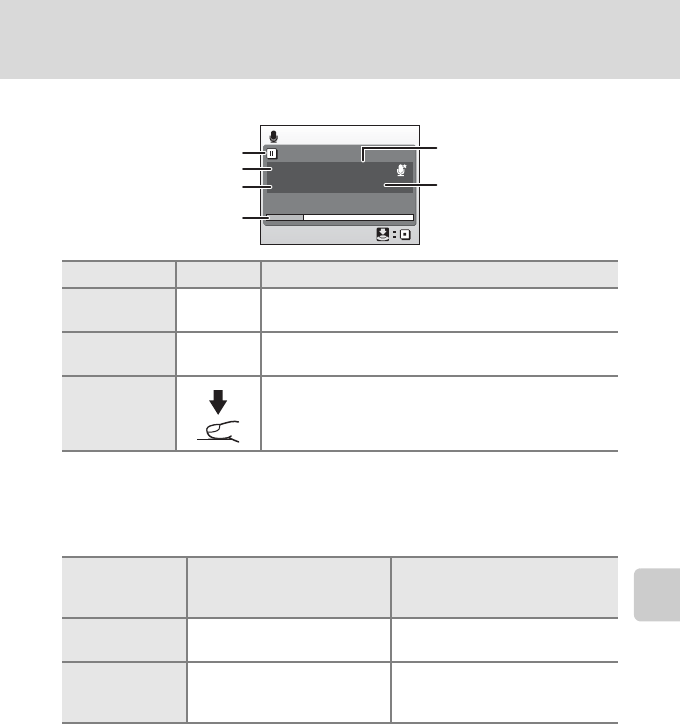
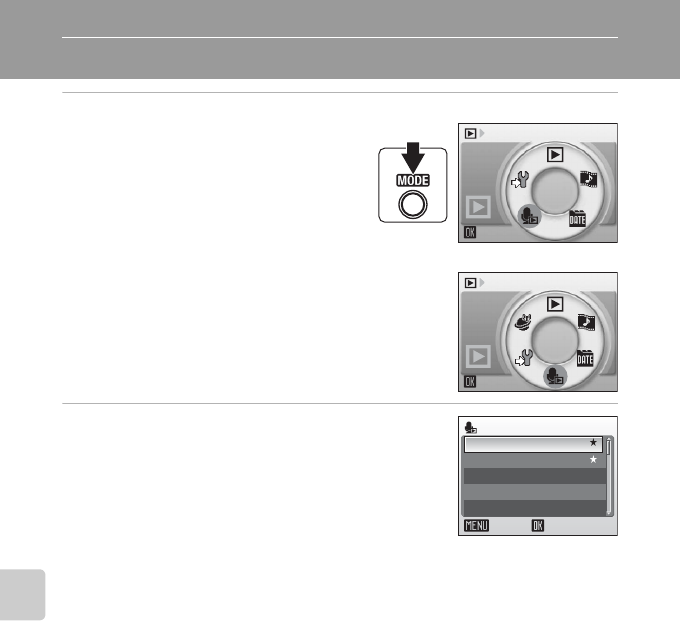
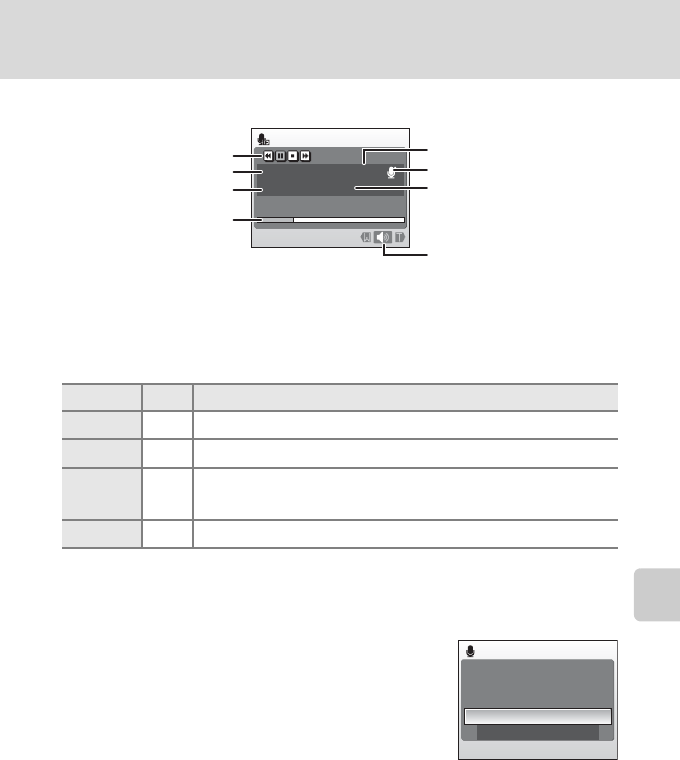
Voice Recordings
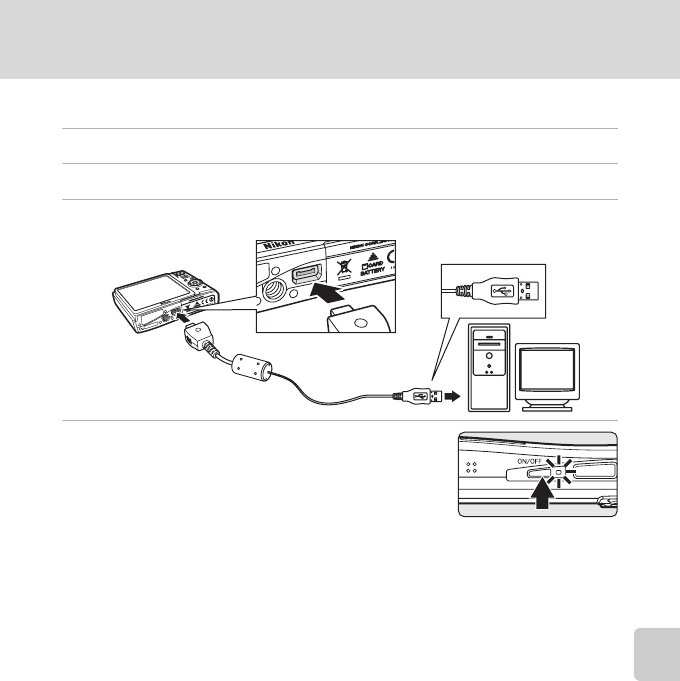
Connecting to Televisions, Computers, and Printers
d
Shooting, Playback, and Setup Menus
Technical Notes
ii
For Your Safety
To prevent damage to your Nikon product or injury to yourself or to others, read
the following safety precautions in their entirety before using this equipment.
Keep these safety instructions where all those who use the product will read them.
The consequences that could result from failure to observe the precautions listed
in this section are indicated by the following symbol:
WARNINGS
Turn off in the Event of
Malfunction
Should you notice smoke or an
unusual smell coming from the
camera or AC adapter, unplug the AC
adapter and remove the battery
immediately, taking care to avoid
burns. Continued operation could
result in injury. After removing or
disconnecting the power source, take
the equipment to a Nikon-authorized
service representative for inspection.
Do not Disassemble
Touching the internal parts of the
camera or AC adapter could result in
injury. Repairs should be performed
only by qualified technicians. Should
the camera or AC adapter break open
as the result of a fall or other accident,
take the product to a Nikon-authorized
service representative for inspection,
after unplugging the product and/or
removing the battery.
Do not use the Camera or AC
Adapter in the Presence of
Flammable Gas
Do not use electronic equipment in
the presence of flammable gas, as this
could result in explosion or fire.
Handle the Camera Strap with
Care
Never place the strap around the neck
of an infant or child.
Keep out of Reach of Children
Particular care should be taken to
prevent infants from putting the
battery or other small parts into their
mouths.
This icon marks warnings, information that should be read before using this Nikon
product to prevent possible injury.
iii
For Your Safety
Observe the following
precautions when handling
the battery
The battery may leak or explode if
improperly handled. Observe the
following precautions when handling
the battery for use in this product:
•Before replacing the battery, turn
the product off. If you are using the
AC adapter, be sure it is unplugged.
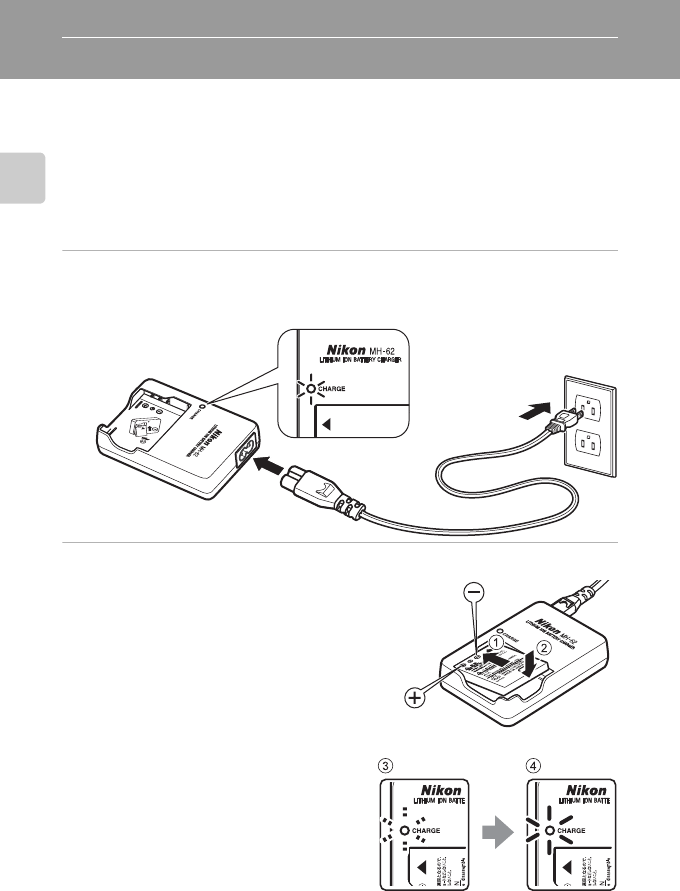
•Use only a Rechargeable Li-ion
Battery EN-EL8 (supplied). Charge
the battery by inserting it into a
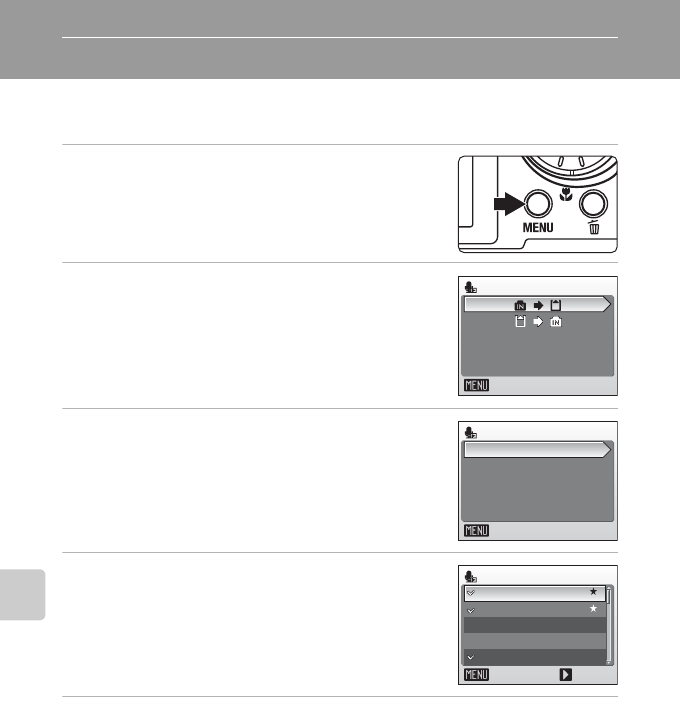
Battery Charger MH-62 (supplied
only with the COOLPIX S52), or by
inserting it into the camera and
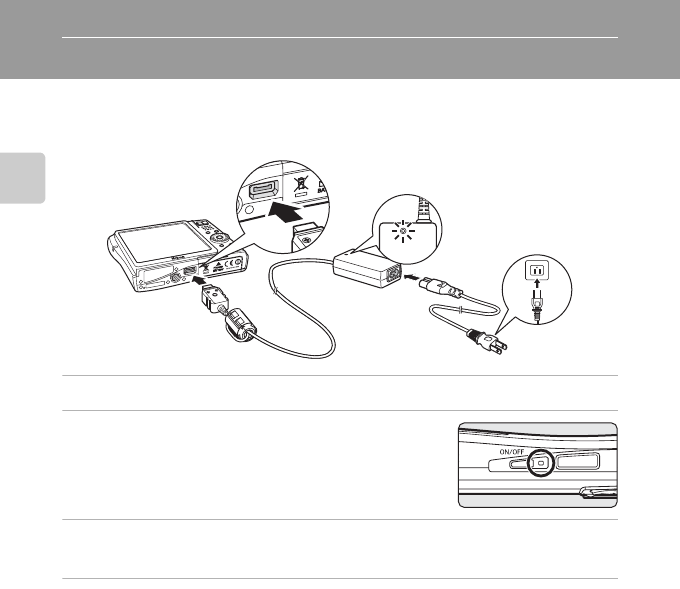
connecting the AC Adapter EH-63
(supplied only with the COOLPIX
S52c).
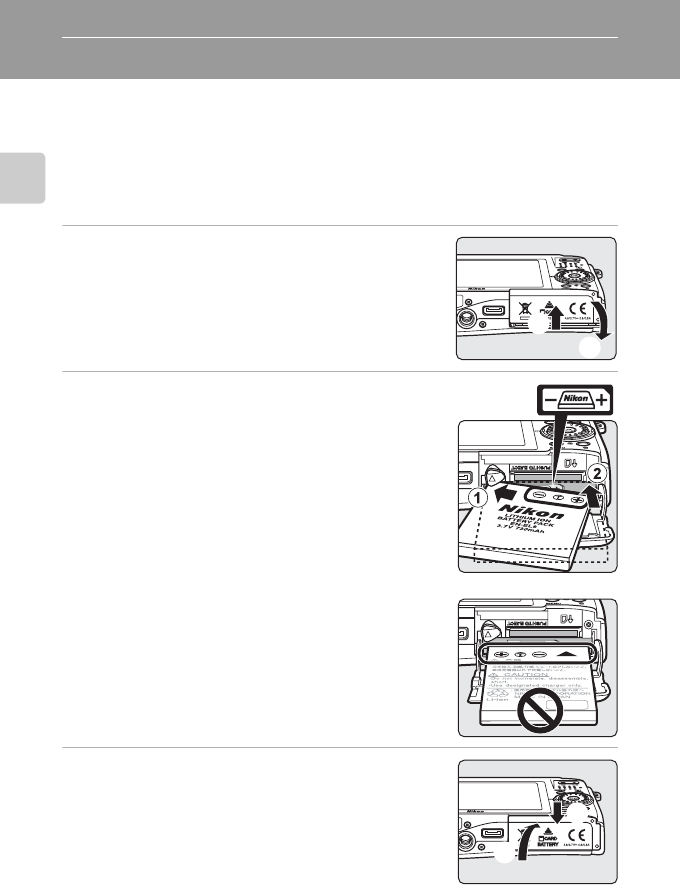
•When inserting the battery, do not
attempt to insert it upside down or
backwards.
•Do not short or disassemble the
battery or attempt to remove or
break the battery insulation or
casing.
•Do not expose the battery to flame
or to excessive heat.
•Do not immerse in or expose to
water.
•Replace the terminal cover when
transporting the battery. Do not
transport or store with metal objects
such as necklaces or hairpins.
•The battery is prone to leakage
when fully discharged. To avoid
damage to the product, be sure to
remove the battery when no charge
remains.
•Discontinue use immediately should
you notice any change in the
battery, such as discoloration or
deformation.
•If liquid from the damaged battery
comes in contact with clothing or
skin, rinse immediately with plenty
of water.
Observe the following
precautions when handling
the battery charger
•Keep dry. Failure to observe this
precaution could result in fire or
electric shock.
•Dust on or near the metal parts of
the plug should be removed with a
dry cloth. Continued use could
result in fire.
•Do not handle the power cable or
go near the battery charger during
lightening storms. Failure to observe
this precaution could result in
electric shock.
•Do not damage, modify, forcibly tug
or bend the power cable, place it
under heavy objects, or expose it to
heat or flame. Should the insulation
be damaged and the wires become
exposed, take it to a Nikon-
authorized service representative for
inspection. Failure to observe these
precautions could result in fire or
electric shock.
•Do not handle the plug or battery
charger with wet hands. Failure to
observe this precaution could result
in electric shock.
iv
For Your Safety
Use appropriate cables
When connecting cables to the input
and output jacks, use only the cables
provided or sold by Nikon for the
purpose, to maintain compliance with
product regulations.
Handle moving parts with
care
Be careful that your fingers or other
objects are not pinched by the lens
cover or other moving parts.
CD-ROMs
The CD-ROMs supplied with this
device should not be played back on
audio CD equipment. Playing CD-
ROMs on an audio CD player could
cause hearing loss or damage the
equipment.
Observe caution when using
the flash
Using the flash close to your subject’s
eyes could cause temporary visual
impairment. Particular care should be
observed if photographing infants,
when the flash should be no less than
one meter (39 in.) from the subject.
Do not operate the flash with
the flash window touching a
person or object
Failure to observe this precaution
could result in burns or fire.
Avoid contact with liquid
crystal
Should the monitor break, care should
be taken to avoid injury caused by
broken glass and to prevent liquid
crystal from the monitor touching the
skin or entering the eyes or mouth.
v
Notices
Notice for Customers in the
U.S.A.
Federal Communications
Commission (FCC) Radio
Frequency Interference Statement
This equipment has been tested and
found to comply with the limits for a
Class B digital device, pursuant to Part
15 of the FCC rules. These limits are
designed to provide reasonable
protection against harmful
interference in a residential installation.
This equipment generates, uses, and
can radiate radio frequency energy
and, if not installed and used in
accordance with the instructions, may
cause harmful interference to radio
communications. However, there is no
guarantee that interference will not
occur in a particular installation. If this
equipment does cause harmful
interference to radio or television
reception, which can be determined
by turning the equipment off and on,
the user is encouraged to try to correct
the interference by one or more of the
following measures:
•Reorient or relocate the receiving
antenna.
•Increase the separation between the
equipment and receiver.
•Connect the equipment into an
outlet on a circuit different from that
to which the receiver is connected.
•Consult the dealer or an
experienced radio/television
technician for help.
CAUTIONS
Modifications
The FCC requires the user to be
notified that any changes or
modifications made to this device that
are not expressly approved by Nikon
Corporation may void the user’s
authority to operate the equipment.
Interface Cables
Use the interface cables sold or
provided by Nikon for your equipment.
Using other interface cables may
exceed the limits of Class B Part 15 of
the FCC rules.
Notice for customers in the State of
California
WARNING: Handling the cord on this
product will expose you to lead, a
chemical known to the State of
California to cause birth defects or
other reproductive harm. Wash hands
after handling.
Nikon Inc.,
1300 Walt Whitman Road
Melville, New York 11747-3064
USA
Tel: 631-547-4200
COOLPIX S52/S52c
vi
Notices
Notice for customers in Canada
CAUTION
This Class B digital apparatus complies
with Canadian ICES-003.
ATTENTION
Cet appareil numérique de la classe B
est conforme à la norme NMB-003 du
Canada.
Symbol for Separate Collection
in European Countries
This symbol indicates that
this product is to be
collected separately.
The following apply only to
users in European countries:
•This product is designated for
separate collection at an
appropriate collection point. Do not
dispose of as household waste.
•For more information, contact the
retailer or the local authorities in
charge of waste management.
vii
Table of Contents
For Your Safety........................................................................................................................................ii
About This Manual ................................................................................................................................1
Information and Precautions.............................................................................................................2
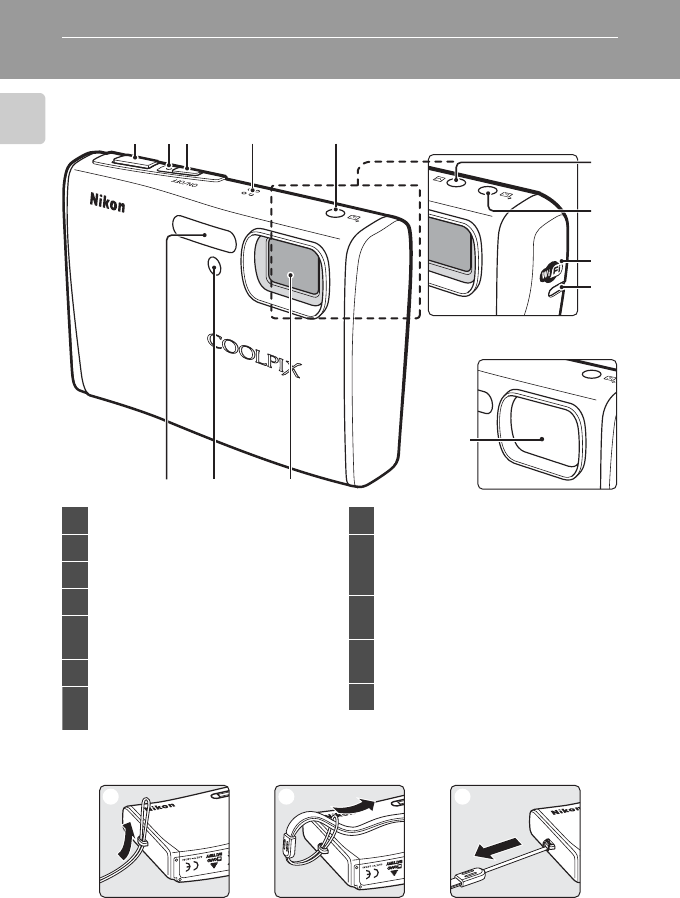
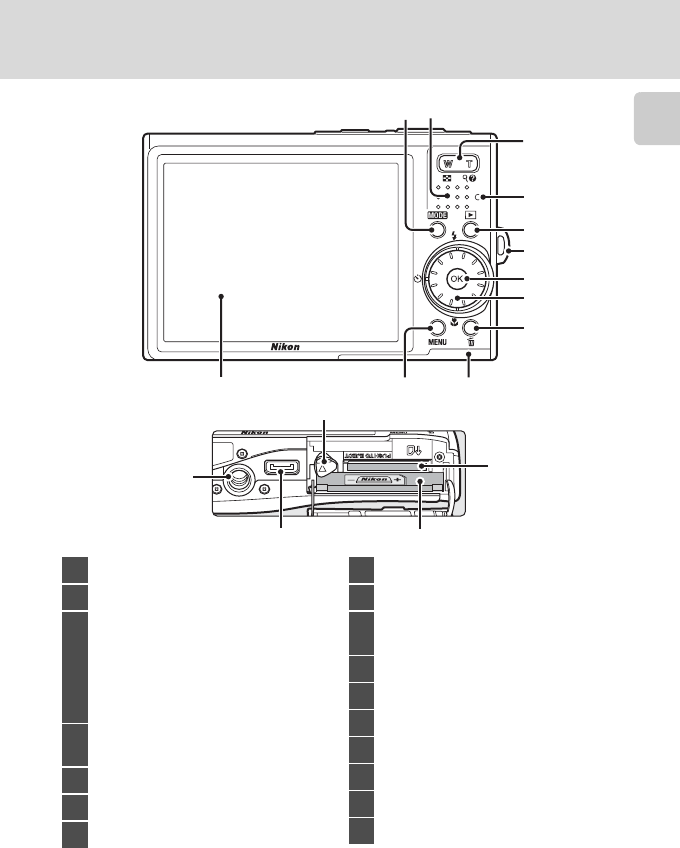
Parts of the Camera...............................................................................................................................4
The Camera Body...................................................................................................................................................4
Attaching the Camera Strap............................................................................................................................4
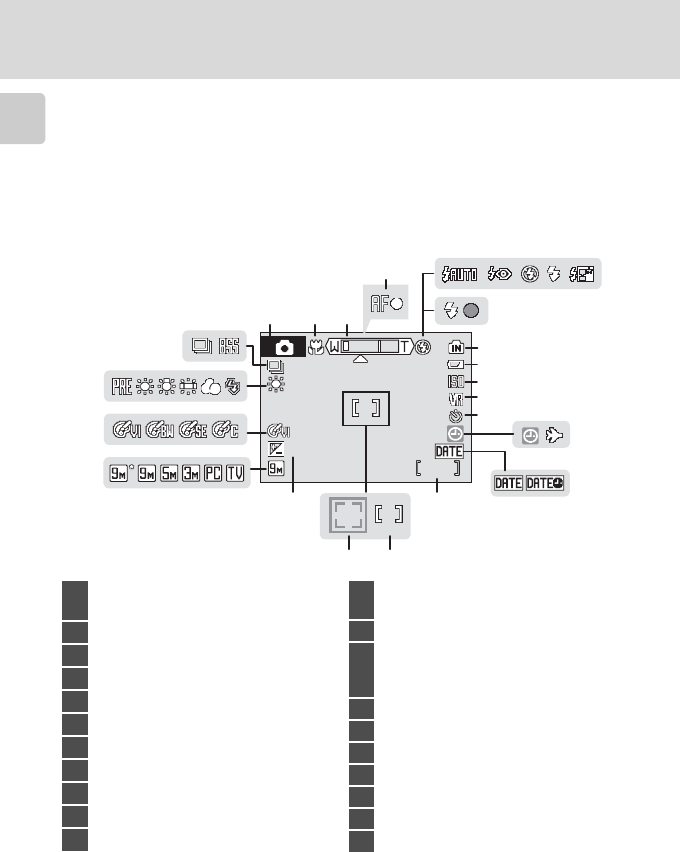
The Monitor................................................................................................................................................................6
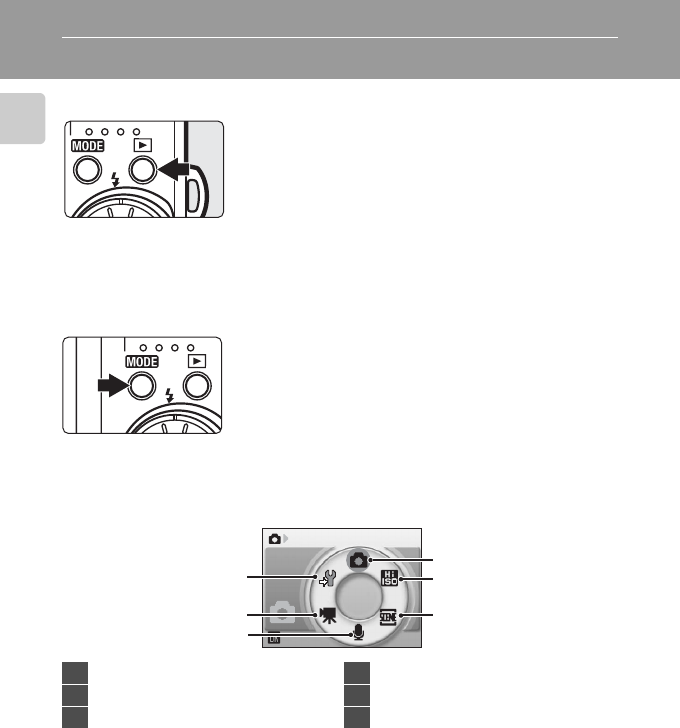
The c (shooting/playback) Button...........................................................................................................8
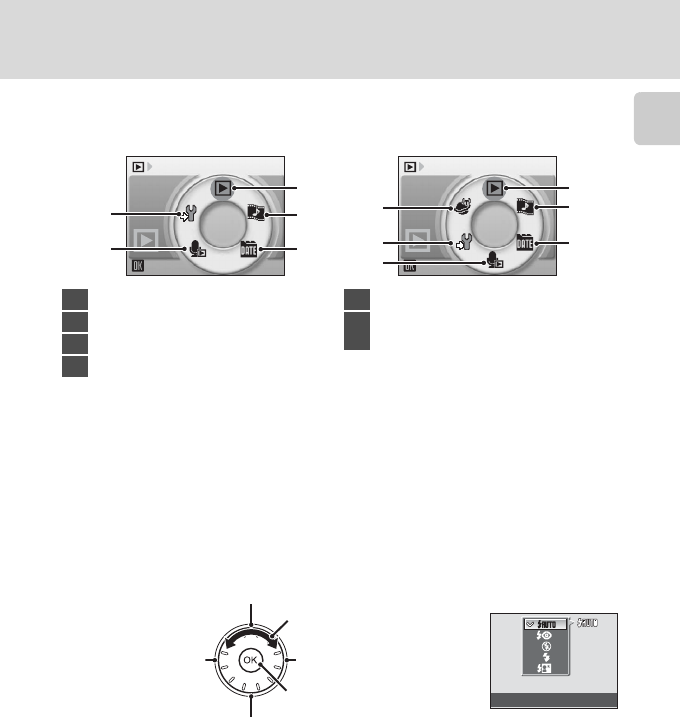
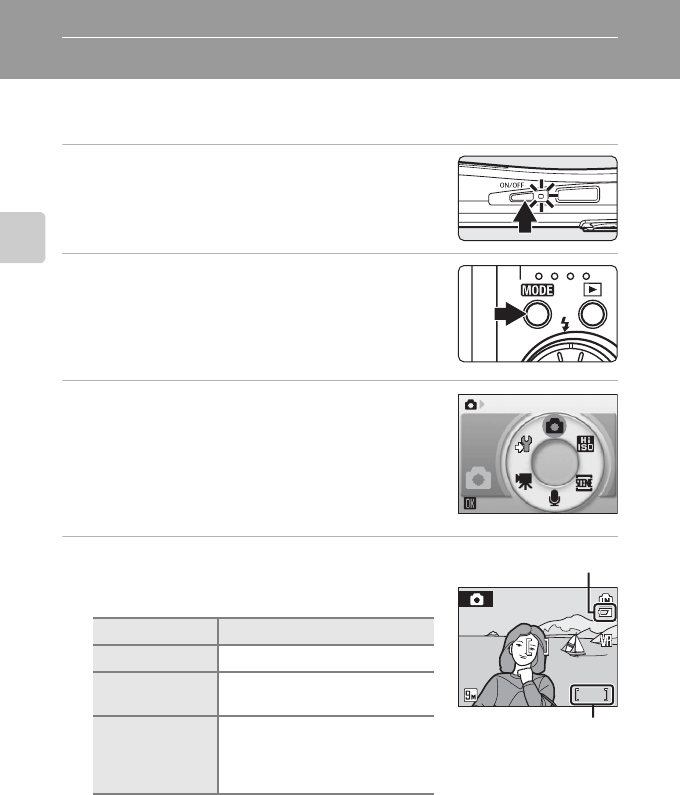
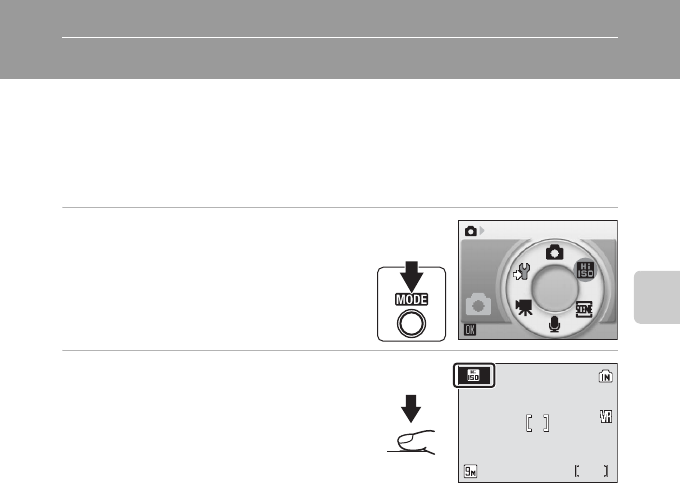
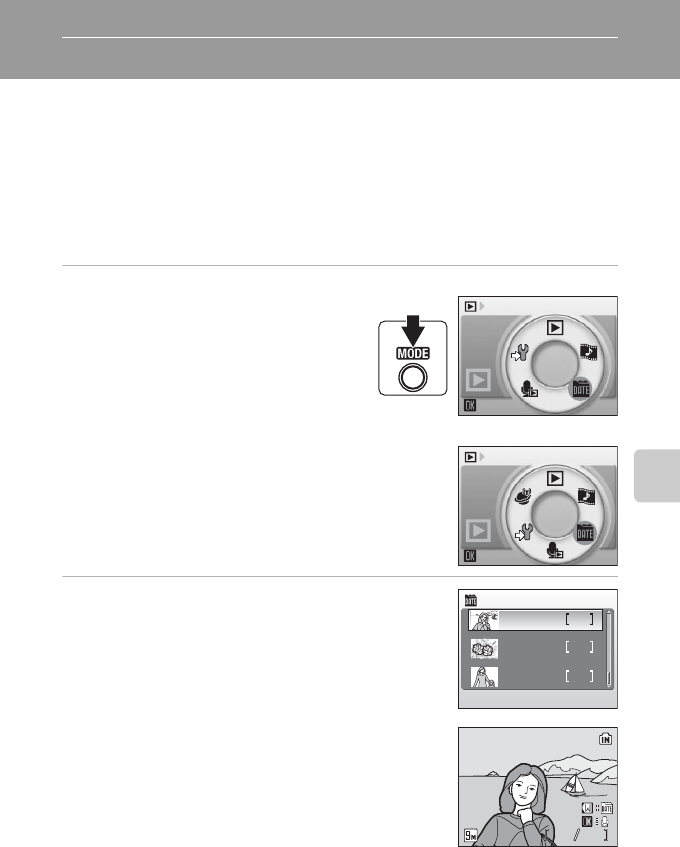
The e (mode) Button..................................................................................................................................8
The Rotary Multi Selector...................................................................................................................................9
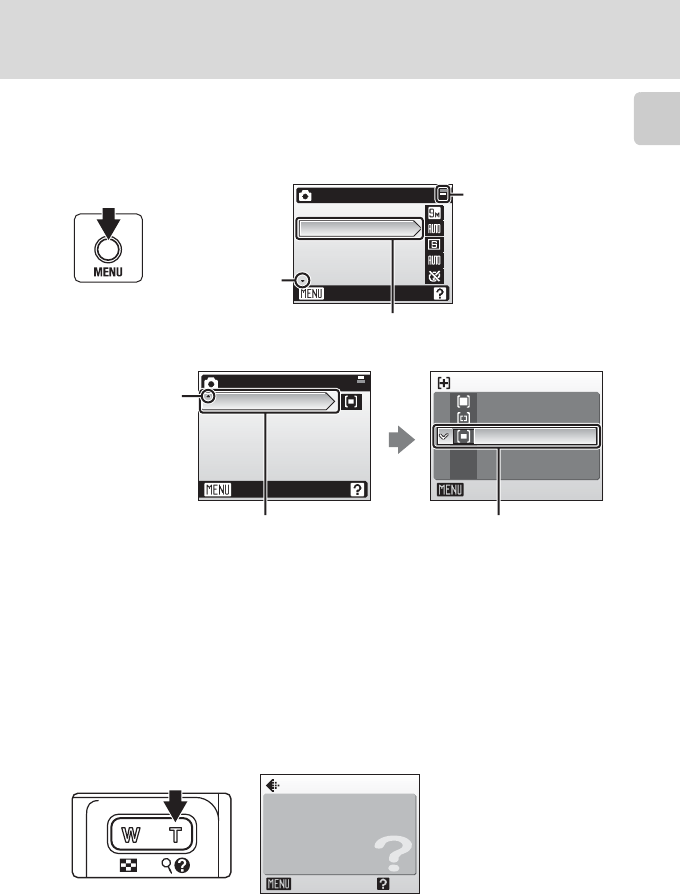
The d Button....................................................................................................................................................11
Help Displays..........................................................................................................................................................11
First Steps.............................................................................................................................................12
Charging the Battery Using the Battery Charger (COOLPIX S52).......................................12
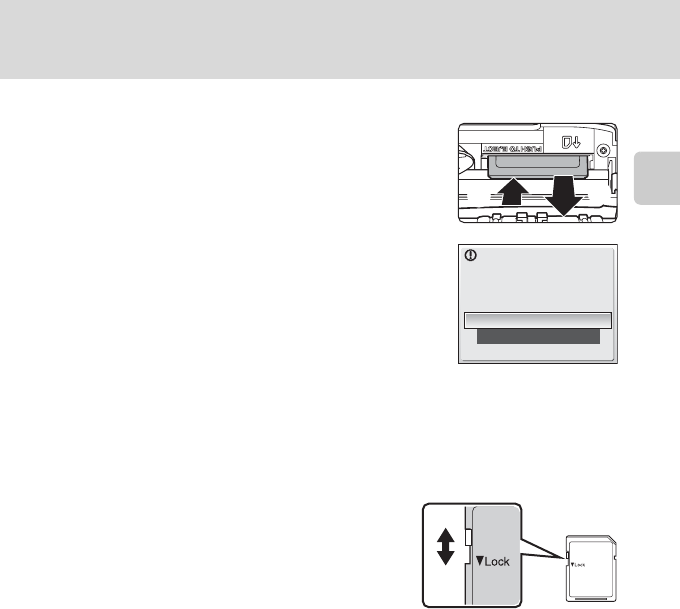
Inserting the Battery into the Camera..........................................................................................14
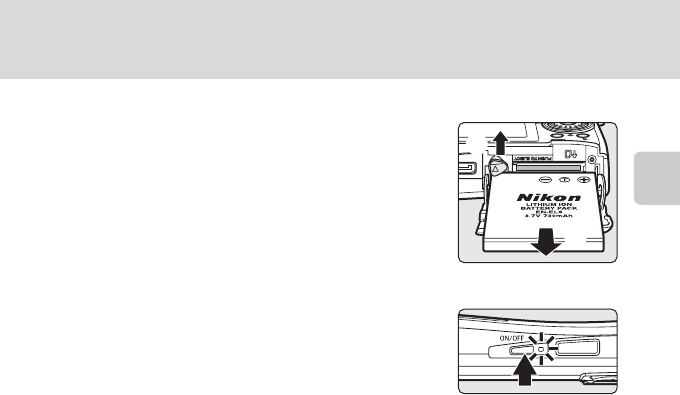
Removing the Battery.......................................................................................................................................15
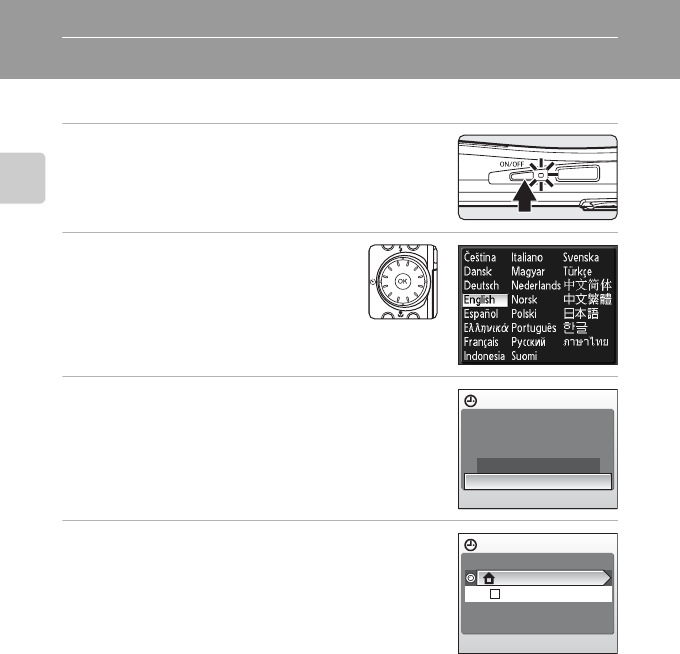
Turning On and Off the Camera.................................................................................................................15
Charging the Battery Using the AC Adapter (COOLPIX S52c)..............................................16
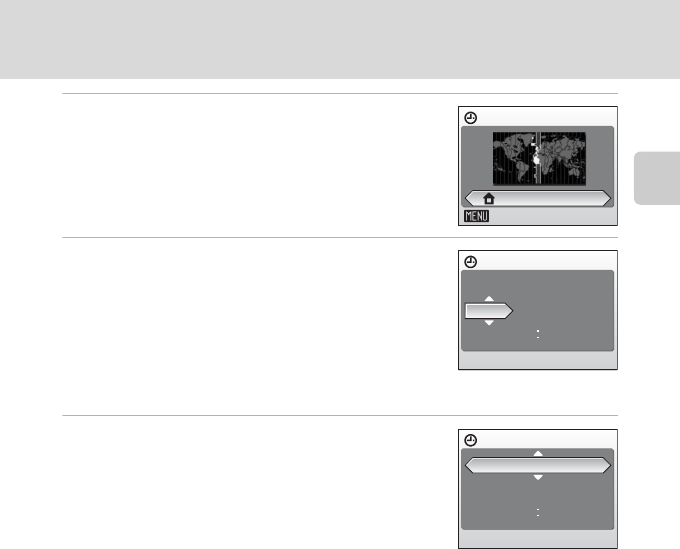
Setting Display Language, Date, and Time ................................................................................18
ABasic Photography and Playback: Auto Mode..................................................................22
Step 1 Turn the Camera On and Select A (Auto) Mode.......................................................22
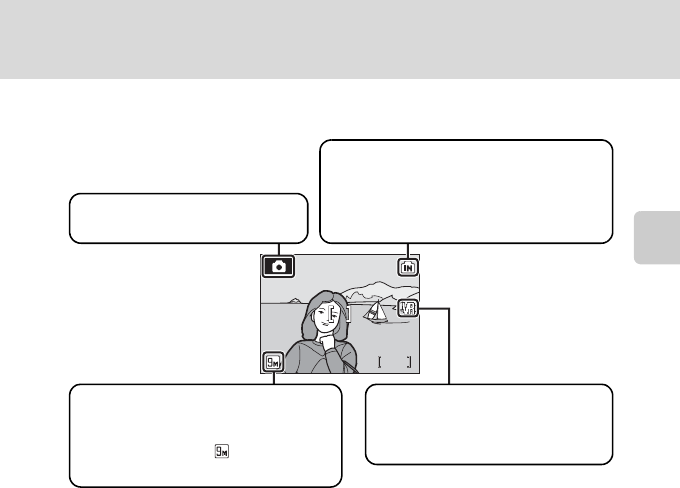
Step 2 Frame a Picture.......................................................................................................................24
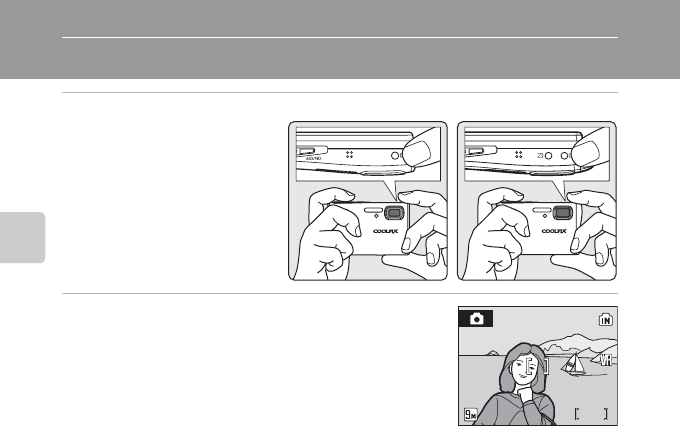
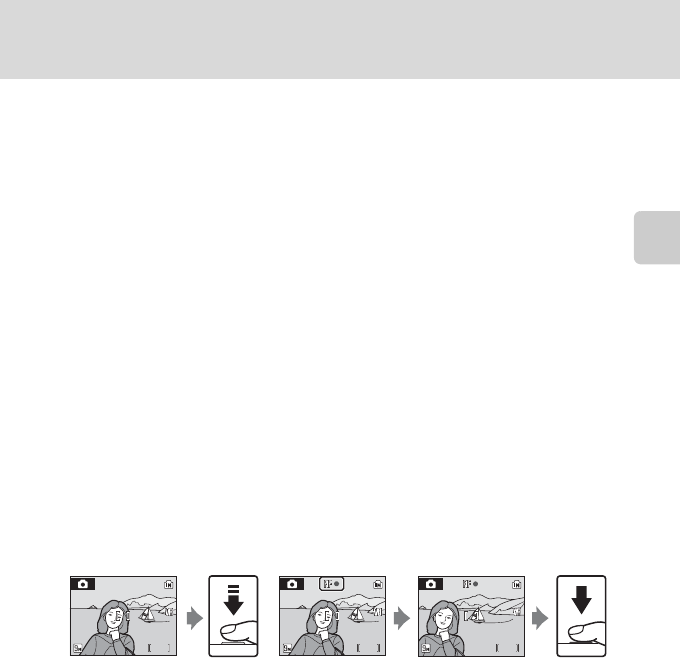
Step 3 Focus and Shoot.....................................................................................................................26
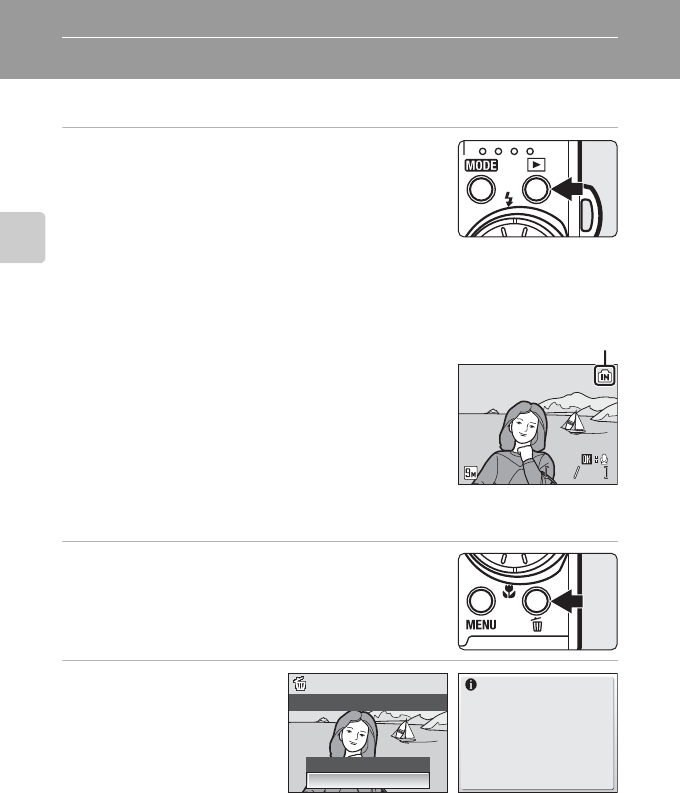
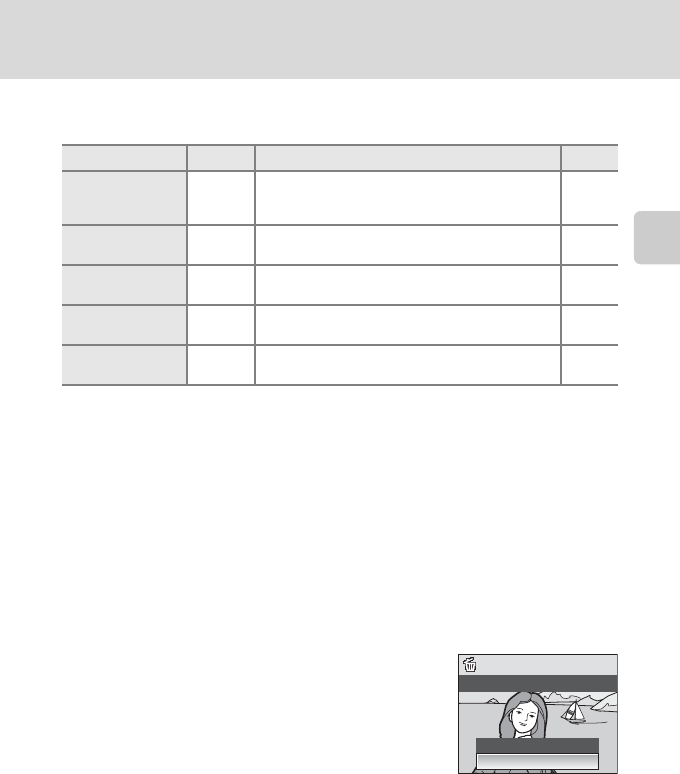
Step 4 Viewing and Deleting Pictures..........................................................................................28
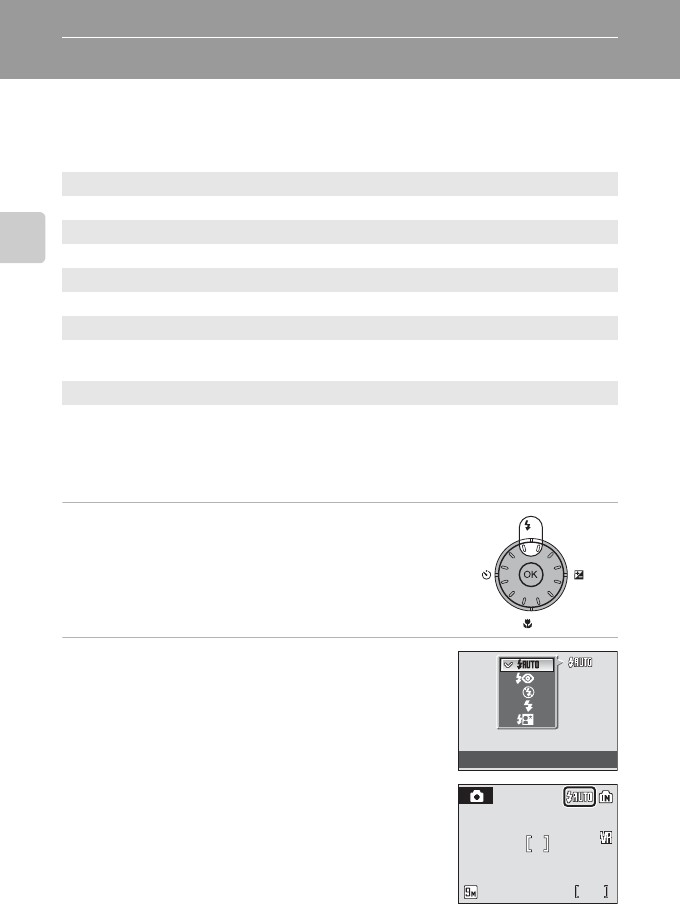
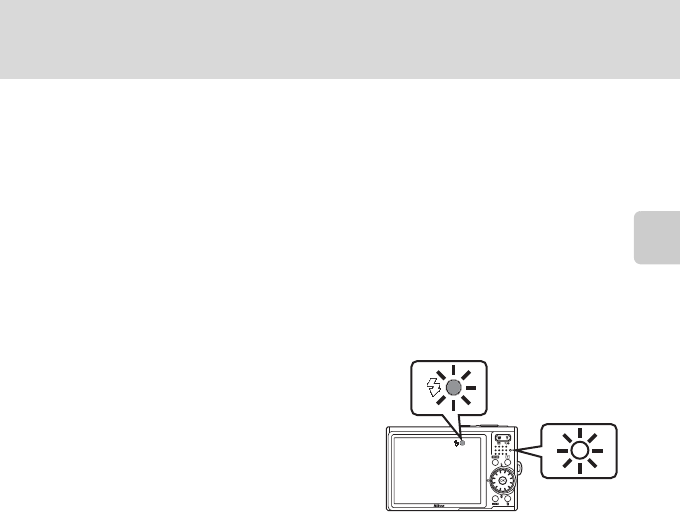
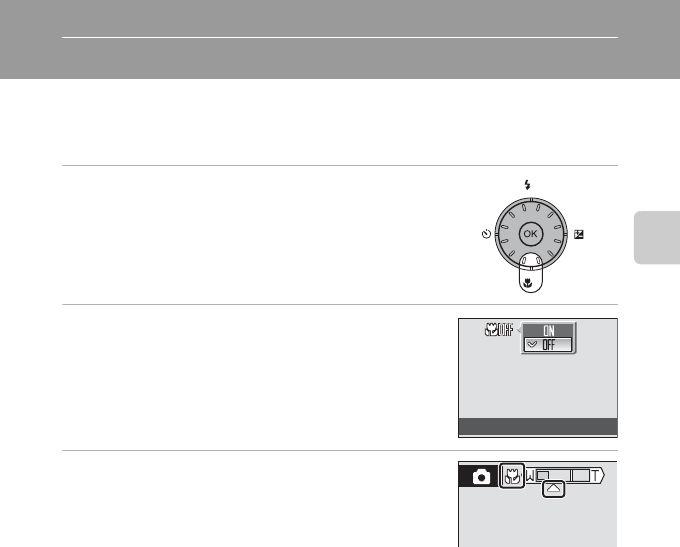
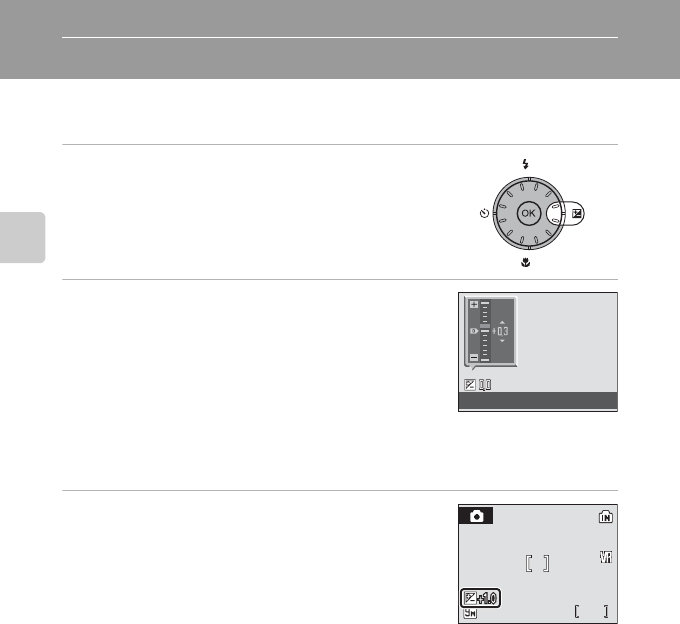
Using the Flash......................................................................................................................................30
Setting the Flash Mode....................................................................................................................................30
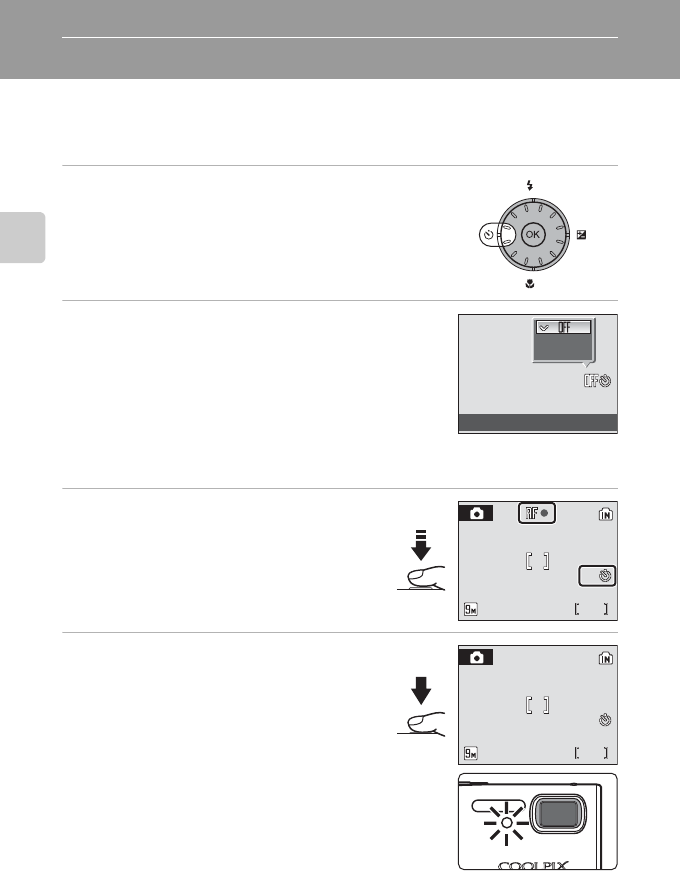
Taking Pictures with the Self-Timer...............................................................................................32
Shooting in High-Sensitivity Shooting Mode............................................................................35
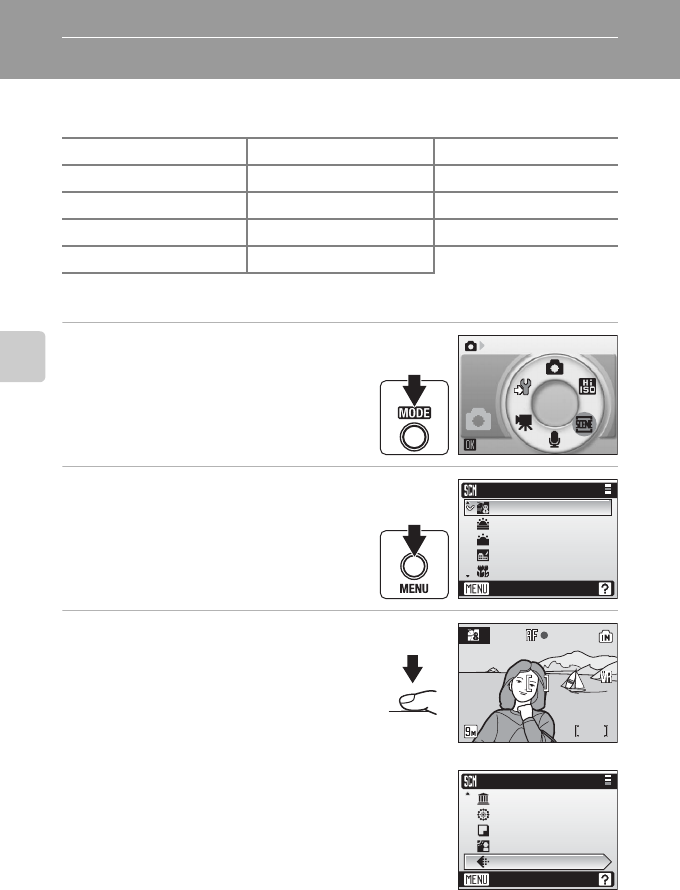
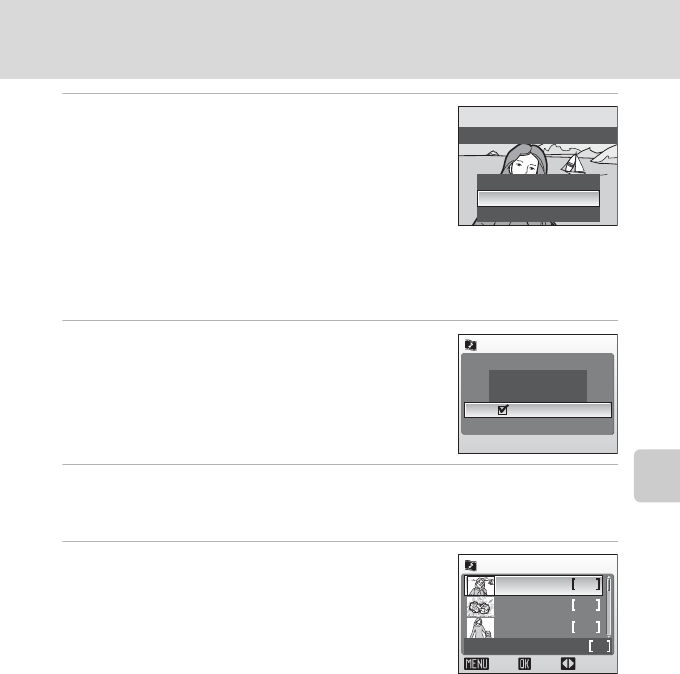
CShooting Suited for the Scene................................................................................................36
Shooting in Scene Mode...................................................................................................................36
Setting the Scene Mode..................................................................................................................................36
The Movie Menu...................................................................................................................................61
D Selecting Movie Options..........................................................................................................................61
I Auto-Focus Mode........................................................................................................................................62
Movie Playback.....................................................................................................................................63
Deleting Movie Files...........................................................................................................................................63
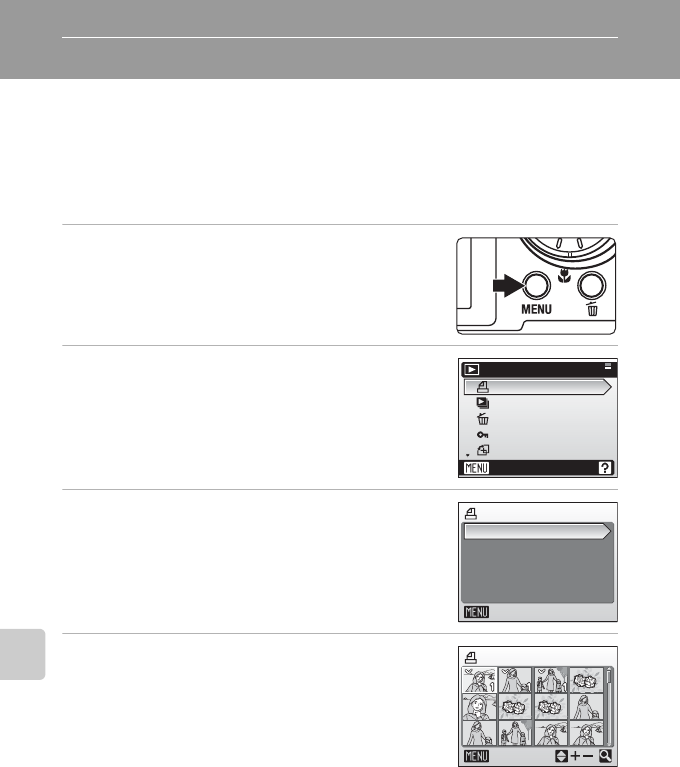
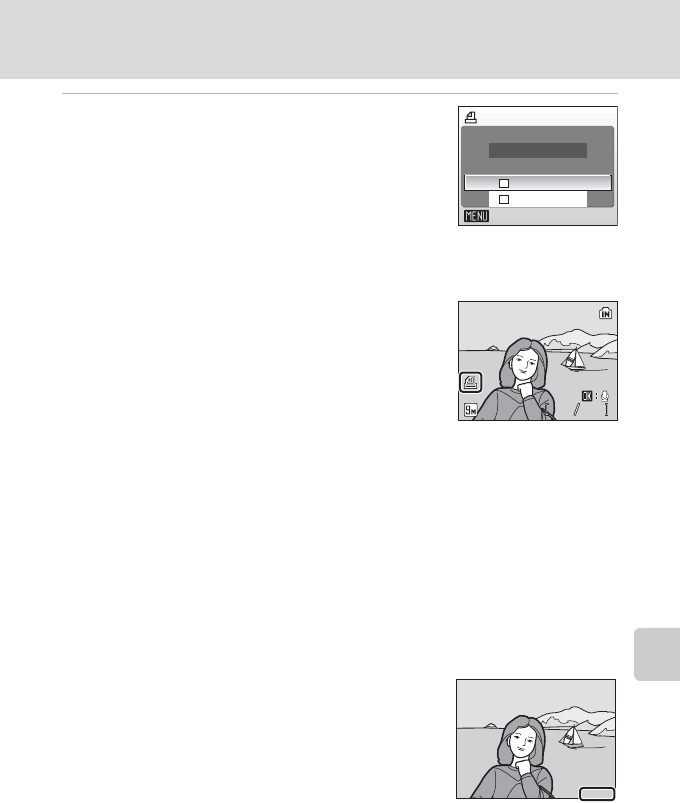
Creating a DPOF Print Order: Print Set.........................................................................................80
dShooting, Playback, and Setup Menus ............................................................................82
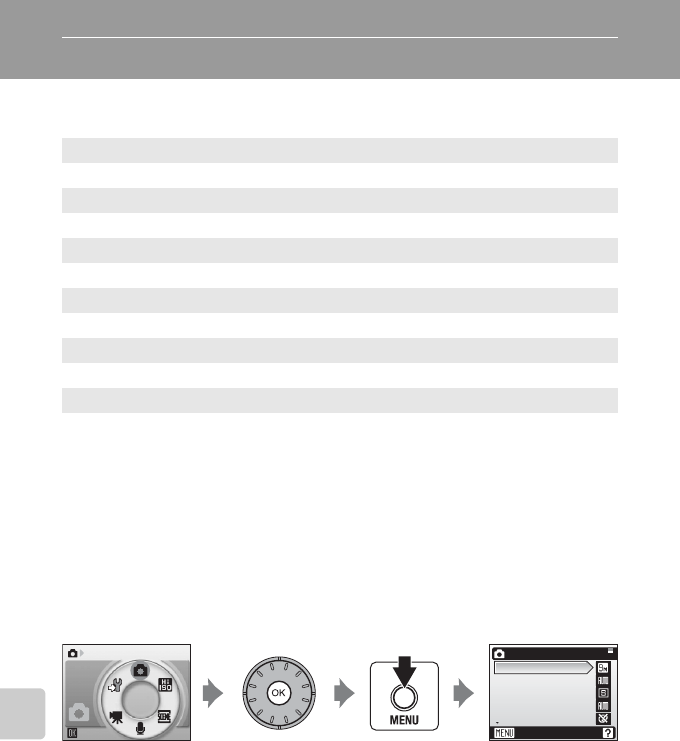
Shooting Options: The Shooting Menu.......................................................................................82
Displaying the Shooting Menu and High-sensitivity Menu......................................................82
A Image Mode....................................................................................................................................................83
B White Balance.................................................................................................................................................85
C Continuous......................................................................................................................................................87
E ISO Sensitivity..................................................................................................................................................88
F Color Options..................................................................................................................................................88
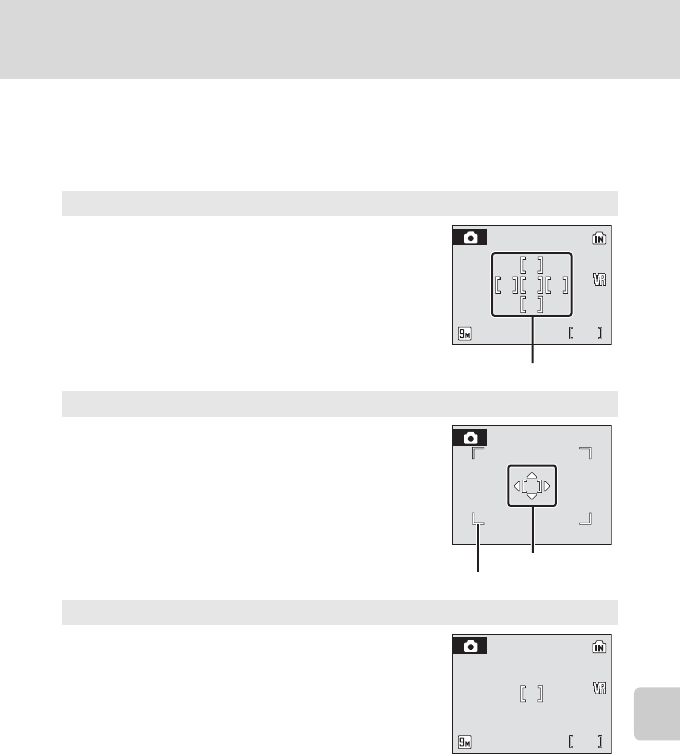
G AF Area Mode.................................................................................................................................................89
Restrictions on Camera Settings................................................................................................................90
x
Table of Contents
Playback Options: The Playback Menu........................................................................................91
Displaying the Playback Menu....................................................................................................................91
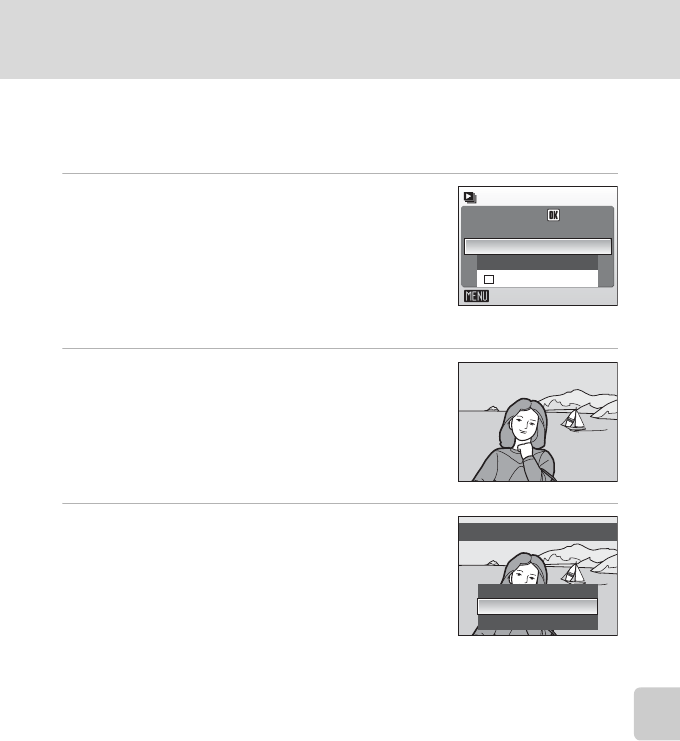
b Slide Show........................................................................................................................................................93
c Delete...................................................................................................................................................................94
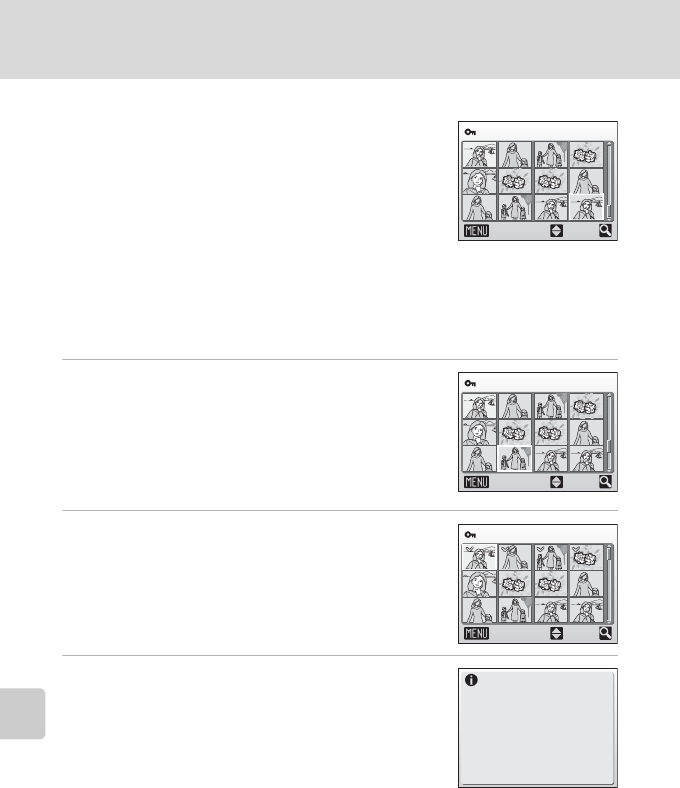
d Protect...............................................................................................................................................................94
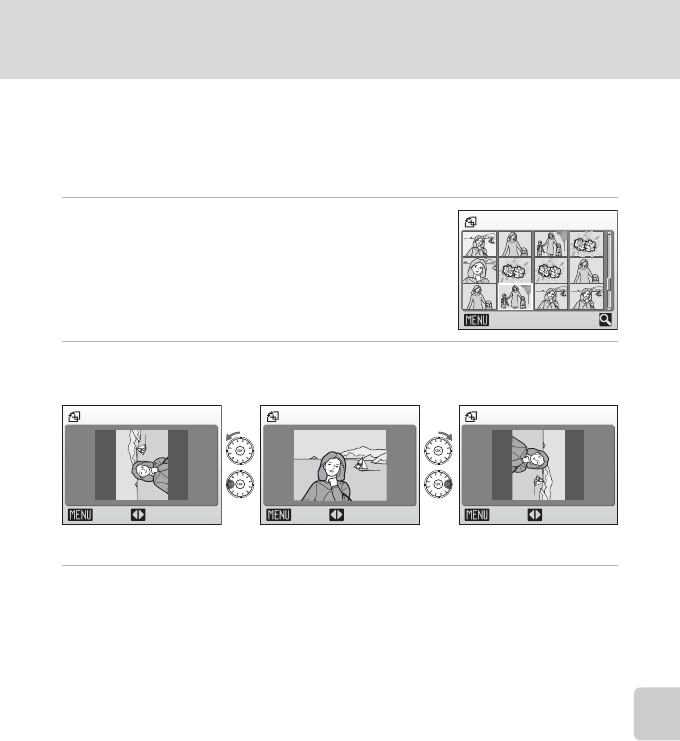
f Rotate Image...................................................................................................................................................95
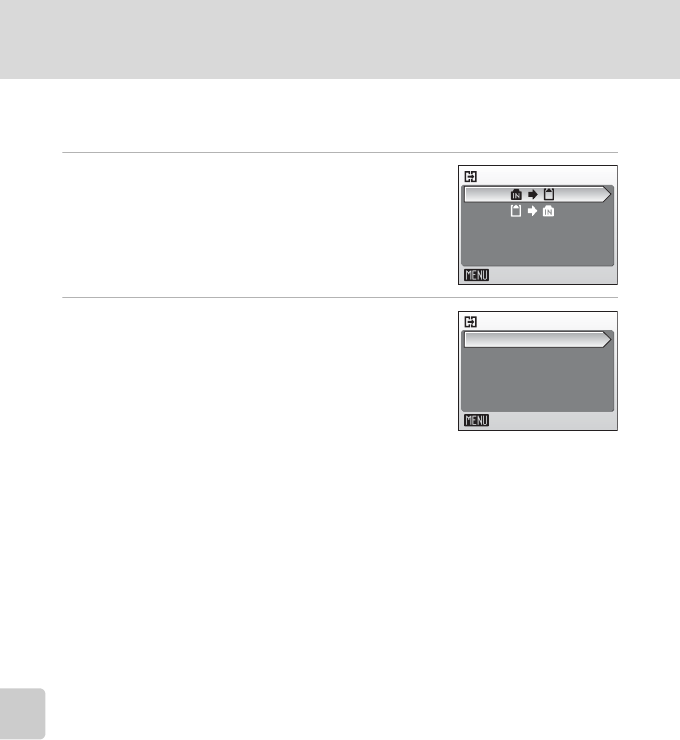
h Copy.....................................................................................................................................................................96
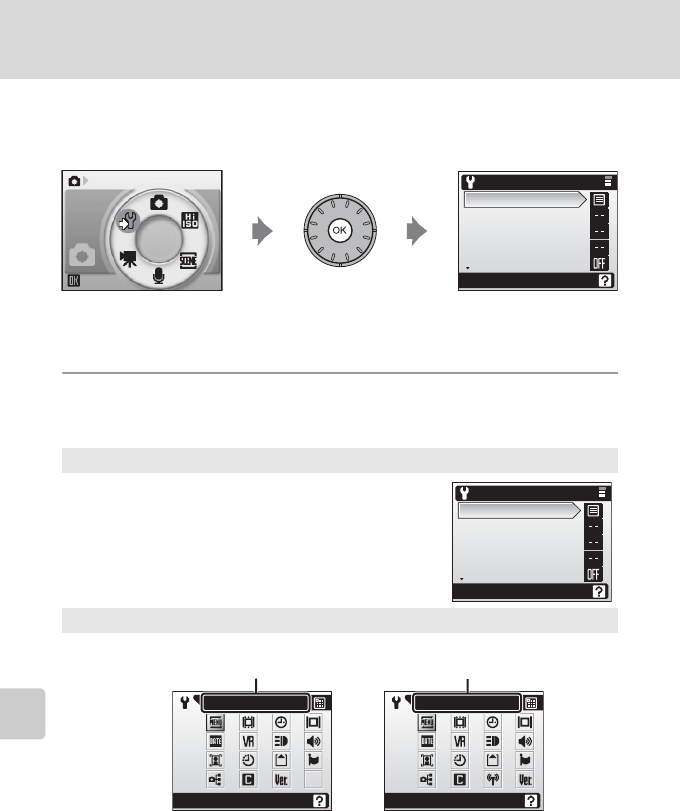
Basic Camera Setup: The Setup Menu..........................................................................................97
Displaying the Setup Menu...........................................................................................................................98
a Menus..................................................................................................................................................................98
c Welcome Screen...........................................................................................................................................99
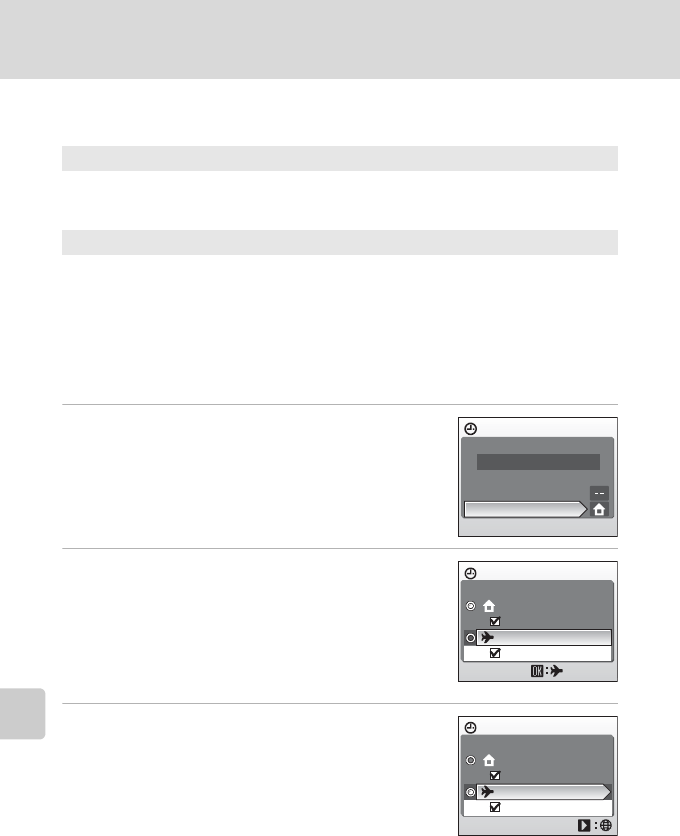
d Date....................................................................................................................................................................100
e Monitor Settings.......................................................................................................................................103
C Date Imprint..................................................................................................................................................104
g Vibration Reduction.................................................................................................................................105
h AF Assist.........................................................................................................................................................105
i Sound Settings...........................................................................................................................................106
j Record Orientation...................................................................................................................................106
k Auto Off...........................................................................................................................................................107
l Format Memory/m Format Card....................................................................................................107
n Language........................................................................................................................................................108
o Video Mode...................................................................................................................................................108
p Reset All...........................................................................................................................................................108
r Firmware Version......................................................................................................................................111
Libble takes abuse of its services very seriously. We're committed to dealing with such abuse according to the laws in your country of residence. When you submit a report, we'll investigate it and take the appropriate action. We'll get back to you only if we require additional details or have more information to share.
Product:
Forumrules
To achieve meaningful questions, we apply the following rules:
First, read the manual;
Check if your question has been asked previously;
Try to ask your question as clearly as possible;
Did you already try to solve the problem? Please mention this;
Is your problem solved by a visitor then let him/her know in this forum;
To give a response to a question or answer, do not use this form but click on the button 'reply to this question';
Your question will be posted here and emailed to our subscribers. Therefore, avoid filling in personal details.
Register
Register getting emails for Nikon Coolpix S52 at:
new questions and answers
new manuals
You will receive an email to register for one or both of the options.
Get your user manual by e-mail
Enter your email address to receive the manual of Nikon Coolpix S52 in the language / languages: English as an attachment in your email.
The manual is 4,49 mb in size.
You will receive the manual in your email within minutes. If you have not received an email, then probably have entered the wrong email address or your mailbox is too full. In addition, it may be that your ISP may have a maximum size for emails to receive.
If you have not received an email with the manual within fifteen minutes, it may be that you have a entered a wrong email address or that your ISP has set a maximum size to receive email that is smaller than the size of the manual.
The email address you have provided is not correct.
Please check the email address and correct it.
Your question is posted on this page
Would you like to receive an email when new answers and questions are posted? Please enter your email address.