655777
24
Zoom out
Zoom in
Previous page
1/116
Next page
Neato XV™ Series Robot Vacuum
User Guide
READ ALL INSTRUCTIONS BEFORE USING THIS APPLIANCE.
SAVE THESE INSTRUCTIONS.
PLEASE REFER TO PAGE 10 FOR ADDITIONAL SAFETY INSTRUCTIONS.
Neato Robotics, Inc.
8100 Jarvis Avenue Suite 100
Newark, CA 94560
Copyright © 2013 Neato Robotics, Inc. All rights reserved.
Neato Robotics is a registered trademark of Neato Robotics, Inc.
Neato XV™ Series User Guide 3
Table of Contents
Welcome!......................................................................................................................................................... 5
Anatomy of Your Neato Vacuum..........................................................................................................................................................................................................6
Important Safety Instructions........................................................................................................................................................................................................... 10
Likes and Dislikes......................................................................................................................................................................................................................................11
Turn to Run Mode.....................................................................................................................................................................................................................................14
Using the Neato Vacuum...........................................................................................................................15
Using the Charging Base ........................................................................................................................................................................................................................ 16
Charging Status....................................................................................................................................................................................................................................... 20
Optimal Charging.......................................................................................................................................................................................................................... 20
Cleaning Mode............................................................................................................................................................................................................................................ 21
Quick-Start Your Robotic Vacuum.................................................................................................................................................................................................... 22
Using the Control Center LCD screen...............................................................................................................................................................................................24
Using Spot Mode for Cleaning Smaller Areas................................................................................................................................................................................ 26
Setting the Clock..................................................................................................................................................................................................................................... 28
Scheduling a Cleaning............................................................................................................................................................................................................................. 30
To Get the Most of Scheduled Cleanings......................................................................................................................................................................................... 32
Neato XV™ Series User Guide4
Ideas for Scheduled Cleanings.............................................................................................................................................................................................................33
Removing a Scheduled Cleaning..........................................................................................................................................................................................................34
Changing the Language on the LCD Display......................................................................................................................................................................................36
Pausing a Cleaning ...................................................................................................................................................................................................................................37
Putting your Vacuum to Sleep.............................................................................................................................................................................................................37
Turning off Your Vacuum......................................................................................................................................................................................................................38
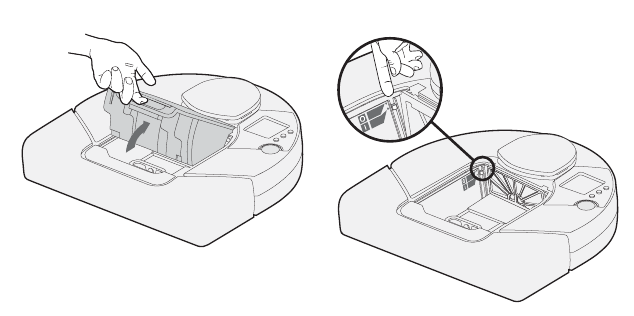
Emptying the Dirt Bin..............................................................................................................................................................................................................................39
Boundary Markers .................................................................................................................................................................................................................................41
Using boundary markers ..........................................................................................................................................................................................................41
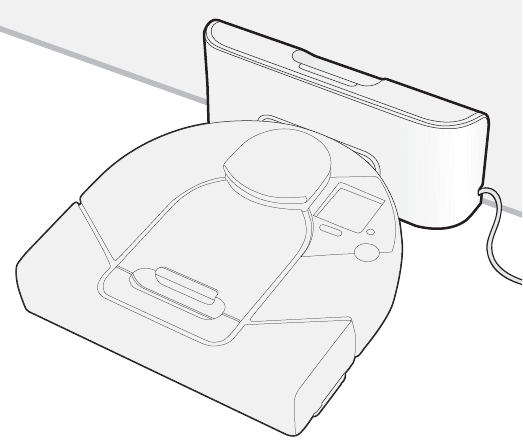
Communicating with Your Neato Vacuum...................................................................................................................................................................................... 42
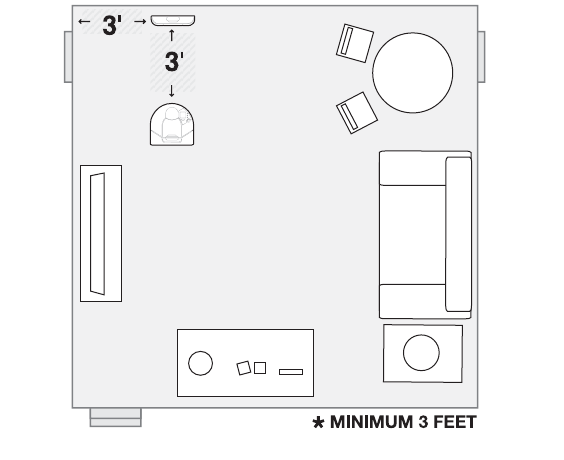
Getting the Best Performance from Your Neato Vacuum.......................................................................................................................................................43
LCD Feedback Messages.......................................................................................................................................................................................................................44
Filters ......................................................................................................................................................................................................................................................... 47
Customer Support ....................................................................................................................................49
Limited Warranty....................................................................................................................................................................................................................................50
Compliance Information..........................................................................................................................................................................................................................51
Declaration of Conformity....................................................................................................................................................................................................................52
FCC COMPLIANCE STATEMENT..............................................................................................................................................................................................................54
Disposal Notices.......................................................................................................................................................................................................................................56
Neato Vacuum ...............................................................................................................................................................................................................................56
Batteries.........................................................................................................................................................................................................................................56
Linux Operating System.............................................................................................................................................................................................................57
Neato XV™ Series User Guide 5
Welcome!
Thank you for purchasing your new Neato Vacuum. And welcome to the home robotics revolution.
This detailed user’s guide will provide all you need to know. It’s easy.
If you are in a hurry, and want to learn the basics to get started right away, you can read the Quick Start
Guide. It’s even easier.
We want to keep in touch.
To ensure that we keep you up to date on your new Neato Vacuum, please register at
http://www.neatorobotics.com
.
Neato is developing robotic home products that promise to free everyone from the drudgery of household
cleaning.
Neato XV™ Series User Guide6
Anatomy of Your Neato Vacuum
Top view
Control panel
dirt bin eject
dirt bin
handle
bumper
(see next page)
—the robot’s “eye”
Start
button
(grasp in
direction
of arrow)
Laser-Guided Vision System
Neato XV™ Series User Guide 7
Control panel
Buttons:
Start button
LCD screen
Up
Down
Back
softkey
status
light
Neato XV™ Series User Guide8
Bottom view
Back View
sweeping brush
wheel
brush guard
battery doors
brush guard
release
drop sensor
window
drop sensor
window
brush guard
release
wheel
information
label
charging
contact points
Neato XV™ Series User Guide 9
Charging base (external view)
Charging base (internal view)
charging
contact points
release button
cable wrap
pegs
power cable
Neato XV™ Series User Guide10
Important Safety Instructions
Please read all instructions before using this appliance.
Save these instructions for future reference.
Refer all non-routine servicing to Neato Robotics.
The robotic vacuum cleaner shall only be charged using the included charging base.
The robotic vacuum cleaner shall only be operated using the included batteries. Do not
replace with non-rechargeable batteries.
This appliance is not intended for use by persons (including children) with reduced
physical, sensory or mental capabilities, or lack of experience and knowledge, unless
they have been given supervision or instruction concerning use of the appliance by a
person responsible for their safety. Children should be supervised to ensure that they
do not play with the appliance.
For best performance, empty your dirt bin and clean the vacuum’s brush after each use.
Neato XV™ Series User Guide 11
Likes and Dislikes
There are just a few things to remember that will keep your Neato Vacuum happy and
successful in your home:
Likes Dislikes
POWER. Charge it when you aren't using
it to ensure that every time you need it,
it will be ready to roll.
WATER, CHEMICALS, or OTHER MOLD
PRODUCING FLUIDS. Do not clean wet
messes with your Neato Vacuum. Though
it may seem pet-like, do not bathe or
otherwise submerge your Neato Vacuum
in water. It also doesn’t like harsh
chemicals, or anything that can
permanently stain it. It doesn’t mind
being cleaned and groomed with a damp
cloth, however.
Neato XV™ Series User Guide12
BOUNDARIES. Your Neato Vacuum likes
to clean everywhere it can reach. If you
want to keep the robot from a certain
area, just put out the boundary markers
(see page 41). The robot will clean up to
the boundary markers but will not cross
over the them.
HANGING CABLES AND LOW TO THE
GROUND TABLECLOTHS. To keep your
robot and your home safe, make sure
that your vacuum cannot get caught on
hanging electric cords, tablecloths, or
other cord-like items.
GROOMING. Because it's down in the dirt
all day long, your Neato Vacuum can get
a little grungy. After a while, give it a
once over to ensure wheels and brushes
are free of hair and debris and to keep it
running smoothly.
COLD. Exposing your Neato Robotics
vacuum to freezing temperatures may
cause permanent damage, and possibly
hurt its feelings.
OUTDOORS. Your Neato vacuum is a
domestic device and not intended for
outdoor use. Keep it in the house where
it will be happy.
Likes Dislikes
Neato XV™ Series User Guide 13
Neato Vacuum cleaning smarts
1
2
1- Rectangular front design allows vacuuming close to walls and into corners.
2- Low profile allows cleaning under furniture.
3- Always vacuums in straight lines.
4 & 5- Cleans closely around obstacles.
6- Automatic doorway recognition ensures complete cleaning of room before
moving on to the next.
Neato XV™ Series User Guide14
OF
F
O
OFF
ON
Turn to Run Mode...
Remove dirt bin, and locate
the ON/OFF switch.
Push the switch DOWN to
turn your Neato to ON.
Replace the dirt bin.
Neato XV™ Series User Guide 15
Using the Neato Vacuum
The Neato Vacuum is ready to start cleaning as soon as you charge up its battery.
To charge the battery, see Using the Charging Base on page 16.
To begin a quick-start cleaning, see Quick-Start Your Robotic Vacuum on page 22.
To schedule regular cleanings, see Scheduling a Cleaning on page 30.
Using the Charging Base
Neato XV™ Series User Guide16
Using the Charging Base
The Neato Vacuum has a preinstalled rechargeable battery that has to be fully charged
before you can use it for the first time.
To use the charging base, follow these steps:
1 Plug the charging base into the wall and place it on the floor in a room that you want
to vacuum frequently and which provides the vacuum a clear path to return to
recharge itself.
2 When placing the charging base, ensure that:
the back of the charging base is against a wall
the charging base is least 3 feet from a corner of the room
the charging base is not tilted
Using the Charging Base
Neato XV™ Series User Guide 17
NOTE:There are exit holes on either side of the charging base so that you can
have the cable exit the charging base on the side closest to the wall plug.
Refer to the illustration on page 9.
Connecting the Neato Vacuum to the charging base
Using the Charging Base
Neato XV™ Series User Guide18
Giving the vacuum a clear path to its charger
Using the Charging Base
Neato XV™ Series User Guide 19
3 Place the Neato Vacuum’s curved edge up against the charging base so that the
charging base's contact points make contact with the vacuum’s charging contact
points. The status light turns on to show you it is charging.
Neato Vacuum in its charging base
Charging Status
Neato XV™ Series User Guide20
Charging Status
Recharging the battery takes about 2 to 3 hours. The status light lets you know the
current charging state of your Neato Vacuum:
Optimal Charging
For optimal performance, we recommend that you charge your Neato Vacuum on the
charging base whenever it is not cleaning. Not only will this make sure the vacuum will
be ready for upcoming cleaning tasks, but it also ensures longer battery life.
Status light color Meaning
Solid green Fully charged and ready to clean
Pulsing green Charging, but ready to clean
Pulsing amber Charging, can’t clean yet
Solid amber Vacuum has an error (see the LCD screen for details, and refer
to Communicating with Your Neato Vacuum on page 42)
Cleaning Mode
Neato XV™ Series User Guide 21
Cleaning Mode
Your Neato cleans using its powerful vacuum. Just press the START button and it will
vacuum your home, cleaning one room at a time. Neato creates a map of your home as
it goes from room to room. When it needs to recharge its batteries, it uses the map to
find it way back to where it started. Depending on where it started, it will:
START Connected to Charge Base: If Neato started at its charge base, it will
return to the charge base to recharge, and after charging, go out and continue
cleaning where it left off. If it still hasn’t finished cleaning, it will return to its
charge base once more, recharge, and return to finish cleaning where it left off.
START Not Connected to Charge Base: If Neato did not start at its charge base, it
will go back to the location where it started, stop, and say please recharge my
battery. When finished charging, place Neato within two feet of where it stopped
and press START. It will return to where it left off to finish the cleaning job. This
can be repeated one more time if it hasn’t finished the cleaning job.
During a cleaning cycle Neato will do a maximum of three cleaning runs. When Neato
finishes a cleaning cycle the map is erased.
Quick-Start Your Robotic Vacuum
Neato XV™ Series User Guide22
Quick-Start Your Robotic Vacuum
The Neato Vacuum works best when it performs regularly scheduled cleanings (see
Scheduling a Cleaning on page 30), but you can quick-start the vacuum for immediate
cleaning any time.
To start the Neato Vacuum:
1 Charge the vacuum (see Using the Charging Base on page 16). When the START
button light is solid green, the vacuum is fully charged.
2 Remove any loose items (such as small toy pieces) that might get caught in the
vacuum’s brushes.
3 Place your Neato Vacuum on the floor.
4 Press the START button. If the vacuum is asleep, that will wake it up! Then press the
button once more to clean your entire house.
Quick-Start Your Robotic Vacuum
Neato XV™ Series User Guide 23
5 The Neato Vacuum maps the room and cleans it automatically.
6 When finished, the vacuum returns to where it started—either to the charging base
or to where you manually started it in the room and turns itself off.
Using the Control Center LCD screen
Neato XV™ Series User Guide24
Using the Control Center LCD screen
The Neato Vacuum’s LCD Control Center screen is your interface to communicate with
the vacuum. This is where you give the vacuum its cleaning schedule or pause its
cleaning cycle, and it’s also where the vacuum will give you information. For example,
it may tell you that it is returning to its base to recharge. In addition, if your vacuum
encounters a problem, it will tell you what is happening so you can correct the problem.
The Welcome screen looks like this:
The button (called a soft key) below the screen performs the action shown above it on
the screen (in this case, MENU, which opens the main menu).
24


Need help? Post your question in this forum.

Forumrules


Report abuse

Libble takes abuse of its services very seriously. We're committed to dealing with such abuse according to the laws in your country of residence. When you submit a report, we'll investigate it and take the appropriate action. We'll get back to you only if we require additional details or have more information to share.

Product:

For example, Anti-Semitic content, racist content, or material that could result in a violent physical act.

For example, a credit card number, a personal identification number, or an unlisted home address. Note that email addresses and full names are not considered private information.

Forumrules

To achieve meaningful questions, we apply the following rules:

Register

Register getting emails for Neato XV Signature at:


You will receive an email to register for one or both of the options.


Get your user manual by e-mail

Enter your email address to receive the manual of Neato XV Signature in the language / languages: English as an attachment in your email.

The manual is 1,23 mb in size.


You will receive the manual in your email within minutes. If you have not received an email, then probably have entered the wrong email address or your mailbox is too full. In addition, it may be that your ISP may have a maximum size for emails to receive.

Others manual(s) of Neato XV Signature

Neato XV Signature Additional guide - English - 2 pages

Neato XV Signature Quick start guide - English - 24 pages

Neato XV Signature Additional guide - German - 2 pages

Neato XV Signature Quick start guide - German - 24 pages

Neato XV Signature Additional guide - Dutch - 2 pages

Neato XV Signature Quick start guide - Dutch - 24 pages

Neato XV Signature Additional guide - Danish - 2 pages

Neato XV Signature Quick start guide - Danish - 24 pages

Neato XV Signature Additional guide - French - 2 pages

Neato XV Signature Quick start guide - French - 24 pages

Neato XV Signature Additional guide - Italian - 2 pages

Neato XV Signature Quick start guide - Italian - 24 pages

Neato XV Signature Additional guide - Swedish - 2 pages

Neato XV Signature Quick start guide - Swedish - 24 pages

Neato XV Signature Additional guide - Spanish - 2 pages

Neato XV Signature Quick start guide - Spanish - 24 pages

Neato XV Signature Additional guide - Norwegian - 2 pages

Neato XV Signature Quick start guide - Norwegian - 24 pages

Neato XV Signature Additional guide - Finnish - 2 pages

Neato XV Signature Quick start guide - Finnish - 24 pages


The manual is sent by email. Check your email

If you have not received an email with the manual within fifteen minutes, it may be that you have a entered a wrong email address or that your ISP has set a maximum size to receive email that is smaller than the size of the manual.

The email address you have provided is not correct.

Please check the email address and correct it.

Your question is posted on this page

Would you like to receive an email when new answers and questions are posted? Please enter your email address.


Info