Drop-stitch material (MONO) / Plastic wood (TUSCANY)
F-MO061 / F-TU061
Round
Octagon
6
6
F-MO061
Mono
F-TU061
Tuscany
930 L
(245 Gal.)
1100 L
(291 Gal.)
Ø1.73 m (68”)
Ø1.93 m (76”)
Ø1.63 m (64”)
Ø1.73 m (68”)
38 kg (83.7 lbs)
72 kg (158.6 lbs)
0.65m (26”)
0.73m (29”)
Control System Specs
7
H.
NOTE:
The drawings are for reference only. Actual products may vary. Not to scale.
Use accessories exclusively provided by MSpa for safety reasons.
When ordering parts, be sure to quote the MSpa model number and description.
8
REF. NO.PARTS DESCRIPTION
SPA cover with buckle and inflatable bladder
Spa tub
All-in-one control box + U-shape cover
Filter cartridge with mesh cover * 2 + Filter cartridge base * 1
23.5” high-pressure pump, inflation hose, pressure gauge, seal ring
Heat-preservation foam mat
Garden hose adaptor
Wrench for inlet and outlet
Wrench for inflation valve
Repair kit
A
B
C
D
E
F
G
H
I
J
NOTE:
The drawings are for reference only. Actual products may vary. Not to scale.
Use accessories exclusively provided by MSpa for safety reasons.
When ordering parts, be sure to quote the MSpa model number and description.
REF. NO.PARTS DESCRIPTION
Buckle spa cover
All-in-one control box + U-shape cover
Sponge rail * 8
Plastic wood panel * 7
Filter cartridge with mesh cover * 2 + Filter cartridge base * 1
Foot pump and inflation hose for bladder
Wrench
A
C
E
G
I
K
M
REF. NO.PARTS DESCRIPTION
Spa liner
Corner beam * 8
Open-end panel * 1
Heat-preservation foam mat
Inflatable bladder
Garden hose adaptor
Repair kit
B
D
F
H
J
L
N
PRODUCT OVERVIEW
Packaging content – TUSCANY
A.B.C.D.E.
F.I.J.
K.L.M.N.
G.H.
®
9
FIRST USE AND SETUP PREPARATION
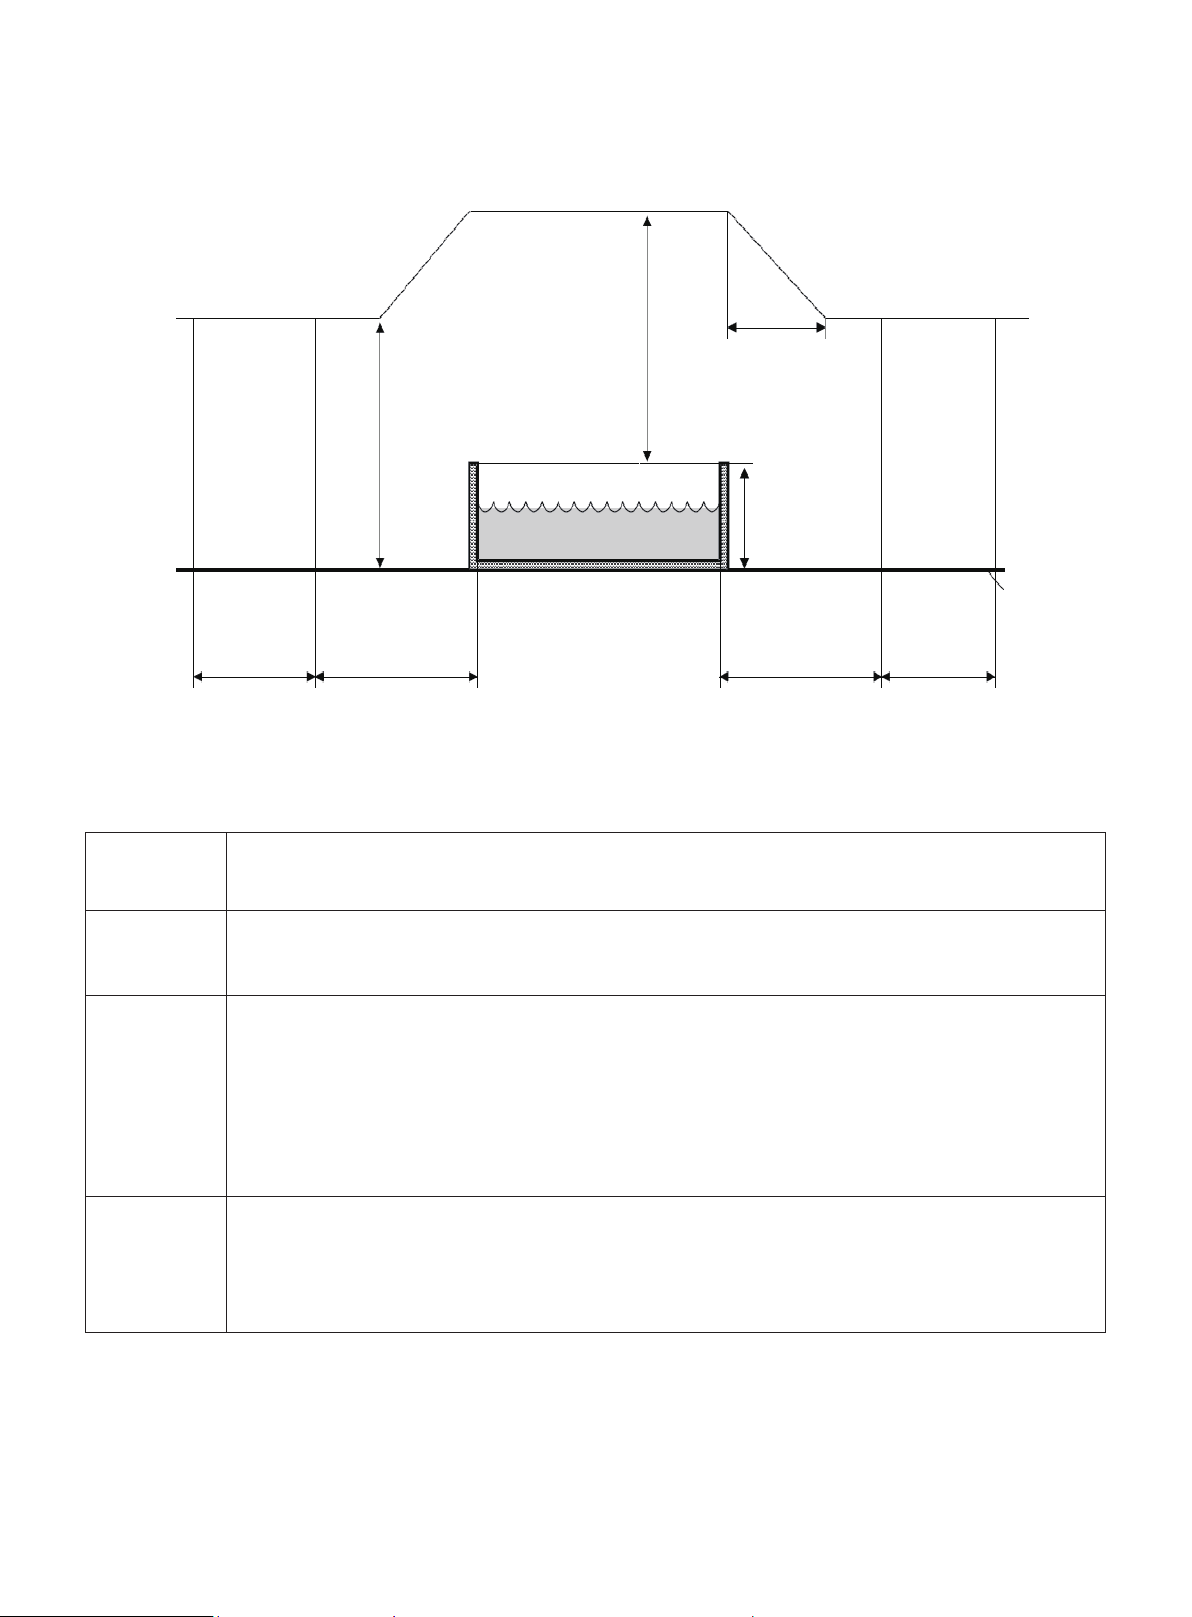
The spa can be installed indoors or outdoors in around 10 minutes by one or more persons. For household use only.
The spa must be set up on a flat, smooth and supporting surface that is able to bear the maximum load of the filled spa with the listed maximum number
of occupants. Check with a qualified contractor or structural engineer to verify the requirement.
Make sure the area is free of sharp objects under or around the spa. Uneven or unsound surface can damage the spa and void your warranty. Level the
surface before filling the spa with water.
Provide an adequate drainage system around the spa to deal with overflow water and splashes.
Make sure there is enough clearance around the spa for full access to the equipment for maintenance and/or servicing.
Consider positioning the spa to minimize noise disturbance as much as possible.
●
●
●
●
●
●
●
●
●
●
Site preparation and requirements
Humidity is a natural side effect of indoor spa installation. The room must be properly ventilated to allow moisture to escape. Install a ventilating system
to prevent excess condensation moisture in the room.
Ensure the spa can be removed from the building without destroying any part of the built structure.
Consider any local regulations on these topics.
●
●
●
Additional requirements for indoor installation
Do not set up the spa on grass or dirt, as this will increase the amount of debris entering the spa and will damage the floor.
To ensure a longer lifespan, do not leave the spa tub exposed to direct sunlight.
Always lower the spa air pressure than 10psi when using it at a temperature higher than 20°C (68°F) or when exposing it to sunlight for a short time.
Do not install or use the spa outdoors at a temperature lower than 4°C (39°F). Do not use the spa when the water inside the circulation system, pump,
or pipework is frozen. Put a heat preservation mat (optional accessories) between the base of the spa and the ground to prevent heat loss from the
bottom of the spa and to provide better heat retention.
Additional requirements for outdoor installation
1. Plug the machine into the mains.
2. Press the RESET button on the PRCD. The indicator turns red.
3. Press the TEST button on the PRCD. The red color shown on the indicator should disappear. Otherwise the PRCD is faulty. Do not use the spa if the spa
is faulty. Contact a qualified electrician to correct the fault.
4. Press the RESET button on the PRCD again. The indicator should turn red. When it does, the spa is ready for use.
PRCD Testing
Risk of electric shock: This product is provided with a PRCD located at the end of the power cord. The PRCD must be tested before each use. Do not
use the spa if the PRCD does not function properly.
Disconnect the power cord until the fault has been identified and corrected. Contact a licensed electrician to correct the fault. There are no serviceable
parts inside the PRCD. Opening the PRCD will void the warranty.
! WARNING
Spa Control Unit Connected External Equipotential Bonding Conductors
A qualified electrician should wire the spa control unit to the household equipotential terminal using a minimum 1.5mm² solid copper conductor.
1.2.
RESET
TEST
RESET
IndicatorTEST
3.
RESET
TEST
√
Do not use faulty
sockets or plug
boards.
NOTE: Move the entire package to the selected site. Do not drag the spa tub across the ground as this can cause damage and leakage. Open the carton
carefully as this can be used to store the spa over long periods or when not in use.
NOTE: Lay out all the parts on the ground and make sure they are all accounted for. For missing or damaged parts contact the appropriate MSpa
after-sales service center.
Spa Control Unit Assembly
1. Take out the foam mat and spread it over the cleared area. Then spread out the spa tub over the ground mat and point the connection tubes towards the
corner where you intend to set up your external control box.
2. Ensure all the rubber sealing rings are in place.
3. Connect the control box to the spa by lining up the numbers (1 to 1, 2 to 2 and 3 to 3). Securely hand-tighten the connectors.
NOTE: Do not use tools to tighten.
Inflating the Spa Tub Wall
1. Attach the pressure gauge and the pump hose to the hand pump and tighten it securely.
2. Open the valve cap by twisting it counter-clockwise. Ensure the valve is clear from debris, sand, or dirt before releasing.
3. Push the valve button in and turn it counter-clockwise 90 degrees so it pops up and is in the “OUT” position.
4. Connect the pump nozzle to the valve receptacle on the spa body, and tighten it clockwise.
5. Start pumping air into the SPA tub by sliding the pump piston up and down, inflate the spa to 12 PSI (only the spa tub, not the bladder).
6. Attach the U-shape cover to the spa control box.
NOTE: The U-shape cover must be installed before using the spa. CAUTION: Do not sit on, lean on, cover or place any objects over the spa control unit.
10
SPA SETUP: MONO
ASSEMBLY - MONO
①
1.
1.
5.6.
2.3.4.
2.
3.
11
22
3
3
①
13
Inflating the Spa Air Bladder
1. Open the inflation valve and insert the inflation hose into the valve.
NOTE: Ensure that you use the correct nozzle.
2. Use the foot pump to inflate until it is firm to the touch but not hard.
3. Disconnect the inflation hose from the valve, then close and push in the inflation valve.
NOTE: If you need to add some air to the air bladder after it has been set up, please refer back to this “Inflating the spa air bladder" section.
Installing the Filter Cartridge
1. Attach the filter cartridge base to the spa tub inlet grid (upper position) and turn it slightly to secure. NOTE: The filter cartridge base is designed to be
screwed on and off. Never exert force as this could cause damage.
2. Put the mesh cover on the filter cartridge then attach the filter cartridge to the base.
NOTE: Inflate the spa tub first before installing the filter cartridge.
NOTE: Always use a filter cartridge when the spa is in use and filled with water.
Filling the Spa with Water
1. Before filling with water ensure the bottom drain valve cap is securely closed.
2. Fill the spa tub with fresh water to a level between MIN and MAX marked on the inside
of the spa wall.
WARNING:
Do not overfill the spa.
Do not operate the spa until the water reaches the MIN mark.
Never move the spa tub when there is water inside it and/or when the control box is
attached, as this may damage the spa or control box.
Never pour water with a temperature higher than 40°C (104°F) into the spa directly. We
recommend that you fill the spa tub with lukewarm water to heat it more quickly and save
energy.
Heating the Water
1. Place the air bladder and spa cover over the spa tub, and make sure the spa cover buckles are locked using the key provided after pulling the buckled
straps tight.
2. Ensure the spa is plugged into an electrical socket and see the “ALL-IN-ONE CONTROL PANEL” section for further details on operation.
NOTE: Always keep the spa cover on to minimize heat loss when heating the water.
Libble takes abuse of its services very seriously. We're committed to dealing with such abuse according to the laws in your country of residence. When you submit a report, we'll investigate it and take the appropriate action. We'll get back to you only if we require additional details or have more information to share.
Product:
Forumrules
To achieve meaningful questions, we apply the following rules:
First, read the manual;
Check if your question has been asked previously;
Try to ask your question as clearly as possible;
Did you already try to solve the problem? Please mention this;
Is your problem solved by a visitor then let him/her know in this forum;
To give a response to a question or answer, do not use this form but click on the button 'reply to this question';
Your question will be posted here and emailed to our subscribers. Therefore, avoid filling in personal details.
Register
Register getting emails for MSpa Frame - Mono at:
new questions and answers
new manuals
You will receive an email to register for one or both of the options.
Get your user manual by e-mail
Enter your email address to receive the manual of MSpa Frame - Mono in the language / languages: English, German, French, Spanish as an attachment in your email.
The manual is 4,18 mb in size.
You will receive the manual in your email within minutes. If you have not received an email, then probably have entered the wrong email address or your mailbox is too full. In addition, it may be that your ISP may have a maximum size for emails to receive.
The manual is sent by email. Check your email
If you have not received an email with the manual within fifteen minutes, it may be that you have a entered a wrong email address or that your ISP has set a maximum size to receive email that is smaller than the size of the manual.
The email address you have provided is not correct.
Please check the email address and correct it.
Your question is posted on this page
Would you like to receive an email when new answers and questions are posted? Please enter your email address.