549867
47
Zoom out
Zoom in
Previous page
1/79
Next page
EN-47
Adjusting projected images (continued)
How to adjust the computer image
This projector automatically selects a proper signal format according to the type of video signal supplied from the
computer. However, video signals from the computer may not be projected correctly depending on the types of the
computer and images to be projected. In such a case, make adjustment according to the flowchart below.
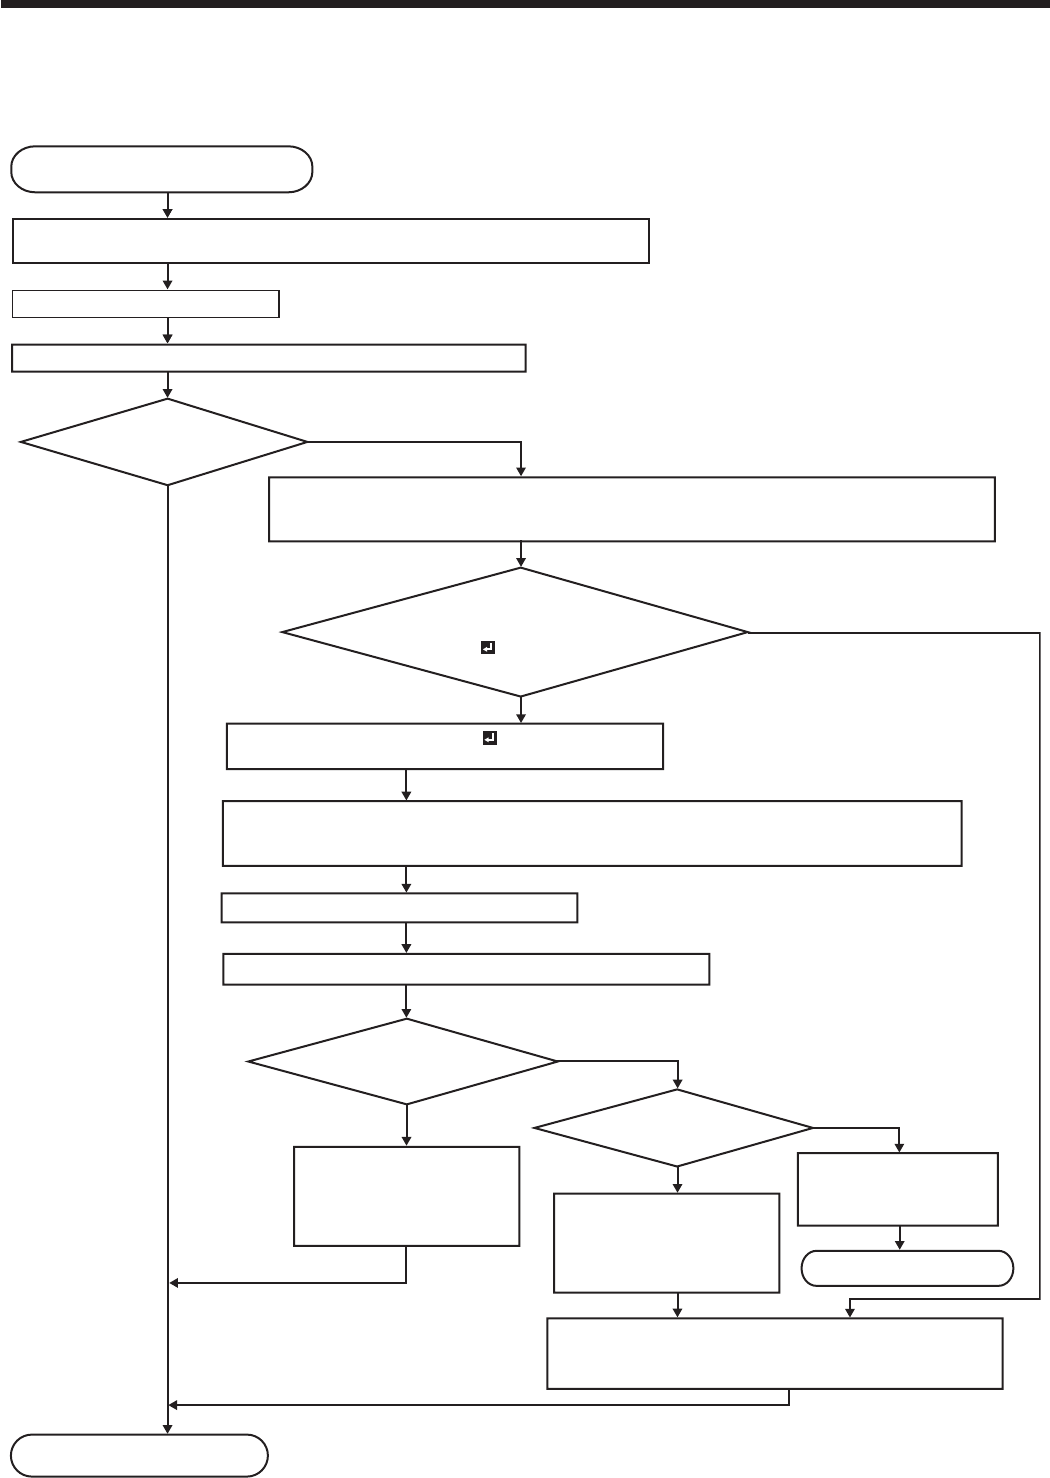
Adjustment is completed.
When the size and position of
the computer image are not correct.
Project a bright computer image containing as many texts and characters as possible.
Note) Disable the screen saver if it is active.
Press the AUTO POSITION button.
Settings are automatically and optimally adjusted for the input signal.
Image is projected
correctly.
YES
NO
Display the screen resolution setting menu of your computer.
(Example: In the case of Windows
®
PC, right-click on the desktop, select Properties, and click the
Settings tab to display the screen resolution setting.)
The screen
resolution setting of your computer
is different from the setting of RESOLUTION
(MEMORIZE ) in the SIGNAL menu
of the projector.
Select RESOLUTION (MEMORIZE ) in the SIGNAL menu
and press the ENTER button.
Set HORIZ. PIXELS and VERT. LINES to the values of the screen resolution of your computer.
(Example: When the screen resolution of the computer is 1280x800, set HORIZ. PIXELS to 1280 and
VERT. LINES to 800.)
Select EXECUTE and press the ENTER button.
Automatic adjustment starts according to the selected resolution.
Image is projected
correctly.
Perform manual
adjustment.
When you don’t save
the adjustment result,
press the MENU button.
Adjustment is canceled.
Adjust HORIZ. POSITION, VERT. POSITION, and TRACKING
in the SIGNAL menu. For details, see “Simple method to
adjust the image position.” (See page 48.)
YES
NO
YES
NO
YES
NO
After the memory saving
message is displayed,
select MEMORY and press
the ENTER button.
After the memory saving
message is displayed,
select MEMORY and press
the ENTER button.
47


Need help? Post your question in this forum.

Forumrules


Report abuse

Libble takes abuse of its services very seriously. We're committed to dealing with such abuse according to the laws in your country of residence. When you submit a report, we'll investigate it and take the appropriate action. We'll get back to you only if we require additional details or have more information to share.

Product:

For example, Anti-Semitic content, racist content, or material that could result in a violent physical act.

For example, a credit card number, a personal identification number, or an unlisted home address. Note that email addresses and full names are not considered private information.

Forumrules

To achieve meaningful questions, we apply the following rules:

Register

Register getting emails for Mitsubishi XD8500U at:


You will receive an email to register for one or both of the options.


Get your user manual by e-mail

Enter your email address to receive the manual of Mitsubishi XD8500U in the language / languages: English as an attachment in your email.

The manual is 10,48 mb in size.


You will receive the manual in your email within minutes. If you have not received an email, then probably have entered the wrong email address or your mailbox is too full. In addition, it may be that your ISP may have a maximum size for emails to receive.

Others manual(s) of Mitsubishi XD8500U

Mitsubishi XD8500U Additional guide - English - 32 pages


The manual is sent by email. Check your email

If you have not received an email with the manual within fifteen minutes, it may be that you have a entered a wrong email address or that your ISP has set a maximum size to receive email that is smaller than the size of the manual.

The email address you have provided is not correct.

Please check the email address and correct it.

Your question is posted on this page

Would you like to receive an email when new answers and questions are posted? Please enter your email address.


Info