2405
103
Zoom out
Zoom in
Previous page
1/116
Next page
103
Sluit de camera op de printer aan met de USB-kabel. De grootste van de twee
stekkers gaat in de printer. Open het deurtje van de kaartruimte en steek de
kleine stekker in de camera.Zet de camera aan; het USB Direct Print scherm
verschijnt automatisch.
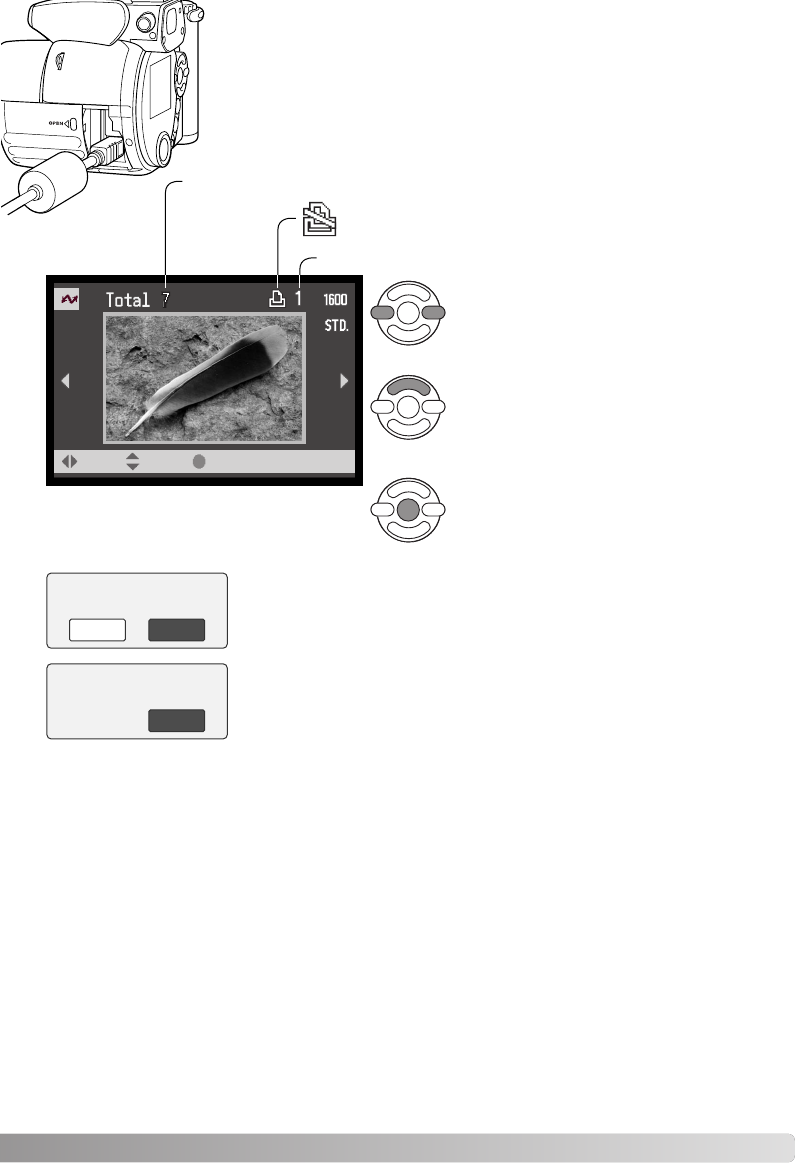
Gebruik de link/rechts-toetsen van de stuur-
eenheid om het te printen beeld op te roepen.
Het aantal prints in de printopdracht verschijnt op de lcd-monitor; index
prints tellen als een extra print. gebruik de links/rechts-toetsen om “Yes” te
markeren en druk op de centrale toets van de stuureenheid om het printen
te starten.
Aantal prints in de printopdracht.
Aantal exemplaren van de weergegeven foto
Schuine streep betekent dat het bestand niet kan worden
geprint.
Herhaal de vorige stappen totdat al de beel-
den zijn geselecteerd. Druk op de centrale
toets van de stuureenheid om het printen te
starten.
Druk op de op-toets om het aantal afdrukken
in te stellen. Wilt u een beeld voor printen
deselecteren, druk dan op de neer-toets tot-
dat het aantal op nul staat.
Als het printen begonnen is, is het mogelijk het printen te stoppen door op
de centrale toets van de stuureenheid te drukken. De boodschap “printing
finished” geeft aan wanneer de print-run is voltooid; zet de camera uit om
de routine te stoppen.
Met de informatievetoets (i*) schakelt u
over tussen enkelbeeld- en index-weerga-
ve.
:move :sel. :print
Print file?
Number of prints: 7
No
Yes
Printing finished.
OK
103


Need help? Post your question in this forum.

Forumrules


Report abuse

Libble takes abuse of its services very seriously. We're committed to dealing with such abuse according to the laws in your country of residence. When you submit a report, we'll investigate it and take the appropriate action. We'll get back to you only if we require additional details or have more information to share.

Product:

For example, Anti-Semitic content, racist content, or material that could result in a violent physical act.

For example, a credit card number, a personal identification number, or an unlisted home address. Note that email addresses and full names are not considered private information.

Forumrules

To achieve meaningful questions, we apply the following rules:

Register

Register getting emails for Minolta Dimage Z1 at:


You will receive an email to register for one or both of the options.


Get your user manual by e-mail

Enter your email address to receive the manual of Minolta Dimage Z1 in the language / languages: Dutch as an attachment in your email.

The manual is 4,53 mb in size.


You will receive the manual in your email within minutes. If you have not received an email, then probably have entered the wrong email address or your mailbox is too full. In addition, it may be that your ISP may have a maximum size for emails to receive.

Others manual(s) of Minolta Dimage Z1

Minolta Dimage Z1 User Manual - English - 116 pages

Minolta Dimage Z1 User Manual - German - 116 pages


The manual is sent by email. Check your email

If you have not received an email with the manual within fifteen minutes, it may be that you have a entered a wrong email address or that your ISP has set a maximum size to receive email that is smaller than the size of the manual.

The email address you have provided is not correct.

Please check the email address and correct it.

Your question is posted on this page

Would you like to receive an email when new answers and questions are posted? Please enter your email address.


Info