512186
9
Zoom out
Zoom in
Previous page
1/53
Next page
1514
ANSCHLUSS DER KAMERA AN DEN PC
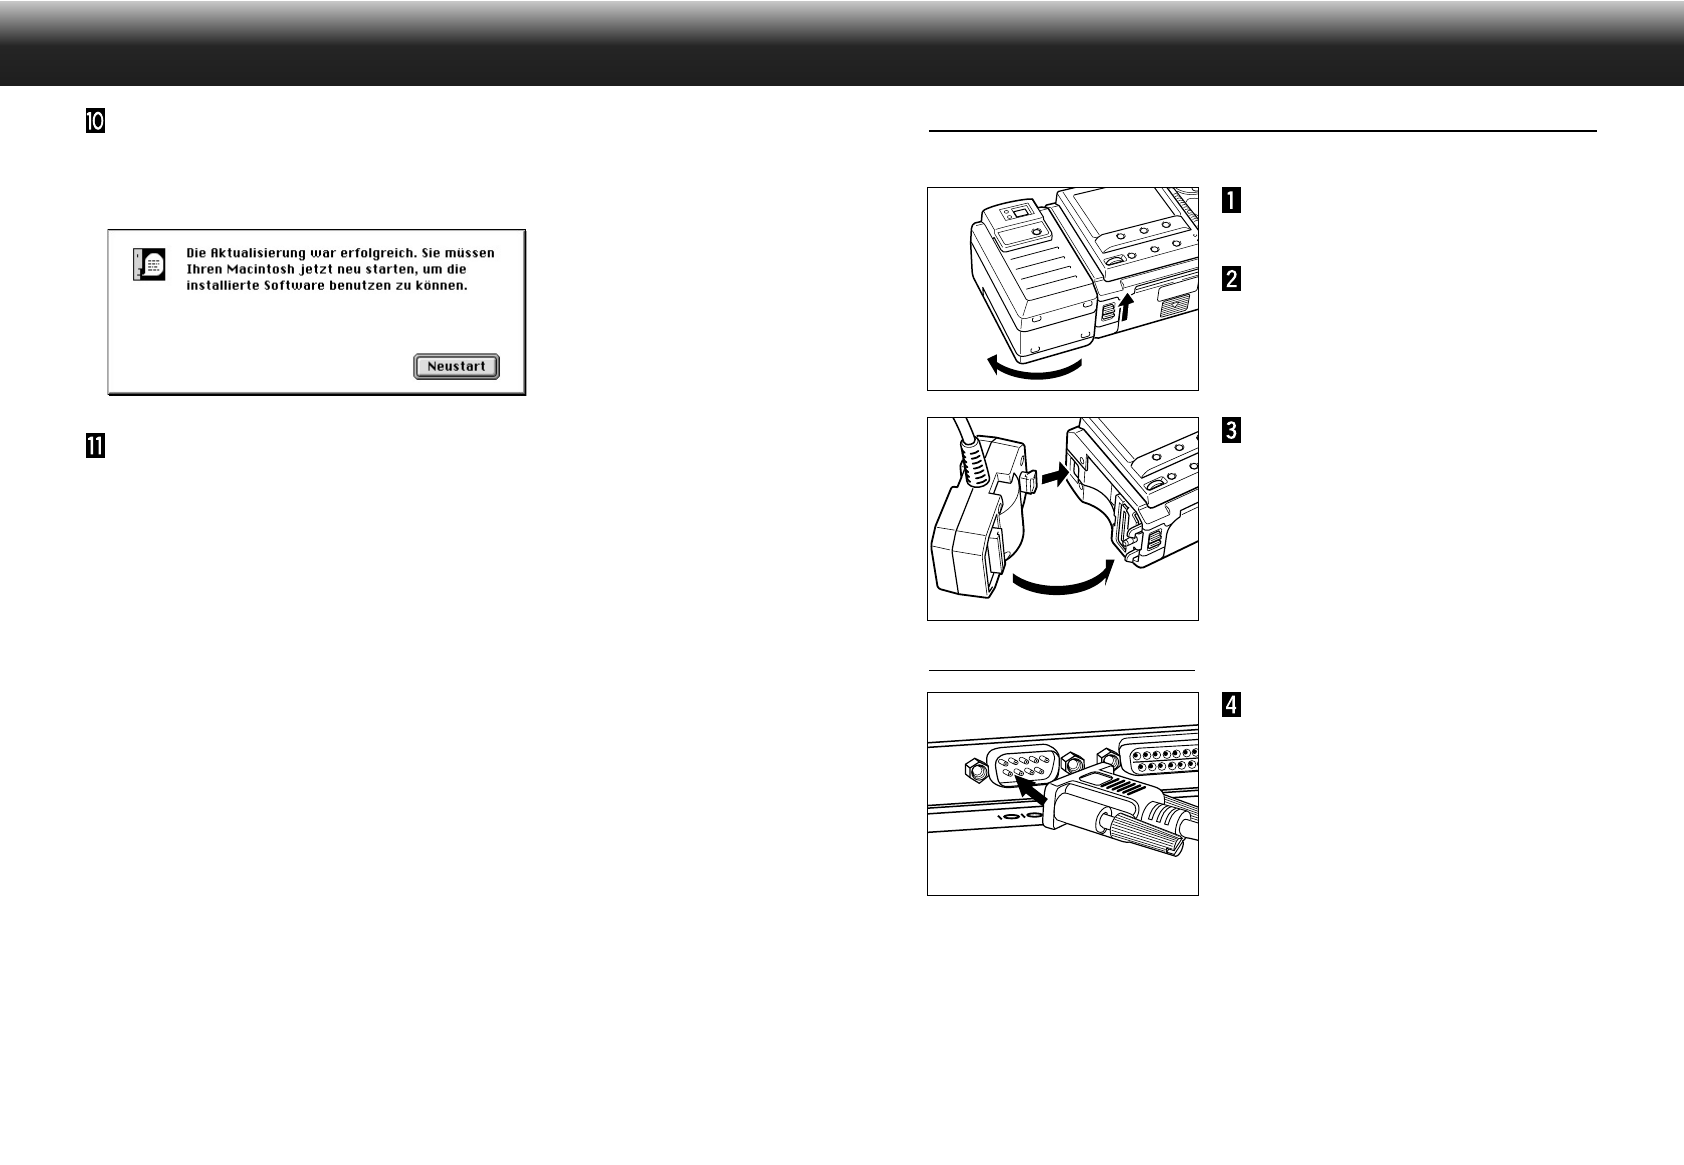
VERWENDUNG DES PC-ANSCHLUß-KABELS SC-EX1
Schließen Sie die Kamera mit dem PC-Anschluß-Kabel SC-EX 1 an den seriellen Anschluß des Computers an.
Schalten Sie den Computer und
die Kamera aus.
Nehmen Sie die Objektiveinheit
ab.
Richten Sie das hervorstehende
Teil des seriellen Adapters SC-
EX 1 an der Vertiefung der
Kamera aus, und drücken Sie es
in die durch den Pfeil angezeigte
Richtung, bis ein Klicken zu
hören ist.
Stecken Sie den D-Sub-9-Pin-
Stecker des PC-Anschluß-Kabels
SC-EX 1 in den seriellen
Anschluß des PC´s.
• Richten Sie die Pins des seriellen Anschlusses am PC
zu den Löchern des Steckers aus, und drücken Sie
die Anschlüsse fest zusammen. Danach können Sie
mit den beiden Schrauben den Stecker festziehen.
Wird die Kamera am Macintosh angeschlossen,
verwenden Sie den Macintosh-Adapter MA-EX 1 in
Kombination mit dem Kabel SC-EX 1, und schließen
Sie es am Modem- oder am Druckeranschluß an.
IBM PC/AT-KOMPATIBLE
Klicken Sie auf „Installieren“.
• Die Installation wird gestartet und auf dem Bildschirm erscheint die Fortschrittsanzeige des
Installationsvorgangs. Folgen Sie den Anweisungen auf dem Bildschirm.
• Nach abgeschlossener Installation erscheint das folgende Fenster.
Klicken Sie auf „Neustart“.
HIER BEFINDEN SICH DIE DATEIEN NACH DER INSTALLATION:
• Im vom Benutzer gewählten Zielverzeichnis
Digita Desktop (Anwendungssoftware)
Goodies (Ordner)
• Im Ordner Systemerweiterungen
Digita Desktop (Systemerweiterung)
Digita Camera (Systemerweiterung)
• Bei der einfachen Installation werden alle aufgelisteten Dateien auf das Laufwerk kopiert. Wird die
benutzerdefinierte Installation gewählt, so werden nur die ausgewählten Dateien auf das Laufwerk
kopiert.
Fortsetzung nächste Seite.
9


Need help? Post your question in this forum.

Forumrules


Report abuse

Libble takes abuse of its services very seriously. We're committed to dealing with such abuse according to the laws in your country of residence. When you submit a report, we'll investigate it and take the appropriate action. We'll get back to you only if we require additional details or have more information to share.

Product:

For example, Anti-Semitic content, racist content, or material that could result in a violent physical act.

For example, a credit card number, a personal identification number, or an unlisted home address. Note that email addresses and full names are not considered private information.

Forumrules

To achieve meaningful questions, we apply the following rules:

Register

Register getting emails for Minolta Dimage EX at:


You will receive an email to register for one or both of the options.


Get your user manual by e-mail

Enter your email address to receive the manual of Minolta Dimage EX in the language / languages: German as an attachment in your email.

The manual is 1,7 mb in size.


You will receive the manual in your email within minutes. If you have not received an email, then probably have entered the wrong email address or your mailbox is too full. In addition, it may be that your ISP may have a maximum size for emails to receive.

The manual is sent by email. Check your email

If you have not received an email with the manual within fifteen minutes, it may be that you have a entered a wrong email address or that your ISP has set a maximum size to receive email that is smaller than the size of the manual.

The email address you have provided is not correct.

Please check the email address and correct it.

Your question is posted on this page

Would you like to receive an email when new answers and questions are posted? Please enter your email address.


Info