2337
46
Zoom out
Zoom in
Previous page
1/164
Next page
46
OPNAMESTAND
GEHEUGEN – CAMERA-INSTELLINGEN OPSLAAN
U kunt drie sets camera-instellingen opslaan. Zo kunt u onder regelmatig
terugkerende omstandigheden snel alle nodige instellingen realiseren, zonder ze
stuk voor stuk te hoeven uitvoeren. Alle instellingen van het opnamemenu
kunnen worden opgeslagen, behalve de instellingen voor de spot/AEL-toets, de
onderwerpsprogramma's, de datum/tijd-imprint in de foto gesproken memo en de
directe weergave. Ook de positie van het Flex-scherpstelpunt, de eigen witba-
lansinstelling en veranderingen die met het functiewiel en de effect-schakelaar
zijn uitgevoerd kunnen worden opgeslagen. Hoewel de bracketing-functie ook
kan worden opgenomen moeten het type bracketing (belichting, contrast, kleurverzadiging of filter)
opnieuw worden gekozen.
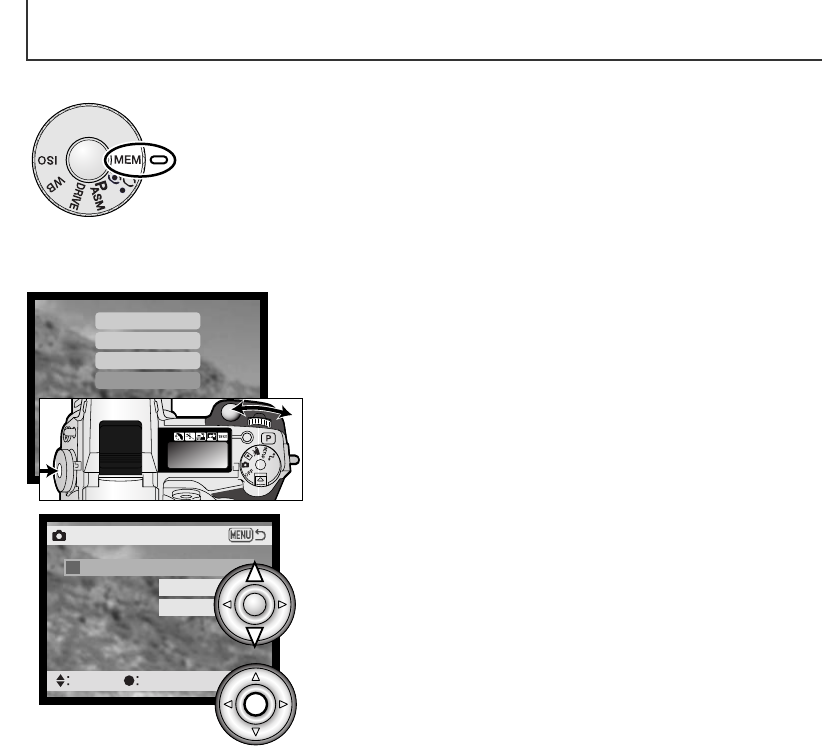
Wilt u de huidige camera-instellingen opslaan, zet dan het
functiewiel in de opnamestand en druk op de functietoets (1)
om de geheugeninstellingen op de monitor te laten verschij-
nen. Draai aan het instelwiel om de opslag-optie te markeren
(store memory). Laat de functietoets los om het opslagscherm
(store memory) te openen.
Memory 1
Memory 2
Memory 3
Store memory
1
2
De camera-instellingen worden opgeslagen met het functiewiel
(blz. 44). Bij het eerste gebruik bevat elk geheugen de
standaardinstellingen van de camera.
Om een combinatie van instellingen op te roepen gebruikt u
de op/neer-toetsen van de stuurknop (3) om het
geheugenregister te openen waarin de camera-instellingen
zijn opgeslagen. Druk op de centrale toets van de stuurknop
(4) om de instellingen op te slaan; de voorgaande instellingen
worden vervangen door de nieuwe. Er verschijnt een
bevestigingsscherm; druk op de centrale toets van de
stuurknop om het te sluiten.
Rec.
Store memory
select enter
1
Store in 1
2
3
3
4
46


Need help? Post your question in this forum.

Forumrules


Report abuse

Libble takes abuse of its services very seriously. We're committed to dealing with such abuse according to the laws in your country of residence. When you submit a report, we'll investigate it and take the appropriate action. We'll get back to you only if we require additional details or have more information to share.

Product:

For example, Anti-Semitic content, racist content, or material that could result in a violent physical act.

For example, a credit card number, a personal identification number, or an unlisted home address. Note that email addresses and full names are not considered private information.

Forumrules

To achieve meaningful questions, we apply the following rules:

Register

Register getting emails for Minolta Dimage 7i at:


You will receive an email to register for one or both of the options.


Get your user manual by e-mail

Enter your email address to receive the manual of Minolta Dimage 7i in the language / languages: Dutch as an attachment in your email.

The manual is 3,73 mb in size.


You will receive the manual in your email within minutes. If you have not received an email, then probably have entered the wrong email address or your mailbox is too full. In addition, it may be that your ISP may have a maximum size for emails to receive.

Others manual(s) of Minolta Dimage 7i

Minolta Dimage 7i User Manual - German - 164 pages


The manual is sent by email. Check your email

If you have not received an email with the manual within fifteen minutes, it may be that you have a entered a wrong email address or that your ISP has set a maximum size to receive email that is smaller than the size of the manual.

The email address you have provided is not correct.

Please check the email address and correct it.

Your question is posted on this page

Would you like to receive an email when new answers and questions are posted? Please enter your email address.


Info