71
• Se uno SLAVE non emette un lampo ritardato, significa
che il sensore di questo SLAVE non ha ricevuto l’impulso
luminoso. Ruotate lo SLAVE in modo tale che il sensore
ቭ possa ricevere l’impulso luminoso e ripetete il test.
Se la luminosità ambiente e/o l’apertura del
diaframma sull’obiettivo della fotocamera sono
troppo grandi, lo SlAVE potrebbe non ricevere
completamente l’impulso luminoso nella ripre-
sa successiva, poiché la centralina elettronica
interrompe prima l’emissione luminosa. Ridu-
cete in questo caso l’apertura del diaframma
sull’obiettivo della fotocamera o applicate
davanti all’obiettivo un filtro neutrale grigio.
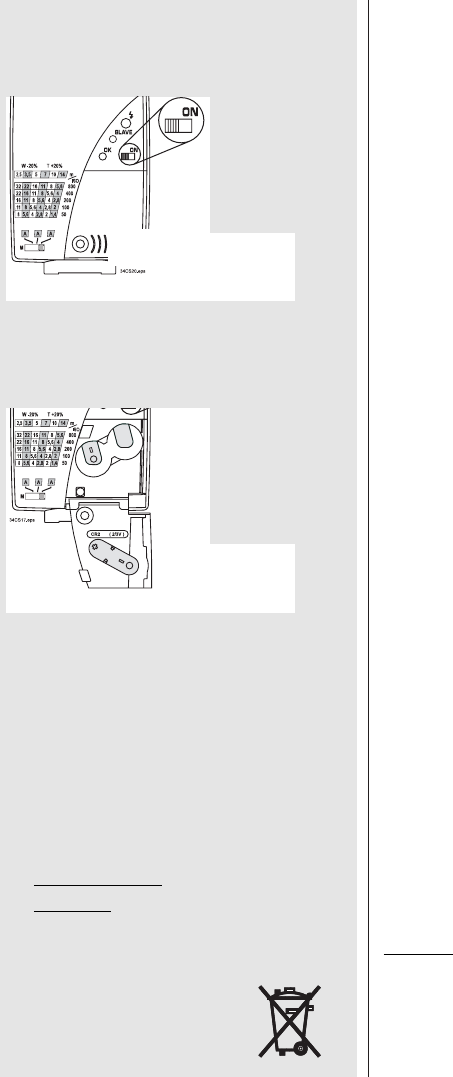
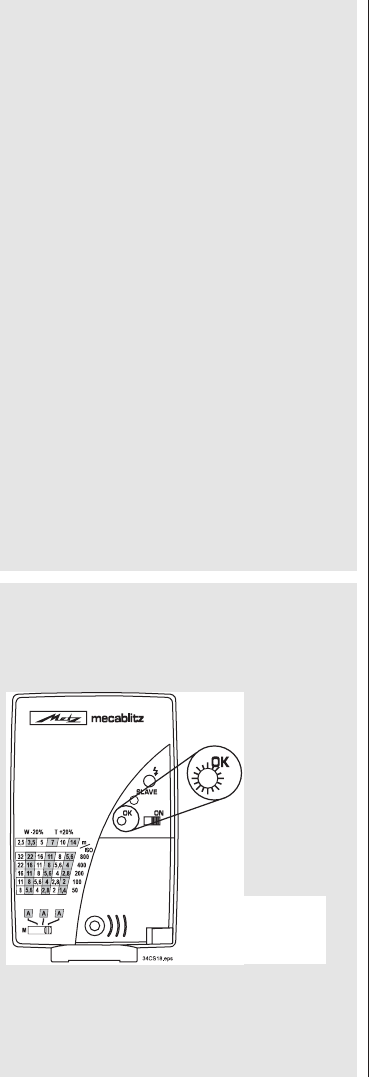
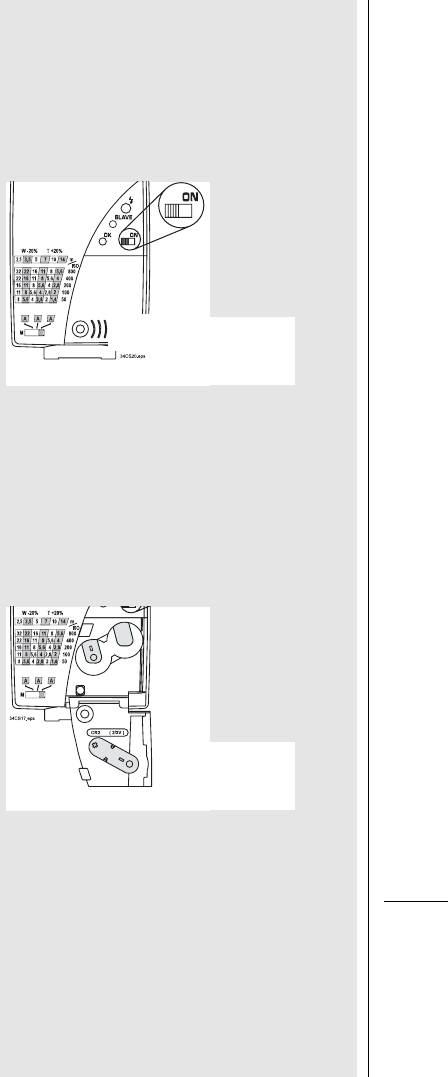
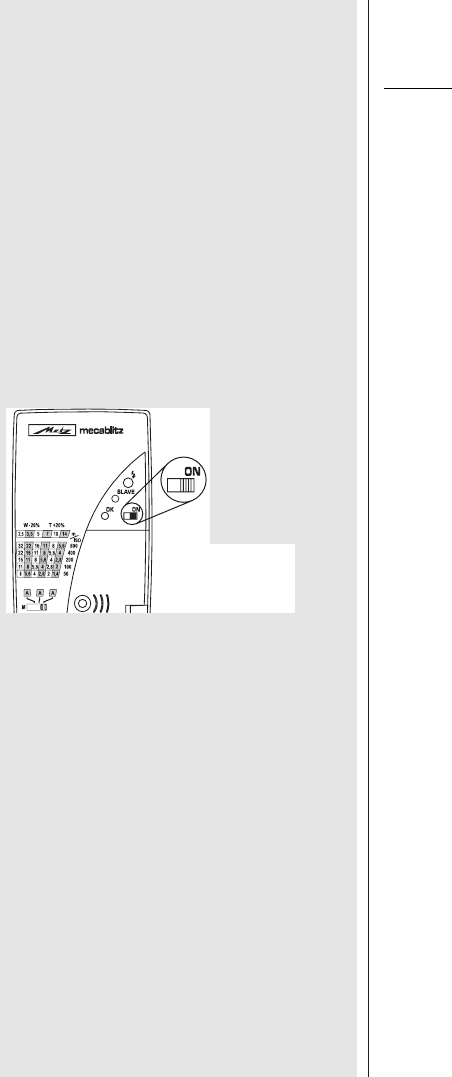
Per commutare il mecablitz dalla „Funzione SLAVE nel Con-
trollo Metz a distanza senza cavi“ alla „Funzione mecalux
con sopppressione del prelampo di misurazione“ (selettore
di funzionamento SLAVE rispettivamente in posizione 2), non
dovete fare altro che spegnere e poco dopo riaccendere il
mecablitz con l’interruttore principale ቤ. Nella posizione 1
del selettore di funzionamento SLAVE ቮ il mecablitz funzio-
na sempre nella „Funzione mecalux-SLAVE“.
Il lampeggiatore SLAVE reagisce solo all’impul-
so luminoso del Controller. I lampeggiatori di
altri fotografi che abbiano lo stesso raggio di
azione non possono attivare lo SLAVE.
Nel Controllo Metz a distanza senza cavi sul
lampeggiatore SLAVE non viene indicato il con-
trollo dell’esposizione. Per il controllo dell’es-
posizione è rilevante solo la spia sul Controller.
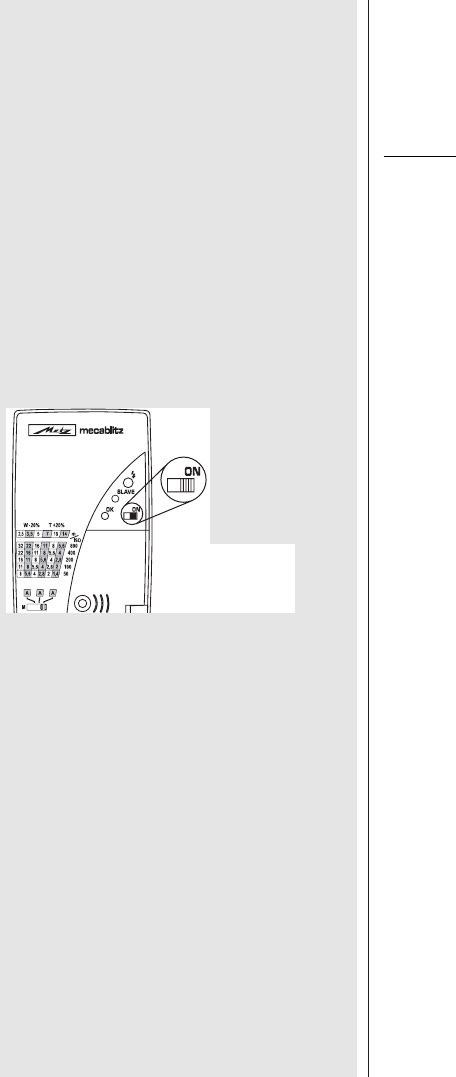
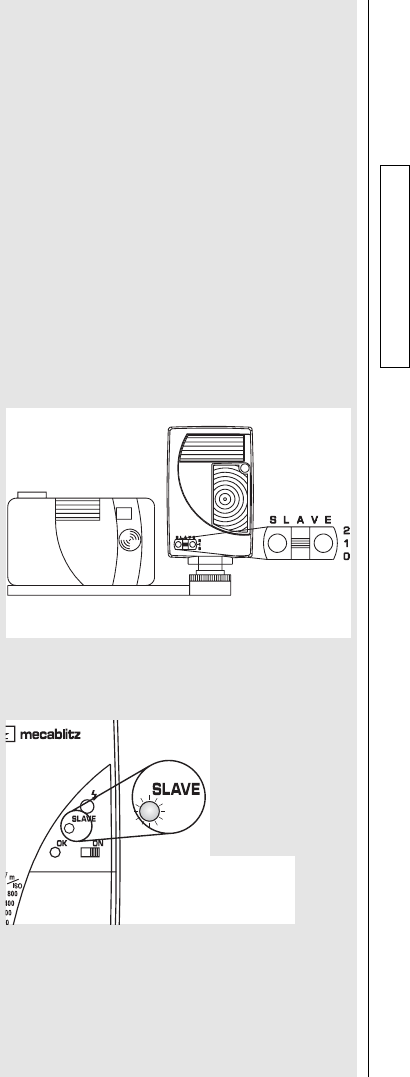
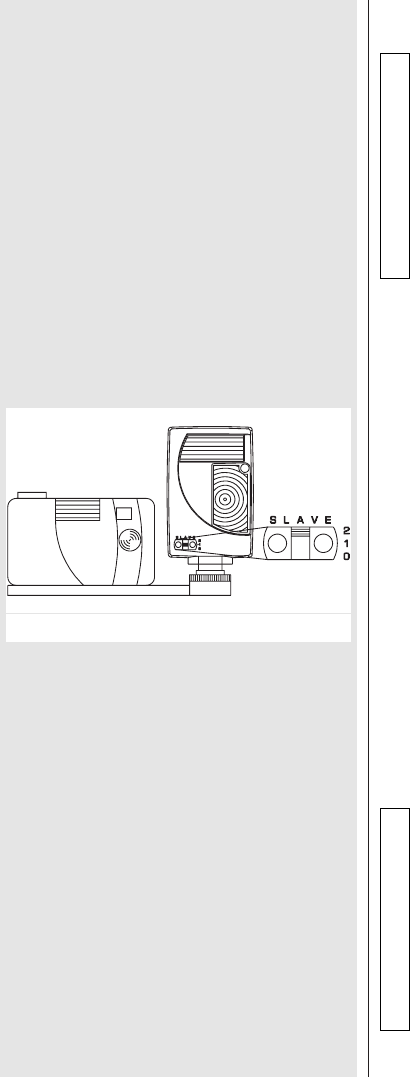
Modo flash Controller senza cavi
Nel Modo flash Controller la luce lampo del mecablitz
controlla senza cavi l’attivazione di uno o più appa-
recchi SLAVE. Il Controller viene montato sulla slitta
accessori della camera o sulla staffa della camera
oppure collegato tramite cavo sincro con il contatto
sincro (contatto X) della camera (vedi pagina 49: sin-
cronizzazione). Il mecablitz 34 CS-2 digital supporta
come Controller solo la funzione mecalux-SLAVE:
selettore di funzionamento SLAVE del mecablitz 34
CS-2 digital sulla camera in posizione 0.
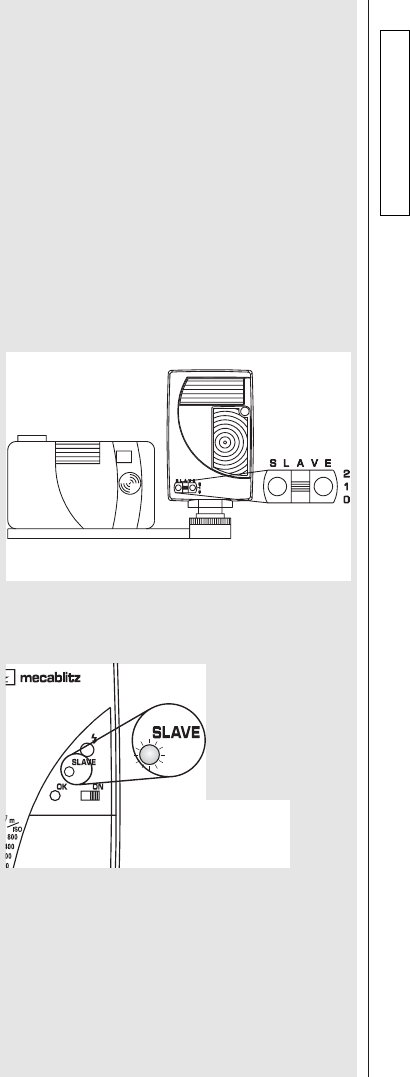
Mettete il selettore di funzionamento SLAVE ቮ
del lampeggiatore SLAVE in posizione 1!
Il mecablitz funzionerà nel Modo flash Auto A o nel Modo
flash Manuale M. Per l’impiego come lampeggiatore Con-
troller non sono necessarie altre impostazioni.
☞
☞
☞
☞
respuesta de todos ellos es simultánea.
•
En el caso de que un esclavo no emita un destello retarda-
do, significa que su sensor no ha recibido ningún impulso
luminoso. Gire el esclavo, de manera que el sensor ቭ
pueda recibir un impulso luminoso y repita Vd. la prueba
Una gran luminosidad ambiente y/o una gran
abertura del diafragma en el objetivo de la cáma-
ra, pueden ocasionar que en la toma consecutiva,
el esclavo no reciba plenamente el impulso lumi-
noso, dado que la electrónica ha interrumpido
previamente la emisión de luz. En ese caso,
diafragme Vd. el objetivo de la cámara, o coloque
un filtro neutro - gris delante del objetivo.
Para conmutar el mecablitz de la „función esclavo en el
sistema sin cables Metz-Remote“ a la „función mecalux
con supresión del predestello de medición“, (en cada caso,
el interruptor de función esclavo en la posición 2), es sufi-
ciente desconectar y volver a conectar brevemente el
mecablitz con el interruptor principal ቤ. En la posición 1
del interruptor de función esclavo ቮ, el mecablitz opera
siempre con la „función mecalux esclavo“.
El flash esclavo reacciona solamente ante el
impulso luminoso del controlador. Los flashes
de otros fotógrafos en el mismo radio de
acción no pueden disparar al esclavo
En el funcionamiento sin cables Metz-Remote,
no se produce en el flash esclavo ninguna indi-
cación de control de la exposición. Para el con-
trol de la exposición sólo es relevante la indi-
cación en el controlador.
Funcionamiento del flash controlador sin cables
En el funcionamiento del flash controlador, la luz de
destello del mecablitz activa, sin cables, el disparo de
uno o de varios flashes esclavos. El controlador se
monta en la zapata para flash o accesorios, o regleta
de la cámara o bien, se une a través de un cable sín-
crono con el contacto de sincronización (contacto X)
de la cámara (vea la página 49: Sincronización). El
mecablitz 34 CS-2 digital soporta como controlador
solamente la función mecalux esclavo: el interruptor
de función esclavo del mecablitz 34 CS-2 digital, en o
de la cámara en posición 0
¡Coloque el interruptor de función SLAVE ቮ,
del flash esclavo, en la posición 1!
El mecablitz opera en el modo de funcionamiento
automático A o en el modo manual M. Para su aplicación
como flash controlador, no es necesario ningún ajuste adi-
cional.
☞
☞
☞
☞
Ǻ
Ǻ