15
• Checkregularlythatneithercordnorplugis
damaged and do not use if they are, or if the
appliance has been dropped or damaged in
any other way.
• Iftheappliance,cordorplughasbeen
damaged, have the appliance inspected
and if necessary repaired by an authorised
repairer.Nevertrytorepairtheappliance
yourself. Please contact the store where
you bought the appliance for repairs under
theguarantee.Unauthorisedrepairsor
modifications to the appliance will invalidate
the guarantee.
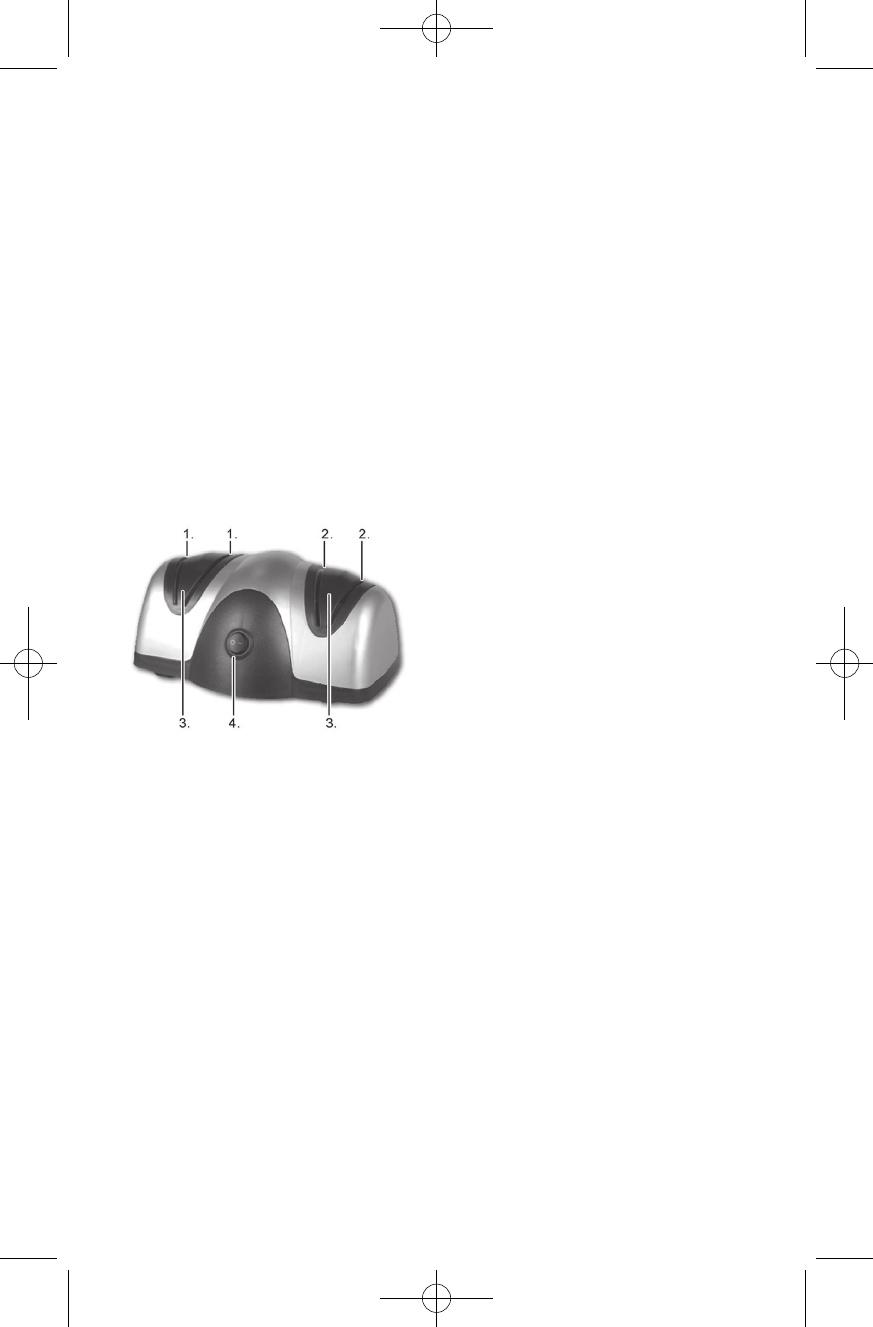
KEY TO THE MAIN COMPONENTS OF THE
APPLIANCE
1. Left-sideguidesforprecisionsharpening
(stage 1)
2. Right-side guides for fine sharpening (stage
2)
3. Coverplate
4. On/Offbutton
USING THE APPLIANCE
Theappliancehastwosetsofknifeguides:The
left guide (1) is for precision sharpening, and the
right guide (2) is for fine sharpening. The guides
arepreciselyangledforoptimalsharpening.Left
-side and right-side guides sharpen both sides
of the knife blade.
Unlessotherwisestated,alwaysstartwith
precision sharpening, followed by fine
sharpening.
1. Dampen the suction cups under the
appliance with a little water. Place the
appliance on a flat, stable surface, e.g.
kitchen counter and ensure the appliance is
firmly in place.
2. Plug in and switch on the power.
3. Switchontheappliancebyswitchingthe
on/off button (4) to "I".
4. Stage1–precisionsharpening:Slowlydraw
the knife back towards you through one
and then the other left-side guide. Repeat
the process three times. Do not press down
hard on the knife or draw it too fast through
the guide. Draw the knife through at a rate of
1 second for every 5 cm of blade.
5. Keep the knife edge parallel with the table,
unless sharpening the point.
6. Sharpenthepointbyslightlyraisingtheknife
handle, so that the curved part of the blade
is drawn through the guide.
7. Stage2–finesharpening:Slowlydrawthe
knife back towards you through one and
then the other right-side guide. Repeat the
process three times. Do not press down
hard on the knife or draw it too fast through
theguide.Takearound3secondstodraw
the knife, depending on the blade length.
8. Finish the fine sharpening by quickly
drawing the knife a single time though each
right-side guide (approx. 1 second duration).
9. You must always wipe the blade with a wet
cloth to remove any metal shavings when
you have finished sharpening the knife.
10. Repeat stages 1 and 2 until the knife is
sufficiently sharpened.
11.TurnofftheappliancebypressingtheOn/
Offbuttonto“0”andremovetheplugfrom
the socket.
IMPORTANT!Neverputtheknifepointfirst
into the sharpener and push it forward. You
must always draw the knife back through the
sharpener towards yourself.
IMPORTANT!Theappliancemustnotbeused
to sharpen scissors, bread knives, electrical
knives with bevelled indentations or knives with
bevelled indentations on both sides.
NOTE!Youmayhavetosharpentheknife
several times to achieve the required sharpness.
It may be the case that the knife was previously
sharpened incorrectly or badly, or the knife is
made from tempered steel which is extremely
hard. Repeat stages 1 and 2 until the knife cuts
easily though food. In such cases, it will usually
only be necessary to repeatedly sharpen the
knife on the very first occasion. Carrying out
stages 1 and 2 will be enough thereafter.
Particular care with knives with single-sided
bevelled indentations
The appliance can sharpen knives with single-
sided bevelled indentations.
• Thesetypesofknifemustonlybesharpened
in the right-side guides of the appliance, so
as to only sharpen the smooth side of the
blade.
• Drawtheknifeverylightlythroughthe
guides.
• Pleasenote,thatasmallpartofthe
indentations will be worn away every time
the knife is sharpened, and eventually, they
will be completely worn away.