34
2 Informazioni interessanti / 3 Messa in funzione
I
• Se il valore sistolico o diastolico rilevato nel corso nella misurazione non
sembra normale (troppo alto o troppo basso), nonostante il corretto utilizzo
dell’apparecchio, e se ciò si ripete diverse volte, è opportuno rivolgersi al
proprio medico curante. Lo stesso vale anche nei rari casi in cui un polso
irregolare o troppo debole non renda possibile la misurazione.
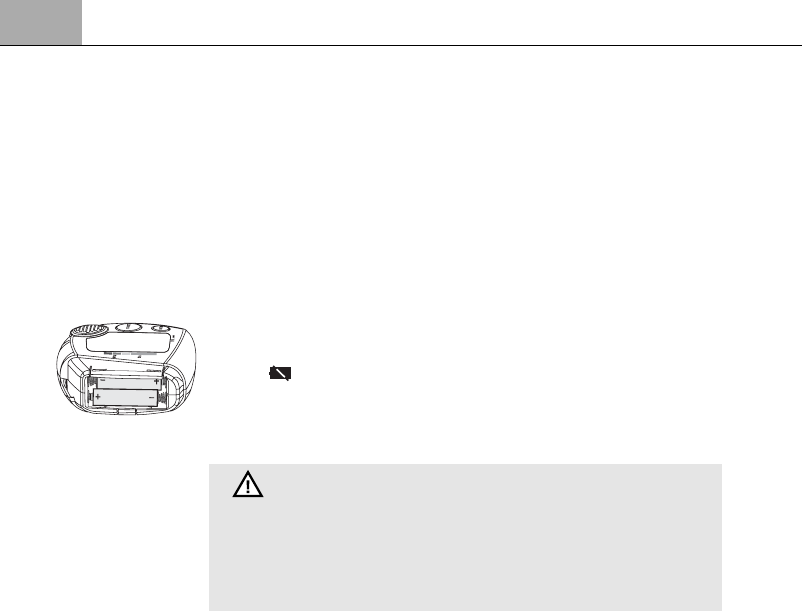
Per inserire le batterie: Aprire il vano batteria
sul lato dell'apparecchio
esercitando una leggera pressione contro il bordo superiore del coperchio e
inserire le due batterie fornite in dotazione (tipo AAA LRO3). Prestare attenzio-
ne a disporre le batterie nel senso giusto (schema nel vano batterie). Appoggi-
are di nuovo il coperchio di chiusura e spingerlo fino a quando si incastra per-
fettamente con uno scatto.
Per estrarre le batterie: Quando sul display appare il simbolo della batteria
sbarrato , occorre inserire delle nuove pile. Dopo aver inserito le batterie sul
display vengono visualizzate la data e l’ora (preimpostate). Impostare la data e
l'ora, come descritto al punto 3.2 Impostazione di data e ora. Si ricordi che
ogni volta che si inseriscono le batterie, è necessario impostare nuovamente la
data e l'ora. I risultati della misurazione effettuata rimangono memorizzati.
INDICAZIONI DI SICUREZZA PER LA BATTERIA
• Tenere la batteria lontano dalla portata dei bambini!
• Non ricaricarla! • Non cortocircuitarla! • Non gettarla nel fuoco!
• Non gettare la batteria esaurita e gli accumulatori nei rifiuti
domestici, ma nei rifiuti speciali o in una stazione di raccolta pile
nel commercio specializzato!
1. Data e ora possono essere impostate ad apparecchio spento. Premere con-
temporaneamente il tasto START
e il tasto MEM
. L’indicazione del
mese comincia a lampeggiare sul display. Per modificare il numero del
mese, confermarlo con il tasto MEM
fino a quando compare la cifra
desiderata. Tenere premuto il tasto MEM
per visualizzare i numeri a
scorrimento rapido. Premere il tasto START
; le cifre di mese, giorno, ora
e minuti lampeggeranno consecutivamente. Per modificare i valori visua-
lizzati, azionare di volta in volta il tasto MEM
.
2. Dopo aver premuto il tasto START
per la quinta volta, le cifre sul
display smettono di lampeggiare. L’impostazione dell’ora è terminata.
3. Se si sostituiscono le batterie, è necessario reimpostare data e ora.
La funzione vocale può essere impostata ad apparecchio spento, vale a dire con
la sola visualizzazione di data e ora. Premere e tenere premuto il tasto MEM
fino a quando sul display viene visualizzato l’indicatore della lingua im-
postata (ad es. L1).
L1 = inglese L3 = spagnolo L5 = francese
L2 = tedesco L4 = olandese L6 = italiano
L0 = funzione vocale disattivata
3.1
Inserire / estrarre
le batterie
3.3
Impostazione
della funzione
vocale
3.2
Impostazione
di data e ora