4
The Marantz TT-15S1 comes in several pre mounted
parts, as described in Scope of supply. The set up
and installation is done quickly and very easy.
Please use the white gloves during this procedure,
to avoid scratches.
You should consider a safe and clean working area
for the installation, in spite, as near as possible to
the final position of the turntable.
First take out the accessories, the motor and the
tonearm of the packing. Now you should take out
the first packing layer. After that you can take out
the turntable chassis including the mounted lower
and upper bearing part from the second packing
layer. Place the turntable chassis on its feet on the
area where the final position of your turntable will be.
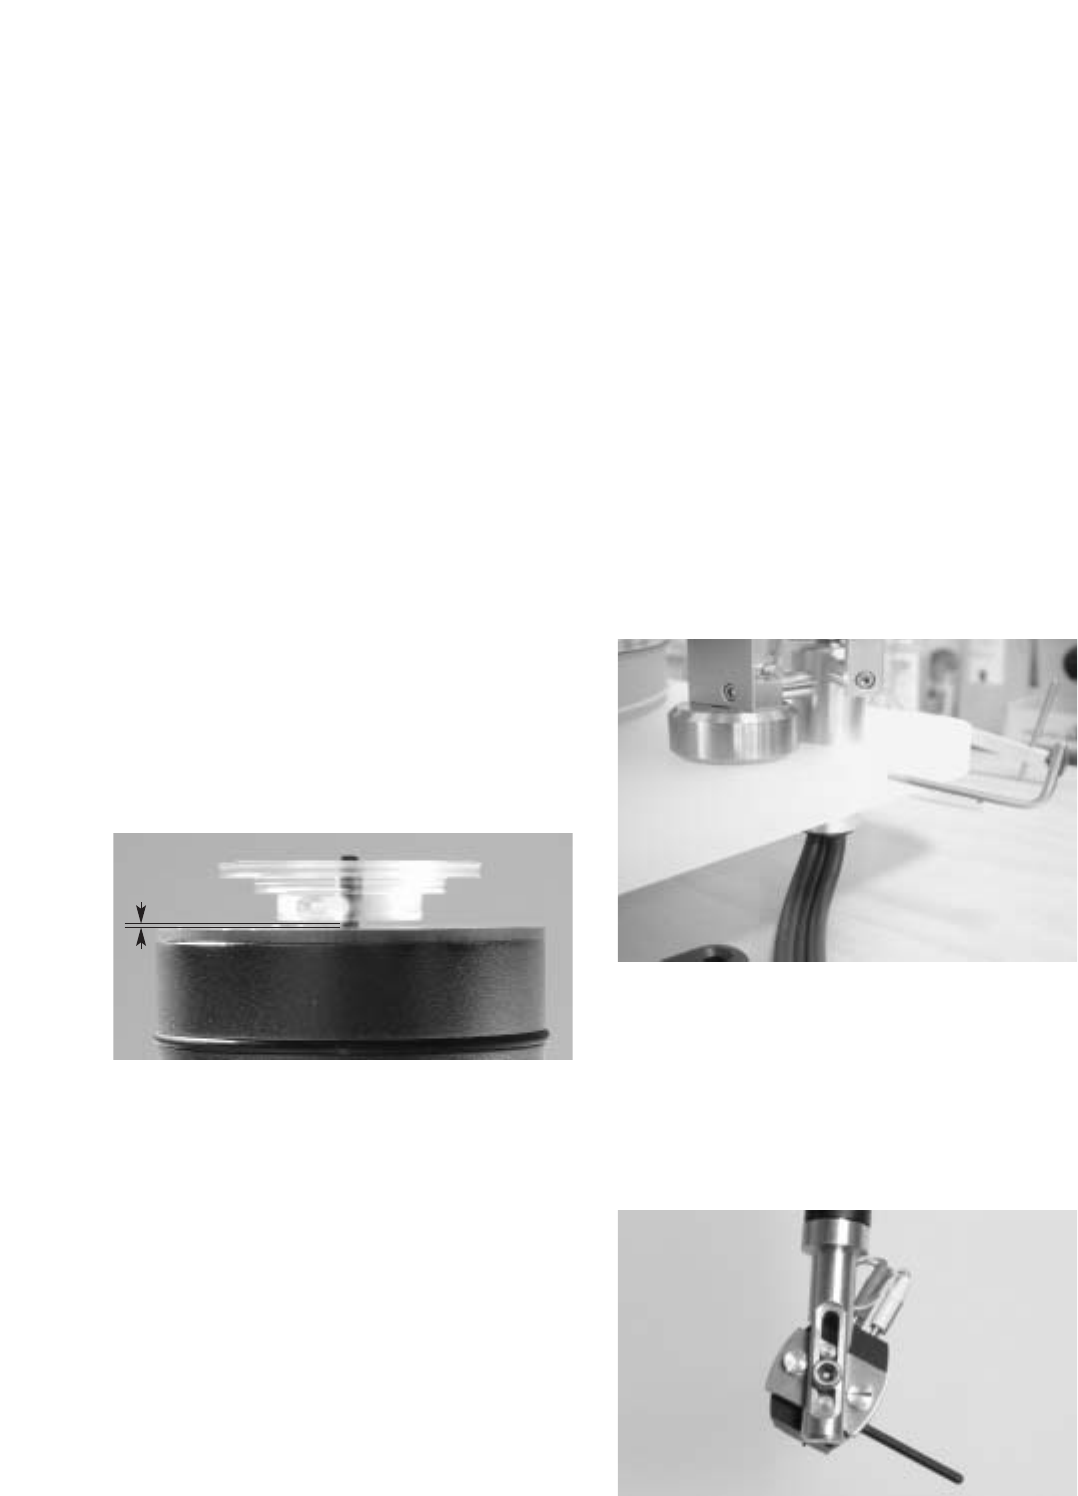
Take the motor-pulley out of the accessory bag and
shift the motor pulley as far as on the motors´ shaft
until you have a distance of approximately 1 mm
between the upper edge of the motor and the lower
edge of the pulley. Now screw the three screws in
the pulley one after the other with a screwdriver.
Lift the turntable chassis and slide the motor from
below exactly under the predefined position hole in
the chassis. Please pay attention that the switch of
the motor is outside on the left side of the record
player body. When the motor is at the right position
carefully put the chassis down again.
After that you have to centre the motor in the motor-
position hole without any contact to the turntable
chassis. This way you can use your turntable
perfectly decoupled from the motor.
Remove the second packing layer. In the bottom
packing layer you will find the turntable platter.
Please take the platter out with both hands.
Place the platter with the 60mm wide and 5mm
deep cut out on the upper bearing part. Through a
lightly up and down movement the platter will slip
onto the bearing upper part. Ensure with a gently (!)
pressure that the platter is applying on the complete
surface of the bearing.
Take the threaded bolt (M6 x 8) out of your acces-
sory bag and screw it with the adequate Allen key
into the winding near the tonearm cut of the turnta-
ble chassis, so that the front of the bolt is not
facing out the inner side of the tonearm cut.
Position the enclosed counterweight on top of the
chassis in front of the cut out for the tonearm. Take
the tonearm and slide first the interconnect cable
through the hole followed by the tonearm’s shaft.
Gently push the arm down into to the hole until the
pickup lift is seated on the counterweight (see figu-
re…). Please ensure that the tonearm tube is in
parallel to the right edge of the turntable body. Now
carefully fix by turning the pick up with an Allen key
and afterwards remove the counterweight.
When the tonearm is fixed you can connect the
cartridge to the tonearm. The guideway in the
headshell simplifies the assembling. Please fix the
cartridge, with the screw and appropriate allen key,
to the tonearm when positioned at the lower treshold
(see picture). In this position the cartridge and the
arm will automatically have the correct angle and
an optimised incline.
Carefully connect the cartridge to the tonearm cable.
The headshell wires (cartridge connection leads)
are colour coded according to the international
standard and are given in the below overview:
INSTALLATION AND SET UP
1mm