495203
9
Zoom out
Zoom in
Previous page
1/84
Next page
9
Connections
The following sections introduce a step-by-step process to set up this DVD recorder. When more than one setup
option are listed at a specifi c stage, please refer to the option most suitable for your setup condition.
DVD Recorder Overview
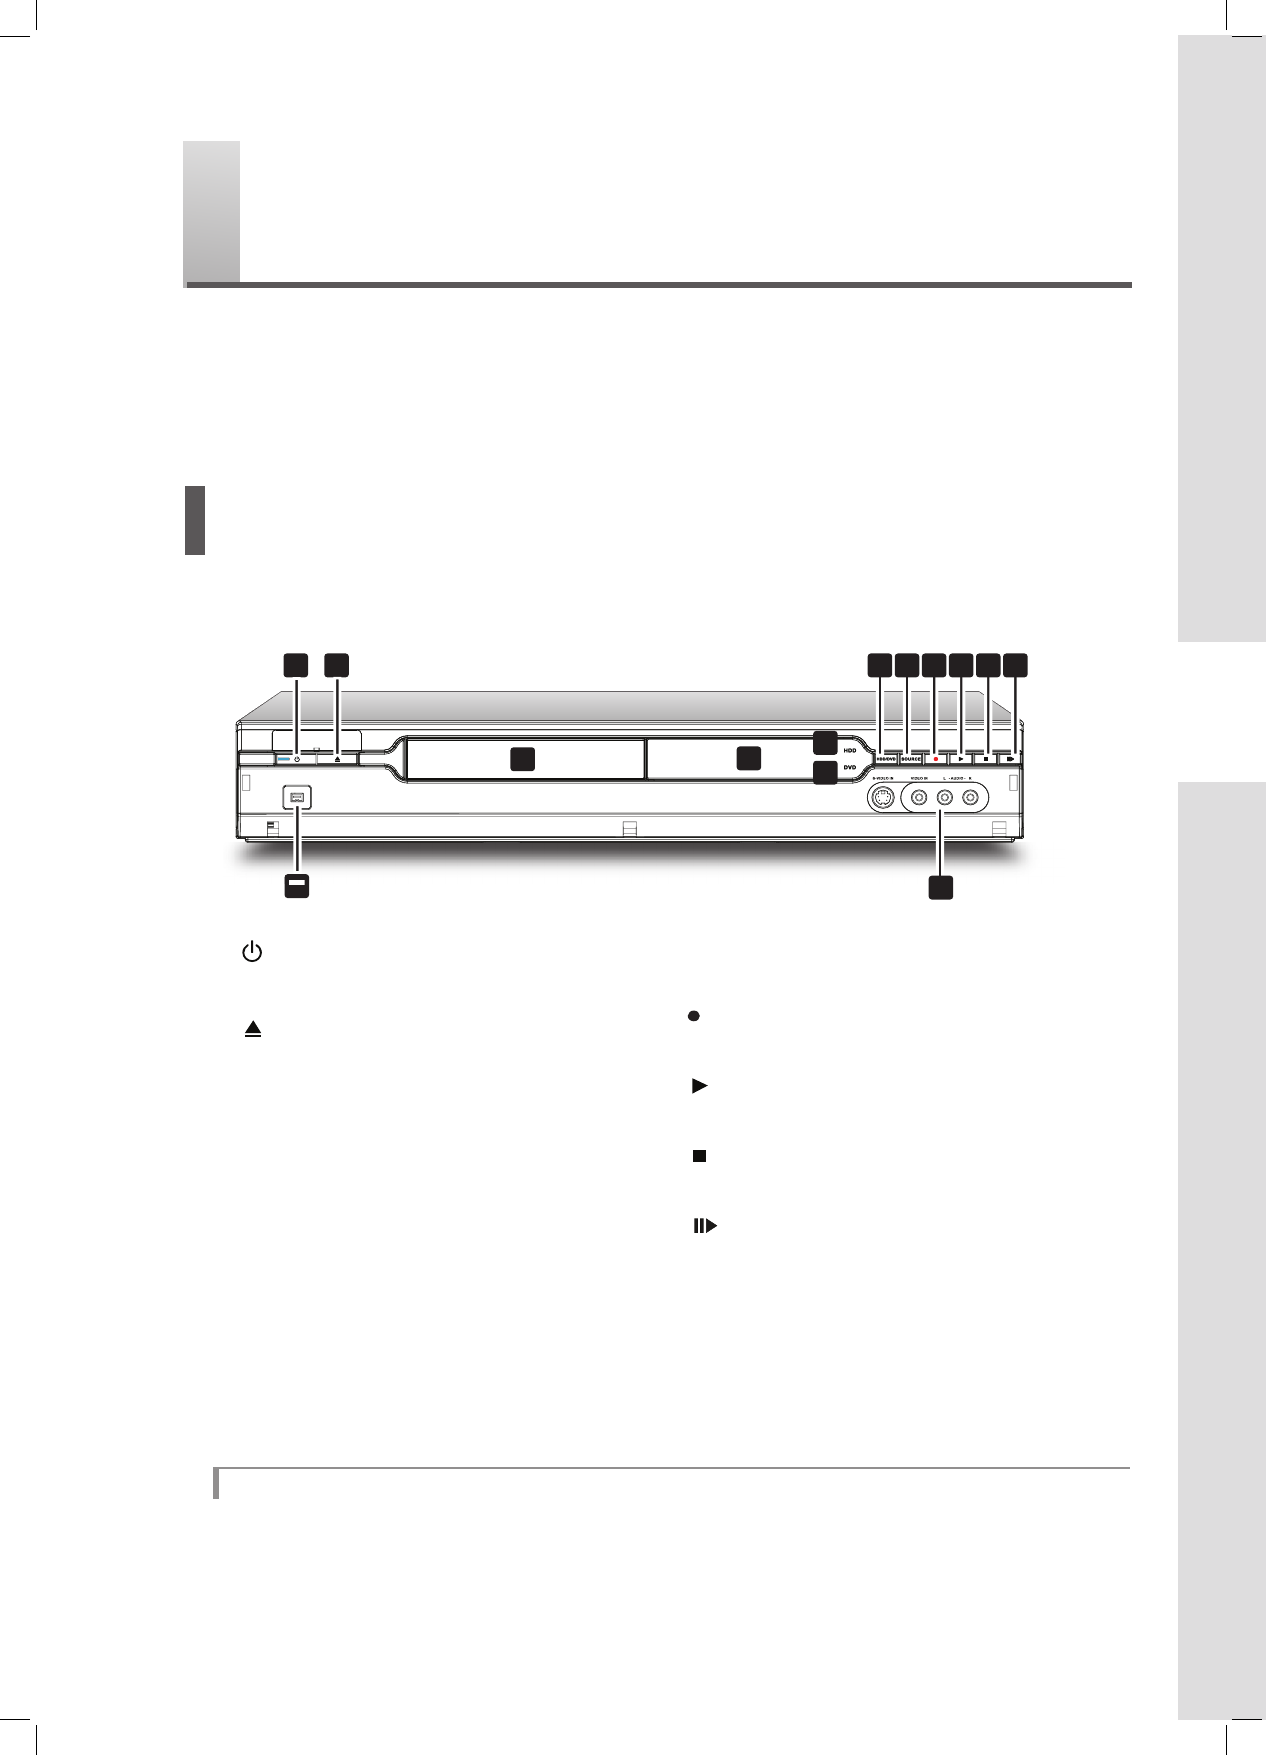
Front View
13
13
1
2
4 DISPLAY window
Shows operation information
2 OPEN/CLOSE button
Opens or closes the disc tray
7 8 9 10 11 12
3
5
6
4
14
3 Disc tray
Holds discs securely during recording or
playback
5 HDD indicator
Lights when HDD (hard disk drive) is selected
as the target device
6 DVD indicator
Lights when DVD drive is selected as the target
device
7 HDD/DVD button
Changes DVD recorders current mode from
HDD (hard disk drive) to DVD and vice versa
8 SOURCE button
Selects equipment connected via line inputs
13 DV-LINK (IEEE 1394) jack
Connects digital camcorder
14 LINE IN (S-Video/Composite VIDEO &
AUDIO L/R) jacks
Connects the outputs of external equipment
via S-Video or composite video/audio cables
1 POWER ON/OFF button
Switches on the DVD recorder or switches
the unit to standby mode
9 RECORD button
Starts recording on current device
10 PLAY button
Starts playback on current device
11 STOP button
Stops playback or recording
12 PUASE/STEP button
Pauses playback or recording
*Appearance of the unit may vary slightly depending on the model.
When using the LINE IN jacks
By default, this DVD recorder automatically selects S-Video signal over the composite one when both input jacks are
used to connect to other devices. If you would like your videos to be imported from a specifi c source, you can either
change the default setting through Setup → Video Input/Output → Front AV Input, or use one set of the connec-
tions at a time.
Connections
9


Need help? Post your question in this forum.

Forumrules


Report abuse

Libble takes abuse of its services very seriously. We're committed to dealing with such abuse according to the laws in your country of residence. When you submit a report, we'll investigate it and take the appropriate action. We'll get back to you only if we require additional details or have more information to share.

Product:

For example, Anti-Semitic content, racist content, or material that could result in a violent physical act.

For example, a credit card number, a personal identification number, or an unlisted home address. Note that email addresses and full names are not considered private information.

Forumrules

To achieve meaningful questions, we apply the following rules:

Register

Register getting emails for Lite-On HD-A940 series at:


You will receive an email to register for one or both of the options.


Get your user manual by e-mail

Enter your email address to receive the manual of Lite-On HD-A940 series in the language / languages: English as an attachment in your email.

The manual is 9,06 mb in size.


You will receive the manual in your email within minutes. If you have not received an email, then probably have entered the wrong email address or your mailbox is too full. In addition, it may be that your ISP may have a maximum size for emails to receive.

The manual is sent by email. Check your email

If you have not received an email with the manual within fifteen minutes, it may be that you have a entered a wrong email address or that your ISP has set a maximum size to receive email that is smaller than the size of the manual.

The email address you have provided is not correct.

Please check the email address and correct it.

Your question is posted on this page

Would you like to receive an email when new answers and questions are posted? Please enter your email address.


Info