12
3.7 ABLAGESCHALEN UND KONSOLE
Teile: Schraubenbeutel Nr. 5 (2 8-mm-Sechskantschrauben)
(4 selbstschneidende Schrauben, 12 mm)
Werkzeug: Kreuzschlitzschraubendreher
NUR FÜR C3:
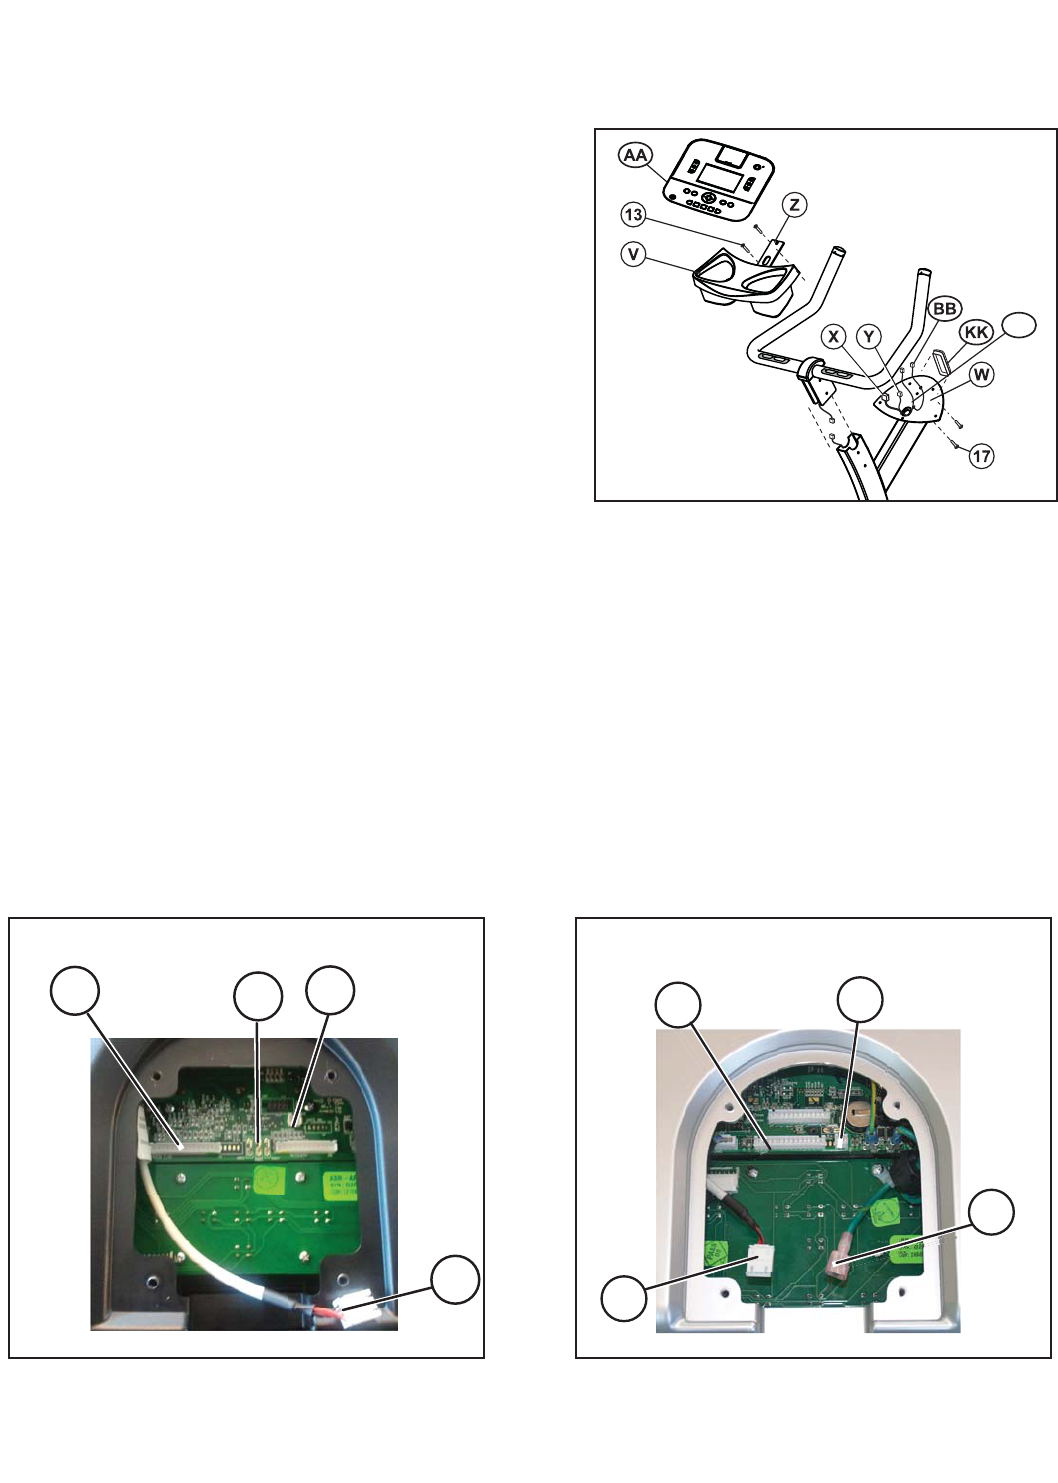
Die ABLAGESCHALE (V) zurechtlegen. Die ABLAGESCHALE
neben der Abdeckung der EINZELSÄULE (E) an der DISPLAY-KONSOLEN-
HALTERUNG (W) positionieren. Das KONSOLENKABEL (X) und das
HERZFREQUENZKABEL (Y) festhalten und den Kabelbinder,
mit dem die KONSOLENKABEL an der DISPLAY-KONSOLENHALTERUNG
befestigt sind, durchschneiden. Die KONSOLENKABEL durch die mittige
Öffnung der ABLAGESCHALEN-MONTAGEHALTERUNG (Z) führen. Die
ABLAGESCHALE mithilfe von zwei 8-mm-KREUZSCHLITZSCHRAUBEN
(13) an der DISPLAY-KONSOLENHALTERUNG Befestigen. Die
SCHRAUBEN festziehen.
VORSICHT:
Darauf achten, dass das KONSOLENKABEL (X) und
das HERZFREQUENZKABEL (Y) nicht eingeklemmt wird, wenn die
ABLAGESCHALE (V) an der DISPLAY-KONSOLENHALTERUNG (W) befes-
tigt wird.
Hinweis: Darauf achten, dass das KONSOLENKABEL (X) und das
HERZFREQUENZKABEL (Y) nicht in die DISPLAY-KONSOLENHAL-
TERUNG (W) gelangen.
Die DISPLAY-KONSOLE (AA) aus der Lieferverpackung nehmen. Die DISPLAY-KONSOLE oberhalb der ABLAGESCHALE (V)
positio-nieren. Das KONSOLENKABEL mit dem 15-poligen Stecker (X), das HERZFREQUENZKABEL mit dem 4-poligen Stecker (Y),
das ZUSÄTZLICHE STROMKABEL mit dem 2-poligen Stecker (MM) und das ERDUNGSKABEL (BB) (grün) mit den zugehörigen
BUCHSEN verbinden, die sich auf der Rückseite der DISPLAY-KONSOLE befinden. Die DISPLAY-KONSOLE mit vier 12-mm-SCHNEID-
SCHRAUBEN (17) an der DISPLAY-KONSOLENHALTERUNG (W) befestigen. Die SCHRAUBEN festziehen. Nicht überdrehen.
NUR FÜR C1:
Die DISPLAY-KONSOLE (AA) aus der Lieferverpackung nehmen. Das KONSOLENKABEL (X) und das HERZ-
FREQUENZKABEL (Y) festhalten und den Kabelbinde, mit dem das KONSOLENKABEL an der DISPLAY-KONSOLENHALTERUNG (W)
befestigt ist, durchschneiden. Die DISPLAY-KONSOLE über der KONSOLENHALTERUNG positionieren. Das KONSOLENKABEL mit dem
15 poligen Stecker (X), das HERZFREQUENZKABEL mit dem 4-poligen Stecker (Y) und das ERDUNGSKABEL (BB) (grün) mit den zuge-
hörigen BUCHSEN verbinden, die sich auf der Rückseite der DISPLAY-KONSOLE befinden. Die DISPLAY-KONSOLE mit vier 12-mm-
SCHNEIDSCHRAUBEN (17) an der DISPLAY-KONSOLENHALTERUNG befestigen. Die SCHRAUBEN festziehen. Nicht überdrehen.
Hinweis: Darauf achten, dass das KONSOLENKABEL (X) und das HERZFREQUENZKABEL (Y) nicht in die DISPLAY-KONSOLEN-
HALTERUNG (W) gelangen.