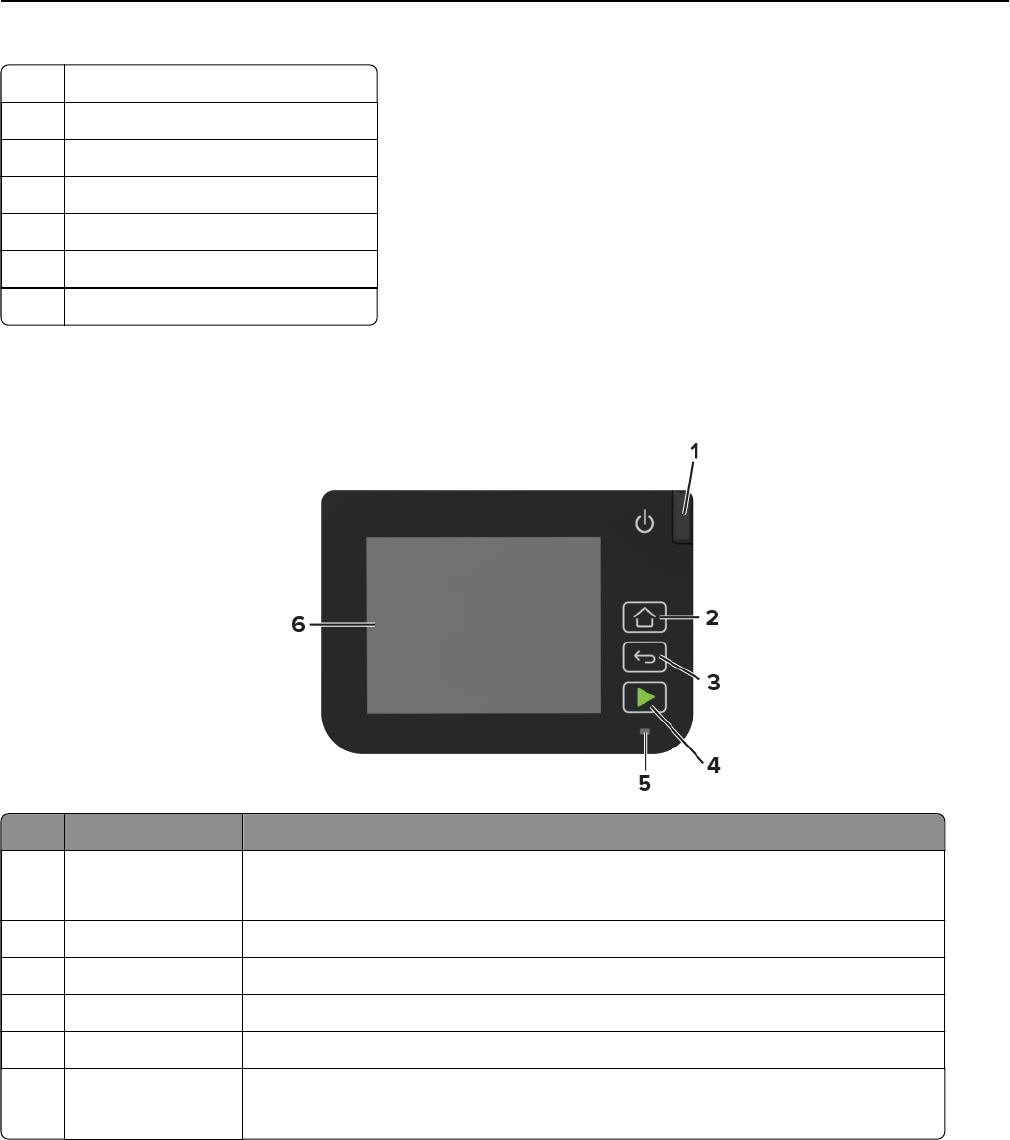
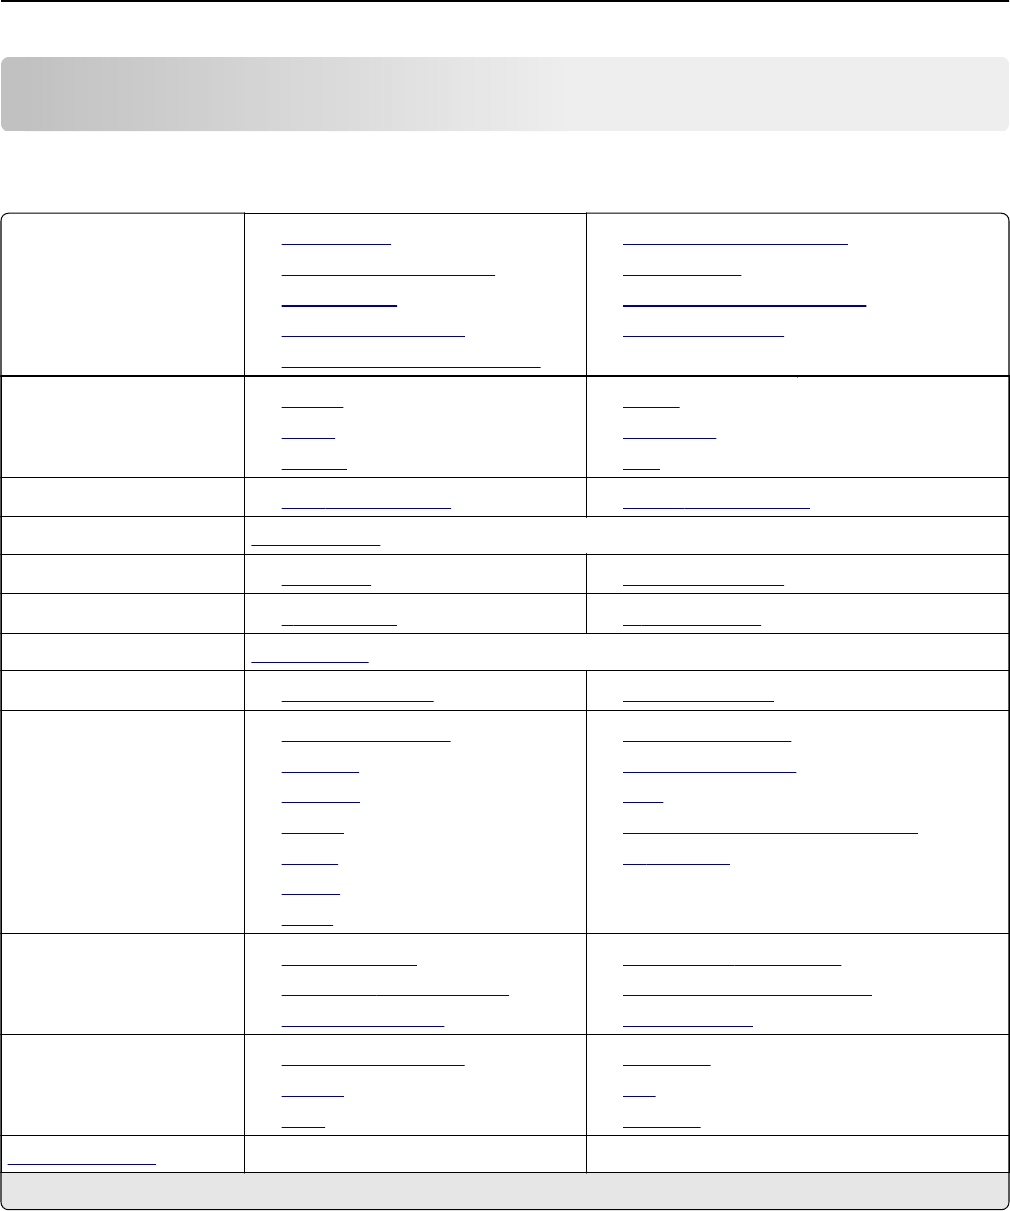
Using the control panel....................................................................................................................................12
Changing the language of the keyboard on the display.........................................................................12
Understanding the status of the indicator light..........................................................................................13
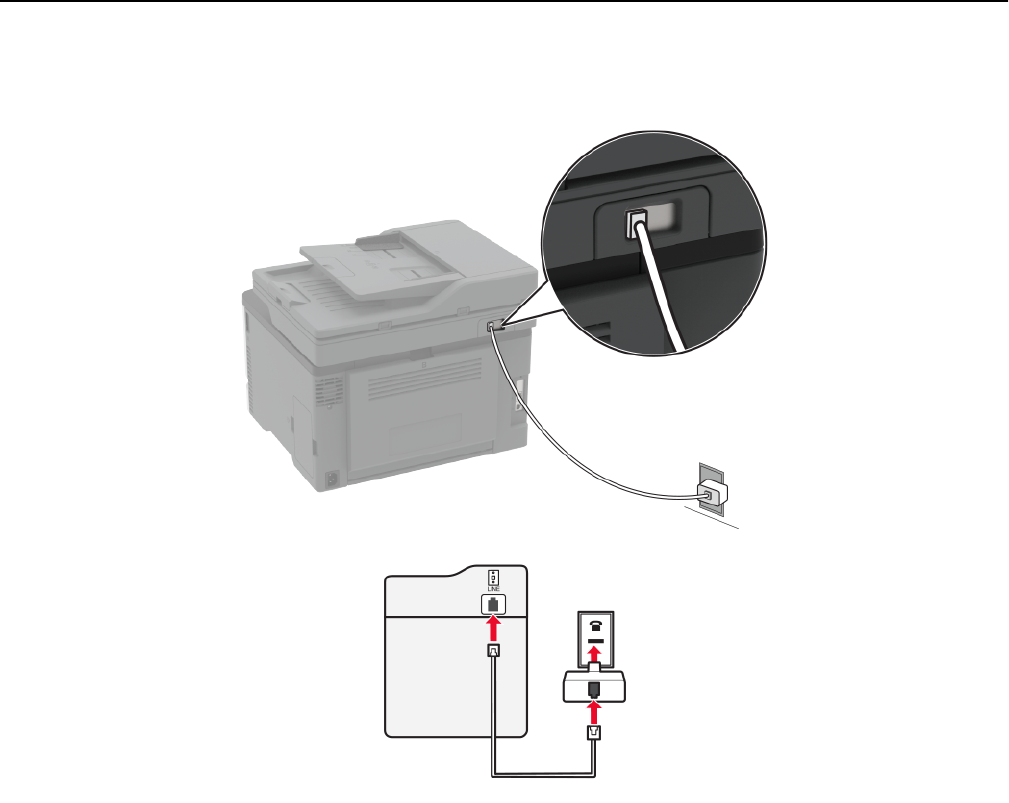
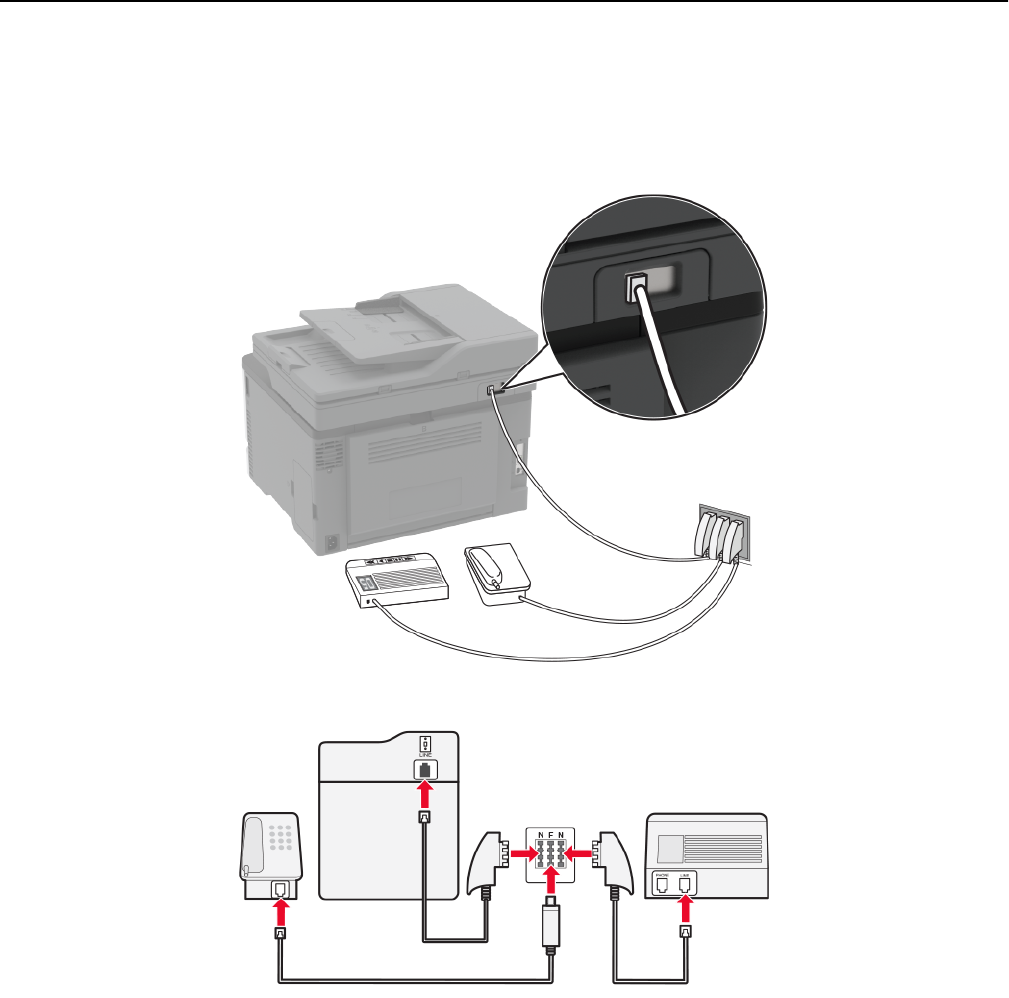
Setting up the printer to fax.............................................................................................................................21
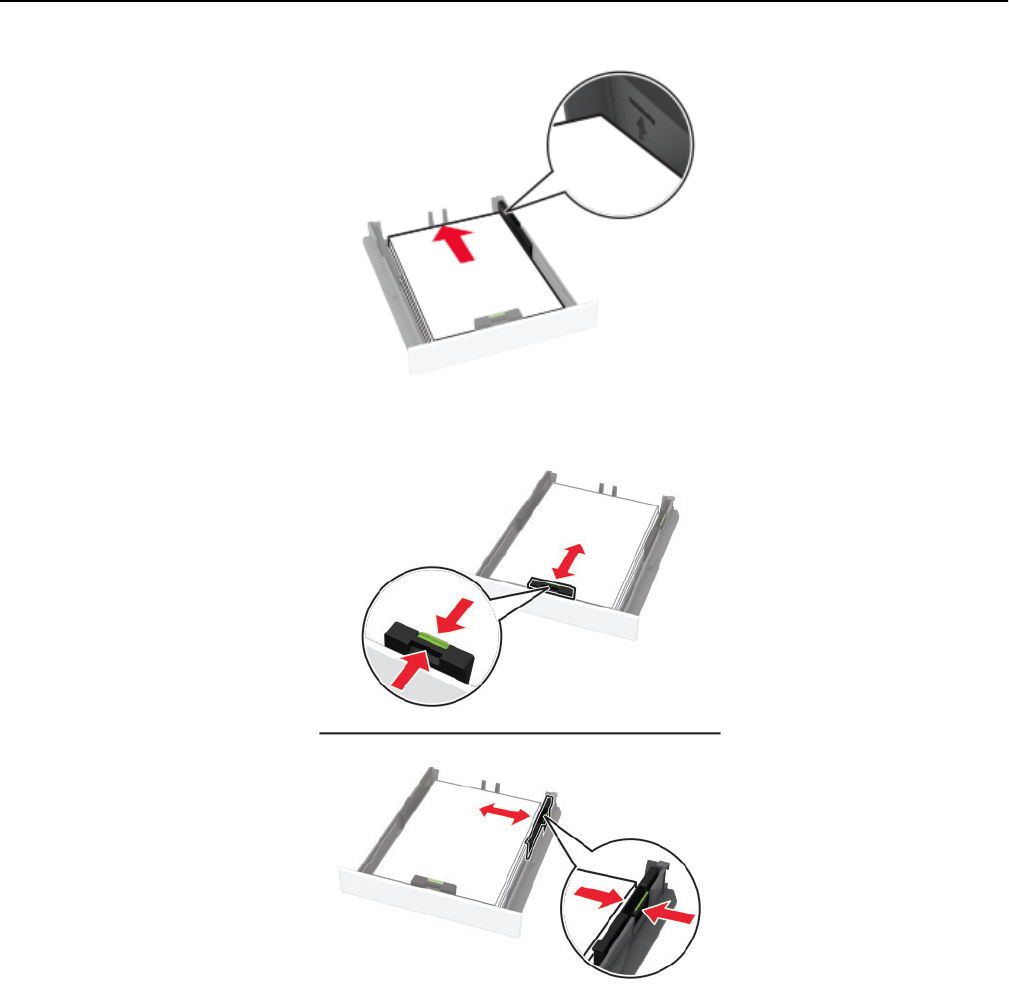
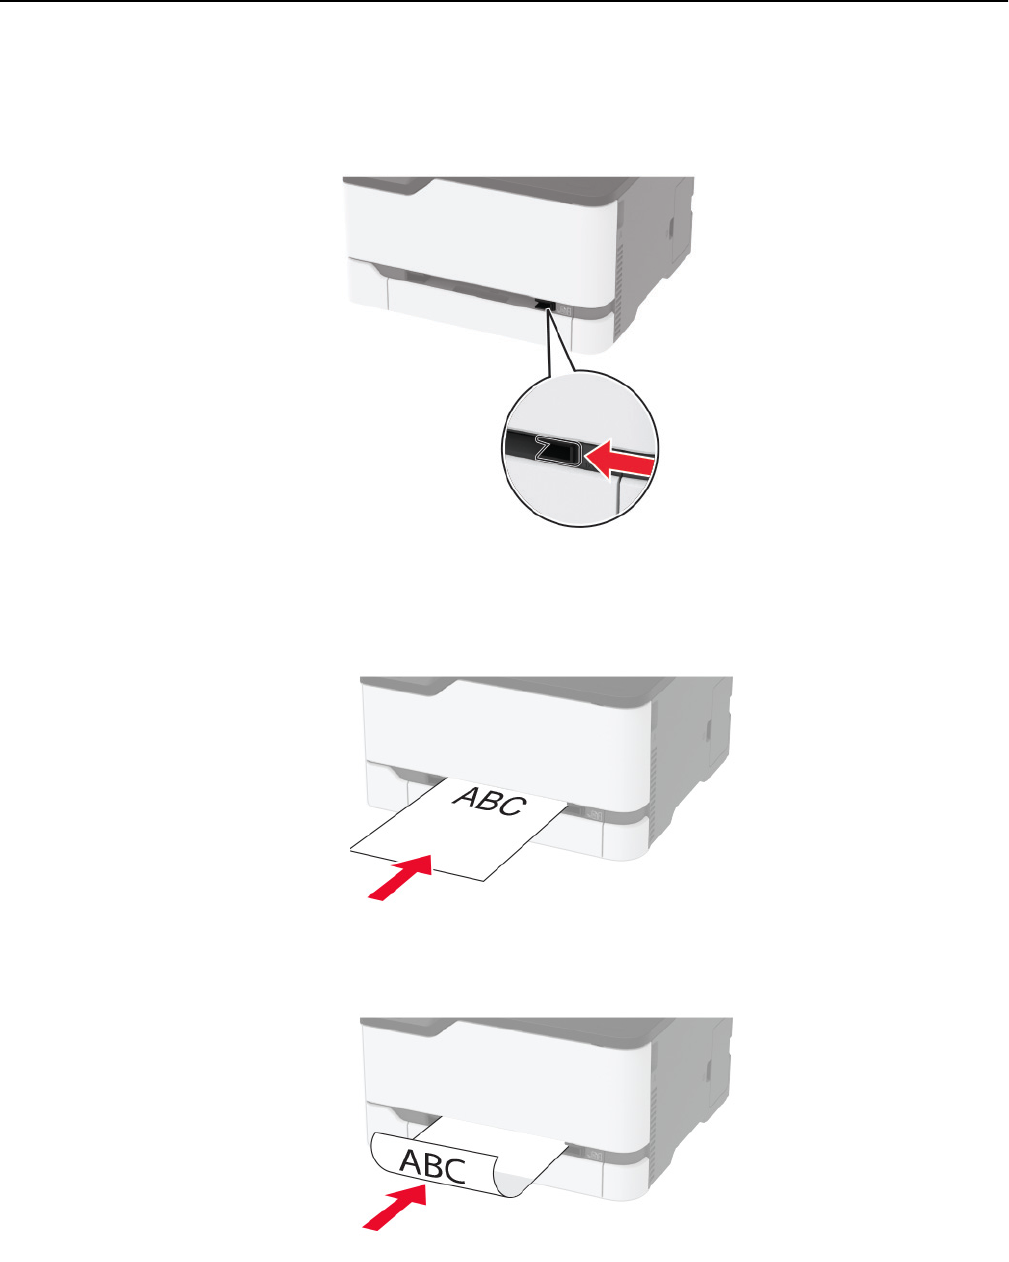
Loading paper and specialty media.............................................................................................................27
Installing and updating software, drivers, and firmware..........................................................................31
Statement of Volatility......................................................................................................................................35
Printing from a computer.................................................................................................................................36
Printing from a mobile device........................................................................................................................36
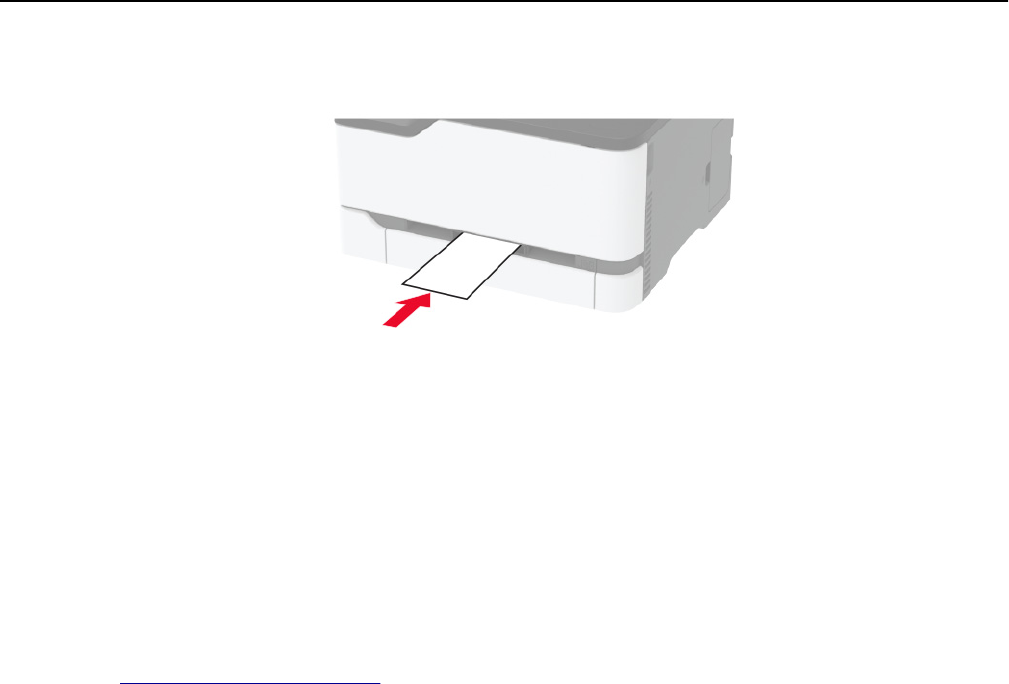
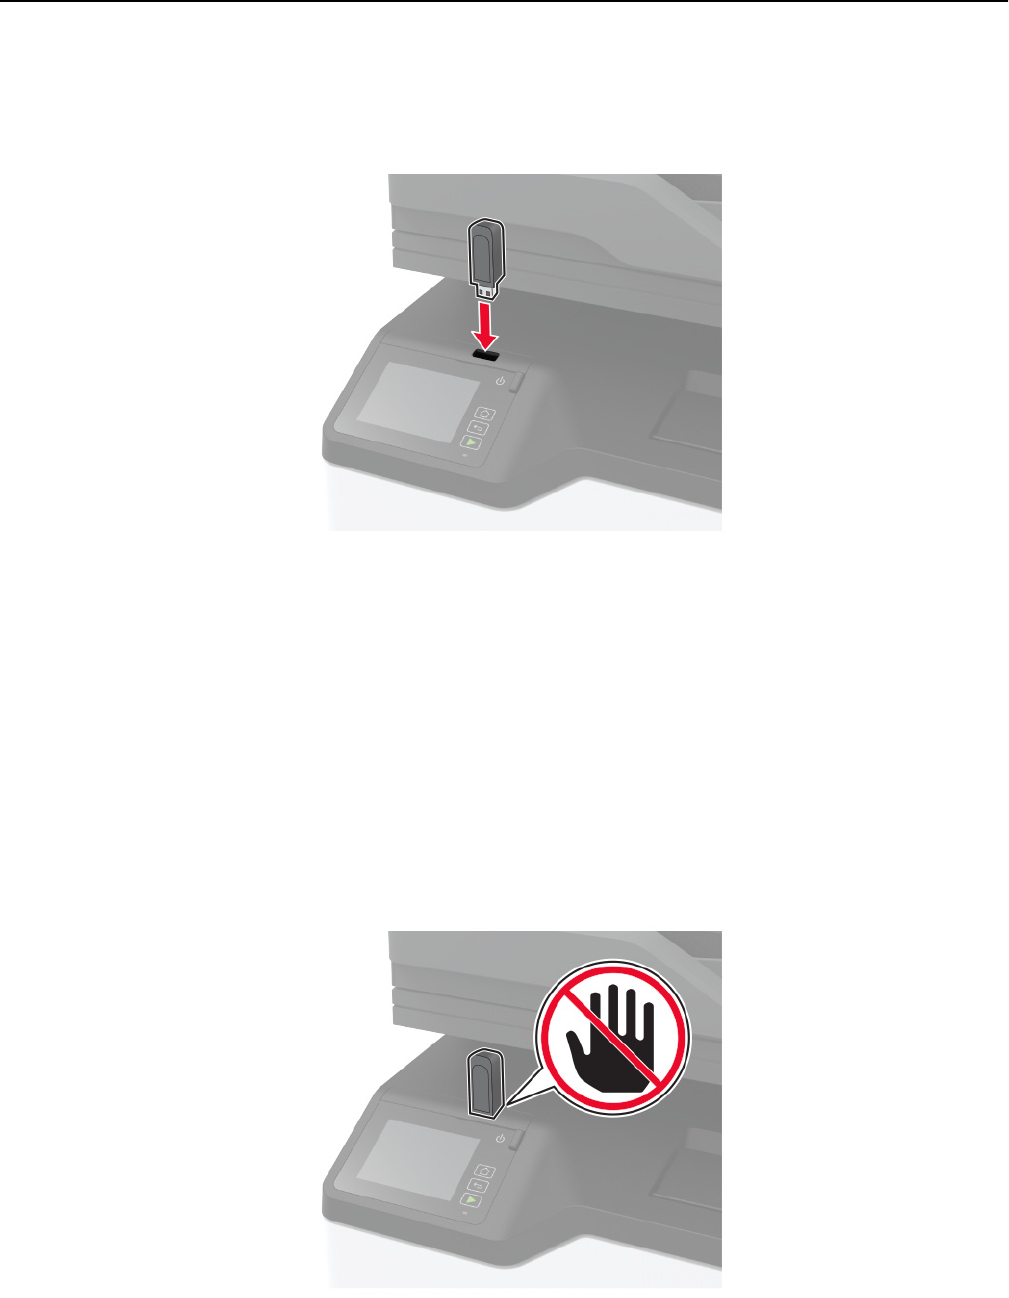
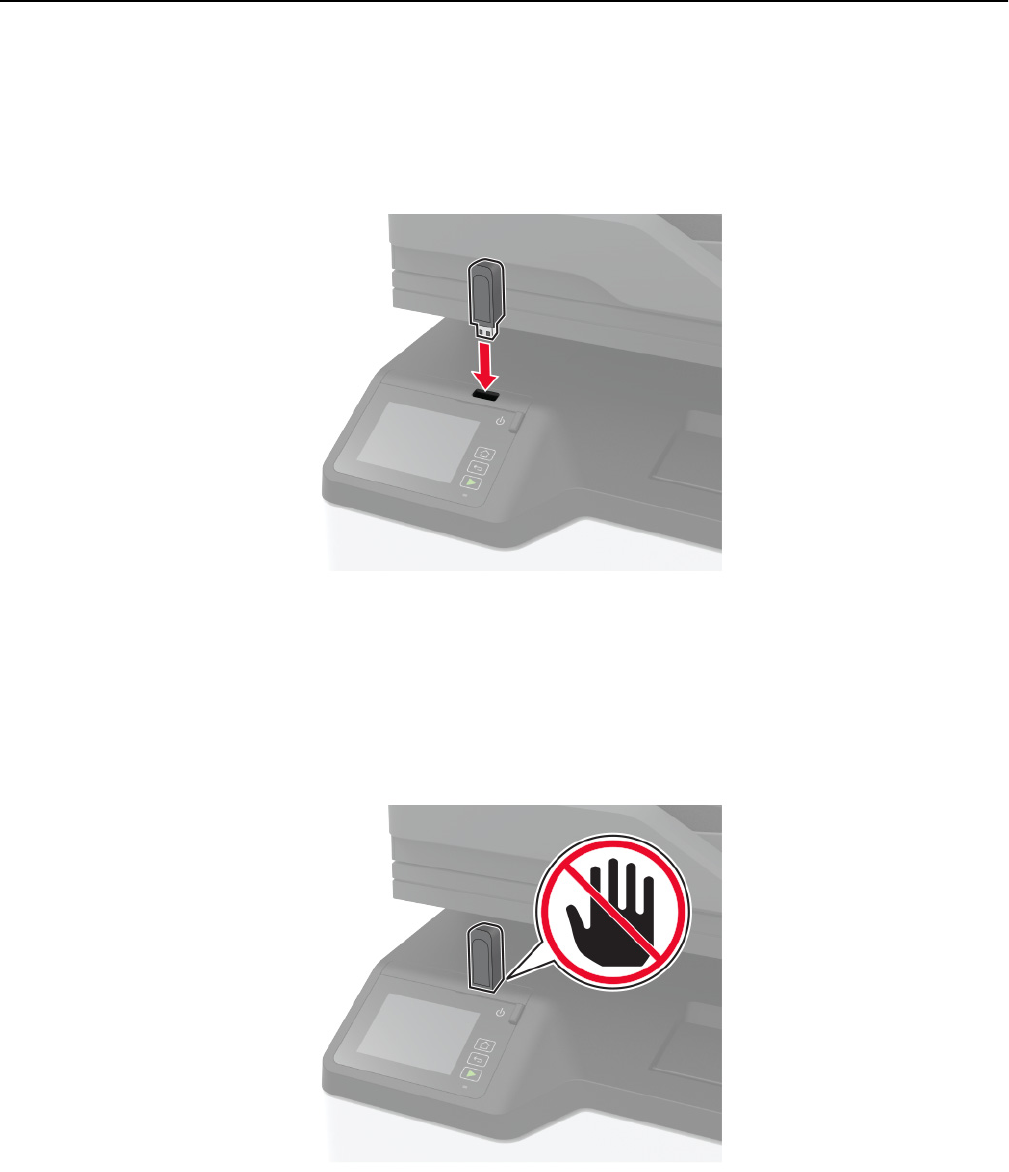
Printing from a flash drive...............................................................................................................................38
Supported flash drives and file types..........................................................................................................39
Printing confidential and other held jobs....................................................................................................40
Printing a font sample list................................................................................................................................40
Placing separator sheets between copies..................................................................................................41
Contents2
Canceling a print job..........................................................................................................................................41
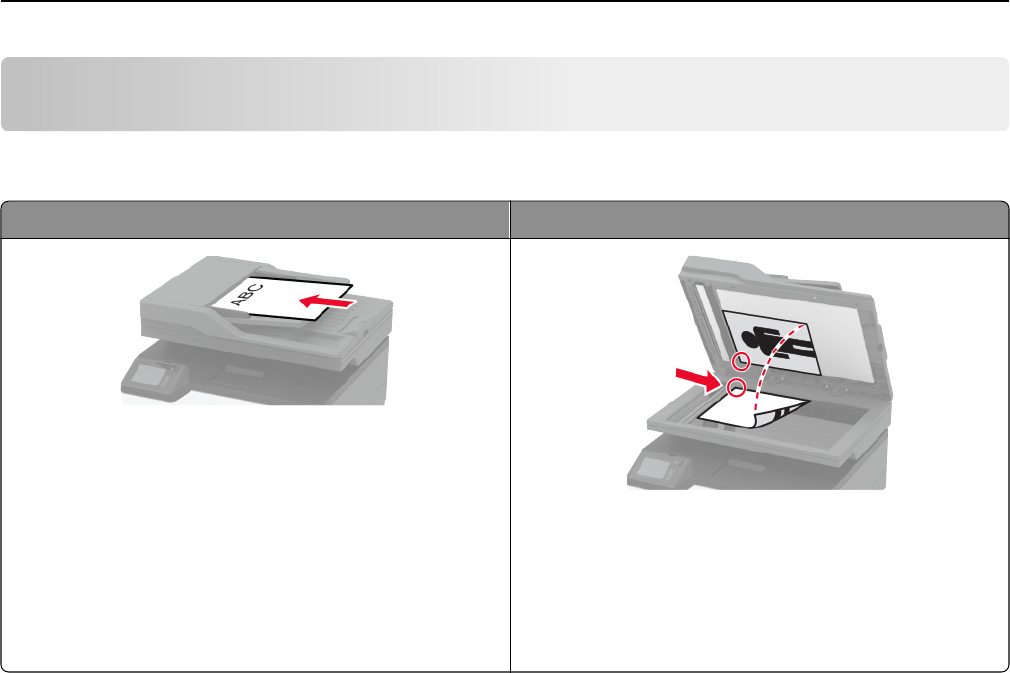
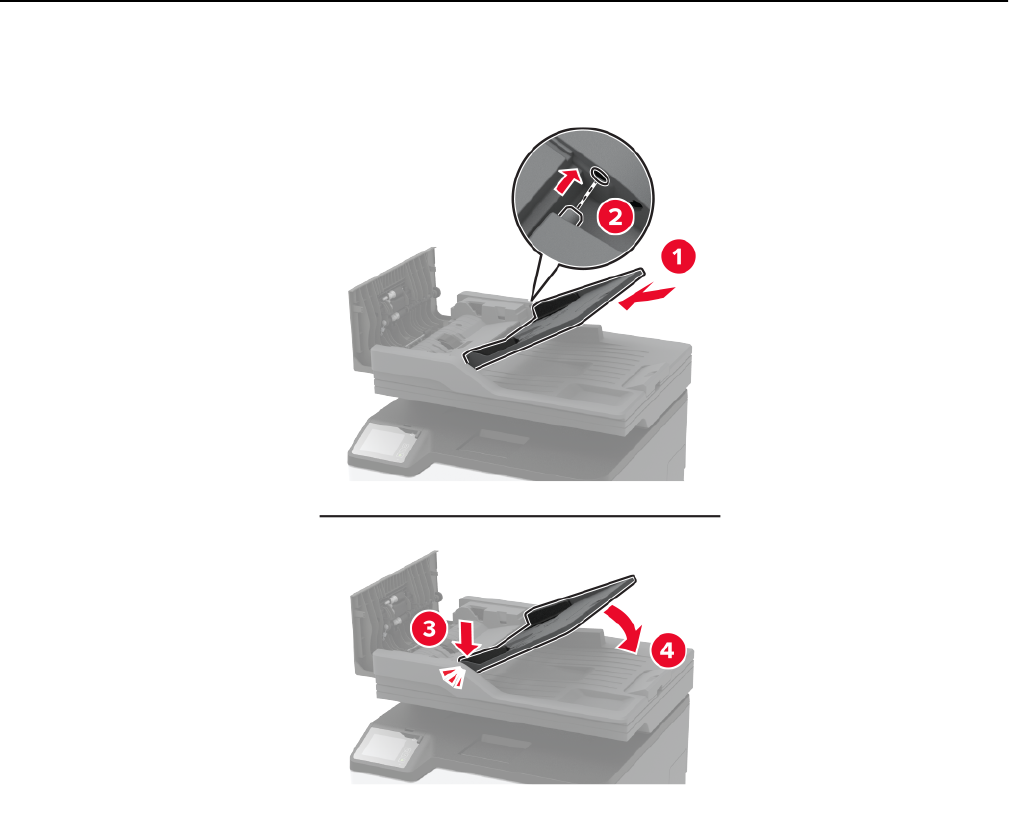
Using the automatic document feeder and scanner glass....................................................................42
Making copies....................................................................................................................................................42
Copying on letterhead.....................................................................................................................................43
Copying on both sides of the paper.............................................................................................................43
Reducing or enlarging copies........................................................................................................................43
Creating a copy shortcut.................................................................................................................................43
Using the automatic document feeder and scanner glass....................................................................45
Setting up the e‑mail function........................................................................................................................45
Sending an e-mail..............................................................................................................................................46
Creating an e-mail shortcut............................................................................................................................46
Using the automatic document feeder and scanner glass.....................................................................47
Sending a fax......................................................................................................................................................47
Creating a fax destination shortcut...............................................................................................................48
Changing the fax resolution...........................................................................................................................48
Adjusting the fax darkness.............................................................................................................................48
Viewing a fax log...............................................................................................................................................48
Holding a fax.......................................................................................................................................................49
Forwarding a fax................................................................................................................................................49
Using the automatic document feeder and scanner glass....................................................................50
Creating an FTP shortcut................................................................................................................................50
Scanning to a flash drive..................................................................................................................................51
Sending scanned documents to a computer..............................................................................................51
Contents3
Use printer menus......................................................................................52
Menu map...........................................................................................................................................................52
USB Drive............................................................................................................................................................87
Setting up e‑mail alerts..................................................................................................................................109
Ordering parts and supplies..........................................................................................................................110
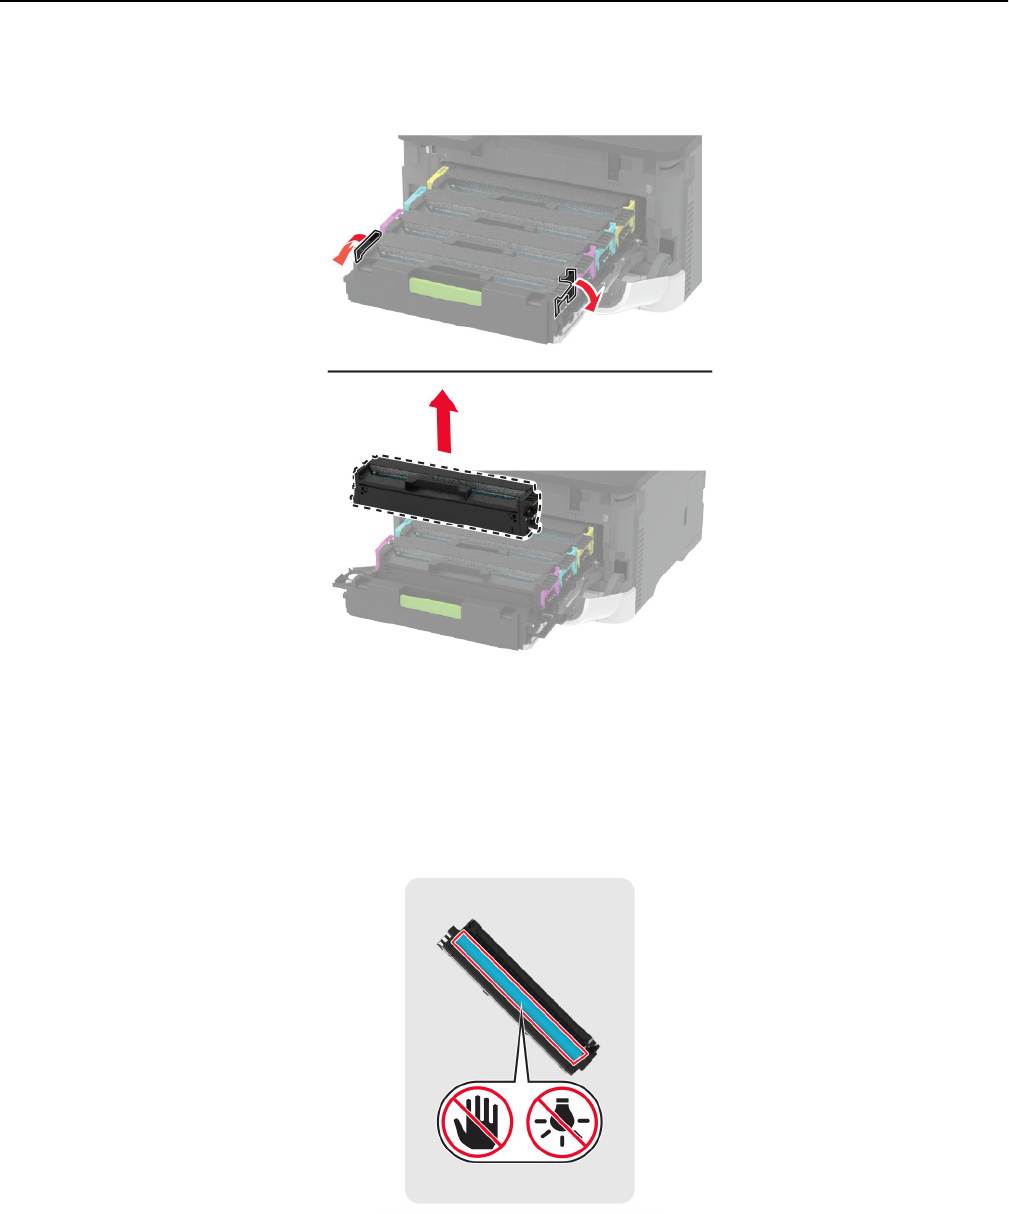
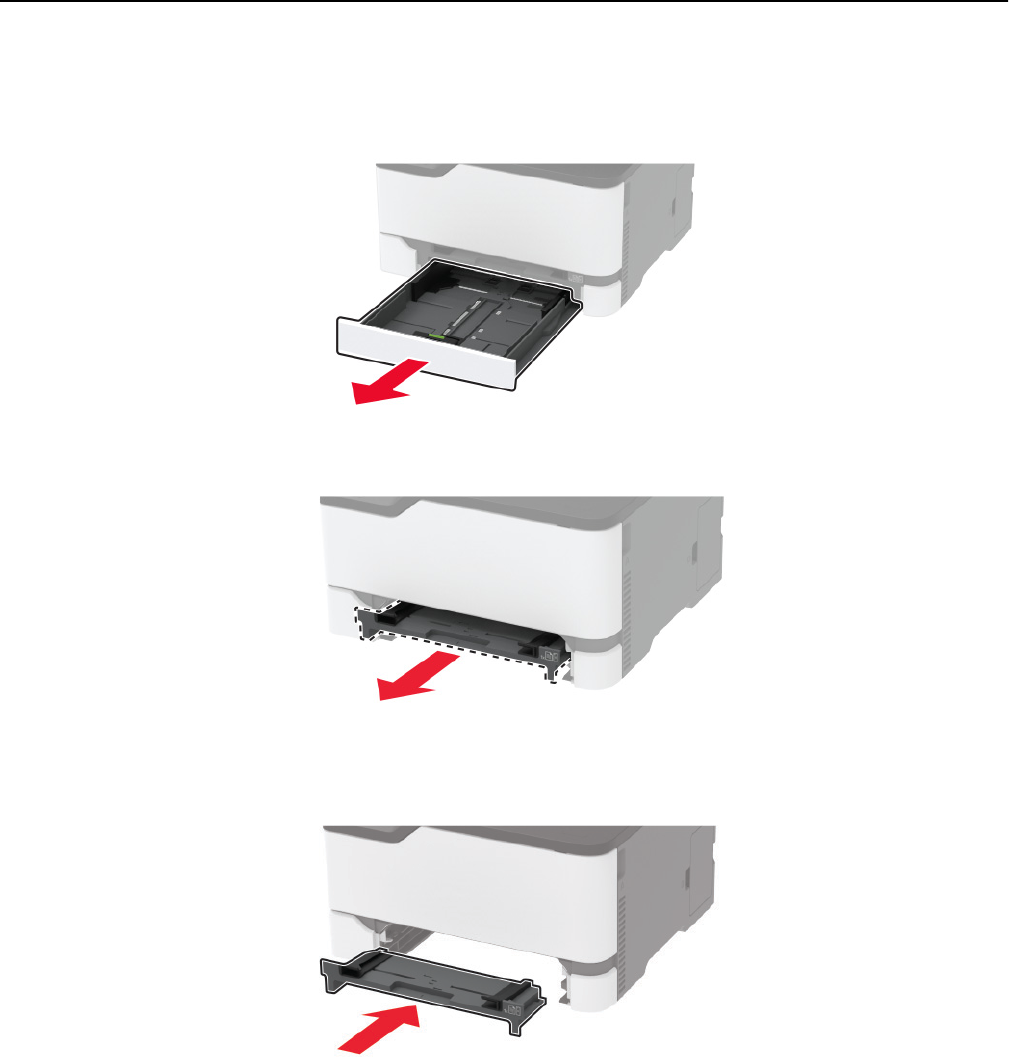
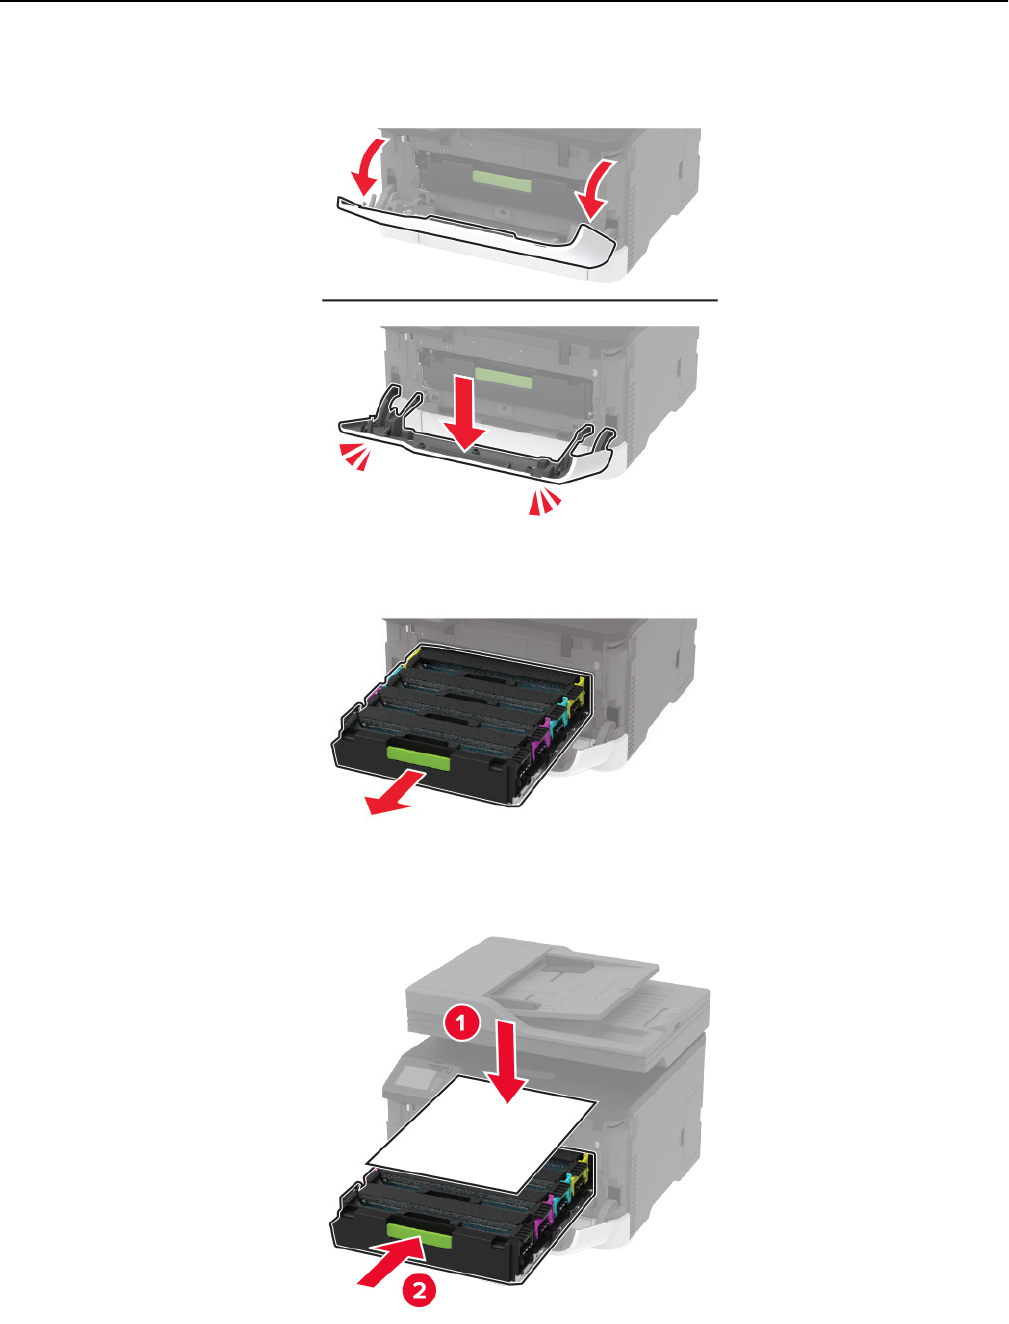
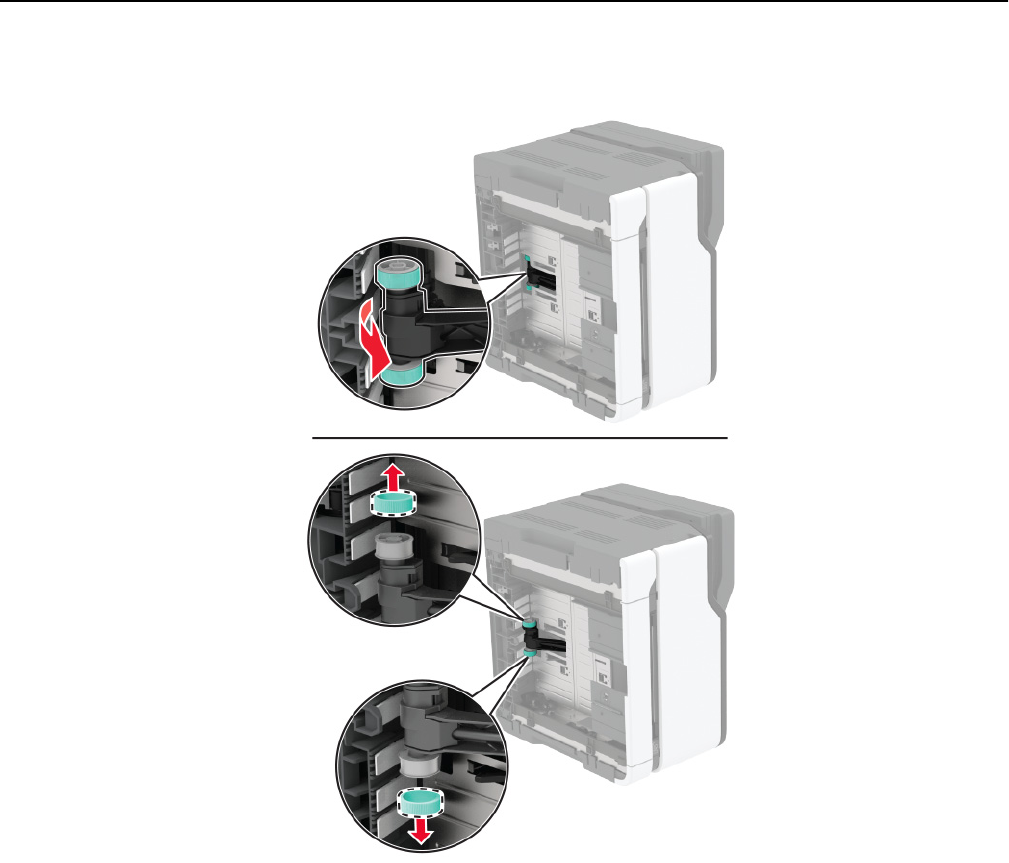
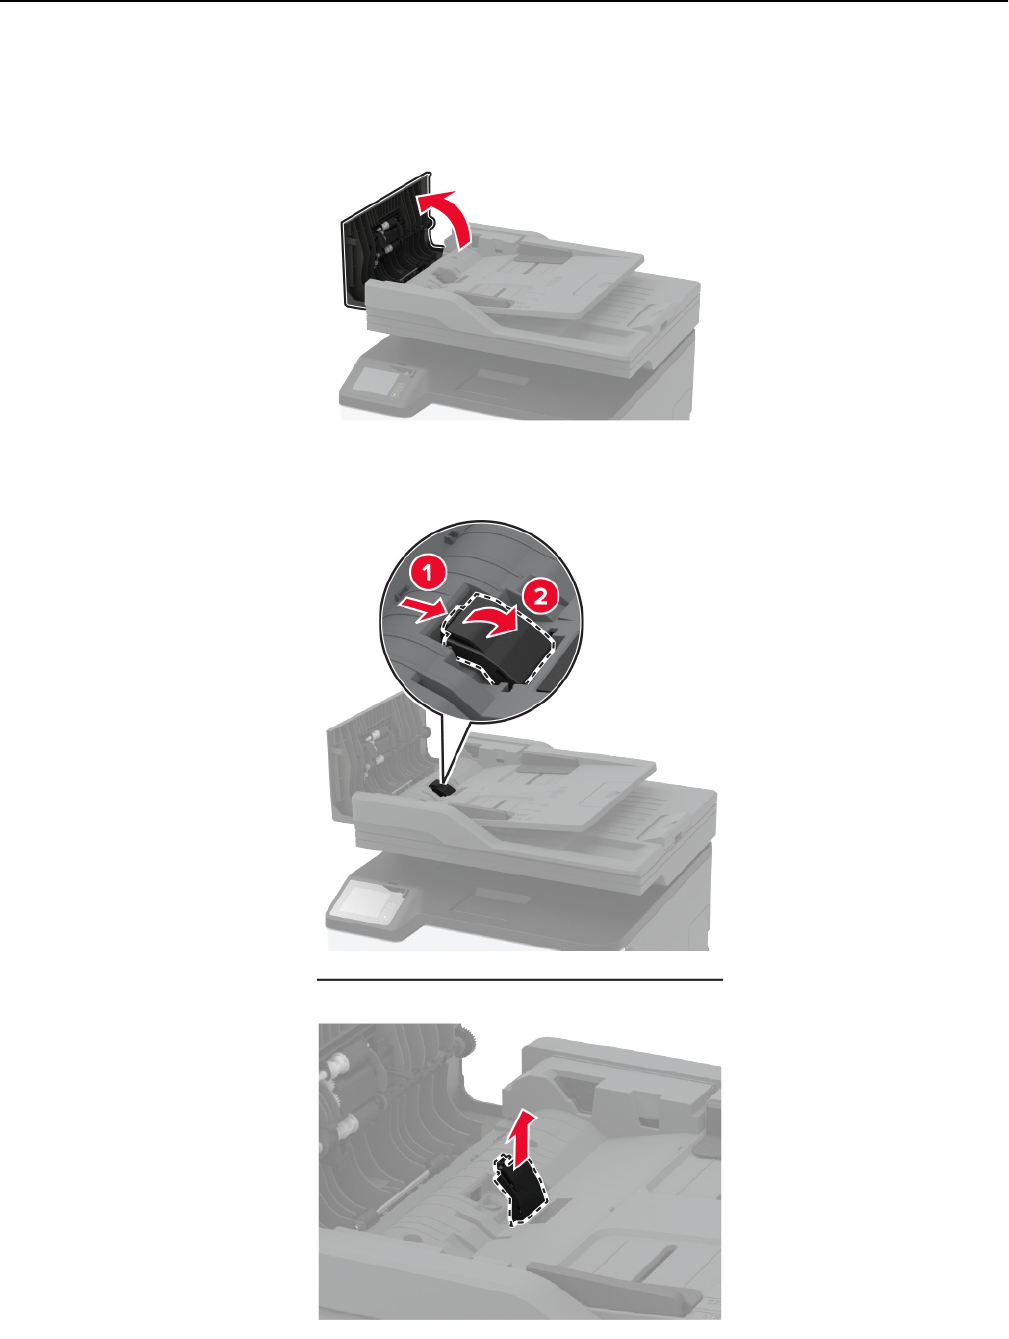
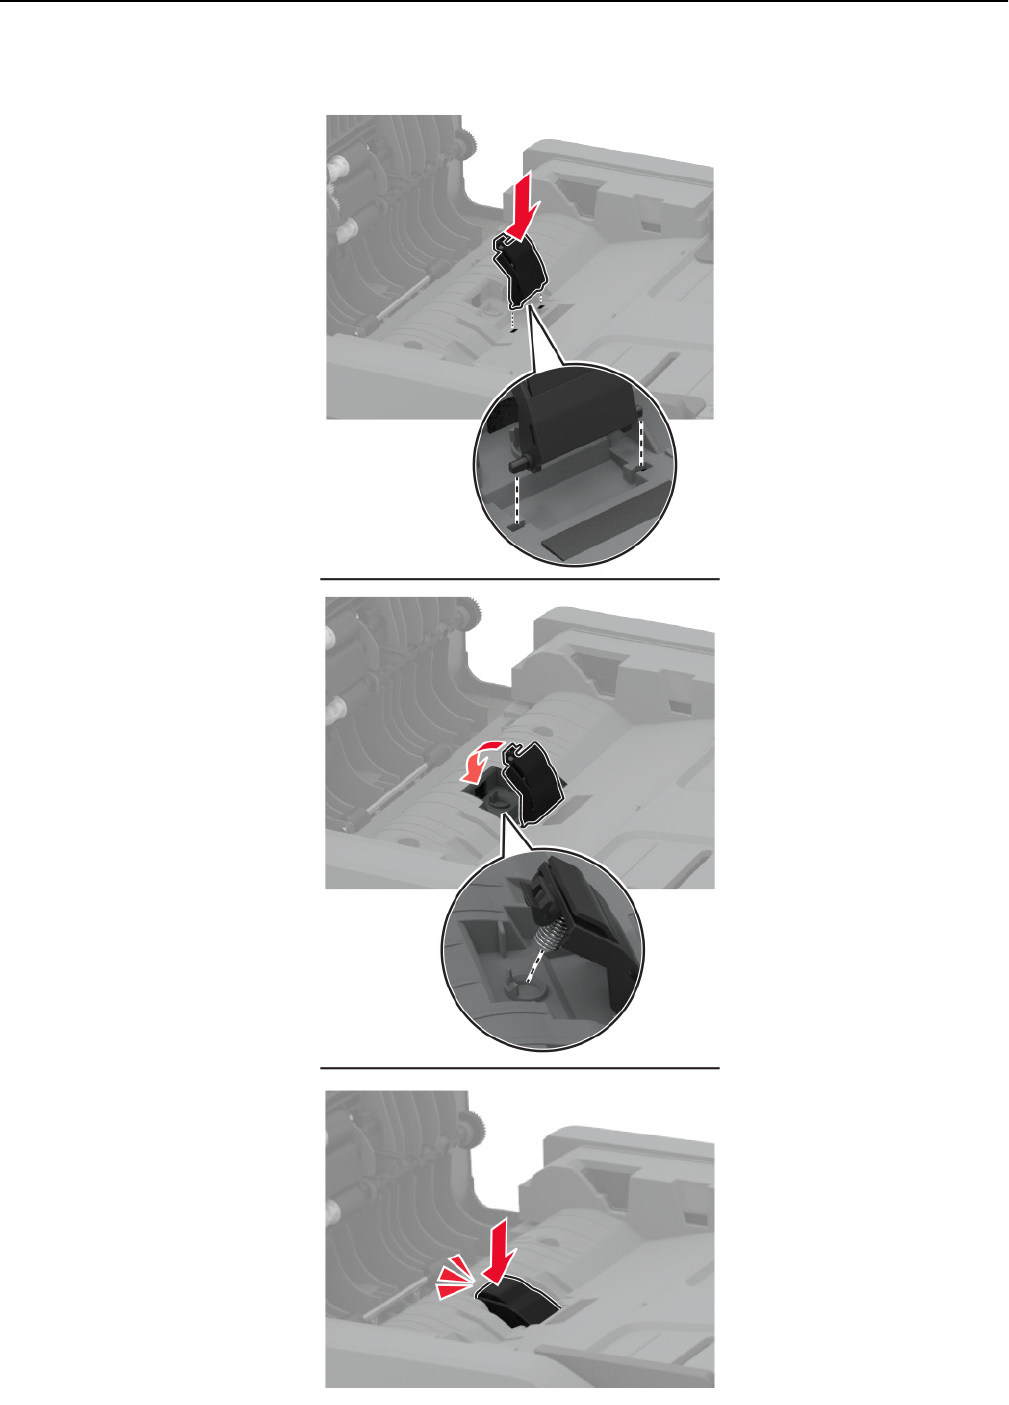
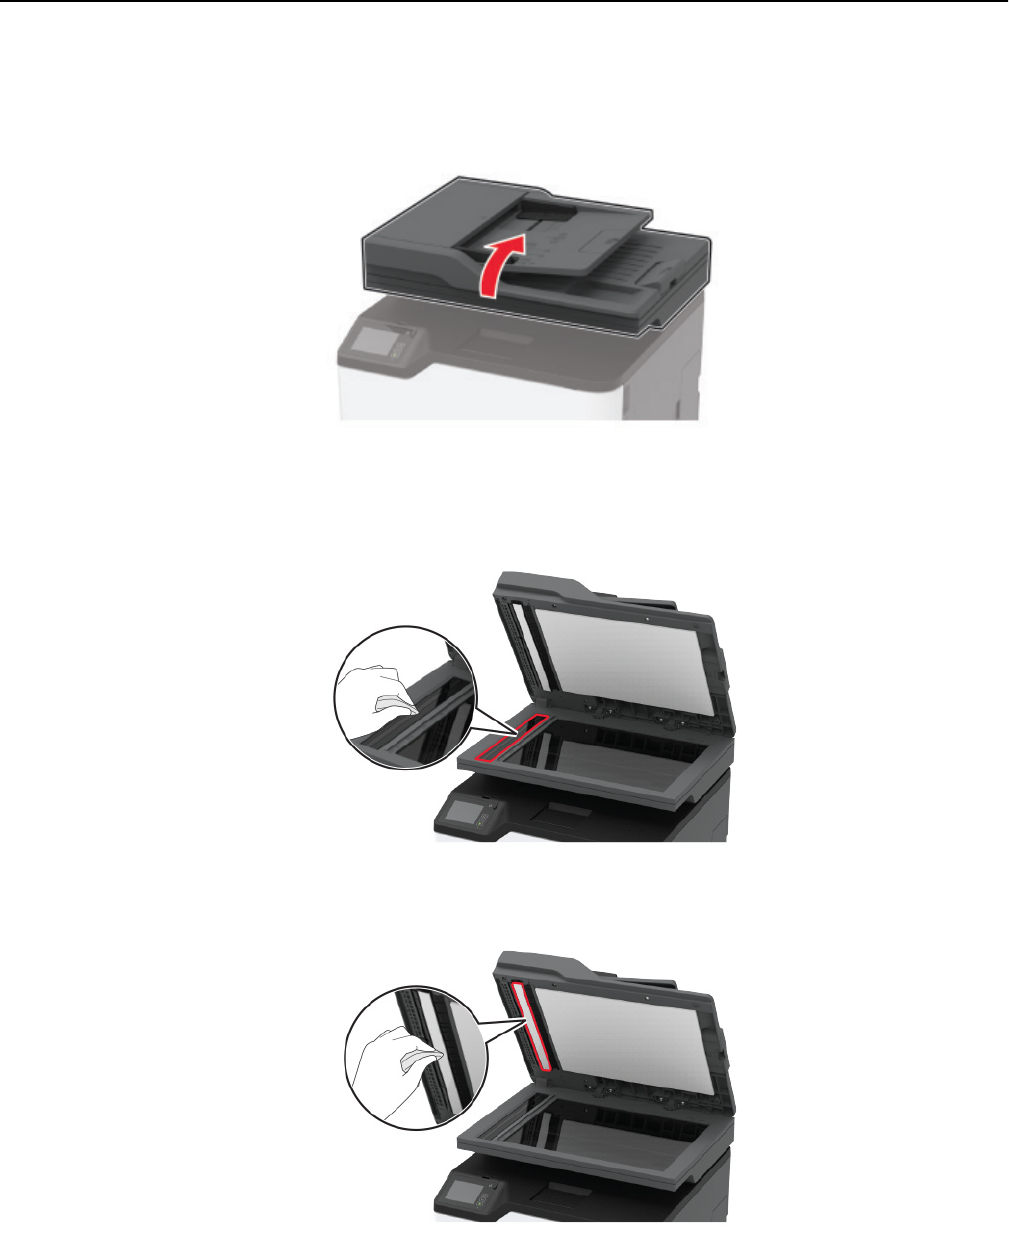
Replacing parts and supplies.........................................................................................................................113
Saving energy and paper..............................................................................................................................129
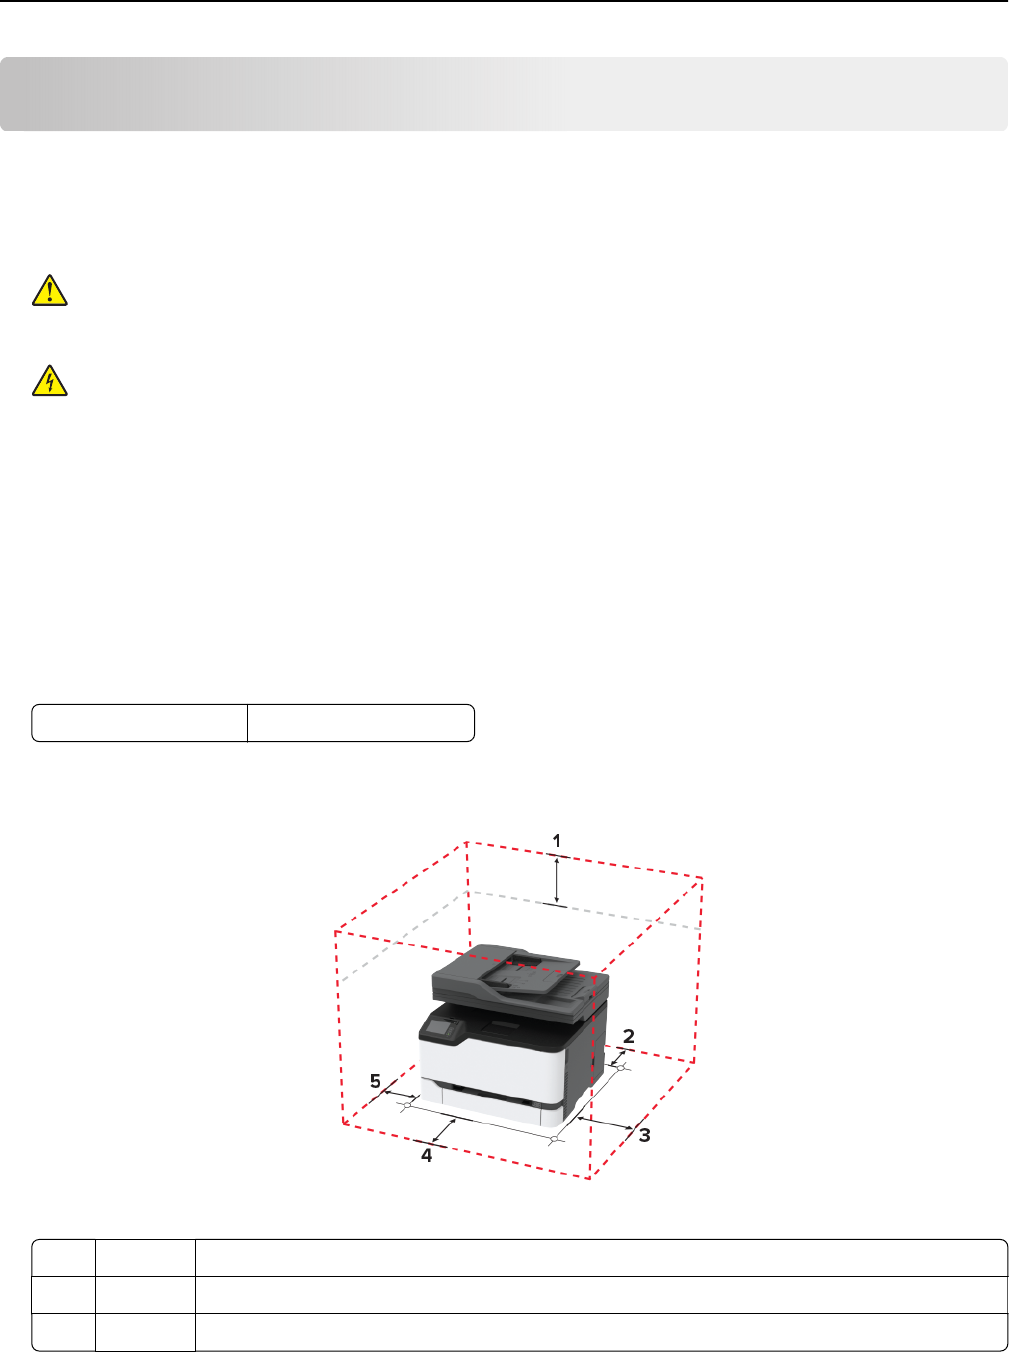
Moving the printer to another location......................................................................................................130
Shipping the printer..........................................................................................................................................131
Troubleshoot a problem...........................................................................132
The printer is not responding.......................................................................................................................132
Issues with supplies.........................................................................................................................................134
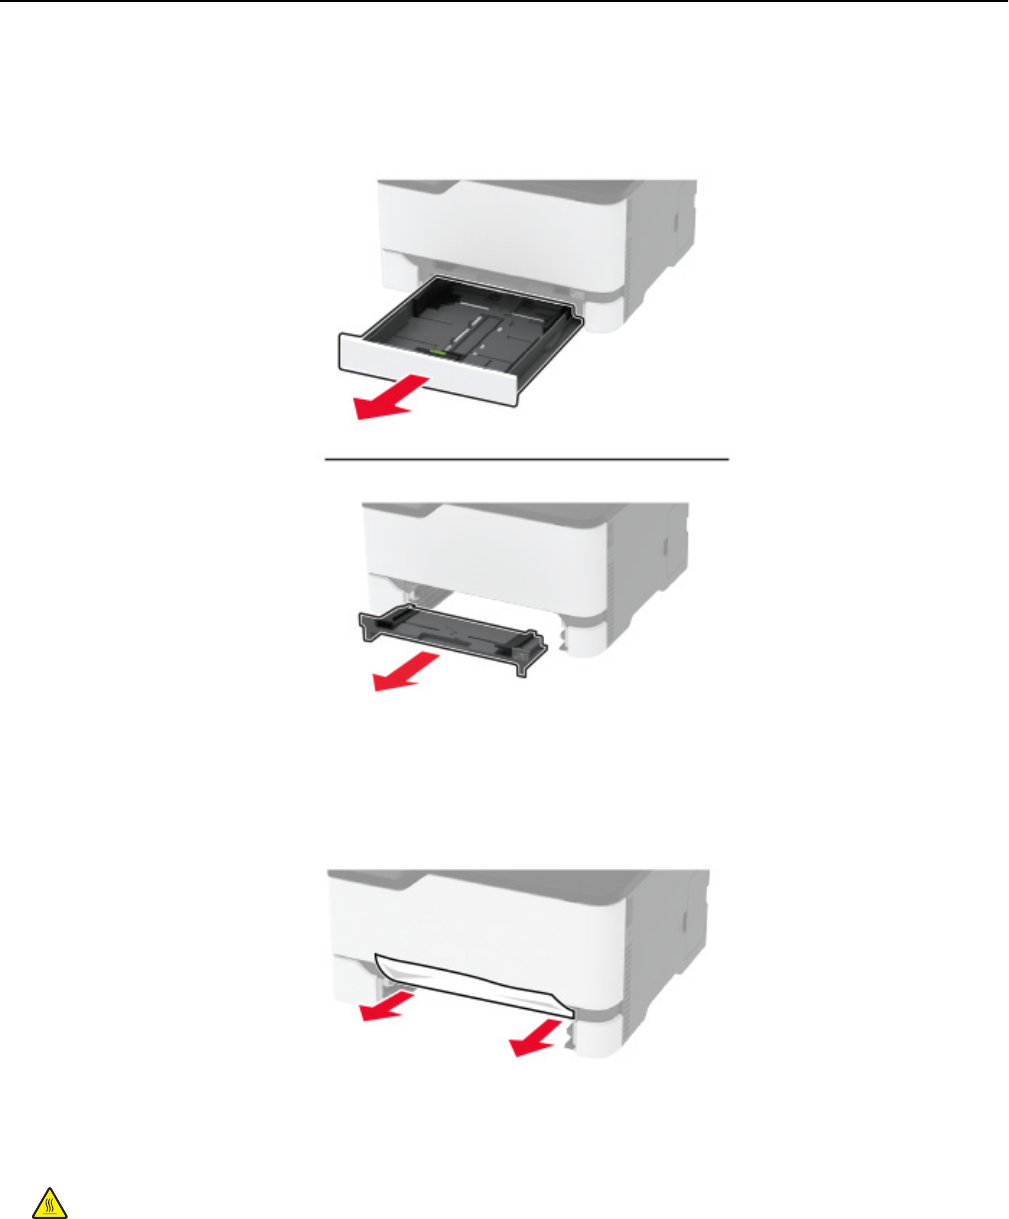
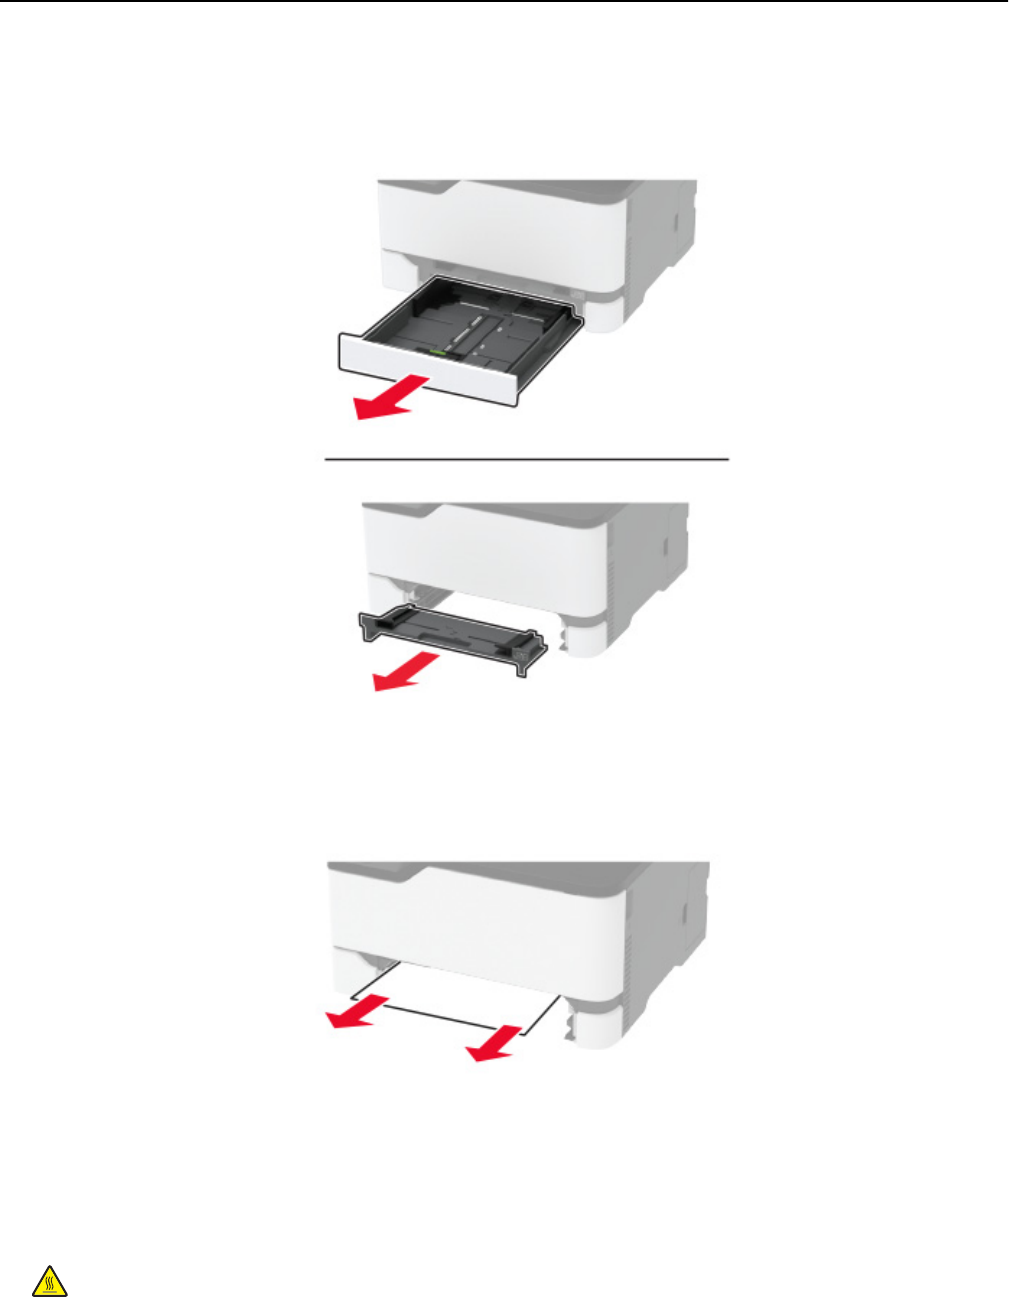
Paper feed problems.......................................................................................................................................144
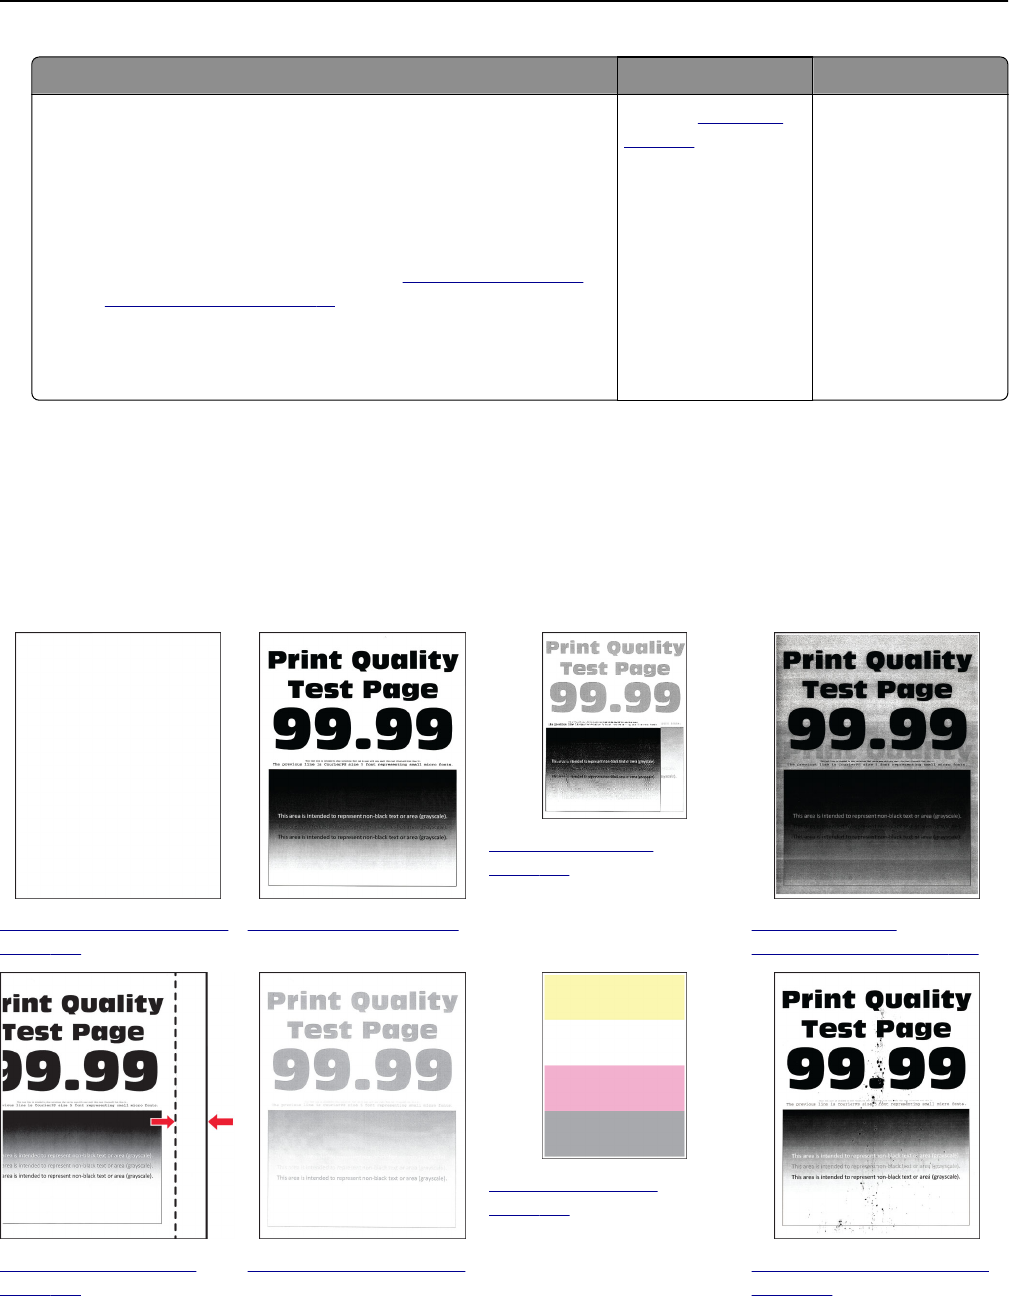
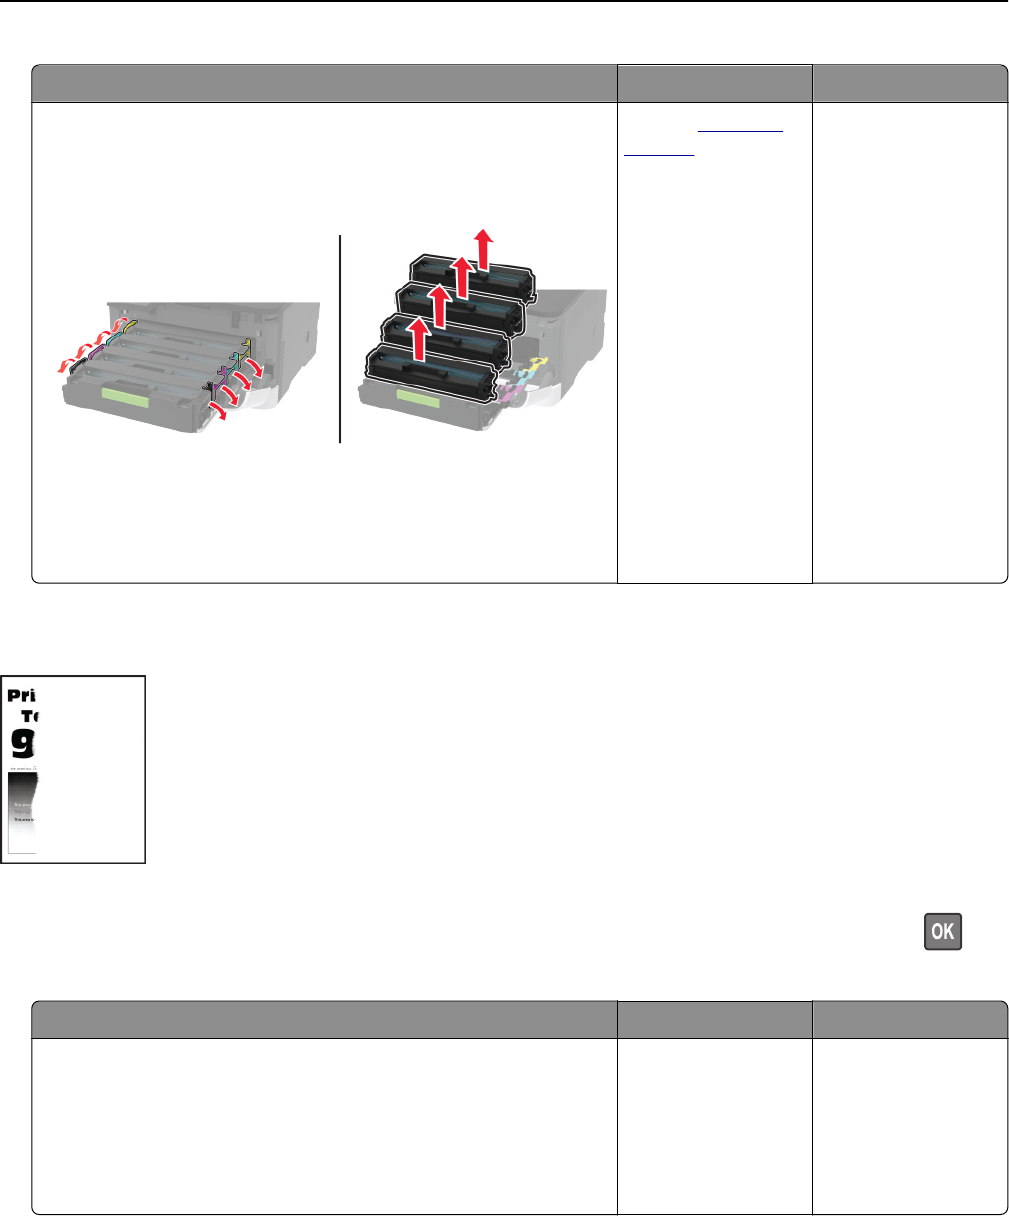
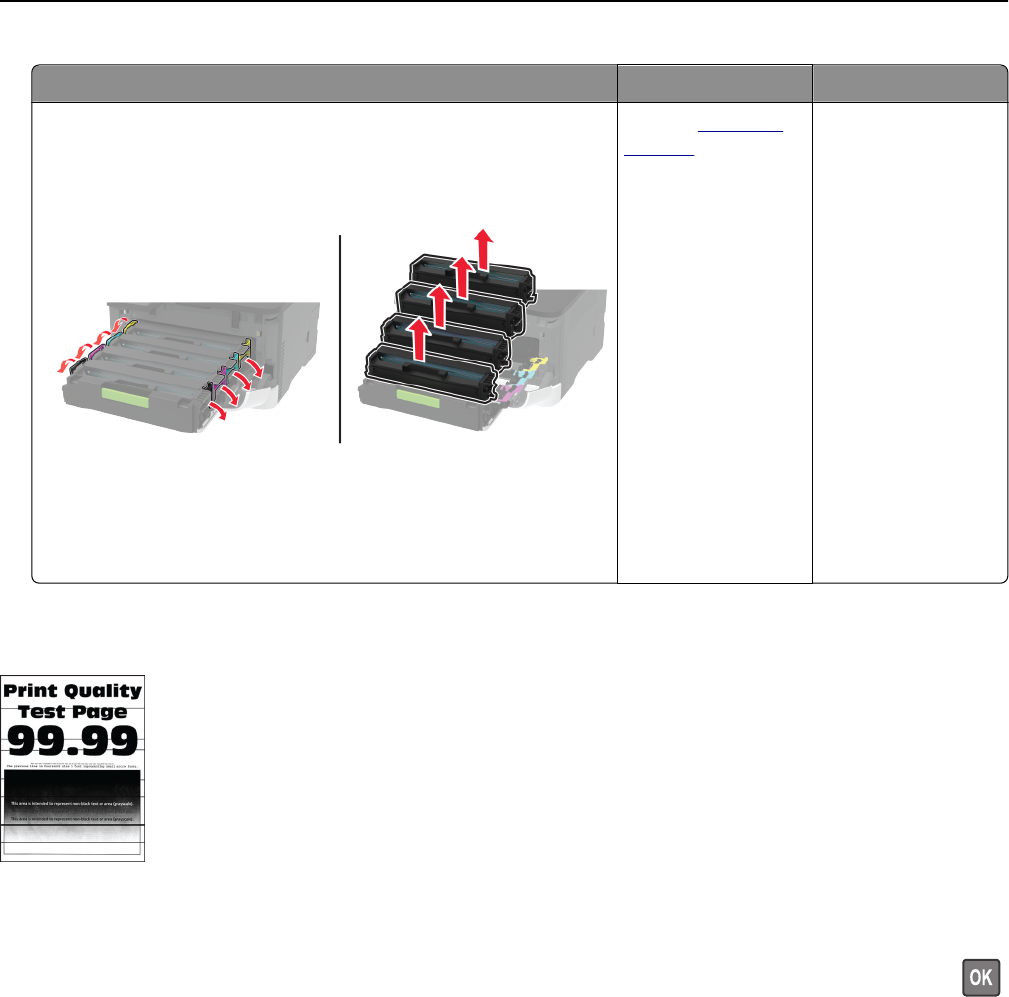
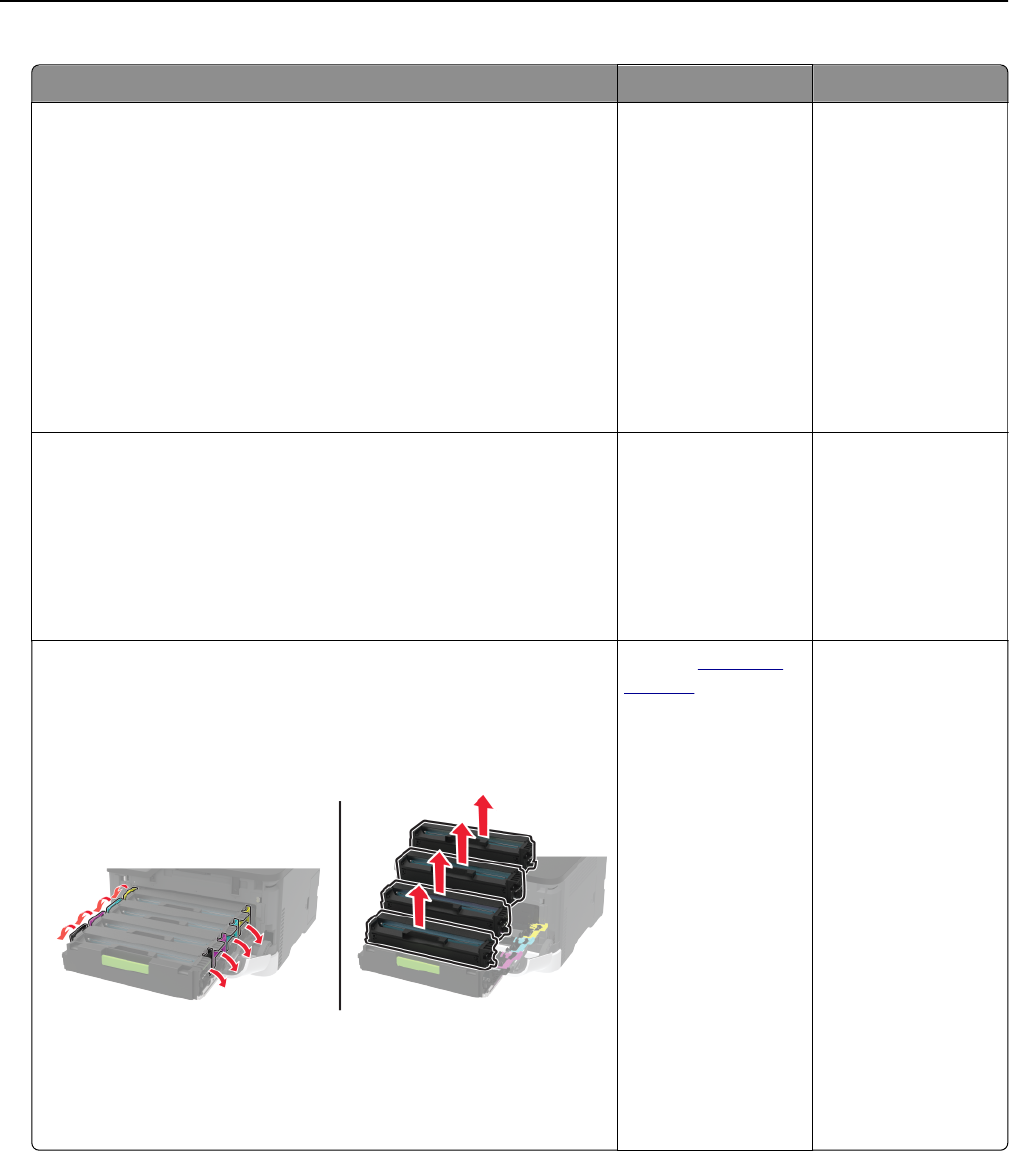
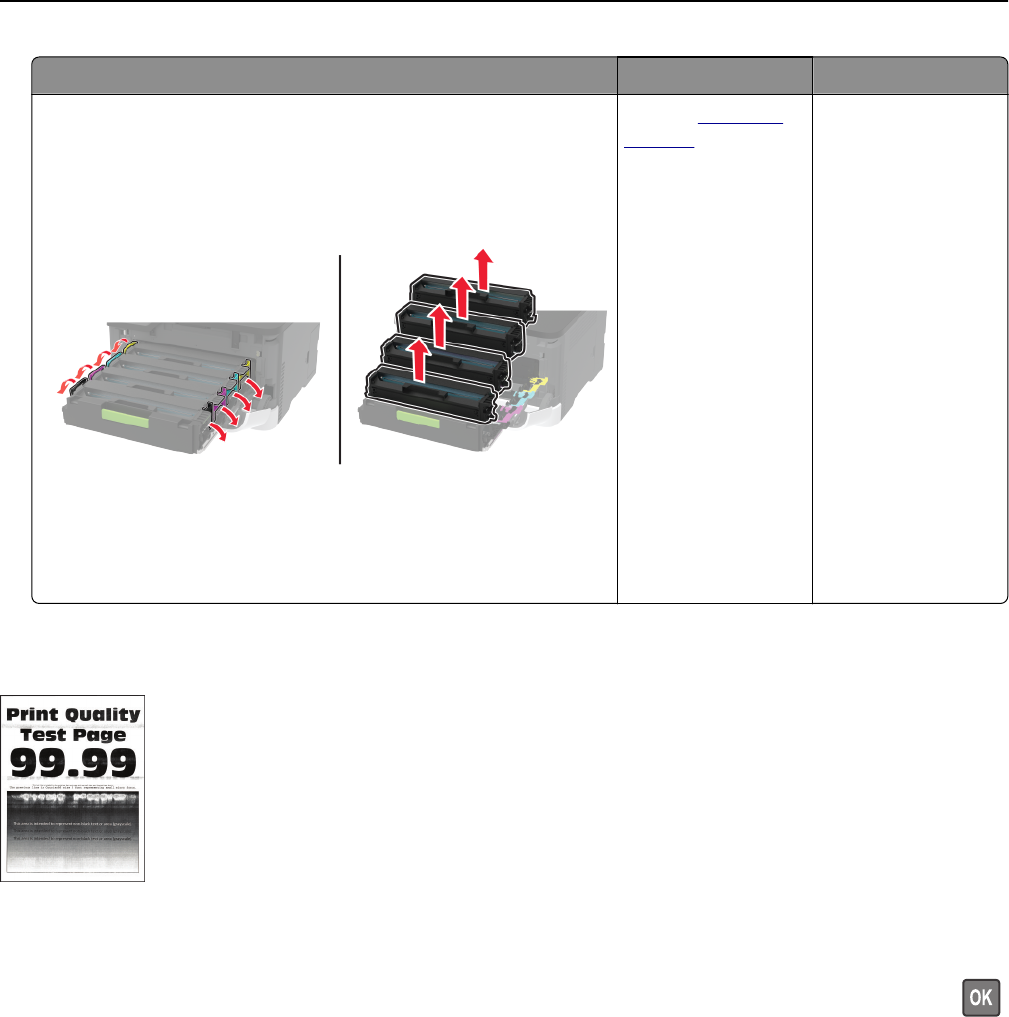
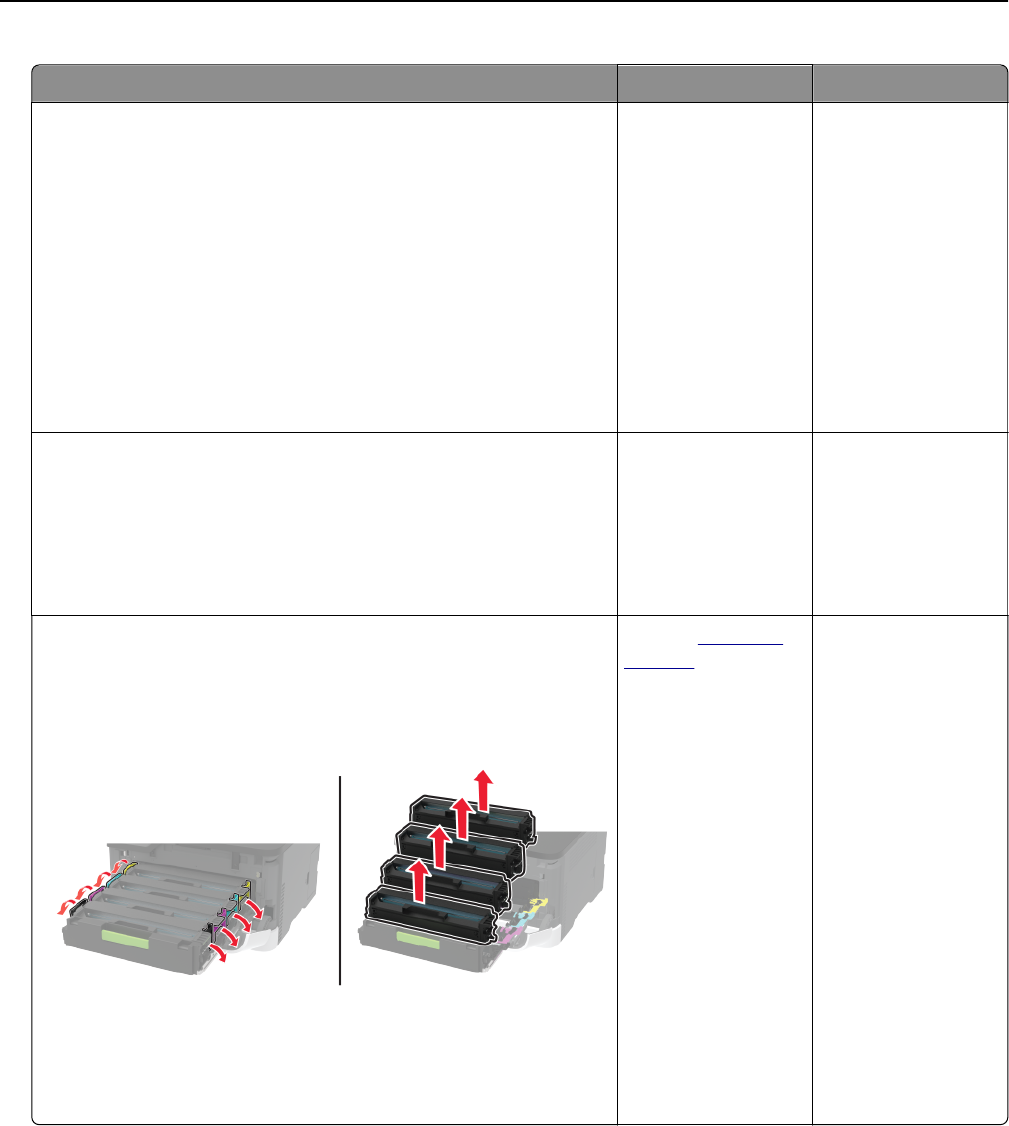
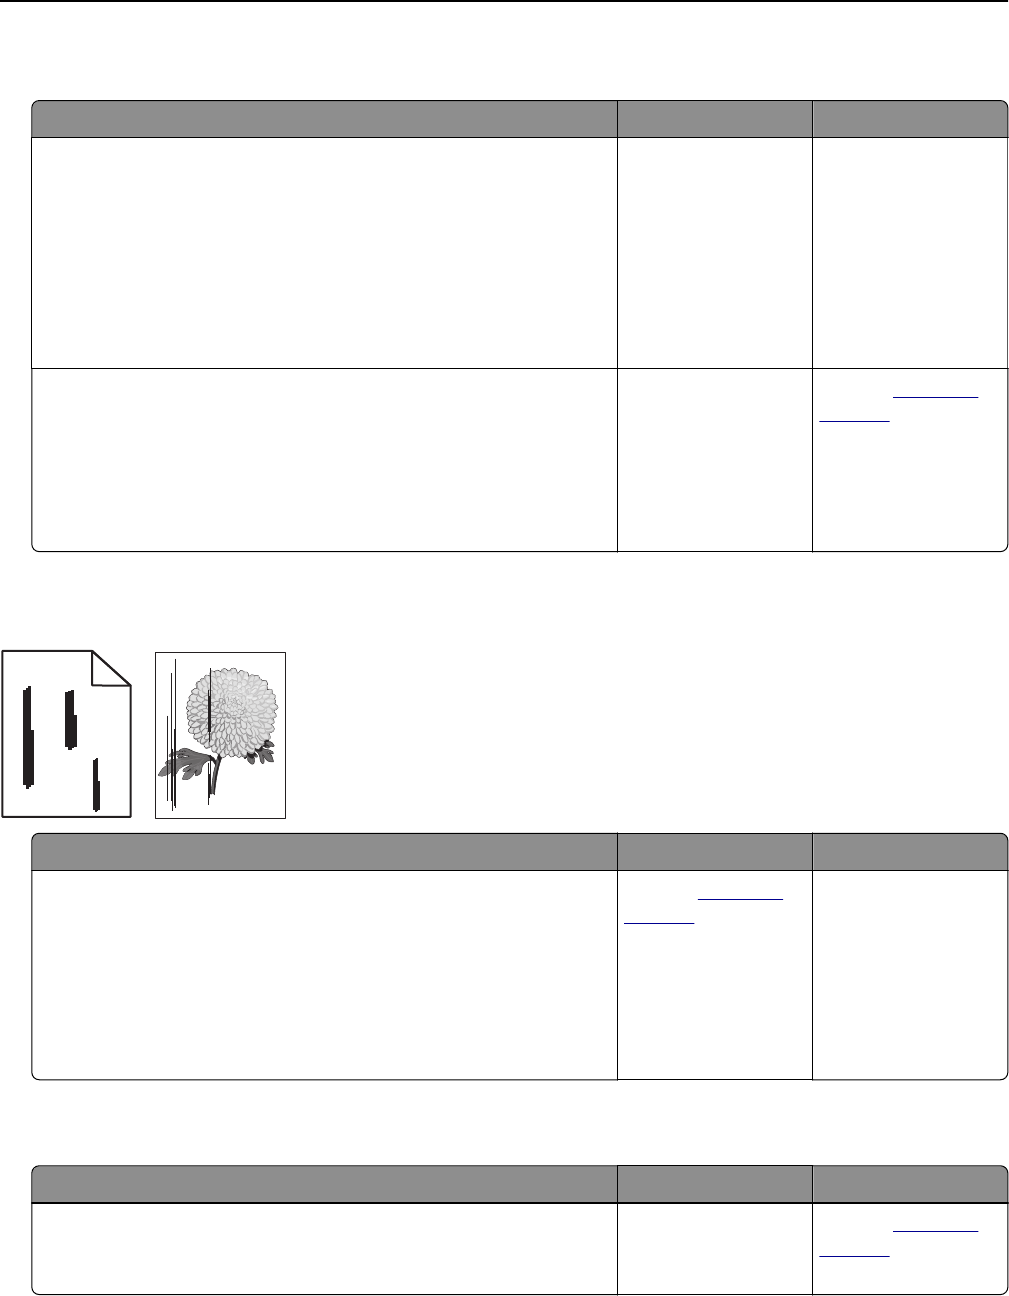
Color quality problems....................................................................................................................................173
we do not know how to turn on the colour for printing that used to work since the machine was put into service but has now failed
Submitted on 27-12-2020 at 16:54
Libble takes abuse of its services very seriously. We're committed to dealing with such abuse according to the laws in your country of residence. When you submit a report, we'll investigate it and take the appropriate action. We'll get back to you only if we require additional details or have more information to share.
Product:
Forumrules
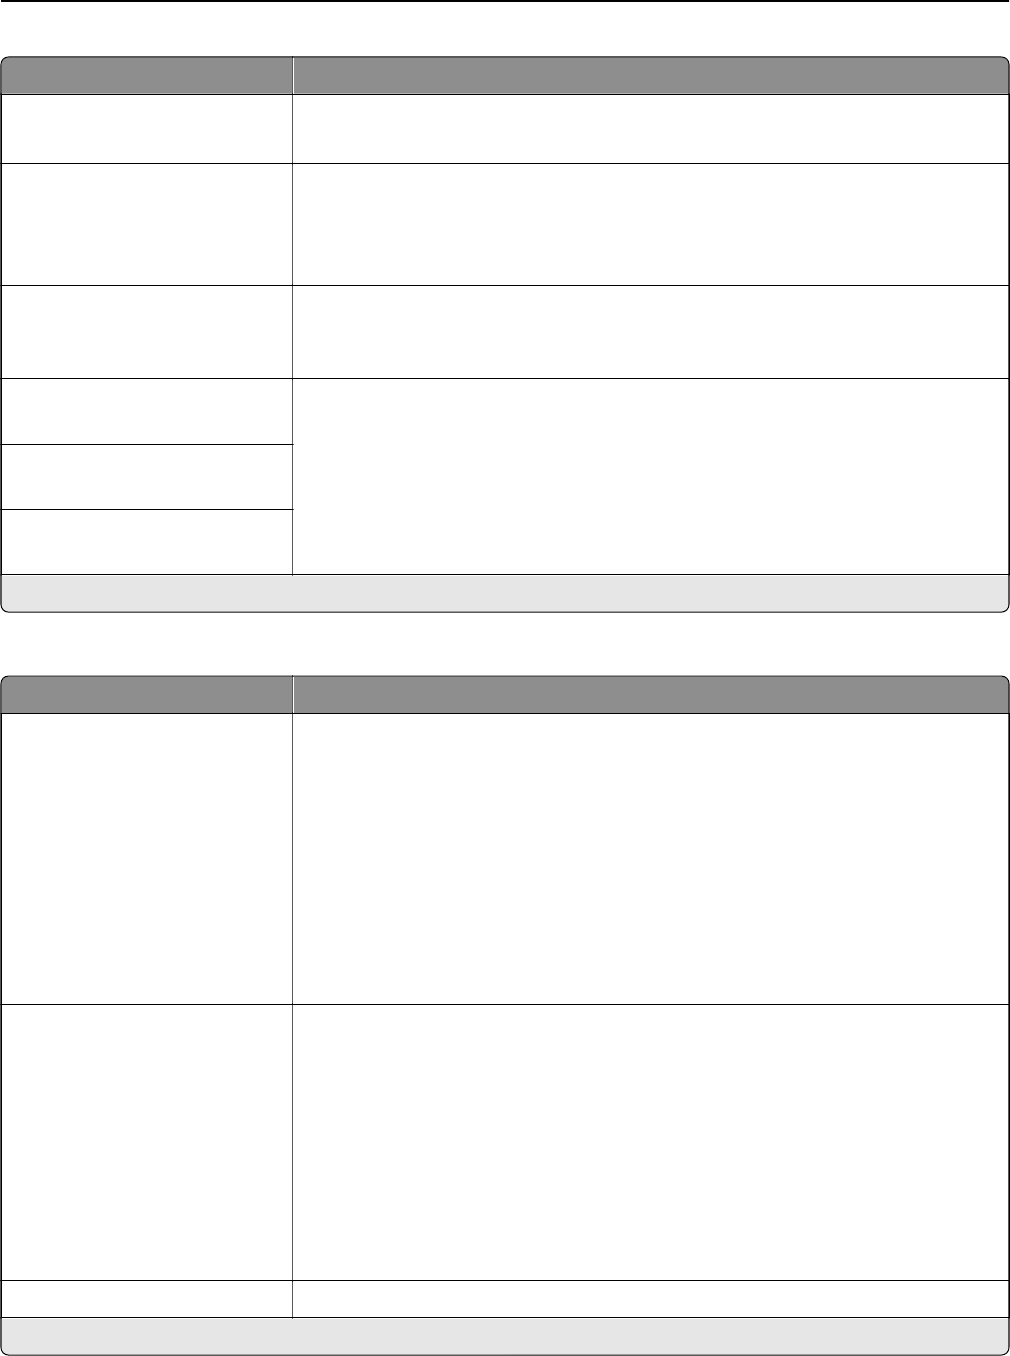
To achieve meaningful questions, we apply the following rules:
First, read the manual;
Check if your question has been asked previously;
Try to ask your question as clearly as possible;
Did you already try to solve the problem? Please mention this;
Is your problem solved by a visitor then let him/her know in this forum;
To give a response to a question or answer, do not use this form but click on the button 'reply to this question';
Your question will be posted here and emailed to our subscribers. Therefore, avoid filling in personal details.
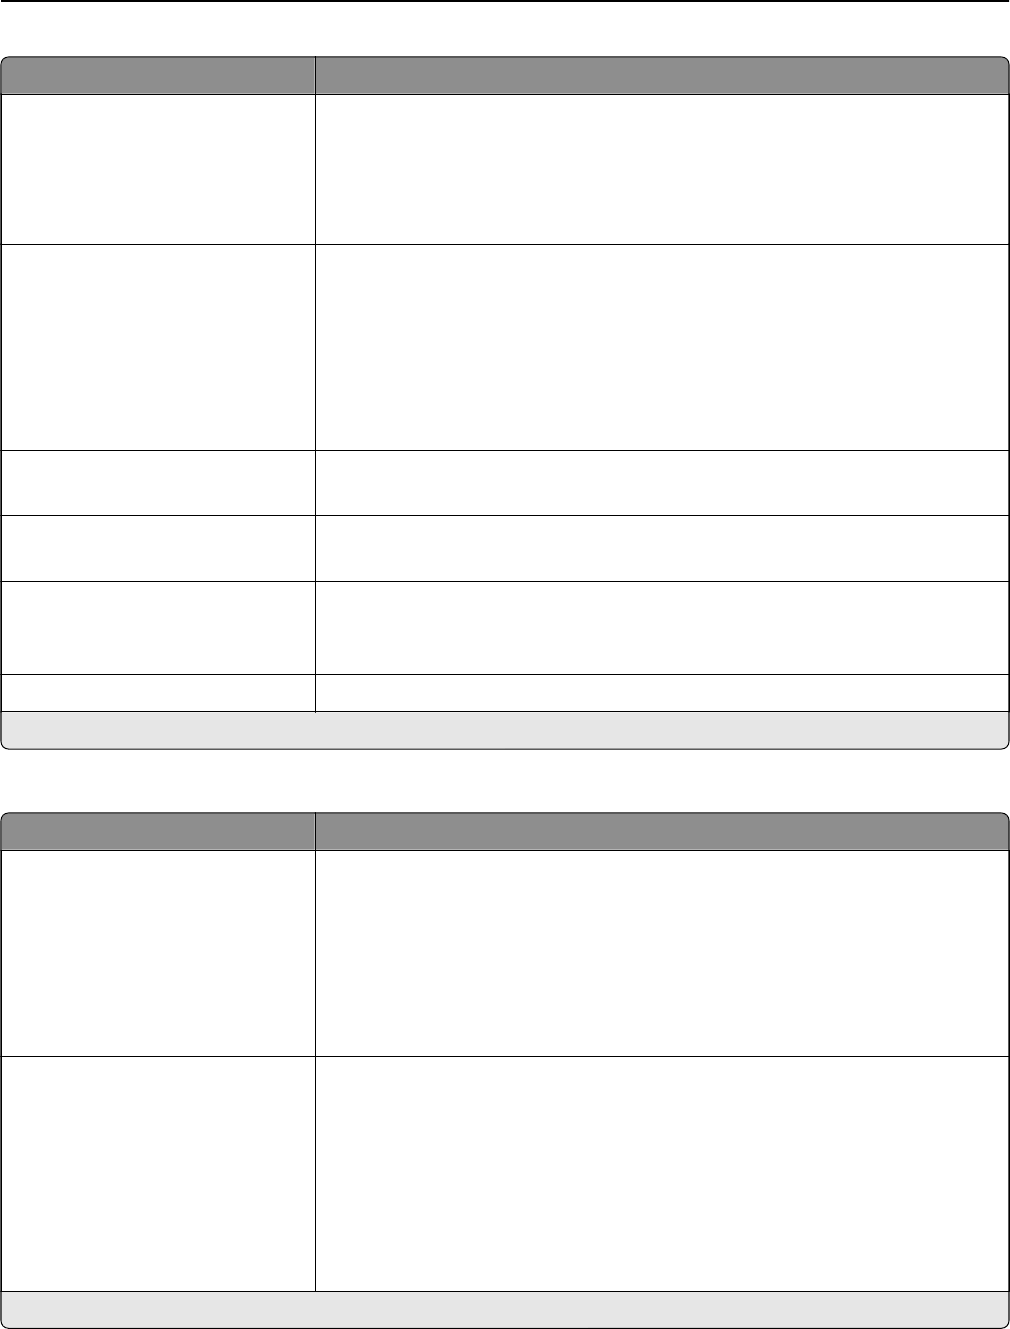
Register
Register getting emails for Lexmark MC3326 at:
new questions and answers
new manuals
You will receive an email to register for one or both of the options.
Get your user manual by e-mail
Enter your email address to receive the manual of Lexmark MC3326 in the language / languages: English as an attachment in your email.
The manual is 12,87 mb in size.
You will receive the manual in your email within minutes. If you have not received an email, then probably have entered the wrong email address or your mailbox is too full. In addition, it may be that your ISP may have a maximum size for emails to receive.
If you have not received an email with the manual within fifteen minutes, it may be that you have a entered a wrong email address or that your ISP has set a maximum size to receive email that is smaller than the size of the manual.
The email address you have provided is not correct.
Please check the email address and correct it.
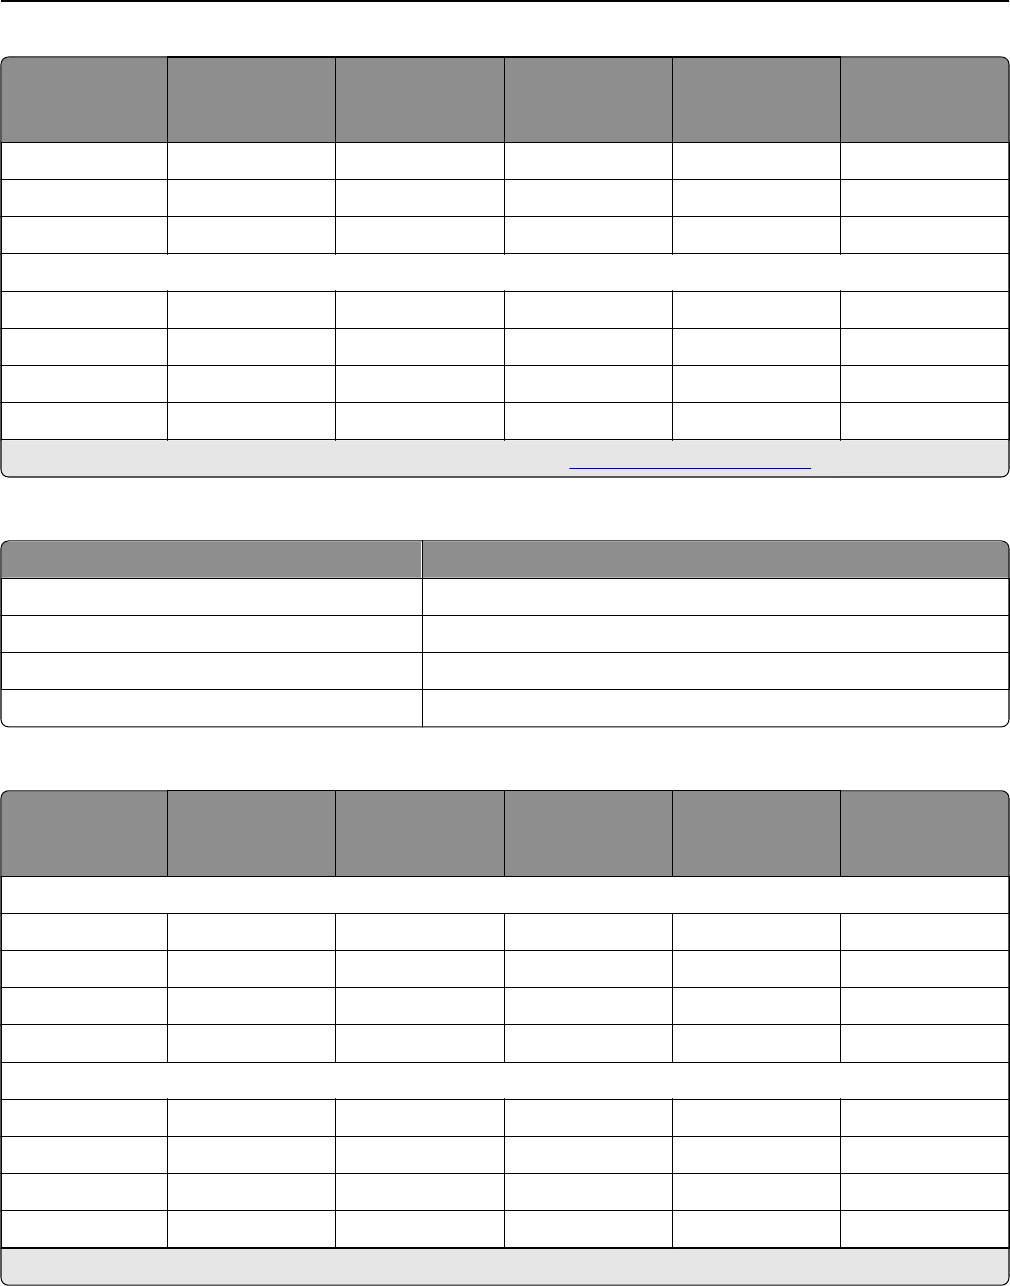
Your question is posted on this page
Would you like to receive an email when new answers and questions are posted? Please enter your email address.