15375
174
Zoom out
Zoom in
Previous page
1/192
Next page
172 / Detailed guide / Review mode
Deleting all markings – CANCEL ALL
3. Open the relevant viewfinder/monitor screen and
follow the further menu instructions.
Note: The flashing arrow pointing to the right only
appears if the corresponding markings exist. If
there are none, it is not possible to access the sub-
menu and the subsequent steps.
• In the viewfinder/monitor, the sub-menu to
cancel all DPOF markings for the presentation
appears, and the original viewfinder/monitor
screen appears after leaving the menu system.
PLayback with AV equipment -
Y
VIDEO OUT
The LEICA DIGILUX 2 allows you to view or present
your pictures on a TV or computer monitor, and there-
fore on a large screen. This also applies to all sound
recordings, which can be played back on an audio
system. The camera is connected to the TV via the
A/V lead supplied, after it has been set to the TV
standard applicable in your country – PAL or NTSC.
The camera’s monitor screen (“Livecam”) can also be
reproduced on NTSC compatible TVs or computer
monitors with a video input. The same applies to
(brief) automatic or manual review of the picture just
taken in the record modes (
B
AUTO REVIEW/
VIEW
).
Notes:
Do not use any leads other than the one supplied.
If your TV has a scart socket rather than a cinch
socket, you will also need an appropriate adapter.
We recommend that you run the camera from the
mains for this application (see p. 118)
Please refer to the relevant manual for details of
the required TV settings.
Selecting the TV standard
In the basic review menu
k
SETUP
2
/
3
(see
pp. 113/122) select the menu item
Y
VIDEO OUT
(3.35) and follow the further menu instructions.
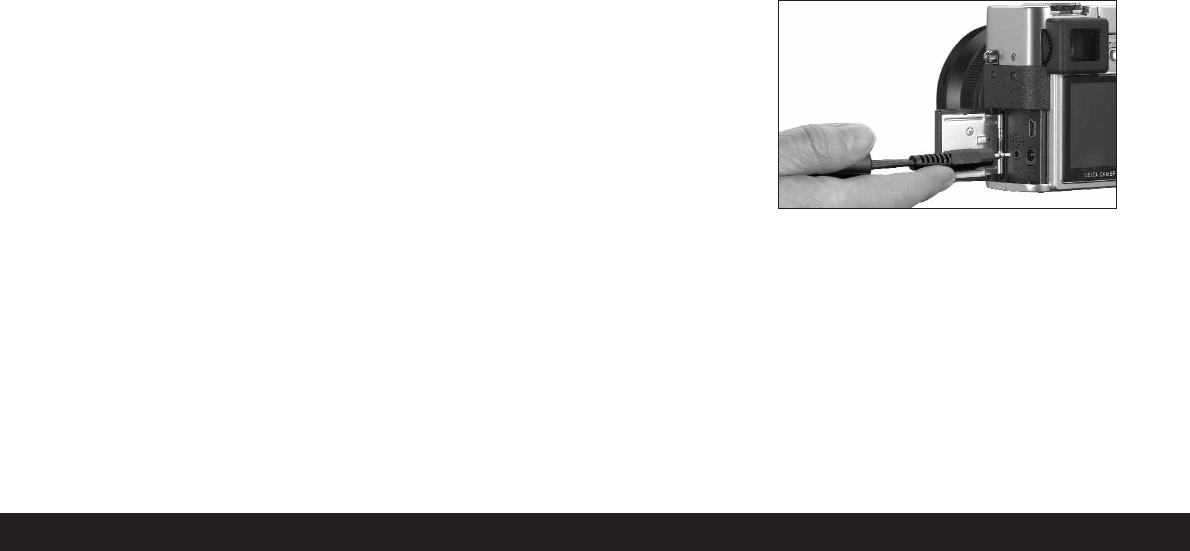
Connecting/Playing back pictures
1. Turn off the camera and the TV.
2. Plug the small individual strip plugs of the lead into
the camera’s “A/V OUT/REMOTE” socket (1.35)
and plug the cinch plugs into the relevant sockets
on the TV: the yellow plug in the video in socket,
the white one in the audio in socket.
3. Turn on the TV and switch to the AV channel.
4. Turn on the camera and set the Record/review
selector (1.15) to review
8
.
• The image set on the camera is then reproduced
on the TV.
174


Need help? Post your question in this forum.

Forumrules


Report abuse

Libble takes abuse of its services very seriously. We're committed to dealing with such abuse according to the laws in your country of residence. When you submit a report, we'll investigate it and take the appropriate action. We'll get back to you only if we require additional details or have more information to share.

Product:

For example, Anti-Semitic content, racist content, or material that could result in a violent physical act.

For example, a credit card number, a personal identification number, or an unlisted home address. Note that email addresses and full names are not considered private information.

Forumrules

To achieve meaningful questions, we apply the following rules:

Register

Register getting emails for Leica DIGILUX2 at:


You will receive an email to register for one or both of the options.


Get your user manual by e-mail

Enter your email address to receive the manual of Leica DIGILUX2 in the language / languages: English, German as an attachment in your email.

The manual is 1,7 mb in size.


You will receive the manual in your email within minutes. If you have not received an email, then probably have entered the wrong email address or your mailbox is too full. In addition, it may be that your ISP may have a maximum size for emails to receive.

Others manual(s) of Leica DIGILUX2

Leica DIGILUX2 User Manual - English - 96 pages

Leica DIGILUX2 User Manual - German - 96 pages

Leica DIGILUX2 User Manual - French - 97 pages

Leica DIGILUX2 User Manual - Italian - 97 pages

Leica DIGILUX2 User Manual - Spanish - 96 pages


The manual is sent by email. Check your email

If you have not received an email with the manual within fifteen minutes, it may be that you have a entered a wrong email address or that your ISP has set a maximum size to receive email that is smaller than the size of the manual.

The email address you have provided is not correct.

Please check the email address and correct it.

Your question is posted on this page

Would you like to receive an email when new answers and questions are posted? Please enter your email address.


Info