15375
159
Zoom out
Zoom in
Previous page
1/192
Next page
Detailed guide / Review mode / 157
3. You can return each indicated picture to normal
size by turning the central setting dial to the right
(clockwise).
Enlarging the picture and selecting the trimming
Notes:
It is not possible to enlarge the images or select
the trimming for video recordings.
The more the picture is enlarged, the more the
quality of reproduction in the viewfinder/monitor is
reduced, due to the proportionally lower resolution.
It may not be possible to enlarge pictures created
on other types of camera.
Setting the function/Selecting pictures
1. The pictures just viewed are enlarged by turning
the central setting dial (1.29) to the right (clock-
wise).
• The previous displays disappear from the view-
finder/monitor and the picture previously shown
is enlarged by 2x.
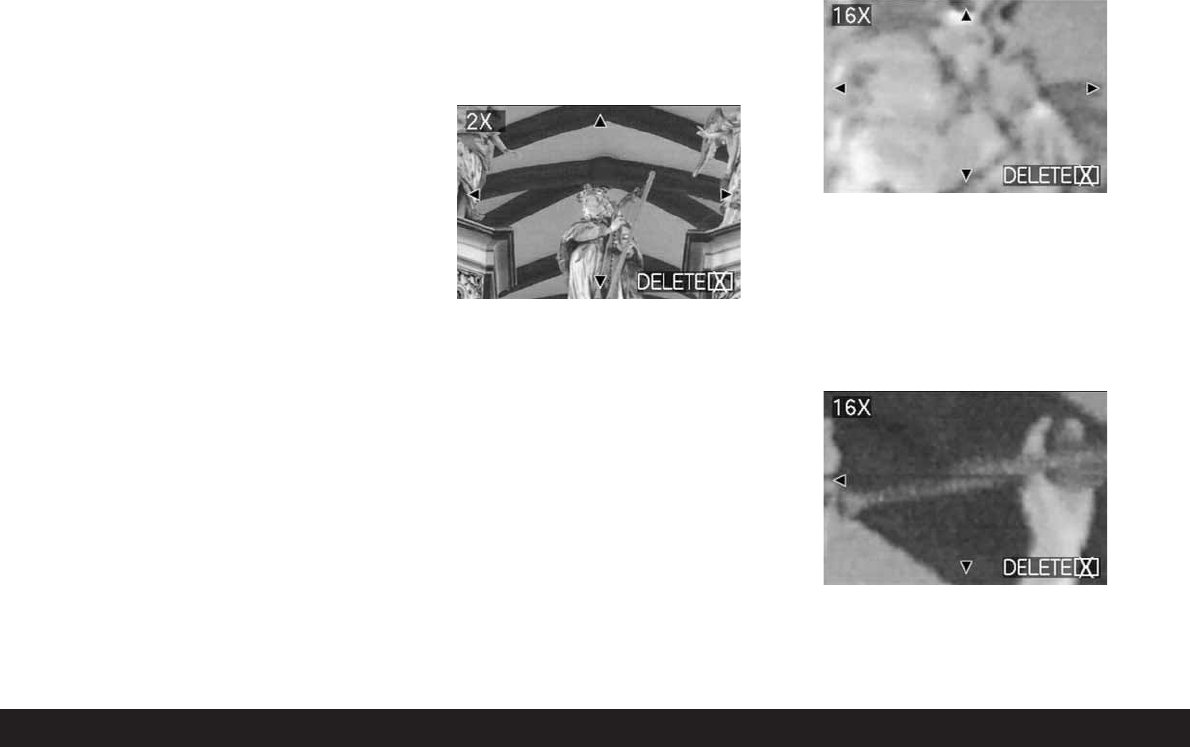
In addition, displays appear that indicate the
relevant magnification factor (header), as well as
(in the footers) the other possible reduction and/
or magnification factors and DELETE
s
as an
indication of how the picture shown can be
directly deleted on this occasion (to delete
pictures see p. 158). At the same time, arrows
appear on all 4 edges of the viewfinder/monitor
screen to indicate how you can change the
trimming.
For even smaller trimmed areas, the enlargement
factor can be increased to a maximum of 16x by
repeatedly turning the central setting dial (up to 4x
in total).
By turning the central setting dial to the left, the
picture can be reduced again.
2. You can select any trimmed area of an enlarged
view using the direction pad (1.30). To do this,
press the direction in which you want to move the
trimmed area.
• If the edge of the original picture is reached in
one or two directions, this is indicated by the fact
that the corresponding arrows disappear.
159


Need help? Post your question in this forum.

Forumrules


Report abuse

Libble takes abuse of its services very seriously. We're committed to dealing with such abuse according to the laws in your country of residence. When you submit a report, we'll investigate it and take the appropriate action. We'll get back to you only if we require additional details or have more information to share.

Product:

For example, Anti-Semitic content, racist content, or material that could result in a violent physical act.

For example, a credit card number, a personal identification number, or an unlisted home address. Note that email addresses and full names are not considered private information.

Forumrules

To achieve meaningful questions, we apply the following rules:

Register

Register getting emails for Leica DIGILUX2 at:


You will receive an email to register for one or both of the options.


Get your user manual by e-mail

Enter your email address to receive the manual of Leica DIGILUX2 in the language / languages: English, German as an attachment in your email.

The manual is 1,7 mb in size.


You will receive the manual in your email within minutes. If you have not received an email, then probably have entered the wrong email address or your mailbox is too full. In addition, it may be that your ISP may have a maximum size for emails to receive.

Others manual(s) of Leica DIGILUX2

Leica DIGILUX2 User Manual - English - 96 pages

Leica DIGILUX2 User Manual - German - 96 pages

Leica DIGILUX2 User Manual - French - 97 pages

Leica DIGILUX2 User Manual - Italian - 97 pages

Leica DIGILUX2 User Manual - Spanish - 96 pages


The manual is sent by email. Check your email

If you have not received an email with the manual within fifteen minutes, it may be that you have a entered a wrong email address or that your ISP has set a maximum size to receive email that is smaller than the size of the manual.

The email address you have provided is not correct.

Please check the email address and correct it.

Your question is posted on this page

Would you like to receive an email when new answers and questions are posted? Please enter your email address.


Info