136 / Detailed guide / Record mode
To set this mode, turn
1. the lens aperture setting ring (1.9) to its A position
(1.9 a), and
2. the shutter speed dial (1.16) to the desired
value.
• In the viewfinder/monitor screen this mode is
displayed by T (2.1.1 c). In addition, the manually
set shutter speed appears – in white – (2.1.18).
What to do next:
3. Aim at your subject with the rectangle (autofocus
metering area 2.1.30/31) and press the shutter
release button (1.13) to its pressure point.
• The automatically set aperture (2.1.20) is dis-
played – in white – in the viewfinder/monitor.
If even the fully opened or closed aperture in
conjunction with the set shutter speed results in
under or over exposure, this is indicated by red
values.
4. Press the shutter release button all the way down
to take the photograph.
Note: After the exposure setting has been locked (see
p. 132), and as long as the shutter release button is
kept depressed, the shutter speed/aperture combina-
tion can be changed by selecting another shutter
speed.
Taking photographs with aperture priority
mode - A
Aperture priority mode automatically controls the
exposure with manual setting of the aperture. It is
therefore particularly well suited for taking pictures
where the depth of field – which is determined by the
aperture used – is the crucial element of composition.
By manually pre-selecting an appropriately low aper-
ture value (= large aperture) you can reduce the depth
of field, for example in a portrait to let a face “stand
out”, i.e. be shown clearly in front of an unimportant
or distracting background. Or, in reverse, with a corre-
spondingly high aperture value (= small aperture) you
can increase the depth of field, in order to reproduce
everything from the foreground to the background
clearly in a landscape photograph.
Aperture values from 2.0 to 11.0 can be set, in
1
/
3
steps.
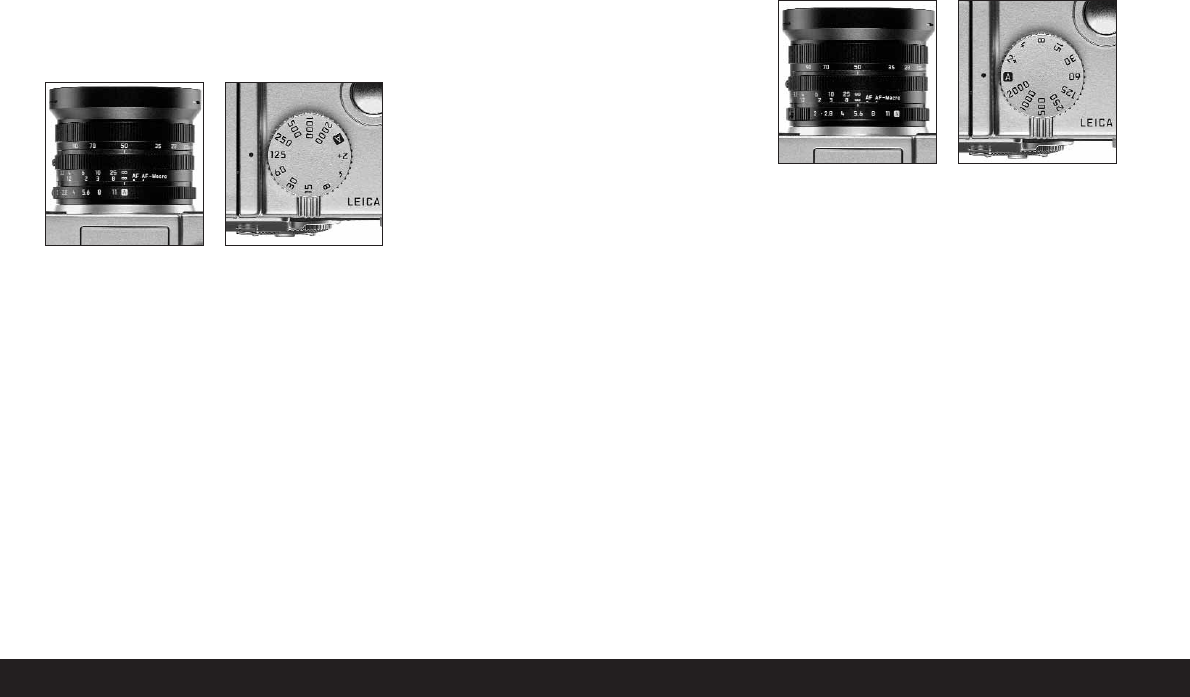
To set this mode, turn
1. the lens aperture ring (1.9) to the desired value,
and
2. the shutter speed dial (1.16) to its A position
(1.9 a).
• In the viewfinder/monitor screen this mode is
displayed by A (2.1.1 b). In addition, the manually
set aperture appears – in white – (2.1.20).
Note: After the exposure setting has been locked (see
p. 132), and as long as the shutter release button is
kept depressed, the shutter speed/aperture combina-
tion can be changed by selecting another aperture
value.
What to do next:
3. Aim at your subject with the rectangle (autofocus
metering area 2.1.30/31) and press the shutter
release button (1.13) to its pressure point.
• The automatically set shutter speed (2.1.18) is
displayed – in white – in the viewfinder/monitor.
If even the slowest or fastest shutter speed in
conjunction with the set aperture results in
under or over exposure, this is indicated by red
values.