ENGLISH
12
OPERATION INSTRUMENTS »
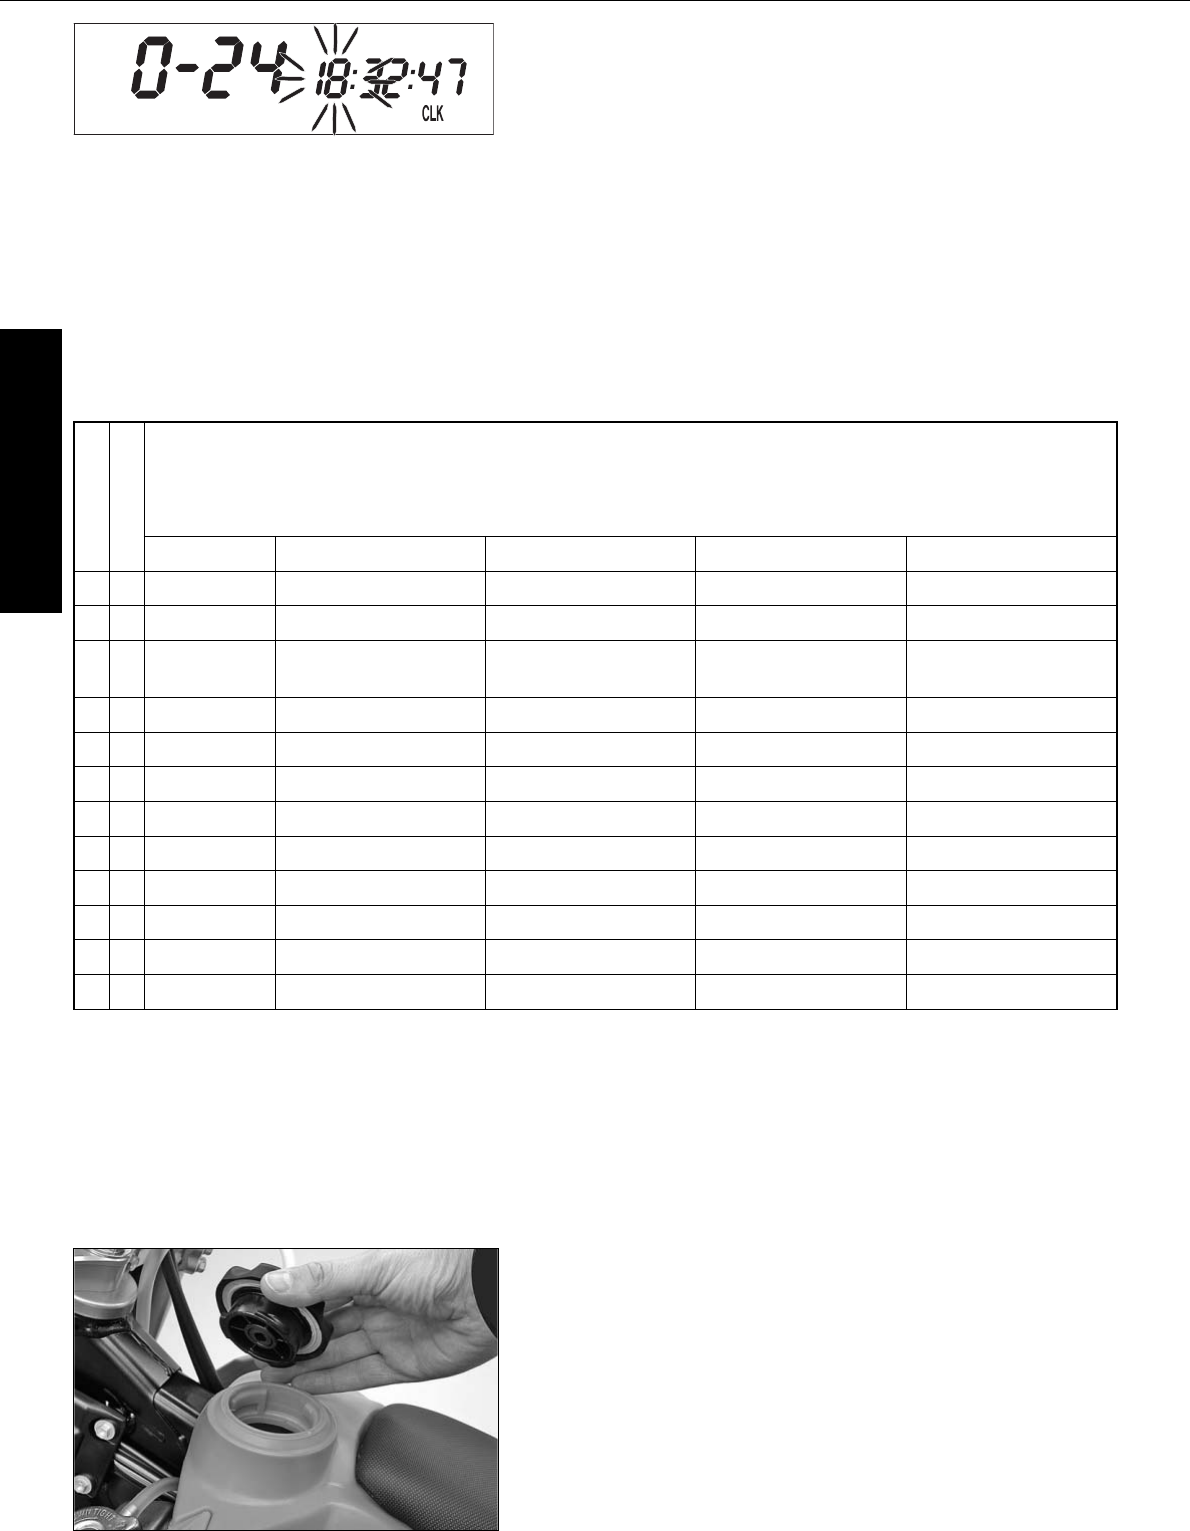
Setting the clock
To set the clock, switch the ignition off and select the SPEED/CLK mode. Press
and hold the | button for 3 seconds. The blinking digits can be changed
using the + and - buttons. Press the | button to move to the next digit. 0-
12 will show the time in the 12-hour mode, 0-24 in the 24-hour mode.
Press and hold the | button for 3 seconds to store the settings.
If no button is pressed for 20 seconds, the settings will be stored automati-
cally and the display will return to the SPEED/CLK mode.
+ button time +
– button time -
briefly press | button changes to the next digit
hold | button 3 secs. starts the SETUP menu
stores the time and changes to the SPEED/CLK dis-
play mode
If the CLK, LAP, MAX, TR1, TR2 A1, A2, S1 and S2 figures are suddenly cleared, the battery in the electronic speedometer is empty
and must be replaced (see: Replacing the battery in the electronic speedometer).
A tripmaster switch is available as an accessory that lets you control the electronic speedometer functions from the handlebar.
Motorcycle is standing
Motorcycle is driving
OVERVIEW OF THE ELECTRONIC SPEEDOMETER FUNCTIONS
display
briefly press + button
briefly press – button
briefly press | button hold | button 3 secs.
X
SPEED / H
no function no function next display mode
displays the SETUP menu
X X
SPEED / CLK
no function no function next display mode Setting the clock menu
X X
SPEED / LAP
starts/stops LAP without
clearing LAP figure
stops LAP, stores LAP
figure, resets LAP to 0
next display mode clears all LAP figures
X
LAP / LAP
next figure no function next display mode next display mode
X X
SPEED / MAX
no function no function next display mode clears MAX
X
SPEED / ODO
no function no function next display mode next display mode
X X
SPEED / TR1
no function no function next display mode clears TR1, S1, A1
X X
SPEED / TR2
increases the TR2 figure reduces the TR2 figure next display mode clears TR2
X X
SPEED / A1
no function no function next display mode clears TR1, S1, A1
X X
SPEED / A2
no function no function next display mode next display mode
X X
SPEED / S1
no function no function next display mode clears TR1, S1, A1
X X
SPEED / S2
starts - stops S2 no function next display mode clears S2
Filler cap (bayonet cap)
To open the filler cap: Turn the filler cap 45° counter-clockwise.
To close the filler cap: Put the filler cap on and turn it 45 ° clockwise.