18
2 g
Verschrauben Sie die Kippsicherung mit Feststeller auf der linken
Plattenseite. Rechts wird ebenso verfahren. Lösen Sie nun das vor-
montierte Verbindungsrohr auf der anderen Seite und führen Sie
die Schritte 2c bis 2g für die zweite Plattenhälfte durch. Denken Sie
auch hier wieder an die Sicherung der Platte!
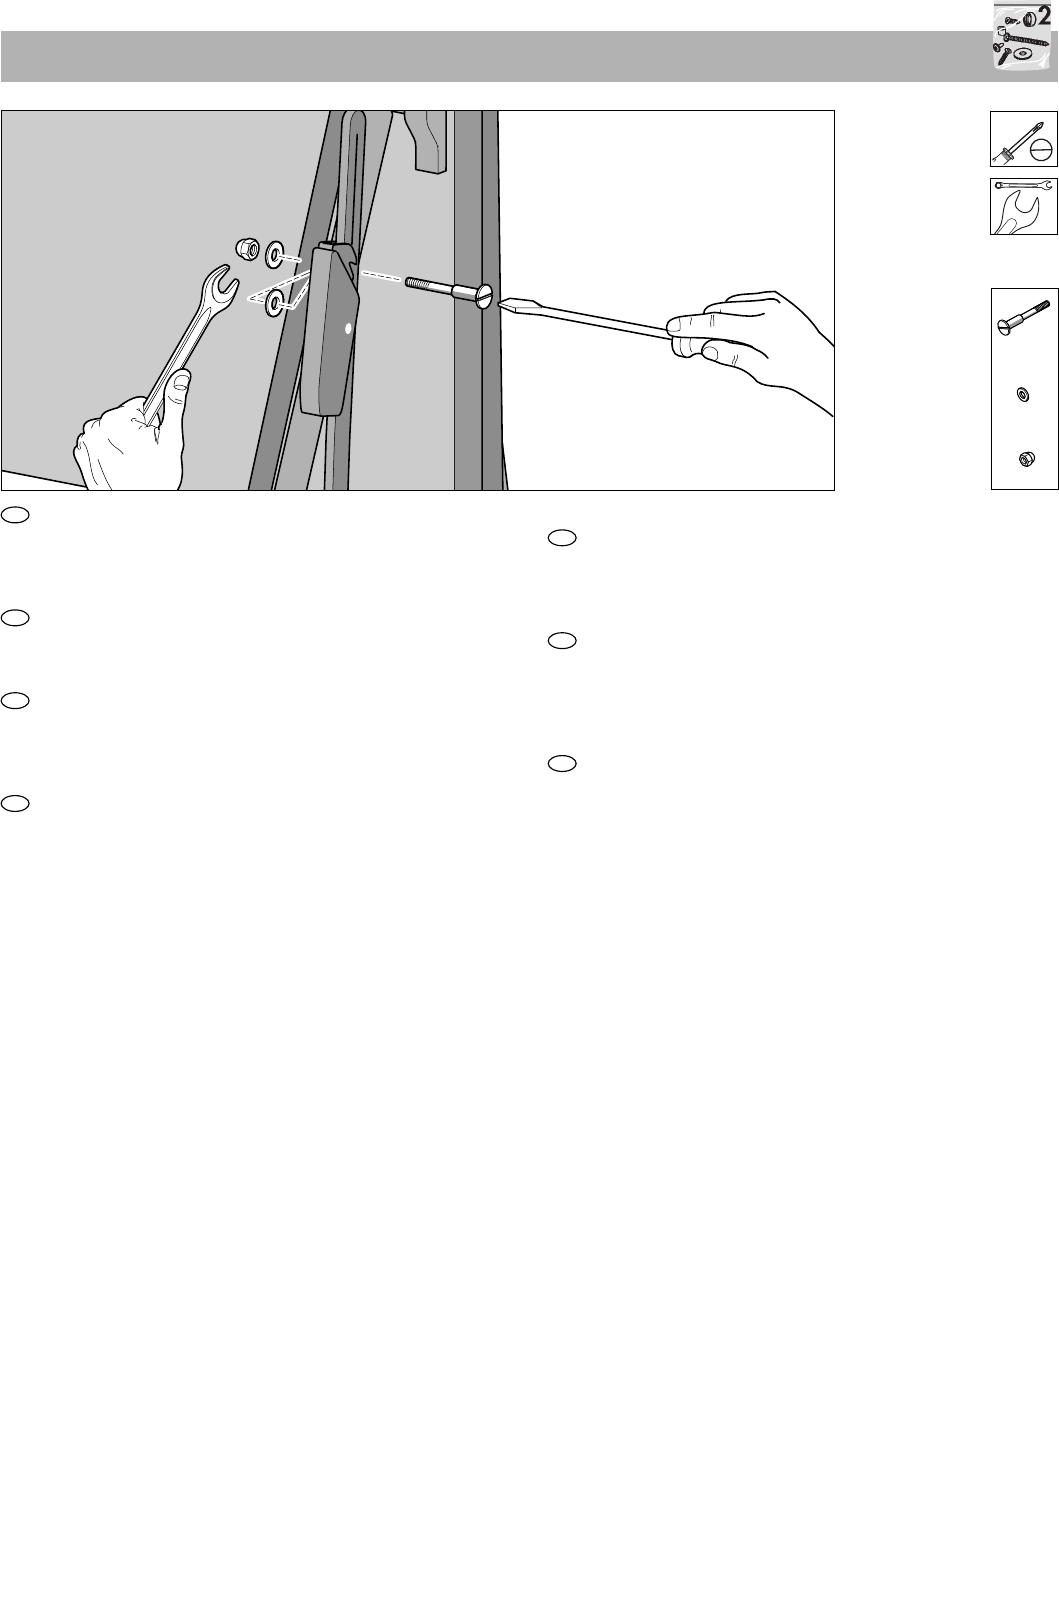
Bolt the anti-tilt device with lock to the left-hand side of the table. Re-
peat this for the right-hand side. Now remove the temporary bar
from the other side and carry out steps 2c–2g for the second half
of the table. Again, ensure that the table cannot slip or tilt over!
Visser du côté gauche du plateau, la sécurité au renversement avec
dispositif de fixation. Procéder de même à droite. Enlever alors le
tube de jonction prémonté de l’autre côté et effectuer les opérations
2c à 2g pour la deuxième moitié de table. Là non plus, ne pas
oublier la sécurisation du plateau.
Schroef de kiepvergrendeling met vergrendeling op de linker blad-
helft vast. Rechts dient u hetzelfde te werk de gaan. Schroef nu de
voorgemonteerde verbindingsbuis aan de andere kant los en voer
de montagestappen 2c tot 2g voor de tweede bladhelft uit. Denk
ook hierbij weer aan de vergrendeling van het blad!
Atornille el seguro contra vuelco con encastramiento en el lado iz-
quierdo de la plancha. Proceda de la misma forma en el lado de-
recho. Suelto ahora el tubo de unión premontado en el lado opu-
esto y ejecute los pasos 2c a 2g para la segunda mitad de la plan-
cha.¡Piense también aquí que tiene que asegurar la plancha!
Avvitare il pulsante antiribaltamento con la levetta di fissaggio sul
lato sinistro del piano. Procedere allo stesso modo anche a destra.
Svitare adesso il tubolare di collegamento precedentemente mon-
tato sull’altro lato, e ripetere le operazioni da 2c a 2g anche per il
sesondo semipiano. Anche in questa fase operativa fare attenzio-
ne a fissare e assicurare bene il piano!
Przykręcić zabezpieczenie przed przewróceniem się razem z blo-
kadą po lewej stronie płyty. Po prawej stronie postąpić w ten sam
sposób. Odkręcić teraz wstępnie zmontowaną rurę łączącą po
drugiej stronie i powtórzyć kroki 2c do 2g dla drugiej połówki pły-
ty. Nie zapomnieć przy tym o zabezpieczeniu płyty!