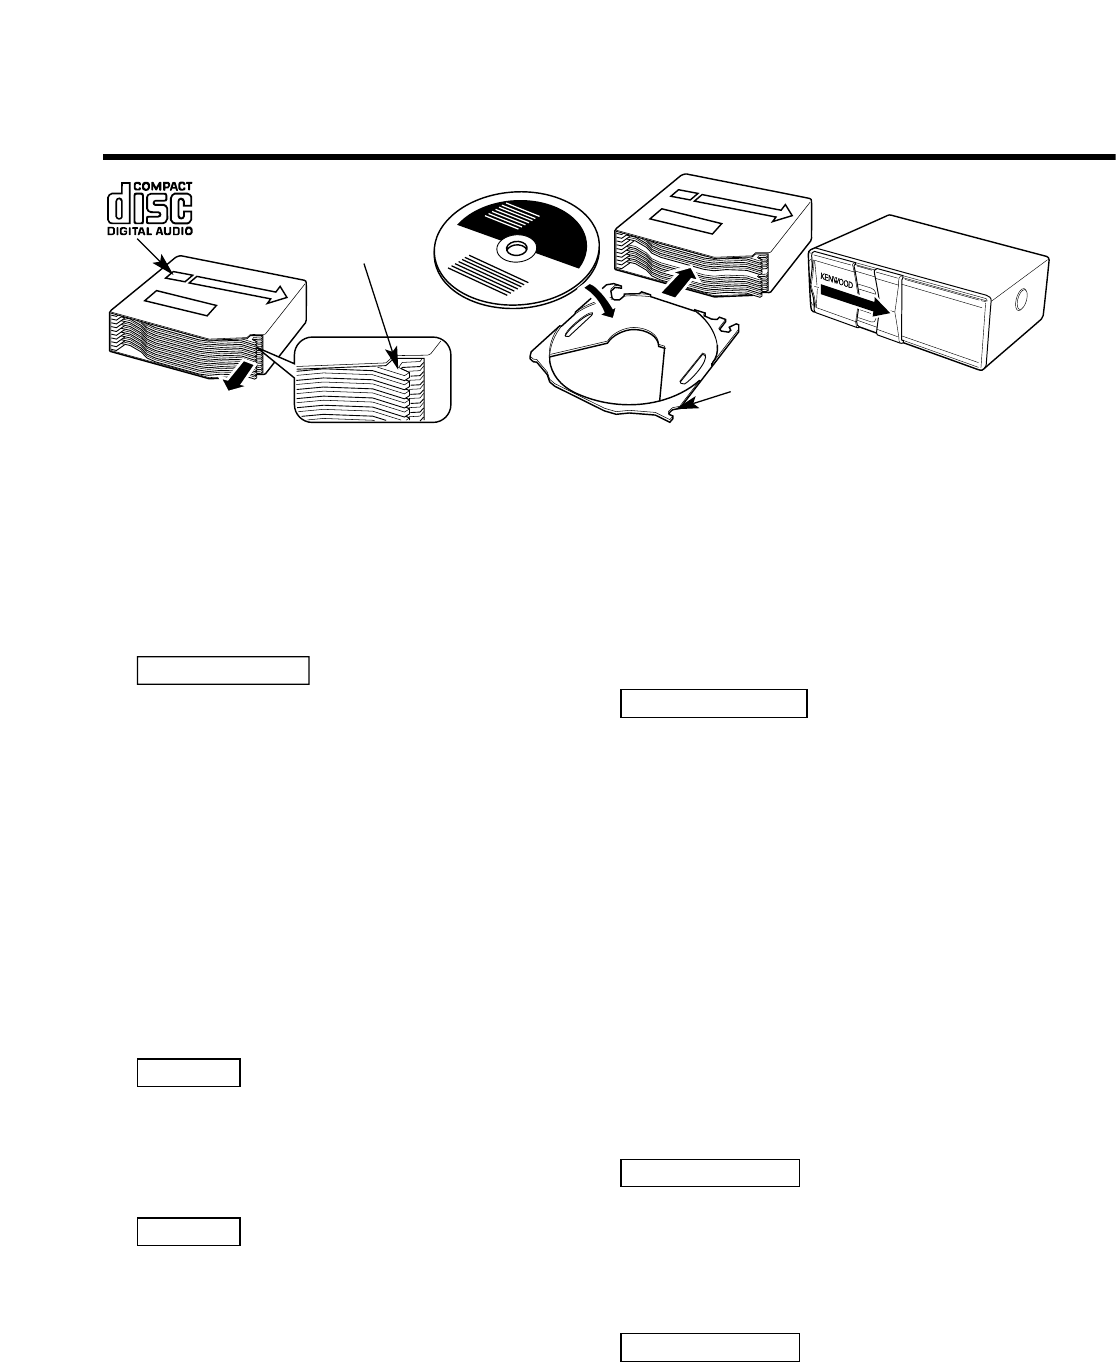
1. Make sure the disc magazine is the right
way up with the "disc" logo on the top.Pull
the tray out by the projection.
2. Place the disc on the tray with the label
facing upwards. Insert the tray into the disc
magazine until it locks. Check that the discs
and trays are inserted properly. The discs
are numbered from the bottom from 1 to
10.
• Take care to insert trays into the correct
grooves in the disc magazine and to insert
discs properly into the tray grooves.
Otherwise malfunction may occur or the
disc may be damaged.
• Insert all trays even when some of them
do not carry discs. Otherwise malfunction
or operation failure may occur.
• 8-cm discs cannot be used. If an 8-cm
disc adapter is used, the disc cannot be
ejected.
3. Open the CD changer door.
4. Insert the magazine into the CD changer
until it clicks.
5. Close the CD changer door.
Use the CD changer with its door closed to
prevent the entry of dust into the changer.
6. Magazine ejection
Open the CD changer door, and press the
"EJECT" button.
Be sure to open the door completely before
pressing the EJECT button. If the door is
not completely open, the magazine may hit
the door and cause damage of malfunction.
1. Assurez-vous que le magasin de disque est
correctement inséré avec le logo "disc"
dirigé vers le haut. Tirez le plateau vers
l'extérieur par la saillie.
2. Placez le disque sur le plateau avec la face
imprimée dirigée vers le haut. Insérez le
plateau dans le magasin de disque jusqu'à
ce qu'il soit verrouillé. Assurez-vous que les
disques et les plateaux sont correctement
en place. Les disques sont numérotés à
partir du bas, de 1 à 10.
• Veillez à ce que les plateaux soient bien
engagés dans les glissières du chargeur et
à ce que les disques soient bien placés
dans l’alvéole des plateaux. Dans le cas
contraire, une anomalie de fonctionnement
peut survenir, ou encore les disques
peuvent être endommagés.
• Mettez en place tous les plateaux meme
si certains ne contiennent pas de disque.
Dans le cas contraire, une anomalie de
fonctionnement peut survenir.
• L’appareil n’accepte pas les disques de
8cm. Si on utilise un adaptateur pour
disque de 8cm, l’éjection du disque
devient impossible.
3. Ouvrir le volet du changeur de CD.
4. Introduire le chargeur dans le changeur de
CD jusqu’à encliquètement.
5. Refermer le volet du changeur de CD.
Le changeur de CD doit s’utiliser avec le
vlet fermé pour éviter que la poussière ne
pénètre à l’intérieur de l’appareil.
6. Ejection du chargeur
Ouvrir le volet du changeur de CD et
appuyer sur le bouton "EJECT".
Vérifier que le volet est ouvert en grand
avant d’appuyer sur le bouton EJECT. Si la
volet n’est pas complètement ouvert, le
chargeur rsique de buter contre, ce qui
pourrait entraîner un mauvais
fonctionnement.
REMARQUE
REMARQUE
2ATTENTION
NOTE
NOTE
2CAUTION
1
2
3
Projection
Saillie
Saliente
Saliência
Tray /
Plateau /
Bandeja /
Bandeja