516527
17
Zoom out
Zoom in
Previous page
1/68
Next page
I Allgemeine Bedienungsanleitung 17
Ziehen Sie den Lenkervorbau nie über die Maximum-
oder Stoppmarkierung am Scha heraus. Falls Sie kei-
ne Markierung nden, stecken Sie den Lenkervorbau
mindestens 6,5 cm tief in das Steuerrohr. Andernfalls
kann der Lenkervorbau sich lösen oder brechen.
9.3.2 Lenkerhöhe bei A-Head-Systemen
anpassen
Bei den hier abgebildeten A-Head-Vorbauten muss eine
Fachwerkstatt die Lenkerhöhenverstellung vornehmen.
9.3.3 Lenker bei A-Head-Systemen zum
Vorderrad ausrichten
Um den Lenker zum Vorderrad auszurichten, gehen Sie so
vor:
Drehen Sie zum Önen die Inbusschrauben an der
hinteren Seite des Vorbaus mit einem Inbusschlüs-
sel gegen den Uhrzeigersinn.
Drehen Sie den Lenkerbügel so, dass der Lenker
genau im rechten Winkel zum Vorderrad steht.
Ziehen Sie die Inbusschraube im Uhrzeigersinn
mit einem Inbusschlüssel fest (siehe
Kapitel 30
Technische Daten“).
9.3.4 Lenkerposition durch Drehen des
Lenkers einstellen
Önen Sie die Inbusschrauben an der Vorderseite des
Vorbaus. Drehen Sie den Lenker, bis er eine r Sie kom-
fortable Position erreicht hat. Achten Sie darauf, dass der
Lenker genau in der Mitte in den Vorbau geklemmt wird.
Ziehen Sie jetzt die Inbusschrauben im Uhrzeigersinn wie-
der fest. Wenn das Anzugsmoment im Vorbau eingeprägt
ist, verwenden Sie diesen Wert, ansonsten nden Sie die
Anzugsmomente im
Kapitel 30 „Technische Daten“.
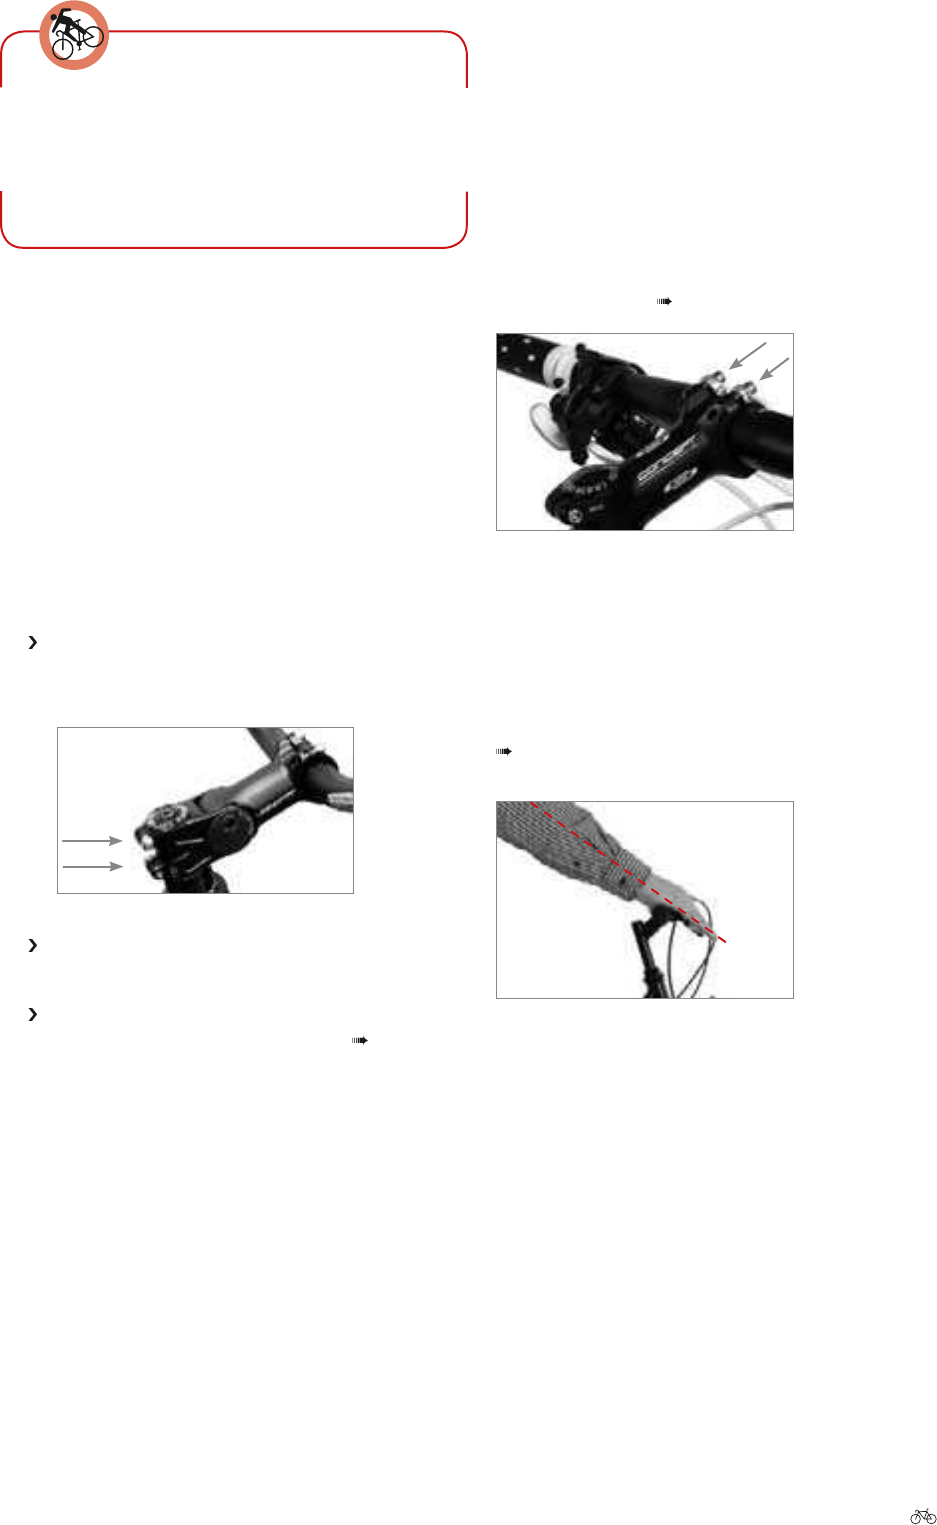
Nachdem Sie den Lenker eingestellt haben, müssen Sie
die Brems- und Schaltgrie justieren. Lösen Sie die Inbus-
schrauben an den Griandagen. Setzen Sie sich auf den
Sattel und legen Sie die Finger auf den Hebel. Drehen Sie
den Hebel, bis Ihre Hand eine gerade Linie mit dem Unter-
arm bildet. Ziehen Sie die Schrauben in den Griandagen
im Uhrzeigersinn wieder fest. (Anzugsmomente siehe
Kapitel 30 „Technische Daten“).
17


Need help? Post your question in this forum.

Forumrules


Report abuse

Libble takes abuse of its services very seriously. We're committed to dealing with such abuse according to the laws in your country of residence. When you submit a report, we'll investigate it and take the appropriate action. We'll get back to you only if we require additional details or have more information to share.

Product:

For example, Anti-Semitic content, racist content, or material that could result in a violent physical act.

For example, a credit card number, a personal identification number, or an unlisted home address. Note that email addresses and full names are not considered private information.

Forumrules

To achieve meaningful questions, we apply the following rules:

Register

Register getting emails for Kalkhoff Sportfiets at:


You will receive an email to register for one or both of the options.


Get your user manual by e-mail

Enter your email address to receive the manual of Kalkhoff Sportfiets in the language / languages: German as an attachment in your email.

The manual is 3,58 mb in size.


You will receive the manual in your email within minutes. If you have not received an email, then probably have entered the wrong email address or your mailbox is too full. In addition, it may be that your ISP may have a maximum size for emails to receive.

Others manual(s) of Kalkhoff Sportfiets

Kalkhoff Sportfiets User Manual - English - 68 pages

Kalkhoff Sportfiets User Manual - Dutch - 69 pages

Kalkhoff Sportfiets User Manual - French - 68 pages


The manual is sent by email. Check your email

If you have not received an email with the manual within fifteen minutes, it may be that you have a entered a wrong email address or that your ISP has set a maximum size to receive email that is smaller than the size of the manual.

The email address you have provided is not correct.

Please check the email address and correct it.

Your question is posted on this page

Would you like to receive an email when new answers and questions are posted? Please enter your email address.


Info