This function allows you to automatically record a
satellite programme which is timer-programmed on your
external satellite receiver. Connect a satellite receiver to
the recorder’s AV2 (L-2) IN/DECODER connector and
programme the timer on the satellite receiver. The
recorder starts or stops recording by the signals input
from the satellite receiver. After recording, the recorder’s
power shuts off automatically.
A
Select the L-2 SELECT mode.
Set “L-2 SELECT” to “A/V” or “SAT” (
墌
pg. 37).
●When you select “SAT”, refer to “IMPORTANT” on page 44.
B
Set the tape speed.
Press
SP/LP
(
p
).
C
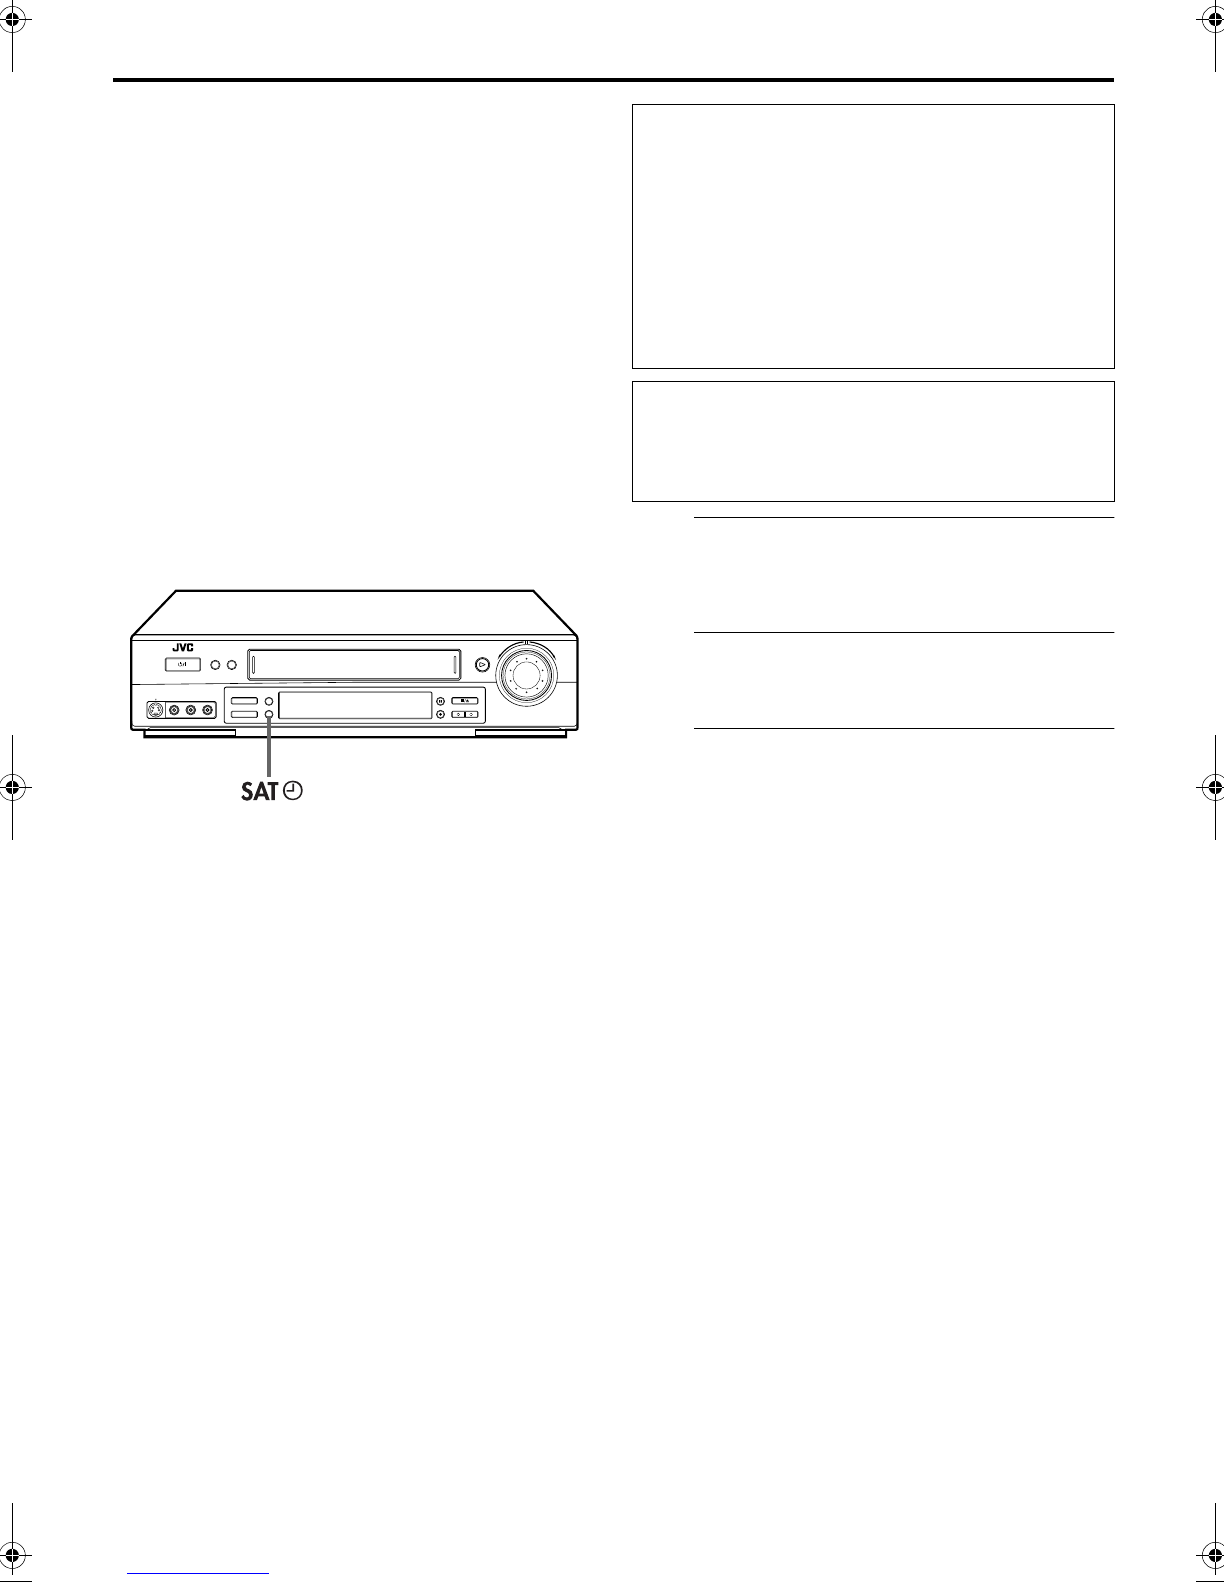
Engage the Automatic Satellite Programme
Recording mode.
Press and hold
SAT#
for about 2 seconds. The button
lights up and the recorder turns off automatically.
NOTES:
●To disengage the Automatic Satellite Programme Recording mode, press
SAT
#. The button’s light goes off.
●If the recorder’s power is off, it is not possible to engage the Automatic Satellite Programme Recording mode.
●In step
3
, if the SAT
# button does not light but instead blinks quickly even though your satellite receiver’s power is off, Automatic
Satellite Programme Recording will not work properly with that satellite receiver*. If this is the case, perform “Express Timer
Programming” (
墌
pg. 30) to timer-record a satellite programme.
*Some satellite receivers output signals even if the power is off. Automatic Satellite Programme Recording is not possible with those satellite receivers.
●The SAT
# button blinks while Automatic Satellite Programme Recording is in progress.
●For timer programming of the satellite receiver, refer to the instruction manual of the satellite receiver.
●Automatic Satellite Programme Recording is not possible if your satellite receiver does not have a timer.
●Pressing the recorder’s
1 button while Automatic Satellite Programme Recording is in progress turns off the recorder’s power and
disengages the Automatic Satellite Programme Recording mode.
●If there are more than one satellite programmes you wish to record with Automatic Satellite Programme Recording, it is not possible
to set different tape speeds for each programme.
●Depending on the type of satellite receiver, the recorder may not record a slight portion of the beginning of the programme or may
record slightly longer than the actual length of the programme.
●If you engage the Automatic Satellite Programme Recording mode when the satellite receiver’s power is on, the recorder will not
start Automatic Satellite Programme Recording even though the SAT
# button blinks. When the satellite receiver shuts off once and
is turned back on again, the recorder starts recording.
●You can also record a programme from your cable system in the same way if the system has a timer.
●The B.E.S.T. system (
墌
pg. 27) does not work while Automatic Satellite Programme Recording is in progress.
●Just Clock (
墌
pg. 60) does not work when the Automatic Satellite Programme Recording mode is engaged.
●When the Automatic Satellite Programme Recording mode is engaged, or the recorder’s power is turned off after Automatic Satellite
Programme Recording is finished, the recorder will not enter the Timer mode even though “AUTO TIMER” is set to “ON”
(
墌
pg. 49).
●After Automatic Satellite Programme Recording, the number of recorded programmes will not be displayed on the front display
panel for the Instant ReView function (
墌
pg. 20).
ATTENTION
●Be sure not to turn on the satellite receiver before the
programme is executed; otherwise, the recorder will start
recording when the satellite receiver’s power is turned on.
●If you have connected another appliance other than a
satellite receiver to the AV2 (L-2) IN/DECODER connector,
be sure not to engage the Automatic Satellite Programme
Recording mode; otherwise, the recorder will start
recording when the connected appliance’s power is turned
on.
●Automatic Satellite Programme Recording and timer-
recording cannot be done at the same time.
Before performing the following steps:
●Make sure the satellite receiver is connected to the recorder’s
AV2 (L-2) IN/DECODER connector. (
墌
pg. 44, 45)
●Programme the timer on the satellite receiver.
●Insert a cassette with the safety tab in place.
HRS7700EU2.fm Page 34 Wednesday, March 8, 2000 1:33 PM
Downloaded from www.Manualslib.commanuals search engine
Libble takes abuse of its services very seriously. We're committed to dealing with such abuse according to the laws in your country of residence. When you submit a report, we'll investigate it and take the appropriate action. We'll get back to you only if we require additional details or have more information to share.
Product:
Forumrules
To achieve meaningful questions, we apply the following rules:
First, read the manual;
Check if your question has been asked previously;
Try to ask your question as clearly as possible;
Did you already try to solve the problem? Please mention this;
Is your problem solved by a visitor then let him/her know in this forum;
To give a response to a question or answer, do not use this form but click on the button 'reply to this question';
Your question will be posted here and emailed to our subscribers. Therefore, avoid filling in personal details.
Register
Register getting emails for JVC HR-S7722EU at:
new questions and answers
new manuals
You will receive an email to register for one or both of the options.
Get your user manual by e-mail
Enter your email address to receive the manual of JVC HR-S7722EU in the language / languages: English as an attachment in your email.
The manual is 3,63 mb in size.
You will receive the manual in your email within minutes. If you have not received an email, then probably have entered the wrong email address or your mailbox is too full. In addition, it may be that your ISP may have a maximum size for emails to receive.
The manual is sent by email. Check your email
If you have not received an email with the manual within fifteen minutes, it may be that you have a entered a wrong email address or that your ISP has set a maximum size to receive email that is smaller than the size of the manual.
The email address you have provided is not correct.
Please check the email address and correct it.
Your question is posted on this page
Would you like to receive an email when new answers and questions are posted? Please enter your email address.