687146
37
Zoom out
Zoom in
Previous page
1/40
Next page
D6/D60 Instructions for Use
2
Table of contents
Your D6/D60
Control elements 4
Important information 6
Proper use ......................................................................................................................................................6
For your safety ...............................................................................................................................................6
1 Preparing and using for the first time 10
JURA on the Internet ....................................................................................................................................10
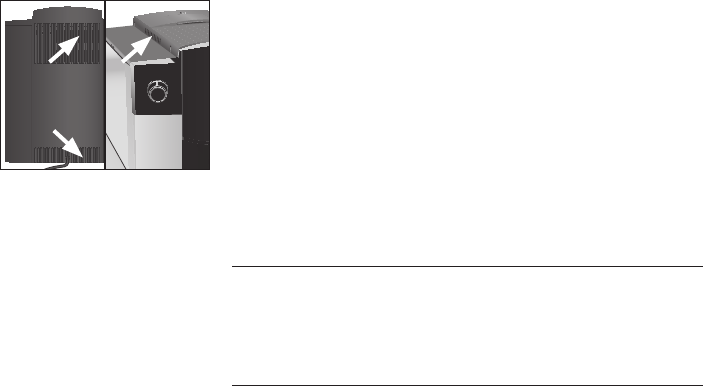
Setting up the machine ..............................................................................................................................10
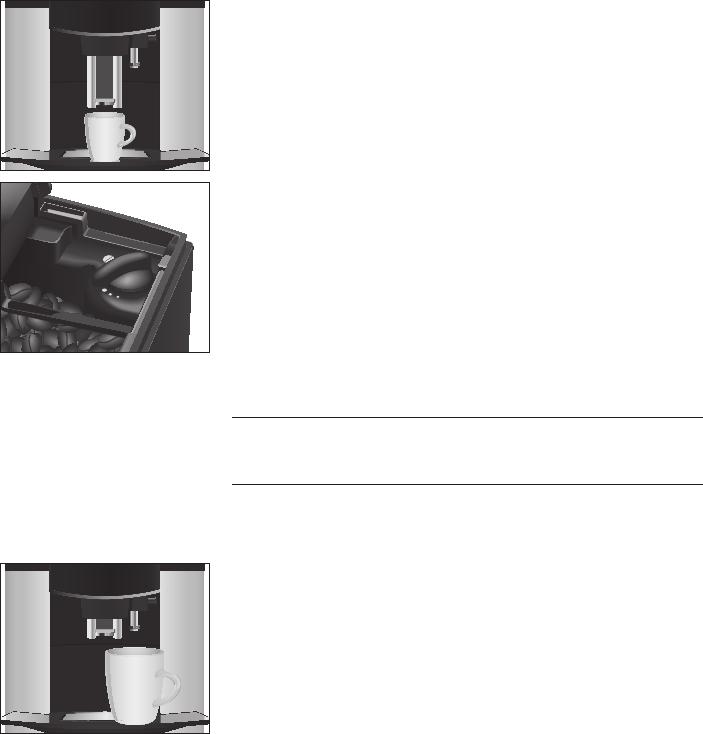
Filling the bean container ...........................................................................................................................10
Determining the water hardness ...............................................................................................................11
First-time use .................................................................................................................................................11
Connecting milk ...........................................................................................................................................13
2 Preparation 14
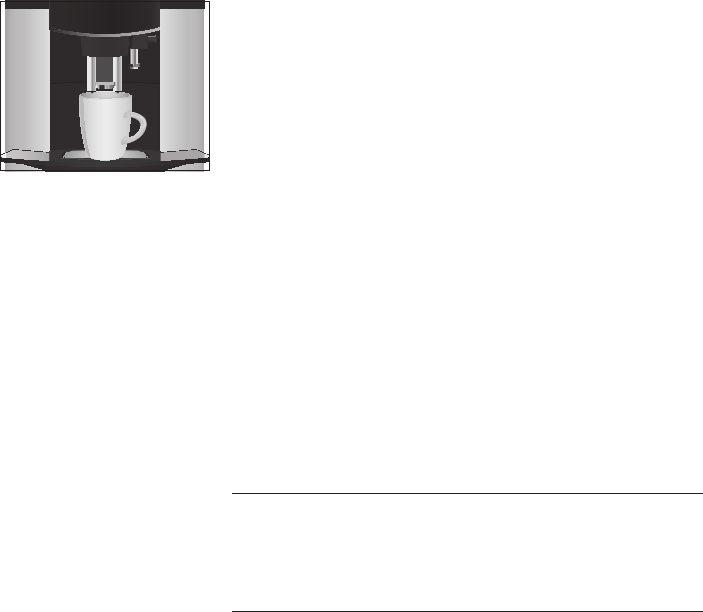
Espresso and coffee .....................................................................................................................................14
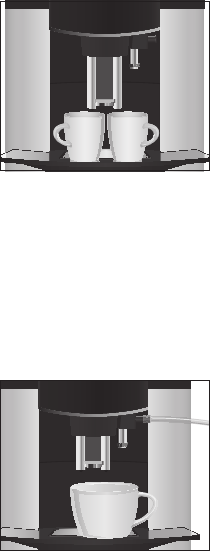
Two speciality coffees at the touch of a button ......................................................................................15
Cappuccino....................................................................................................................................................15
Milk foam .......................................................................................................................................................16
Permanently setting the amount of water for the cup size .................................................................17
Adjusting the grinder ..................................................................................................................................17
Hot water .......................................................................................................................................................18
3 Daily operation 19
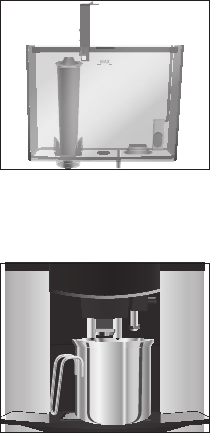
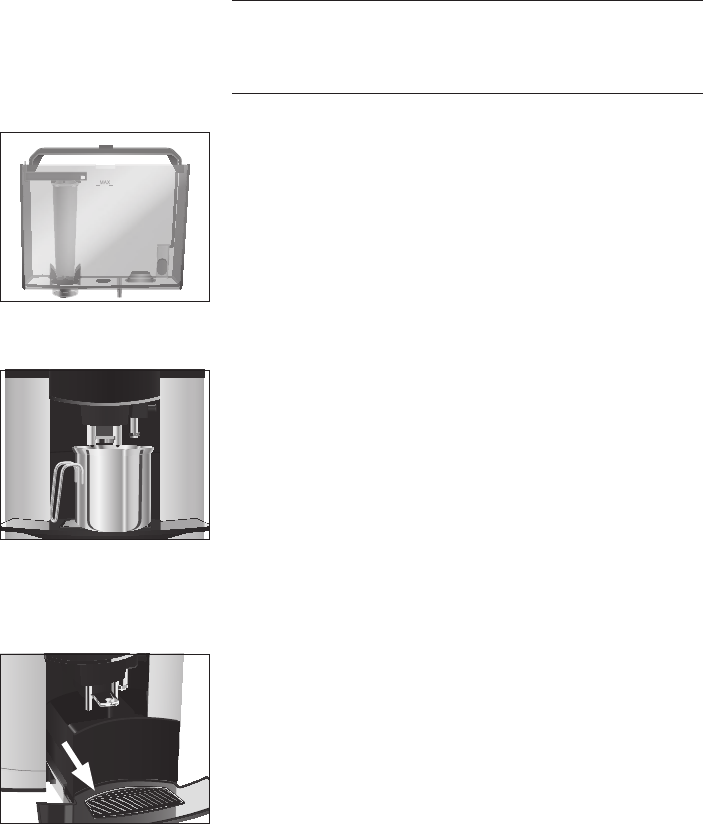
Filling the water tank ...................................................................................................................................19
Switching on .................................................................................................................................................19
Daily maintenance .......................................................................................................................................19
Regular maintenance .................................................................................................................................20
Switching off the machine .........................................................................................................................20
4 Permanent settings in programming mode 22
Product settings ..........................................................................................................................................22
Setting the water hardness .......................................................................................................................24
Automatic switch-off ..................................................................................................................................24
Unit for amount of water ...........................................................................................................................25
Language ......................................................................................................................................................25
5 Maintenance 26
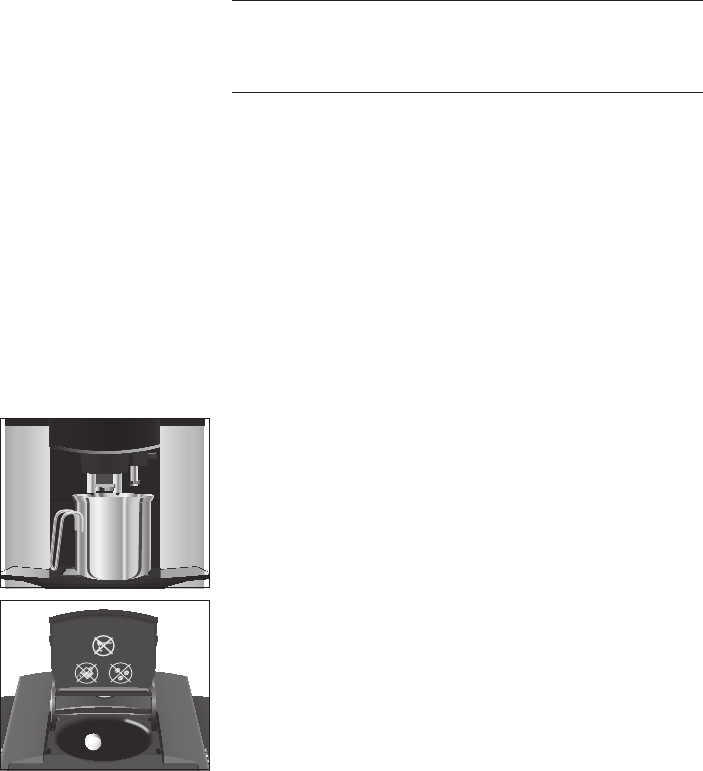
Rinsing the fine foam frother ....................................................................................................................26
Cleaning the fine foam frother .................................................................................................................26
Dismantling and rinsing the fine foam frother......................................................................................27
Inserting/changing the filter ......................................................................................................................28
Cleaning the machine ................................................................................................................................29
Descaling the machine ..............................................................................................................................30
Cleaning the bean container .....................................................................................................................32
Descaling the water tank ...........................................................................................................................32
3
Table of contents
These instructions for use apply to the following models:
U
D6
U
D60
In the interests of clarity, however, the instructions for use only refer
to the ‘D6’ model.
Warnings
J WARNING
J CAUTION
Always take note of any information marked with the words CAUTION
or WARNING and a warning sign. The signal word WARNING draws your
attention to potential serious injury, and the signal word CAUTION to
potential minor injury.
CAUTION CAUTION draws your attention to potential damage to the machine.
Symbols used
T
Prompt to take action. This symbol means that you are being prompted to
perform some action.
E
Information and tips to make it even easier to use your D6.
COFFEE
Display
Scope of validity
Symbol description
6 Display messages 33
7 Troubleshooting 34
8 Transport and environmentally friendly disposal 35
Transport/ Emptying the system .............................................................................................................35
Disposal .........................................................................................................................................................35
9 Technical data 36
10 Index 37
11 JURA contact details/ Legal information 40
4
Control elements
Control elements
15
14
4
3
7
8
6
5
2
1
9
10
13
11
12
1 On/Off button Q
2 Water tank cover
3 Water tank
4 Mains cable (back of the machine)
5 Height-adjustable coffee spout
6 Coffee grounds container
7 Drip tray
8 Cup grille
9 Cover of filler funnel for cleaning tablet
10 Filler funnel for cleaning tablet
11 Bean container cover
12 Grinder adjustment switch
13 Bean container with aroma preservation
cover
14 Switch for hot water and milk foam
preparation
15 Fine foam frother
5
Control elements
nnnnnnnn
cOn
1
2
3
4 5
1 Display
2 Rotary Switch
3 O P symbol (programming)
4 c Maintenance symbol
5 n Milk foam symbol
Service socket for optional JURA Smart Connect (under cover)
6
Important information
The machine is designed and intended for private
domestic use. It should only be used for coffee
preparation and to heat milk and water. Use for
any other purpose will be deemed improper. JURA
Elektroapparate AG cannot accept any responsibil-
ity for the consequences of improper use.
Before using the machine read these instructions
for use thoroughly and completely and comply
with the instructions they contain. A warranty ser-
vice is not applicable for damage or defects caused
by non-compliance with the instructions for use.
Keep these instructions for use close to the machine
and pass them on to the next user.
Please carefully read and observe the important
safety information set out below.
To avoid danger of potentially fatal electric shock:
U
Never use a machine which is damaged or has
a defective mains cable.
U
In the event of signs of damage, for example if
there is a smell of burning, unplug the machine
immediately from the mains supply and con-
tact JURA service.
U
If the mains cable of this machine is damaged,
it must be repaired either directly by JURA or
by an authorised JURA service centre.
U
Make sure that the D6 and the mains cable are
not located close to hot surfaces.
U
Be careful to ensure that the mains cable is not
trapped and does not rub against sharp edges.
Proper use
For your safety
J
7
Important information
U
Never open and repair the machine yourself.
Do not modify the machine in any way that is
not described in these instructions for use. The
machine contains live parts. If opened, there is
a danger of potentially fatal injury. Repairs
may only be carried out by authorised JURA
service centres, using original spare parts and
accessories.
U
To completely and safely disconnect the
machine from the power supply, first switch
off the D6 using the On/Off button. Only then
should you remove the mains plug from the
power socket.
There is a risk of scalds or burns on the spouts and
fine foam frother:
U
Place the machine out of the reach of children.
U
Do not touch any hot parts. Use the handles
provided.
U
Be careful to ensure that the fine foam frother
is correctly installed and clean. If incorrectly
fitted or if it becomes blocked, the fine foam
frother or its parts might come off.
A defective machine is not safe and could cause
injury or fire. To avoid damage and any associated
risk of injury or fire:
U
Never allow the mains cable to loosely hang
down. The mains cable could pose a tripping
hazard or become damaged.
U
Protect the D6 from environmental influences
such as rain, frost and direct sunlight.
U
Do not immerse the D6, mains cable or con-
nections in water.
U
Do not put the D6 or any individual parts in
the dishwasher.
8
Important information
U
Before cleaning, switch the D6 off with the On/
Off button. Always wipe the D6 with a damp
cloth rather than a wet one, and protect it from
prolonged exposure to water splash.
U
Only connect the machine to the mains volt-
age in accordance with the information on the
rating plate. The rating plate is located on the
underside of your D6. Further technical data is
provided in these instructions for use (see
Chapter 9 ‘Technical data’).
U
Connect the D6 directly to a domestic power
socket. Using multi-socket adapters or exten-
sion cords may cause overheating.
U
Please only use original JURA maintenance
products. Use of products that are not explic-
itly recommended by JURA could damage the
machine.
U
Do not use any coffee beans treated with addi-
tives or caramelised coffee beans.
U
Only fill the water tank with fresh, cold water.
U
Switch the machine off with the On/Off button
if you are going to be absent for a longer
period of time and remove the mains plug
from the power socket.
U
Children may not clean or service the machine
unless supervised by a responsible person.
U
Do not allow children to play with the machine.
U
Keep children under the age of 8 away from
the machine, or supervise them constantly.
U
Children aged 8 and over may only operate
the machine without supervision if they have
been instructed in how to use it safely. Chil-
dren must be able to recognise and under-
stand the potential dangers arising from incor-
rect use.
9
Important information
People, including children, who
U
do not have the physical, sensory or mental
capabilities to use the machine safely or
U
are inexperienced or lack knowledge in how to
use the machine safely
must be supervised by a responsible person when
using it, or must be instructed in how to use it cor-
rectly.
Safety when handling the CLARIS Smart filter car-
tridge:
U
Filter cartridges should be kept out of the
reach of children.
U
Store filter cartridges in a dry place in the
sealed packaging.
U
Protect cartridges from heat and direct sun-
light.
U
Do not use damaged filter cartridges.
U
Do not open filter cartridges.
10
1 Preparing and using for the first time
Visit us on the Internet. You can download short operating instruc-
tions for your machine from the JURA website (www.jura.com). You
will also find interesting and up-to-date information on your D6 and
on every aspect of coffee.
If you need assistance with using your machine, you can find this at
www.jura.com/service.
When setting up your D6, please note the following:
U
Place the D6 on a horizontal surface that is not sensitive to
water.
U
Choose a spot for your D6 which protects the machine against
overheating. Ensure that the ventilation slots are not covered.
The bean container has an aroma preservation cover. This will ensure
that your coffee beans retain their aroma for longer.
Coffee beans which have been treated with additives (e.g. sugar),
ground coffee or freeze-dried coffee will damage the grinder.
T Only use roasted, untreated coffee beans to fill the bean con-
tainer.
TOpen the bean container cover and remove the aroma
preservation cover.
TRemove any dirt or foreign objects from inside the bean
container.
TFill the bean container with coffee beans, then close the
aroma preservation cover and the bean container cover.
JURA on the Internet
Setting up the machine
Filling the bean container
CAUTION
11
1 Preparing and using for the first time
When you use the machine for the first time, you must set the water
hardness. If you do not know the hardness of your water, you can
find this out first. Use the Aquadur® test strips supplied with the
machine.
THold the test strip briefly (for 1second) under flowing water.
Shake off the water.
TWait for about 1minute.
TYou will then be able to read the degree of water hardness
from the discolouration of the Aquadur® test strip and the
description on the packaging.
If the machine is operated with a defective mains cable, there is a
danger of potentially fatal electric shock.
T Never use a machine which is damaged or has a defective
mains cable.
Milk, sparkling mineral water or other liquids can damage the water
tank or the machine.
T Only fill the water tank with fresh, cold water.
Precondition:The bean container has been filled.
TInsert the mains plug into a power socket.
TPress the On/Off button Q to switch the D6 on.
SPRACHE DE appears on the display.
TTurn the Rotary Switch until the required language is dis-
played, e.g.
LANGUAGE EN.
TPress the Rotary Switch to confirm the setting.
OK appears briefly on the display.
HARDNESS, 16°dH
E If you do not know the hardness of your water, you can find
this out first (see Chapter 1 ‘Preparing and using for the first
time – Determining the water hardness’).
Determining the water
hardness
First-time use
J
WARNING
CAUTION
nnnnnnnn
cOn
12
1 Preparing and using for the first time
TTurn the Rotary Switch to change the water hardness set-
ting, e.g. to
25°dH.
TPress the Rotary Switch.
OK appears briefly on the display.
INSERT FILTER
TOpen the water tank cover.
TRemove the water tank and rinse it with cold water.
TOpen the filter holder.
TInsert the CLARIS Smart filter cartridge into the water tank,
exerting slight pressure.
TClose the filter holder. It will click into place audibly.
TFill the water tank with fresh, cold water and reinsert the
tank.
E The machine automatically detects that you have just inserted
the filter cartridge.
OK appears briefly on the display.
OPEN SWITCH, the light segment on the switch lights up.
TPlace a receptacle (at least 500ml) under the fine foam
frother and the coffee spout.
TTurn the switch to them position.
FILTER RINSING, water flows out of the fine foam
frother.
E You can interrupt rinsing of the filter at any time. To do this,
turn the switch clockwise. Turn the switch anticlockwise to
continue rinsing the filter.
E The water may be slightly discoloured. This is not harmful to
health and does not affect the taste.
Rinsing of the filter stops automatically.
CLOSE SWITCH
TTurn the switch to the °position.
SYSTEM FILLING, the system fills up with water.
EMPTY TRAY
13
1 Preparing and using for the first time
TEmpty the drip tray and coffee grounds container and put
them back into the machine.
TPlace a receptacle under the coffee spout.
HEATING
RINSING, the system is rinsed. Water flows out of the cof-
fee spout. The rinse stops automatically.
CAPPUCC.
appears on the display. Your D6 is ready for use.
Your D6 creates fine, creamy, feather-light milk foam with a perfect
consistency. The most important requirement for frothing milk is a
milk temperature of 4–8°C. We would therefore recommend using
a milk cooler or a milk container.
TRemove the protective cover from the fine foam frother.
TConnect the milk pipe to the fine foam frother.
TConnect the other end of the milk pipe to a milk container
or a milk cooler.
Connecting milk
14
2 Preparation
2 Preparation
Basic information about preparing drinks:
U
During the grinding operation you can select the coffee
strength of single products by turning the Rotary Switch:
MILD, NORMAL, STRONG or EXTRA.
U
During preparation, you can change the preset amounts (e.g.
amount of water or milk foam) by turning the Rotary Switch.
U
You can stop preparation at any time. Just press the Rotary
Switch (for a speciality coffee) or return the switch to its origi-
nal position (for milk foam and hot water).
U
The last speciality coffee prepared is always displayed, even if
the D6 was switched off in the meantime.
Coffee tastes best served hot. A cold porcelain cup cools the bever-
age – and impairs the taste. We therefore recommend prewarming
the cups. The full coffee aroma can develop only in prewarmed cups.
You can purchase a JURA cup warmer from your specialised dealer.
You can make permanent settings for all products in programming
mode (see Chapter 4 ‘Permanent settings in programming mode –
Product settings’).
Espresso and coffee are both prepared following this model.
Example:Proceed as follows to prepare one coffee.
Precondition:
CAPPUCC. is displayed (example).
TPlace a cup under the coffee spout.
TTurn the Rotary Switch until
COFFEE is displayed.
TPress the Rotary Switch.
Preparation starts.
COFFEE and the coffee strength are
displayed. The preset amount of water for coffee flows into
the cup.
Preparation stops automatically.
COFFEE appears on the
display.
Espresso and coffee
15
2 Preparation
When you prepare two speciality coffees at once, the amount of
water selected for the single product is used for each cup.
The preparation of twoespressi and twocoffees follows this same
model.
Example:Proceed as follows to prepare two espressi.
Precondition:
CAPPUCC. is displayed (example).
TPlace two espresso cups under the coffee spout.
TTurn the Rotary Switch until
ESPRESSO is displayed.
TPress the Rotary Switch twice (within 2seconds) to start
preparation of two espressi.
2CUPS
Preparation starts. The preset amount of water flows into
the cups.
Preparation stops automatically.
ESPRESSO appears on
the display.
Your D6 can prepare a cappuccino at the touch of a button. There is
no need to move the cup.
Precondition:
CAPPUCC. is displayed. Milk is connected to the
fine foam frother.
TPlace a cup under the coffee spout and the fine foam frother.
E Ensure that the filling height of the milk is no higher than the
milk pipe connection on the fine foam frother.
TPress the Rotary Switch.
CAPPUCC.
HEATING
As soon as the machine has heated up, OPEN SWITCH
appears, the light segment on the switch lights up.
TTurn the switch to them position.
The milk foam is prepared. Preparation stops automatically
when the preset amount of milk foam is reached.
CLOSE SWITCH
Two speciality coffees at
the touch of a button
Cappuccino
16
2 Preparation
TTurn the switch to the °position.
Coffee preparation starts. The preset amount of water for
espresso flows into the cup.
Preparation stops automatically.
CAPPUCC. appears on
the display.
To ensure that the fine foam frother always works properly,
you must clean it daily when you have been preparing milk (see
Chapter 5 ‘Maintenance – Cleaning the fine foam frother’).
Precondition:
CAPPUCC. is displayed (example). Milk is con-
nected to the fine foam frother.
TPlace a cup under the fine foam frother.
E Ensure that the filling height of the milk is no higher than the
milk pipe connection on the fine foam frother.
TTouch the Milk foam symboln.
HEATING/ MILK
As soon as the machine has heated up, MILK/ READY,
the light segment on the switch lights up.
TTurn the switch to them position.
The milk foam is prepared.
Preparation stops automatically when the preset amount of
milk foam is reached.
TTurn the switch to the °position.
MILK/ READY
E You can continue to prepare milk foam for the next 40sec-
onds or so without the machine having to heat up again.
To ensure that the fine foam frother always works properly,
you must clean it daily when you have been preparing milk (see
Chapter 5 ‘Maintenance – Cleaning the fine foam frother’).
Milk foam
17
2 Preparation
It is easy to make permanent settings for the amount of water for all
speciality coffees according to the cup size. Adjust the amount once
as shown in the following example. Every time you prepare a drink
in the future, this amount of water will be dispensed.
The process for permanently adapting the amount of water to the
cup size is the same for all speciality coffees.
Example: Proceed as follows to permanently set the amount of
water for one coffee.
Precondition:
CAPPUCC. is displayed (example).
TPlace a cup under the coffee spout.
TTurn the Rotary Switch until
COFFEE is displayed.
T Press and hold the Rotary Switch, until
ENOUGH
COFFEE? appears.
TRelease the Rotary Switch.
Preparation starts and the coffee flows into the cup.
TAs soon as there is sufficient coffee in the cup, press the
Rotary Switch.
Preparation stops.
OK appears briefly on the display. The set
amount of water for one coffee is permanently stored.
COFFEE appears on the display.
E You can alter this setting at any time by repeating the above
procedure.
E You can also permanently set the amount of water for all spe-
ciality coffees in programming mode (see Chapter 4 ‘Perma-
nent settings in programming mode – Product settings’).
You can adjust the grinder to suit the degree of roast of your coffee.
If you adjust the consistency of grind when the grinder is not oper-
ating, the grinder adjustment switch could be damaged.
T Only adjust the consistency of grind when the grinder is run-
ning.
The consistency of grind is correct if the coffee flows regularly from
the coffee spout. In addition a fine, thick crema forms.
Permanently setting the
amount of water for the
cup size
Adjusting the grinder
CAUTION
18
2 Preparation
Example:Proceed as follows to change the consistency of grind dur-
ing the preparation of an espresso.
TPlace a cup under the coffee spout.
TOpen the bean container cover and remove the aroma
preservation cover.
TTurn the Rotary Switch until
ESPRESSO is displayed.
TPress the Rotary Switch to start preparation.
TTurn the grinder adjustment switch to the desired position
while the grinder is running.
The preset amount of water flows into the cup. Preparation
stops automatically.
There is a danger of scalding from hot water splashes.
T Avoid direct contact with the skin.
Example:Proceed as follows to prepare hot water.
Precondition:
CAPPUCC. is displayed (example).
TPlace a cup under the fine foam frother.
TTurn the switch to them position.
WATER, water flows out of the fine foam frother.
Preparation stops automatically when the preset amount of
water is reached.
TTurn the switch to the °position.
CAPPUCC. appears on the display (example).
Hot water
J
CAUTION
19
3 Daily operation
3 Daily operation
Daily maintenance of the machine and hygiene when handling milk,
coffee and water are key to a perfect coffee result in the cup every
time. You should therefore change the water daily.
Milk, sparkling mineral water or other liquids can damage the water
tank or the machine.
T Only fill the water tank with fresh, cold water.
TOpen the water tank cover.
TRemove the water tank and rinse it with cold water.
TFill the water tank with fresh, cold water and reinsert the
tank.
TClose the water tank cover.
TPlace a receptacle under the coffee spout.
TPress the On/Off button Q to switch the D6 on.
HEATING
RINSING, the system is rinsed. The rinse stops auto mati-
cally.
CAPPUCC. appears on the display (example). Your
D6 is ready for use.
To ensure that you get many years of reliable service out of your D6
and to guarantee the optimum coffee quality, the machine requires
daily maintenance.
TPull out the drip tray.
TEmpty the coffee grounds container and the drip tray. Rinse
them both with warm water.
E Always empty the coffee grounds container when the machine
is switched on. This is the only way of resetting the coffee
grounds counter.
Filling the water tank
CAUTION
Switching on
Daily maintenance
20
3 Daily operation
TRefit the coffee grounds container and the drip tray.
TRinse the water tank with clean water.
TClean the fine foam frother (see Chapter 5 ‘Maintenance –
Cleaning the fine foam frother’).
TRemove the milk pipe and rinse it thoroughly under running
water.
TDismantle and rinse the fine foam frother (see Chapter 5
‘Maintenance – Dismantling and rinsing the fine foam
frother’).
TWipe the surface of the machine with a clean, soft, damp
cloth (e.g. microfibre cloth).
Carry out the following maintenance actions regularly or as
required:
U
In the interests of hygiene, we recommend changing the milk
pipe and interchangeable milk spout on a regular basis
(approximately every 3 months). Replacements are available
from specialised dealers.
U
Clean the inside of the water tank, e.g. with a brush. Further
information about the water tank is provided in these instruc-
tions for use (see Chapter 5 ‘Maintenance – Descaling the
water tank’).
U
Traces of milk and coffee may stick to the top and bottom of
the cup grille. If this happens, clean the cup grille.
When the D6 is switched off, the system is automatically rinsed if a
speciality coffee has been prepared. If milk has been prepared, you
will also be prompted to clean the milk system.
TPlace a receptacle under the fine foam frother and under the
coffee spout.
TPress the On/Off button Q.
E If milk has been prepared, you will be prompted to clean the
milk system (
CLEAN MILK?). You can start milk system
cleaning by pressing the Rotary Switch. After 10seconds the
switch-off process continues automatically.
Regular maintenance
Switching off the
machine
21
3 Daily operation
If milk has been prepared but you have not started milk sys-
tem cleaning, you will be prompted to carry out milk system
rinsing first (
M-RINSE).
OPEN SWITCH
TTurn the switch to them position.
nnnkkkkk, the milk system is rinsed.
The rinse stops automatically.
CLOSE SWITCH
TTurn the switch to the °position.
RINSING, the system rinses itself. The rinse stops auto-
matically. Your D6 is switched off.
22
4 Permanent settings in programming mode
You can make permanent settings in programming mode. You can
navigate through the programme items and permanently save the
required settings simply by turning and pressing the Rotary Switch.
You can make the following settings with the Rotary Switch:
Programme
item
Sub-item Explanation
RINSE M-RINSE,
M-CLEAN,
RINSE,
CLEAN,
DESCALE
T Select the desired maintenance programme.
BUTTONS
T Select your settings for speciality coffees.
HARDNESS 1°dH–30°dH
T You can set the water hardness of the water used.
OFF FROM 15MIN., 30MIN.,
1HRS.–9HRS.
T Set the time after which the D6 should switch off
automatically.
UNITS ML, OZ
T Select the unit for the amount of water.
LANGUAGE
T Select your language.
EXIT
T Exit programming mode.
E You can exit programming mode directly at any time. Simply
touch the P symbol for approximately 2 seconds.
In the programme item
BUTTONS you can make individual, per-
manent settings for all products:
Product Amount Coffee strength Temperature
Cappuccino Water:
25ML–240ML
Milk foam:
3SEC.–60SEC.
MILD, NORMAL,
STRONG, EXTRA
NORMAL,
HIGH
Espresso Water:
15ML–80ML
MILD, NORMAL,
STRONG, EXTRA
NORMAL,
HIGH
Coffee Water:
25ML–240ML
MILD, NORMAL,
STRONG, EXTRA
NORMAL,
HIGH
Product settings
23
4 Permanent settings in programming mode
Product Amount Coffee strength Temperature
Milk foam Milk foam:
3SEC.–60SEC.
––
Hot water Water:
25ML–450ML
––
2 cups When you prepare two speciality coffees at once, the temperature and
amount of water selected for the single product are used for each cup.
Permanent settings in programming mode always follow the same
model.
Example:Proceed as follows to change the coffee strength for one
coffee from
NORMAL to STRONG.
Precondition:
CAPPUCC. is displayed (example).
TTouch the P symbol for approximately 2 seconds until
RINSE appears on the display.
TTurn the Rotary Switch until
BUTTONS is displayed.
TPress the Rotary Switch to enter the programme item.
ESPRESSO
TTurn the Rotary Switch until COFFEE is displayed.
TPress the Rotary Switch.
VOLUME
TTurn the Rotary Switch until STRENGTH is displayed.
TPress the Rotary Switch.
NORMAL
TTurn the Rotary Switch until STRONG is displayed.
TPress the Rotary Switch to confirm the setting.
OK appears briefly on the display.
STRENGTH
TTurn the Rotary Switch until EXIT is displayed.
TPress the Rotary Switch to exit the programme item.
COFFEE
TTouch the P symbol to exit programming mode.
CAPPUCC. (example)
24
4 Permanent settings in programming mode
The harder the water is, the more frequently the D6 needs to be
descaled. It is therefore important to set the water hardness accu-
rately.
The water hardness was set when the machine was first used. You
can change this setting at any time.
The water hardness can be adjusted on a continuous scale between
1
°dH and 30°dH.
Precondition:
CAPPUCC. is displayed (example).
TTouch the P symbol for approximately 2 seconds until
RINSE appears on the display.
TTurn the Rotary Switch until
HARDNESS is displayed.
TPress the Rotary Switch to enter the programme item.
16°dH
TTurn the Rotary Switch to change the setting.
TPress the Rotary Switch to confirm the setting.
OK appears briefly on the display.
HARDNESS
TTouch the P symbol to exit programming mode.
CAPPUCC. (example)
By instructing your D6 to automatically switch itself off, you can cut
down your energy consumption. If this function is activated, your
D6 switches off automatically after the preset time following the last
action on the machine.
You can set the automatic switch-off to 15minutes, 30minutes or
1–9hours.
Precondition:
CAPPUCC. is displayed (example).
TTouch the P symbol for approximately 2 seconds until
RINSE appears on the display.
TTurn the Rotary Switch until
OFF FROM is displayed.
TPress the Rotary Switch to enter the programme item.
30MIN.
TTurn the Rotary Switch to change the setting.
TPress the Rotary Switch to confirm the setting.
OK appears briefly on the display.
OFF FROM
Setting the water
hardness
Automatic switch-off
25
4 Permanent settings in programming mode
TTouch the P symbol to exit programming mode.
CAPPUCC. (example)
In the programme item
UNITS you can set the unit used for the
amount of water.
Example:Proceed as follows to change the unit for the amount of
water from
ML to OZ.
Precondition:
CAPPUCC. is displayed (example).
TTouch the P symbol for approximately 2 seconds until
RINSE appears on the display.
TTurn the Rotary Switch until
UNITS is displayed.
TPress the Rotary Switch to enter the programme item.
ML
TTurn the Rotary Switch until OZ is displayed.
TPress the Rotary Switch to confirm the setting.
OK appears briefly on the display.
UNITS
TTouch the P symbol to exit programming mode.
CAPPUCC. (example)
In the programme item
LANGUAGE you can set the language
used by your D6.
Example:Proceed as follows to change the language from
EN to
DE.
Precondition:
CAPPUCC. is displayed (example).
TTouch the P symbol for approximately 2 seconds until
RINSE appears on the display.
TTurn the Rotary Switch until
LANGUAGE is displayed.
TPress the Rotary Switch to enter the programme item.
EN
TTurn the Rotary Switch until DE is displayed.
TPress the Rotary Switch to confirm the setting.
OK appears briefly on the display.
SPRACHE
TTouch the P symbol to exit programming mode.
CAPPUCC. (example)
Unit for amount of water
Language
26
5 Maintenance
5 Maintenance
Your D6 has the following integrated maintenance programmes:
U
Cleaning the fine foam frother (M-CLEAN)
U
Cleaning the machine (CLEAN)
U
Descaling the machine (DESCALE)
E Proceed with the maintenance programmes when prompted
to do so.
E You can start the maintenance programmes at any time in
programming mode (programme item
RINSE).
Ten minutes after milk preparation, the D6 prompts you to perform
milk system rinsing.
Precondition:
M-RINSE/ CAPPUCC. is displayed (example).
TPlace a receptacle under the fine foam frother.
TTouch the Maintenance symbol c for approximately
2 seconds until
OPEN SWITCH appears.
TTurn the switch to them position.
The fine foam frother is rinsed.
CLOSE SWITCH
TTurn the switch to the °position.
CAPPUCC. (example)
To ensure that the fine foam frother always works properly, you
must clean it daily when you have been preparing milk
If the wrong cleaning agent is used, the machine could be damaged
and/or traces could be left behind in the water.
T Use only original JURA maintenance products.
E JURA milk system cleaner is available from specialised dealers.
Precondition:
CAPPUCC. is displayed (example).
TTouch the P symbol for approximately 2 seconds until
RINSE appears on the display.
TPress the Rotary Switch to enter the programme item.
M-RINSE
Rinsing the fine foam
frother
Cleaning the fine foam
frother
CAUTION
27
5 Maintenance
TTurn the Rotary Switch until M-CLEAN is displayed.
TPress the Rotary Switch.
CLEANER / WATER
TRemove the milk pipe from the milk container or milk cooler.
TPour 250ml of fresh water into a receptacle and add 1 capful
of milk system cleaner.
TImmerse the milk pipe in the receptacle.
TPlace a receptacle under the fine foam frother.
TPress the Rotary Switch.
M-CLEAN, OPEN SWITCH, the light segment on the
switch lights up.
TTurn the switch to them position.
The fine foam frother and the milk pipe are cleaned.
CLOSE SWITCH
TTurn the switch to the °position.
WATER
TRinse the receptacle thoroughly, fill it with 250ml of fresh
water and immerse the milk pipe in the water.
TEmpty the other receptacle and place it under the fine foam
frother once more.
TPress the Rotary Switch.
OPEN SWITCH
TTurn the switch to them position.
The fine foam frother and the milk pipe are rinsed with fresh
water.
CLOSE SWITCH
TTurn the switch to the °position.
CAPPUCC. (example)
To make sure the fine foam frother works properly, and in the inter-
ests of hygiene, it must be dismantled and rinsed daily if you have
been preparing milk. Your D6 will not prompt you to dismantle and
rinse the frother.
TRemove the milk pipe and rinse it thoroughly under running
water.
TCarefully remove the fine foam frother from the Connector
System
©
by twisting slightly.
Dismantling and rinsing
the fine foam frother
28
5 Maintenance
TDismantle the fine foam frother into its individual parts.
TRinse all the parts under running water. If there are severely
dried-on milk residues, firstly immerse the individual parts
in a solution of 250ml cold water and 1 capful of JURA milk
system cleaner. Then rinse the parts thoroughly.
TRe-assemble the fine foam frother.
E Ensure that all individual parts are correctly and firmly con-
nected to ensure optimum operation.
TFirmly attach the fine foam frother to the Connector Sys-
tem
©
.
Your D6 no longer has to be descaled if you are using the CLARIS
Smart filter cartridge.
E Once the filter cartridge stops working (depending on the
water hardness setting), the D6 will prompt you to change the
filter.
E CLARIS Smart filter cartridges are available from specialised
dealers.
Precondition:
FILTER/ CAPPUCC. is displayed (example).
TOpen the water tank cover.
TRemove and empty the water tank.
TOpen the filter holder and remove the old CLARIS Smart
filter cartridge.
T Insert a new CLARIS filter cartridge Smart into the water
tank, exerting slight pressure.
TClose the filter holder. It will click into place audibly.
TFill the water tank with fresh, cold water and reinsert the
tank.
The machine has automatically detected that you have just
inserted/changed the filter cartridge.
OPEN SWITCH, the light segment on the switch lights up.
TPlace a receptacle under the fine foam frother.
TTurn the switch to them position.
FILTER RINSING, water flows out of the fine foam
frother.
Inserting/changing the
filter
29
5 Maintenance
Rinsing of the filter stops automatically.
CLOSE SWITCH
TTurn the switch to the °position.
CAPPUCC. (example)
After 180preparations or 80switch-on rinses, the D6 will prompt
you to clean it.
If the wrong cleaning agent is used, the machine could be damaged
and/or traces could be left behind in the water.
T Use only original JURA maintenance products.
E The cleaning programme lasts approximately 20 minutes.
E Do not interrupt the cleaning programme. The quality of
cleaning will be impaired if you do so.
E JURA cleaning tablets are available from specialised dealers.
Precondition:
CLEAN/ CAPPUCC. is displayed (example).
TTouch the Maintenance symbolc for approximately
2 seconds.
EMPTY TRAY appears on the display.
TEmpty the drip tray and coffee grounds container and put
them back into the machine.
PRESS RINSE
TPlace a receptacle under the coffee spout.
TTouch the Maintenance symbolc.
CLEANING, water flows out of the coffee spout.
The operation is interrupted,
ADD TABLET.
TOpen the cover of the filler funnel for the cleaning tablet.
TInsert a JURA cleaning tablet into the filler funnel.
TClose the cover of the filler funnel.
TTouch the Maintenance symbolc.
CLEANING, water flows out of the coffee spout several
times.
The operation stops automatically.
EMPTY TRAY
Cleaning the machine
CAUTION
30
5 Maintenance
TEmpty the drip tray and coffee grounds container and put
them back into the machine.
CAPPUCC. (example)
The D6 builds up deposits of limescale over time and automatically
prompts you to descale it when necessary. The degree of calcifica-
tion depends on the hardness of your water.
If the descaling agent comes into contact with the skin or eyes, this
can cause irritation.
T Avoid contact with the skin or eyes.
T Rinse off the descaling agent with clean water. Should you get
any descaling agent in your eye, see a doctor.
If the wrong descaling agent is used, the machine could be dam-
aged and/or traces could be left behind in the water.
T Use only original JURA maintenance products.
If the descaling operation is interrupted, there may be damage to
the machine.
T Allow the descaling programme to run to the end.
If the descaling agent comes into contact with sensitive surfaces
(e.g. marble), damage cannot be ruled out.
T Clean up any splashes immediately.
E The descaling programme lasts approximately 45minutes.
E JURA descaling tablets are available from specialised dealers.
Precondition:
DESCALE/ CAPPUCC. is displayed (example).
TTouch the Maintenance symbolc for approximately
2 seconds.
EMPTY TRAY appears on the display.
TEmpty the drip tray and coffee grounds container and put
them back into the machine.
AGENT IN TANK
TRemove and empty the water tank.
Descaling the machine
J
CAUTION
CAUTION
CAUTION
CAUTION
31
5 Maintenance
TCompletely dissolve 3JURA descaling tablets in a receptacle
holding 500ml of water. This may take several minutes.
TPour the solution into the empty water tank and insert it
into the machine.
OPEN SWITCH, the light segment on the switch lights up.
TPlace a receptacle under the fine foam frother.
TTurn the switch to them position.
DESCALE appears and water flows out of the fine foam
frother repeatedly. The Maintenance symbolc flashes dur-
ing the descaling operation.
The operation is interrupted,
CLOSE SWITCH.
TTurn the switch to the °position.
DESCALE. The descaling operation is continued.
The operation is interrupted,
EMPTY TRAY.
TEmpty the drip tray and coffee grounds container and put
them back into the machine.
FILL TANK
TEmpty the receptacle and place it under the coffee spout
and fine foam frother.
TRemove the water tank and rinse it thoroughly.
TFill the water tank with fresh, cold water and reinsert the
tank.
OPEN SWITCH, the light segment on the switch lights up.
TTurn the switch to them position.
DESCALE
The operation is interrupted, CLOSE SWITCH.
TTurn the switch to the °position.
DESCALE
The operation is interrupted, DESCALE.
Water flows out of the coffee spout.
EMPTY TRAY
TEmpty the drip tray and coffee grounds container and put
them back into the machine.
CAPPUCC. (example)
E If the descaling operation stops unexpectedly, rinse the water
tank thoroughly.
32
5 Maintenance
Coffee beans may be covered with a slight oil film which remains on
the walls of the bean container. These traces may negatively affect
the coffee result. For this reason clean the bean container from time
to time.
Precondition:
FILL BEANS is displayed.
TPress the On/Off button Q to switch the D6 off.
TOpen the bean container cover and remove the aroma pres-
ervation cover.
TClean the bean container with a soft, dry cloth.
TFill the bean container with coffee beans and close the
aroma preservation cover.
TClose the bean container cover.
Limescale deposits may form in the water tank. To ensure correct
function of the machine, descale the water tank from time to time.
TRemove the water tank.
TIf you use a CLARIS Smart filter cartridge, remove this.
TCompletely fill the water tank and dissolve 3 JURA descaling
tablets in it.
TLeave the water tank with the descaling solution for several
hours (e.g. overnight).
TEmpty the water tank and rinse it thoroughly.
TIf you use a CLARIS Smart filter cartridge, insert this again.
TFill the water tank with fresh, cold water and reinsert the
tank.
Cleaning the bean
container
Descaling the water tank
33
6 Display messages
6 Display messages
Message Cause/Result Action
FILL TANK
The water tank is empty. You
cannot prepare any products.
T Fill the water tank (see Chapter 3
‘Daily operation – Filling the water
tank’).
EMPTY TRAY
The drip tray is full. No
speciality coffees can be
prepared. You can prepare hot
water and milk foam.
T Empty the coffee grounds con-
tainer and the drip tray (see
Chapter 3 ‘Daily operation – Daily
maintenance’).
TRAY MISSING
The drip tray is not inserted
correctly or is not inserted at
all. You cannot prepare any
products.
T Fit the drip tray.
FILL BEANS
The bean container is empty.
No speciality coffees can be
prepared. You can prepare hot
water and milk foam.
T Fill the bean container (see Chap-
ter 1 ‘Preparing and using for the first
time – Filling the bean container’).
T Press the Rotary Switch to confirm
that the bean container has been
filled.
PRESS RINSE
The D6 is prompting you to
continue a previously started
maintenance programme.
T Touch the Maintenance symbol c
to continue the programme.
FILTER/
CAPPUCC.
(example)
The filter cartridge no longer
works.
T Replace the CLARIS Smart filter
cartridge (see Chapter 5 ‘Mainte-
nance – Inserting/changing the
filter’).
CLEAN/
CAPPUCC.
(example)
The D6 is prompting you to
clean it.
T Perform cleaning (see Chapter 5
‘Maintenance – Cleaning the
machine’).
DESCALE/
CAPPUCC.
(example)
The D6 is prompting you to
descale it.
T Perform descaling (see Chapter 5
‘Maintenance – Descaling the
machine ’).
TOO HOT
The system is too hot to start a
maintenance programme.
T Wait for several minutes until
the system has cooled or prepare a
speciality coffee or hot water.
34
7 Troubleshooting
7 Troubleshooting
Problem Cause/Result Action
Insufficient foam is
produced when the milk
is frothed or milk
sprays out of the fine
foam frother.
The fine foam frother is
dirty.
T Clean the fine foam frother (see Chap-
ter 5 ‘Maintenance – Cleaning the fine
foam frother’).
T Dismantle and rinse the fine foam
frother (see Chapter 5 ‘Maintenance –
Dismantling and rinsing the fine foam
frother’).
Coffee only comes out
in drips when it is being
prepared.
The coffee is ground too
finely and obstructs the
system.
T Set the grinder to a coarser setting
(see Chapter 2 ‘Preparation – Adjusting
the grinder’).
The water hardness may
not have been correctly
set.
T Perform descaling (see Chapter 5
‘Maintenance – Descaling the machine ’).
FILL TANK is
displayed although the
water tank is full.
The water tank float is
trapped.
T Descale the water tank (see Chapter 5
‘Maintenance – Descaling the water
tank’).
Grinder is making a very
loud noise.
There are foreign objects
in the grinder.
T Contact customer support in your
country (see Chapter 11 ‘JURA contact
details/ Legal information’).
ERROR2 or ERROR5
is displayed.
If the machine has been
exposed to the cold for a
long period of time,
heating may be disabled
for safety reasons.
T Warm the machine at room tempera-
ture.
Other
ERROR mes-
sages are displayed.
T Switch the machine off with the On/Off
button Q. Contact customer support in
your country (see Chapter 11 ‘JURA contact
details/ Legal information’).
E If you were unable to solve the problem, contact customer
support in your country (see Chapter 11 ‘JURA contact details/
Legal information’).
35
8 Transport and environmentally friendly disposal
Keep the packaging for your D6. It should be used to protect the
machine during transport.
In order to protect the D6 from frost during transport, the system
must be emptied.
Precondition:
CAPPUCC. is displayed (example).
TRemove the milk pipe from the fine foam frother.
TPlace a receptacle under the fine foam frother.
TTouch the Milk foam symboln.
HEATING/ MILK
As soon as the machine has heated up, MILK/ READY
appears, the light segment on the switch lights up.
TTurn the switch to them position.
MILK, hot steam is discharged from the fine foam frother.
TRemove and empty the water tank.
TChange the time to
60SEC..
Steam will continue to be discharged from the fine foam
frother until the system is empty.
CLOSE SWITCH
TTurn the switch to the °position.
FILL TANK
TPress the On/Off button Q.
Your D6 is switched off.
Please dispose of old machines in an environmentally neutral way.
H
Old machines contain valuable, recyclable materials which should
be recycled. Please therefore dispose of old machines via suitable
collection systems.
Transport/ Emptying the
system
Disposal
36
9 Technical data
9 Technical data
Voltage 220–240V~, 50Hz
Power 1450W
Conformity mark
A
Pump pressure static, max. 15bar
Holding capacity of water tank 1.9l
Holding capacity of bean container 200g
Holding capacity of coffee grounds
container
max. 16 portions
Cable length approx. 1.1m
Weight approx. 8.7kg
Dimensions (WHD) 28 34.5 41.5cm
37
10 Index
10 Index
A
Addresses 40
Aroma preservation cover
Bean container with aroma preservation
cover 4
Automatic switch-off 24
B
Bean container
Bean container with aroma preservation
cover 4
Cleaning 32
Filling 10
Bus bar
Technical data 36
Button
On/Off button 4
C
Cappuccino 15
CLARIS Smart filter cartridge
Changing 28
Inserting 28
Cleaning
Bean container 32
Fine foam frother 26
Machine 29
Coffee 14
Coffee grounds container 4
Coffee spout
Height-adjustable coffee spout 4
Consistency of grind
Adjusting the grinder 17
Grinder adjustment switch 4
Contact details 40
Cover
Bean container 4
Filler funnel for cleaning tablet 4
Water tank 4
Cup grille 4
Customer support 40
D
Daily maintenance 19
Descaling
Machine 30
Water tank 32
Display 5
Display messages 33
Disposal 35
Double product 15
Drip tray 4
E
Emptying the system 35
Errors
Troubleshooting 34
Espresso 14
F
Filler funnel
Filler funnel for cleaning tablet 4
Filling
Bean container 10
Water tank 19
Filter
Changing 28
Inserting 28
Fine foam frother 4
Cleaning 26
Dismantling and rinsing 27
Rinsing 26
First-time use 11
G
Grinder adjustment switch 4
H
Height-adjustable coffee spout 4
Homepage 10
Hotline 40
Hot water 18
Hot water and milk foam preparation
Switch for hot water and milk foam
preparation 4
38
10 Index
I
Internet 10
J
JURA
Contact details 40
Internet 10
L
Language 25
M
Machine
Cleaning 29
Daily maintenance 19
Descaling 30
Regular maintenance 20
Setting up 10
Switching off 20
Switching on 19
Mains cable 4
Maintenance 26
Daily maintenance 19
Regular maintenance 20
Messages, display 33
Milk
Connecting milk 13
Milk foam 16
Milk system
Cleaning the fine foam frother 26
Rinsing the fine foam frother 26
P
Permanently setting the water for the
cup size 17
Permanent settings in programming
mode 22
Preparation 14
Cappuccino 15
Coffee 14
Espresso 14
Hot water 18
Milk foam 16
Two speciality coffees 15
Problems
Troubleshooting 34
Product settings 22
Programming mode 22
Automatic switch-off 24
Language 25
Product settings 22
Setting the water hardness 24
Unit for amount of water 25
Proper use 6
R
Regular maintenance 20
Rinsing
Fine foam frother 26
Rotary Switch 5
S
Safety 6
Safety information 6
Service socket 5
Settings
Permanent settings in programming
mode 22
Setting up
Setting up the machine 10
Short operating instructions 10
Smart Connect 5
Switch for hot water and milk foam
preparation 4
Switching off 20
Switching on
Machine 19
Switch-off
Automatic switch-off 24
Symbol
Maintenance 5
Milk foam 5
P (programming) 5
Symbol description 3
T
Technical data 36
Tel 40
Transport 35
Troubleshooting 34
Two products 15
U
Unit for amount of water 25
Use, First-time 11
39
10 Index
W
Water hardness
Determining the water hardness 11
Setting the water hardness 24
Water tank 4
Descaling 32
Filling 19
Website 10
40
11 JURA contact details/ Legal information
JURA Elektroapparate AG
Kaffeeweltstrasse 10
CH-4626 Niederbuchsiten
Tel. +41 (0)62 38 98 233
@ You will find additional contact details for your country at
www.jura.com.
@ If you need assistance with using your machine, you can find
this at www.jura.com/service.
The machine complies with the following directives:
U
2014/35/EU– Low Voltage Directive
U
2014/30/EU– Electromagnetic Compatibility
U
2009/125/EC– Ecodesign Directive
U
2011/65/EU– RoHS Directive
We reserve the right to make technical changes. The diagrams used
in these instructions for use are for illustration purposes only and do
not represent the original colours of the machine. Some details of
your D6 may vary.
Your opinion is important to us! Use the contact details at
www.jura.com.
The instructions for use contain information which is protected by
copyright. It is not permitted to photocopy these instructions for use
or translate them into another language without the prior written
consent of JURA Elektroapparate AG.
Directives
Technical changes
Feedback
Copyright
J73431/D6-D60/en/201708
37


Need help? Post your question in this forum.

Forumrules


Report abuse

Libble takes abuse of its services very seriously. We're committed to dealing with such abuse according to the laws in your country of residence. When you submit a report, we'll investigate it and take the appropriate action. We'll get back to you only if we require additional details or have more information to share.

Product:

For example, Anti-Semitic content, racist content, or material that could result in a violent physical act.

For example, a credit card number, a personal identification number, or an unlisted home address. Note that email addresses and full names are not considered private information.

Forumrules

To achieve meaningful questions, we apply the following rules:

Register

Register getting emails for Jura D600 at:


You will receive an email to register for one or both of the options.


Get your user manual by e-mail

Enter your email address to receive the manual of Jura D600 in the language / languages: English as an attachment in your email.

The manual is 2,38 mb in size.


You will receive the manual in your email within minutes. If you have not received an email, then probably have entered the wrong email address or your mailbox is too full. In addition, it may be that your ISP may have a maximum size for emails to receive.

Others manual(s) of Jura D600

Jura D600 User Manual - German - 40 pages

Jura D600 User Manual - Dutch - 44 pages

Jura D600 User Manual - French - 44 pages


The manual is sent by email. Check your email

If you have not received an email with the manual within fifteen minutes, it may be that you have a entered a wrong email address or that your ISP has set a maximum size to receive email that is smaller than the size of the manual.

The email address you have provided is not correct.

Please check the email address and correct it.

Your question is posted on this page

Would you like to receive an email when new answers and questions are posted? Please enter your email address.


Info