10
Connecting the Speakers
Making the Audio Connections
Separate and strip
the ends of the
speaker wire as
shown. Speakers
and electronics ter-
minals have
corresponding (+)
and (–) terminals.
Most manufacturers of speakers and electronics,
including JBL, use red to denote the (+) terminal
and black for the (–) terminal.
The (+) lead of the speaker wire is noted with a
stripe. It is important to connect both speakers
identically: (+) on the speaker to (+) on the
receiver and (–) on the speaker to (–) on the
receiver. Wiring “out of phase” results in thin
sound, weak bass and a poor stereo image.
With the advent of multichannel surround-sound
systems, connecting all of the speakers in your
system with the correct polarity remains equally
important in order to preserve the proper ambi-
ence and directionality of the program material.
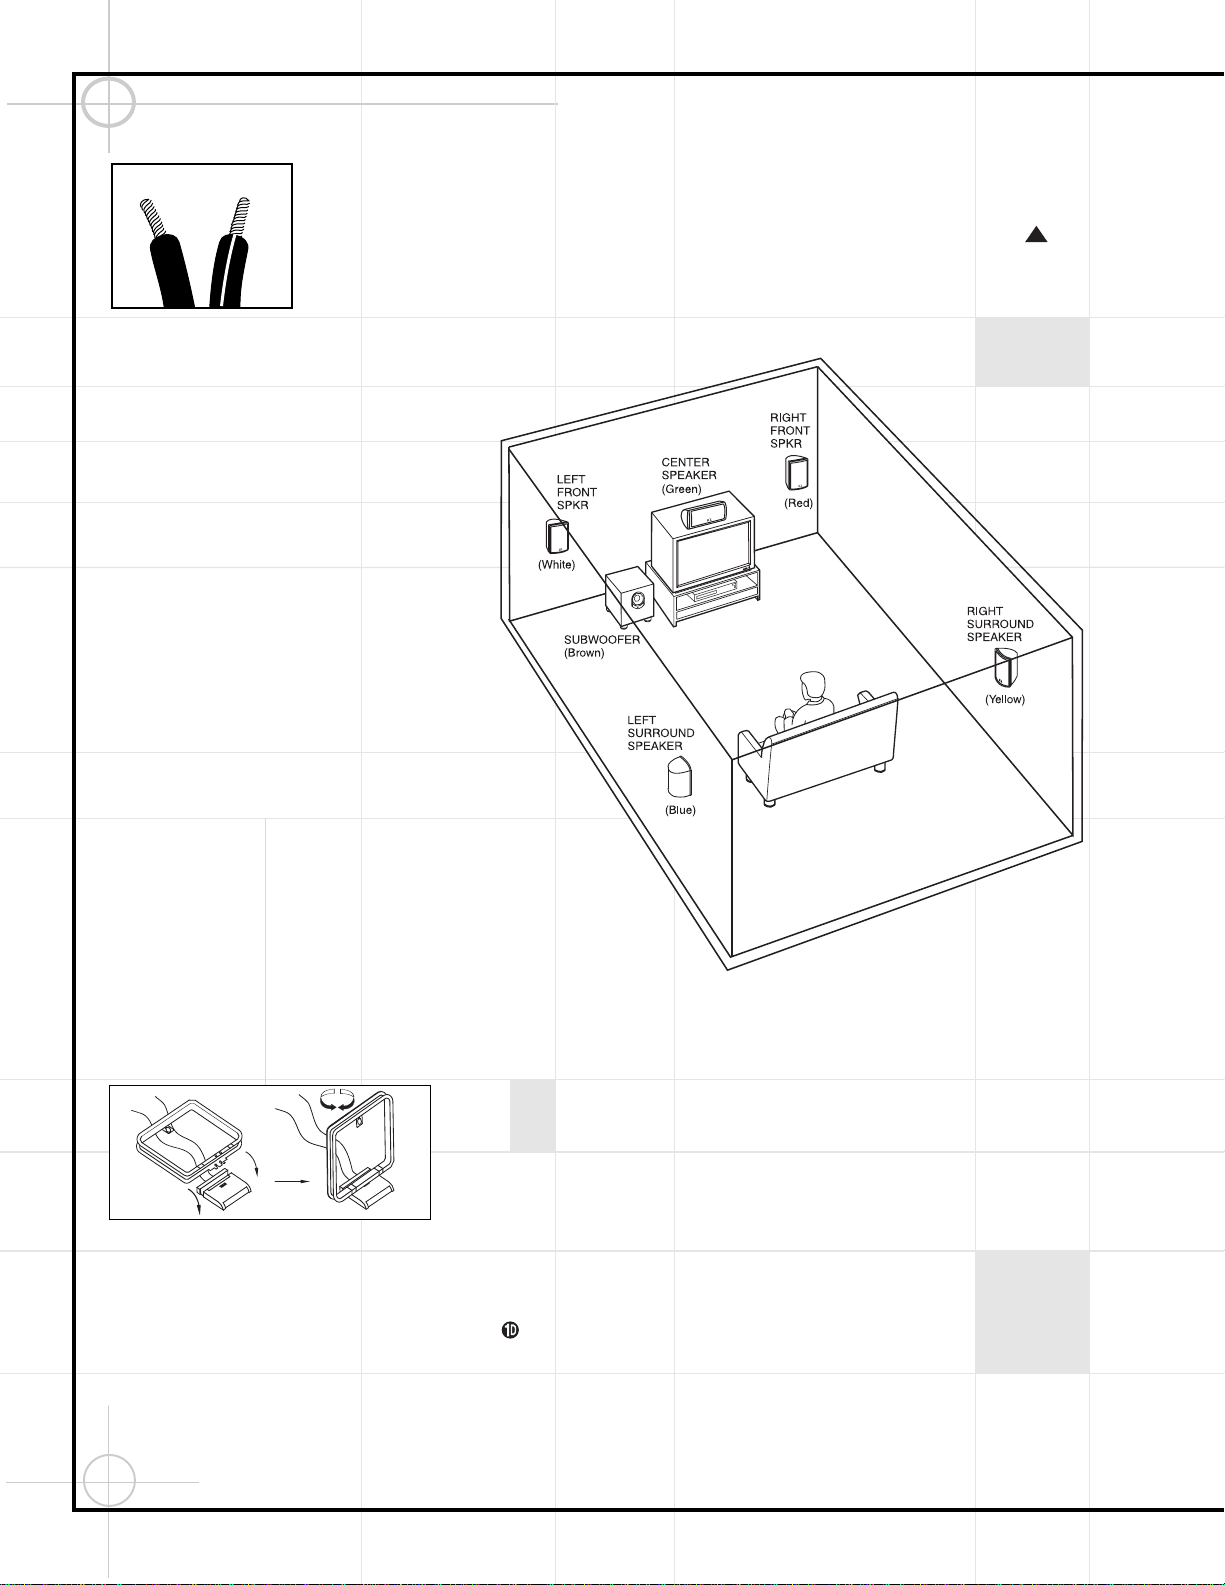
The wires for the three front speakers should all
be of the same length even if the speakers will
be placed at varying distances from the DCR600.
The same applies to the two rear speakers. To
make sure that you use the correct wires for
each speaker, we have color-coded them, as
shown in the diagram:
Left Front: White Wire
Center: Green Wire
Right Front: Red Wire
Right Rear: Yellow Wire
Left Rear: Blue Wire
Finally, connect one end of the single-lead RCA
cable with brown connectors to the LFE/Subwoofer
output ⁄on the back of the DCR600 receiver,
and the other end to the LFE Input on the
back of the SCS135S subwoofer.
1. Assemble the supplied AM Loop Antenna as
shown above. Connect it to the AM and GND
terminals ¢on the back of the DCR600.
2. Connect the supplied 75-ohm FM antenna to
the FM terminal §on the back of the DCR600.
Note that if you use an optional external FM
antenna with 300-ohm twin-lead cable, you
must use a 300-ohm-to-75-ohm adaptor (not
supplied) to make the connection.
3. Connect one end of the supplied single-lead
coaxial digital cable with orange connectors to
the COAX1 (upper) digital input gon the receiver,
and connect the other end to the coaxial digital
output on the DVD changer.
4. In order to obtain the best possible sound
reproduction when watching your television, con-
nect the left and right analog audio outputs of
your TV to the Video 2 Audio inputs hon the
DCR600 using the red (right) and white (left)
leads of the supplied triple-lead RCA cable.
Colors shown in parentheses are wiring color codes.
.
.