655212
10
Zoom out
Zoom in
Previous page
1/49
Next page
IRIScan Pro 3 Cloud
Button Manager
User Guide
ii
Trademark
I.R.I.S are the trademarks of I.R.I.S s.a.
Adobe
®
, Adobe PDF Scan Technology and Adobe PDF Signature
are either registered trademarks or trademarks of Adobe
Systems Inc. in the United States and/or other countries.
Optical characters recognition (OCR) capabilities are provided
by Image Recognition Integrated Systems. Copyright
1987-2013, I.R.I.S. All rights reserved.
Microsoft and Windows are registered trademarks of Microsoft
Corporation.
Other names and products mentioned in this document may be
trademarks or registered trademarks of their respective
companies.
Copyright
IRIScanPro3Cloud-dgi-160713-02
Copyright
©
2013 I.R.I.S All rights reserved.
Information in this document is subject to change without notice.
The software described in this document is furnished under a
license agreement or nondisclosure agreement. The software
may be used or copied only in accordance with the terms of
those agreements. No part of this publication can be
reproduced in any form or by any means without prior written
permission of I.R.I.S.
No part of this publication can be reproduced in any form or by
any means without prior written permission of I.R.I.S
Material scanned by this product may be protected by
governmental laws and other regulations, such as copyright
laws, the customer is solely responsible for complying with all
such laws and regulations.
iii
Table of Contents
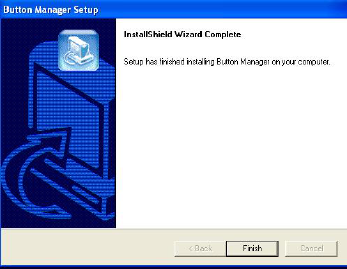
1. Installing the Button Manager ................. 1
2. Scanning From the Button ....................... 4
2.1. Checking the Button Configurations Before
Scanning ................................................................. 4
2.2. The Default Button Settings ............................. 6
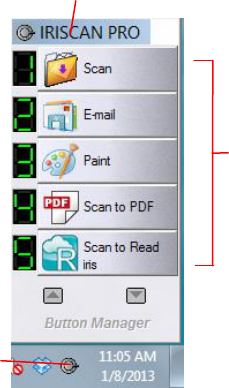
2.3.1. Use of the Button Panel ......................... 8
3. Using Button Manager on Your Desktop . 10
3.1 Starting Button Manager ................................ 10
3.2 Checking the Scan Configurations ................... 11
3.3 Scanning from the Button Panel ...................... 12
4. Configuring the Buttons ......................... 13
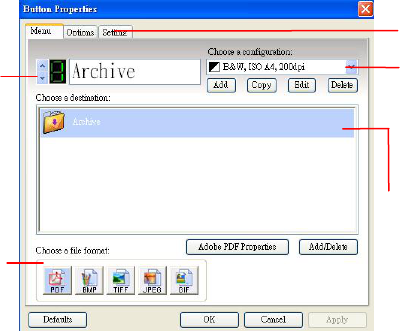
4.1 A Glance at the Button Properties Window ....... 13
4.2 Choosing New Settings For A Button ............... 14
4.3 Choosing a Proper File Format ........................ 17
4.4 Adding A New Destination Application ............. 18
4.5 Deleting A Current Destination Application ....... 20
4.6 Creating A New Scan Configuration ................. 21
4.6.1 The Scan Settings Tab ......................... 21
4.6.2 The Color Dropout Tab ......................... 29
4.6.3 The Color Adjust Tab ........................... 32
4.7 Deleting A Current Scan Configuration ............. 35
4.8 Selecting Options For a Button ....................... 36
4.9 Removing a Blank Page ................................. 39
4.10 Performing Continue Scan From the Document
Feeder 40
4.11 Saving and Loading Profiles ........................... 41
4.12 Solving A Problem ......................................... 43
Index ............................................................ 45
1
1. Installing the Button Manager
1.1 System Requirements
An Intel Pentium IV or higher
Microsoft Windows XP, Windows Vista, Windows 7 or
Windows 8
USB 2.0 port (compatible with USB 1.1)
At least 1 GB of free hard disk space
At least 512 MB of system memory
At least 1 GB of RAM for Windows Vista or later
A DVD-ROM drive
1.2 Introduction
The Button Manager provides you an easy way to scan your
document and then link the scanned image to your designated
software application. All this can be done with a simple touch
of the button on the scanner. Installing the Button Manager is
easy. Please follow these steps:
1.3 Installation Steps
1. Insert the supplied DVD into your DVD-ROM drive. The
setup menu is displayed automatically. (If the menu does
not start run setup.exe from the disc.)
2
2. Click "Readiris Corporate 14 to install Readiris."
3. Click "IRIScan Pro 3 Cloud Driver" to install the scanner
driver.
4. Click “Button Manager” to install the Button Manager. A
language selection window appears.
5. Choose the language you wish to install. The InstallShield
wizard appears to guide you through the rest of the
installation.
3
6. Click “Finish” to complete the installation.
4
2. Scanning From the Button
By simply pressing the Scan button on the scanner, the scanned
document will be sent to your designated destination application.
Yet, before you scan, it is recommended to check the button
configurations first to ensure a proper file format and a
destination application.
2.1. Checking the Button Configurations Before
Scanning
1. After the Button Manager and the scanner driver have been
successfully installed on your computer, the Button Panel
will be displayed in the Windows System Tray at the bottom
right corner of your computer screen.
The Button Panel
The Button
Icon
This indicates the scanner model
5
2. The Button Panel shows the first three scanning buttons.
Right-click the button (function) you wish to check, the
Button Properties window appears.
The default setting is indicated in highlighted color. If you
wish to change the setting, use this window to reset the
setting for the file format, destination application, or other
scan settings. See “Configuring the Button” in the
subsequent section to reset the settings.
3. Click the OK button to leave the window.
Click to select
options or
setting.
The button
number and
name.
The file format
of the scanned
image. (*The
options vary
based on type
of scanner.)
The scan
settings for the
selected button.
(in this case
button #1).
The destination
application. (This
is the application
that opens after
you have finished
scanning.)
6
2.2. The Default Button Settings
The scanner is shipped with preconfigured button settings for
your basic scanning tasks such as, scan-to-folder, scan-to-email,
and scan-to-paint. The following table shows these factory
default settings. You can change any of these settings.
Button
Number
Name
Destination
Application
Preset Scan
Settings
1
Scan
Folder
B&W@200 dpi, US
Letter, BMP
2
E-mail
Microsoft Outlook
Express
Gray@200 dpi, US
Letter, JPEG
3
Paint
Microsoft Paint
Color@100 dpi, US
Letter, BMP
4
Scan to
PDF
Adobe Acrobat or
Reader
Color@300 dpi, A4,
PDF
5
Scan to
Readiris
Readiris
Color @300 dpi, A4,
JPG
Attention: the PDFs generated by the scan-to-pdf button are
Image-only PDFs. They do not allow you to edit or search for
text.
Tip: to create text-searchable PDFs - which can also be
hyper-compressed - use the Readiris 14 software that comes
with your scanner.
7
Scanning From A Simple Touch of the Button
1. Adjust the paper guide for the width of paper and load the
document facing down with their tops into the automatic
document feeder.
1. Check the number on the LED screen to ensure if you are
selecting the proper scan settings and destination
application. (For example, if you want to scan with button
#3, which opens Microsoft Paint and display the scanned
image in the main window of Microsoft Paint, the LED screen
should show 3).
2. Press the Scan button on scanner.
3. After the scanning is finished, Microsoft Paint will be
launched and the scanned image appears in the main
window of Microsoft Paint as below.
10


Need help? Post your question in this forum.

Forumrules


Report abuse

Libble takes abuse of its services very seriously. We're committed to dealing with such abuse according to the laws in your country of residence. When you submit a report, we'll investigate it and take the appropriate action. We'll get back to you only if we require additional details or have more information to share.

Product:

For example, Anti-Semitic content, racist content, or material that could result in a violent physical act.

For example, a credit card number, a personal identification number, or an unlisted home address. Note that email addresses and full names are not considered private information.

Forumrules

To achieve meaningful questions, we apply the following rules:

Register

Register getting emails for IRIS IRIScan Pro 3 Cloud Button Manager at:


You will receive an email to register for one or both of the options.


Get your user manual by e-mail

Enter your email address to receive the manual of IRIS IRIScan Pro 3 Cloud Button Manager in the language / languages: English as an attachment in your email.

The manual is 1,69 mb in size.


You will receive the manual in your email within minutes. If you have not received an email, then probably have entered the wrong email address or your mailbox is too full. In addition, it may be that your ISP may have a maximum size for emails to receive.

Others manual(s) of IRIS IRIScan Pro 3 Cloud Button Manager

IRIS IRIScan Pro 3 Cloud Button Manager User Manual - German - 52 pages

IRIS IRIScan Pro 3 Cloud Button Manager User Manual - French - 52 pages


The manual is sent by email. Check your email

If you have not received an email with the manual within fifteen minutes, it may be that you have a entered a wrong email address or that your ISP has set a maximum size to receive email that is smaller than the size of the manual.

The email address you have provided is not correct.

Please check the email address and correct it.

Your question is posted on this page

Would you like to receive an email when new answers and questions are posted? Please enter your email address.


Info