655227
28
Zoom out
Zoom in
Previous page
1/30
Next page
IRIScan Express 4
Capture Tool
User Guide
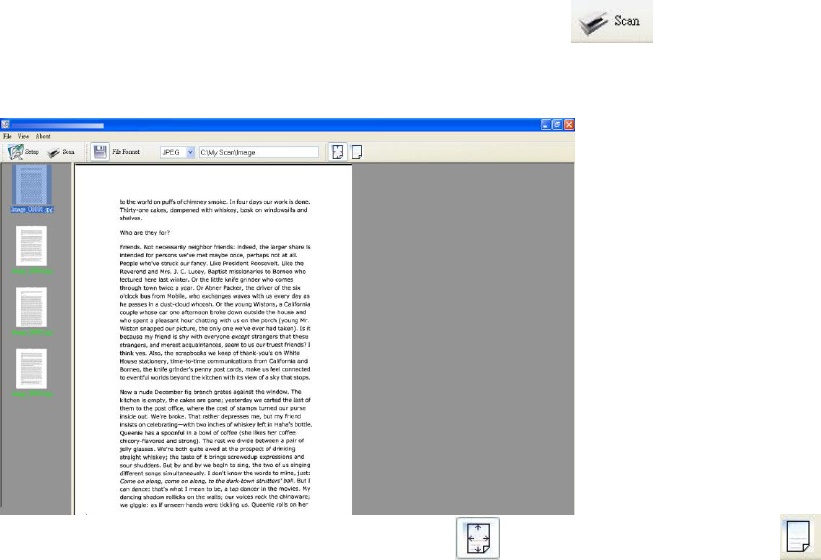
1. INTRODUCTION ......................................................................................................................... 1-1
2. USING THE SCANNER PROPERTIES DIALOG BOX (SETUP) ..................... 2-1
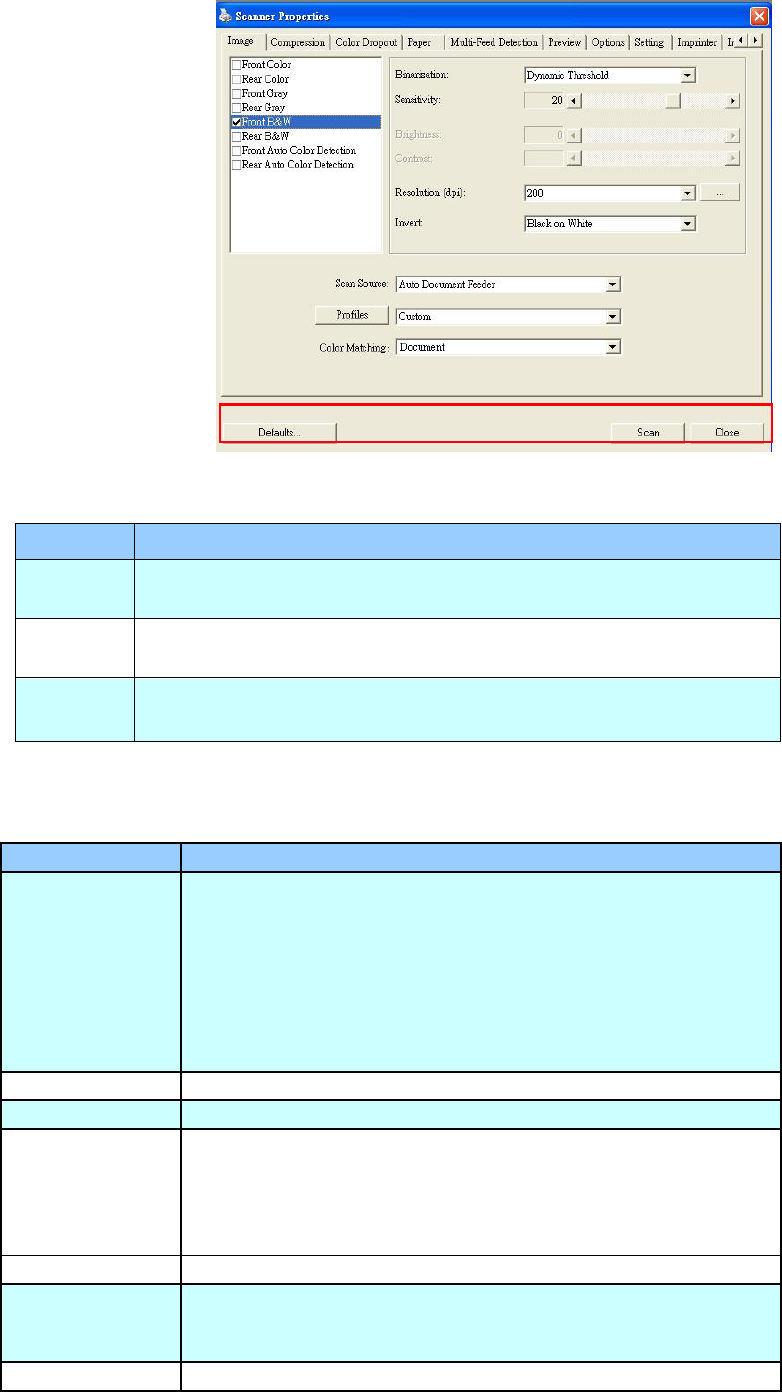
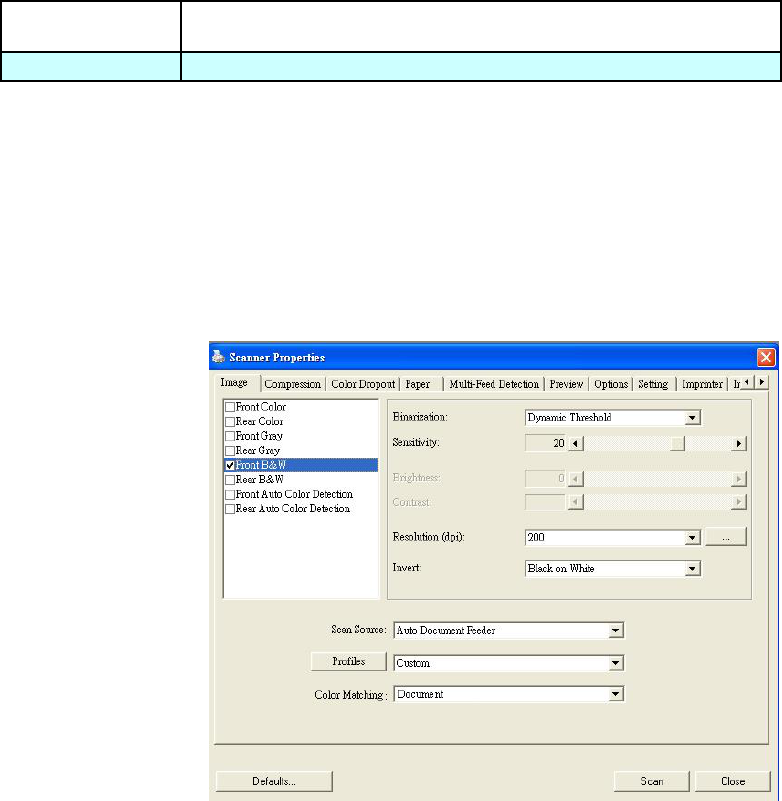
2.1 A Glance of the Scanner Properties Dialog Box ...................................................................... 2-1
2.2 Buttons on the Scanner Properties Dialog Box ....................................................................... 2-2
2.3 The Image Tab ......................................................................................................................................... 2-3
2.3.1 The Image Selection Box .................................................................................................................. 2-4
2.3.2 Other Image Options .......................................................................................................................... 2-5
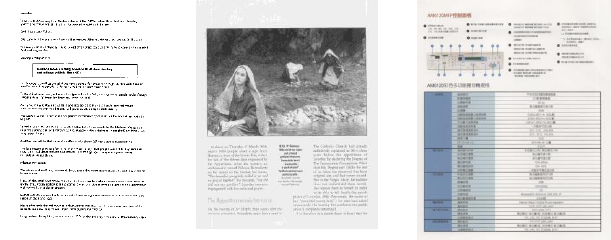
2.3.3 Scanning color images ....................................................................................................................... 2-9
2.3.4 Scanning grayscale images ............................................................................................................. 2-9
2.3.5 Scanning B&W images ....................................................................................................................... 2-9
2.3.6 Editing Profiles ..................................................................................................................................... 2-10
2.4 The Compression Tab (Windows PC only) ................................................................................ 2-11
2.5 The Color Dropout Tab ........................................................................................................................ 2-12
2.5.1 Color Dropout Selection .................................................................................................................. 2-12
2.5.2 Other Color Dropout Options ........................................................................................................ 2-13
2.6 The Paper Tab ......................................................................................................................................... 2-14
2.6.1 Cropping ................................................................................................................................................... 2-14
2.6.2 Other Paper Selection ....................................................................................................................... 2-17
2.7 The Preview Tab..................................................................................................................................... 2-18
2.8 The Options Tab ..................................................................................................................................... 2-18
2.9 The Setting Tab ...................................................................................................................................... 2-22
2.10 The Imprinter Tab .............................................................................................................................. 2-1
2.11 The Information Tab ......................................................................................................................... 2-1
3. LEGAL INFORMATION ........................................................................................................... 3-B
1. Introduction
With the Capture Tool, you can perform simple scans and view the captured images.
On a Windows PC:
1. Start the Capture Tool from Start>All Programs>IRIScan Express 4 Scanner.
2. Select your driver type and scanner model and click OK. The Capture Tool dialog box will be
displayed.
On a Mac computer:
1. Click the Capture Tool icon on the Desktop.
Interface
1. Choose your desired file format from the File Format drop down list box. The choices include
JPEG, TIFF, MTIFF, PDF, MPDF, GIF, and BMP. The supported file formats vary depending on
your scanner model.
2. Type your desired folder name and file name in the File Path box.
3. Click the Setup button ( ) or choose Setup from the File menu to prompt the Scanner
Properties dialog box.
4. From the Image Selection Box, choose your desired image type for your scanned image.
(Default is Front B&W) If you have a duplex scanner, choose Front and Rear to scan both
sides of your document.
5. Click OK to quit the Scanner Properties dialog box.
6. Place your document face up in the feeding slot.
Image
Selection
Box
Setup
Actual Size
Fit Page
Scan
File Format
Save File Path
7. In the Scan Validation dialog box, click the Scan button ( ) or choose Scan from the
File menu.
8. The document will be scanned and displayed in the Scan Validation screen.
9. You can view the scanned image Fit to Page ( ) or in Actual Size (100%) ( ).
10. Click the Close box or Quit from the File menu to exit the Scan Validation Tool.
2. Using the Scanner Properties Dialog Box
(Setup)
In this chapter we provide an overview of the Scanner Properties dialog box (Setup).
The Scanner Properties dialog box allows you to configure the scanner’s settings. It consists of
several tabbed windows each of which will be described in this chapter.
Note:
In this chapter, all options are described based on a duplex (double-side) scanner. If you have
purchased a simplex (single-side) scanner, not all options will be available.
2.1 A Glance at the Scanner Properties Dialog Box
1. Tab Options
Choice: Image, Compression (PC), Color Dropout, Paper, Preview (PC),
Rotation, Separation, Enhancement, Settings, Imprinter, Information.
Note: by default only 4 tabs are shown. To add extra tabs, click the Settings
tab and then select the tabs you want to add.
2. Image
Selection Box
Choose your image type and the side of document you wish to scan. Options
vary based on type of scanner.
3. Brightness
Adjust the brightness level from 100 to +100.
4. Contrast
Adjust the contrast level from 100 to +100.
5. Resolution
Determine the quality of the scanned image. The industry standard is 300 dpi.
6. Invert
Reverse the color of your scanned image.
7. Scan Source
Choice: Auto Document Feeder
8. Defaults
Reset all values on the tabs to the factory default settings.
3
4
5
6
7
1
2
8
2.2 Buttons on the Scanner Properties Dialog Box
The buttons on the Scanner Properties dialog box
Buttons
Description
Defaults
Click the Defaults button, the factory default settings will be
shown on each tab.
Scan
(PC)
After all the scan settings are satisfactory, click the Scan
button to start scanning your document.
Close
Click the Close button to leave the Scanner Properties dialog
box.
The following table shows the default settings
Tab name
Default settings
Image
ImageFront B&W
BinarizationDynamic Threshold
Resolution300 dpi
InvertBlank on White
Scan SourceAuto Document Feeder
ThresholdNone
BrightnessNone
ContrastNone
Compression
None
Color Dropout
None
Paper
CroppingAutomatic
DeskewYes
OrientationPortrait
OverScan0.00
UnitInch
Preview
None
Options
Rotation DegreesNone
Blank Page RemovalNone
Image Control OptionNone
Setting
Show Scanning ProgressNo
Show Warning MessageNo
Imprinter
None
2.3 The Image Tab
The Image tab allows you to choose the front side and (or) the rear side of your document, the
type of image, andconfigure several basic scan settings. Note that except for the resolution, you
can set individual scan settings for the front side and the rear side. For example, all settings in
the Image tab, Compression tab and Color Dropout tab can be set individually for the front and
the rear side. However, the settings in the Paper tab, the Options tab (Rotation, Separation,
Enhancement), and the Settings tab have to be the same for the front and rear side.
The Image tab dialog box
2.3.1 The Image Selection Box
The Image Selection box includes
the image type and document side
option. If you wish to scan both
the front side and the rear side of
your color document, you can
check both Front Color and Rear
Color at the same time. Note that
the options vary based on type of
scanner.
Example 1Scanning a two-sided color document, both sides in color
Side/Image
Selection
Front
Rear
Example 2Scanning a two-sided color document, one in B&W (Drop Blue
ColorThreshold10, Background79), the other in color
Side/Image
Selection
Front
Rear
Image Type
Description
Color
Choose Color if you wish to scan a color
image for your original in color.
Gray
Choose Gray image if your original contains
actual shades of gray.
B&W
Choose B&W if your original contains only
text, pencil or ink sketch.
B&W
Gray
Color
Front/Rear Auto Color Detection:
Click to automatically detect and scan the front or the rear page of your color document in color
image mode. If your document is in colors, the scanner will automatically scan the document
into a color image. If your document is non-color, you can choose the output to be either B&W
or Gray from the Non-Color Selection option. This option is useful when you have a mixture of
color and non-color document.
Note: If you choose Front Rear Auto Color Detection, you can not specify the image mode of
your rear page and vice versa.
Sensitivity of Auto Color Detection
If your documents contain primarily B&W text and a small amount of light or pale colors and you
do not wish them to be recognized as color image to save the file size, you can reduce the
sensitivity value by moving the bar to the left to let these images to be detected as B&W. The
value ranges from 1 to 100. The default is 37.
2.3.2 Other Image Options
Binarization
This is the process of converting a grayscale or color image to a bi-tonal
image. There are several different methods of performing this conversion.
Options: Dynamic Threshold, Fixed Processing, Halftone 1~5, Error
Diffusion.
Dynamic Threshold: Selecting Dynamic Threshold allows the scanner
to dynamically evaluate each document to determine the optimal threshold
value to produce the highest quality image. This is used to scan mixed
document containing faint text, shaded background, or color background
with a single setting. If Dynamic Threshold is selected, Threshold,
Brightness, and Contrast are not available.
Sensitivity of Dynamic Threshold
Occasionally your scanned image may contain small dots or speckles. To
remove these spots, increase the sensitivity value by moving the bar to the
right. The value ranges from 1 to 30. The default is 20.
Fixed Processing: Used for black-and-white and other high contrast
documents. A single level is set to determine the black-and-white
transition. The threshold is programmable over the entire density range.
Fixed Processing sets Contrast to 0. If Fixed Processing is selected,
Contrast is not available.
Halftone: In addition to the black and white display, Halftone can present a
somehow gray shade of image by using different size of dots. Halftone image
looks like the picture we have seen in the newspaper. Options include
Halftone 1, Halftone 2, Halftone 3, Halftone 4, Halftone 5.
Error Diffusion: Error Diffusion is a type of Halftone. Error Diffusion gives
good image texture and makes text in images more readable than Halftone.
Halftone Image Error Diffusion Image
Threshold
Used to convert a grayscale image to a bi-tonal image. The value ranges from 0
to 255. A low threshold value produces a lighter image, and can be used to
subdue backgrounds and subtle, unneeded information. A high threshold value
produces a darker image, and can be used to help pick up faint images.
Adjust the threshold setting by dragging the Threshold sliding bar to the left or
right to achieve the desired threshold setting.
200 dpi,
Threshold:50,
Brightness: 0
200 dpi,
Threshold:100,
Brightness: 0
String
Orientation
Choose your string orientation.
Choice: Normal, Rotated, Vertical, Vertical Inversion, 90 degrees CW,
90 degrees CCW
Normal
Rotated
Vertical
Vertical Inversion
90 degrees CW
90 degrees CCW
If you check the digital imprinter to stamp text on your scanned image, the
illustration of normal and rotated string is shown below:
Normal
Rotated
Print
Position
Choose the position you wish to print your string. Move the slider to the right
to increase the value or to the left to decrease the value. Range: 0~355mm,
default:0 mm
The value indicates the height from the bottom of your paper to the last letter
of your string. This option is available only if an external imprinter is installed.
The value of
Print Position
0001abc 2010
28


Need help? Post your question in this forum.

Forumrules


Report abuse

Libble takes abuse of its services very seriously. We're committed to dealing with such abuse according to the laws in your country of residence. When you submit a report, we'll investigate it and take the appropriate action. We'll get back to you only if we require additional details or have more information to share.

Product:

For example, Anti-Semitic content, racist content, or material that could result in a violent physical act.

For example, a credit card number, a personal identification number, or an unlisted home address. Note that email addresses and full names are not considered private information.

Forumrules

To achieve meaningful questions, we apply the following rules:

Register

Register getting emails for IRIS IRIScan Express 4 Capture Tool at:


You will receive an email to register for one or both of the options.


Get your user manual by e-mail

Enter your email address to receive the manual of IRIS IRIScan Express 4 Capture Tool in the language / languages: English as an attachment in your email.

The manual is 2,36 mb in size.


You will receive the manual in your email within minutes. If you have not received an email, then probably have entered the wrong email address or your mailbox is too full. In addition, it may be that your ISP may have a maximum size for emails to receive.

The manual is sent by email. Check your email

If you have not received an email with the manual within fifteen minutes, it may be that you have a entered a wrong email address or that your ISP has set a maximum size to receive email that is smaller than the size of the manual.

The email address you have provided is not correct.

Please check the email address and correct it.

Your question is posted on this page

Would you like to receive an email when new answers and questions are posted? Please enter your email address.


Info