Before you use the appliance for the rst time, please do
as follows: Carefully unpack the appliance and remove
all the packaging material. Keep the material (plastic
bags and cardboard) out of reach of children. Check the
appliance after unpacking for any damage, possible from
transportation.
Before plugging into a socket, check that the voltage in
your home corresponds with the voltage printed on the
bottom of the appliance. Place the appliance on a stable
and heat resistant surface.
Clean the outside of the appliance with only a damp cloth
and dry it with a dry cloth. Clean the parts:
the multi-padholder 14, the
cremamaker 15, the drawer 8,
the coffee outlet 7, the grid 5 and
the driptray 6 with warm water
and some washing-up liquid or
in the dishwasher and make sure
that the parts are dry before
next use. See chapter: CLEANING
& MAINTENANCE. Connect the
appliance to an earthed socket. You can adjust the length
of the cord by pulling it out from, or pushing it into, the
interior of the appliance.
• Fill the removable
waterreservoir 1 with cold water
to the maximum level and place
it in the coffeepadmachine.
• Open the drawer 8 for the
coffeepadholder by gently
pulling on the handles. The
drawer will now slide open.
• Place a coffeepad in the multi-
padholder 14 with the round side
downwards and press it lightly.
Please make sure that the coffee
is evenly devided.
• Close the drawer 8 gently
inwards untill it can’t go further.
• Put a large mug or bowl under
the coffee-outlet 7 to hold the
water.
• Connect the appliance to an
earthed socket.
• Switch the coffeepadmachine on
with the on/off button and
press directly the 1-cup
- button and 2-cups -
button at the same time.
To rinse the appliance, don’t let
it heat up.
2 | BEFORE FIRST USE
• The coffeepadmachine will now ll the boiler and rinse
the appliance.
• The coffeepadmachine will switch off automatically as
soon as the rinsing is done.
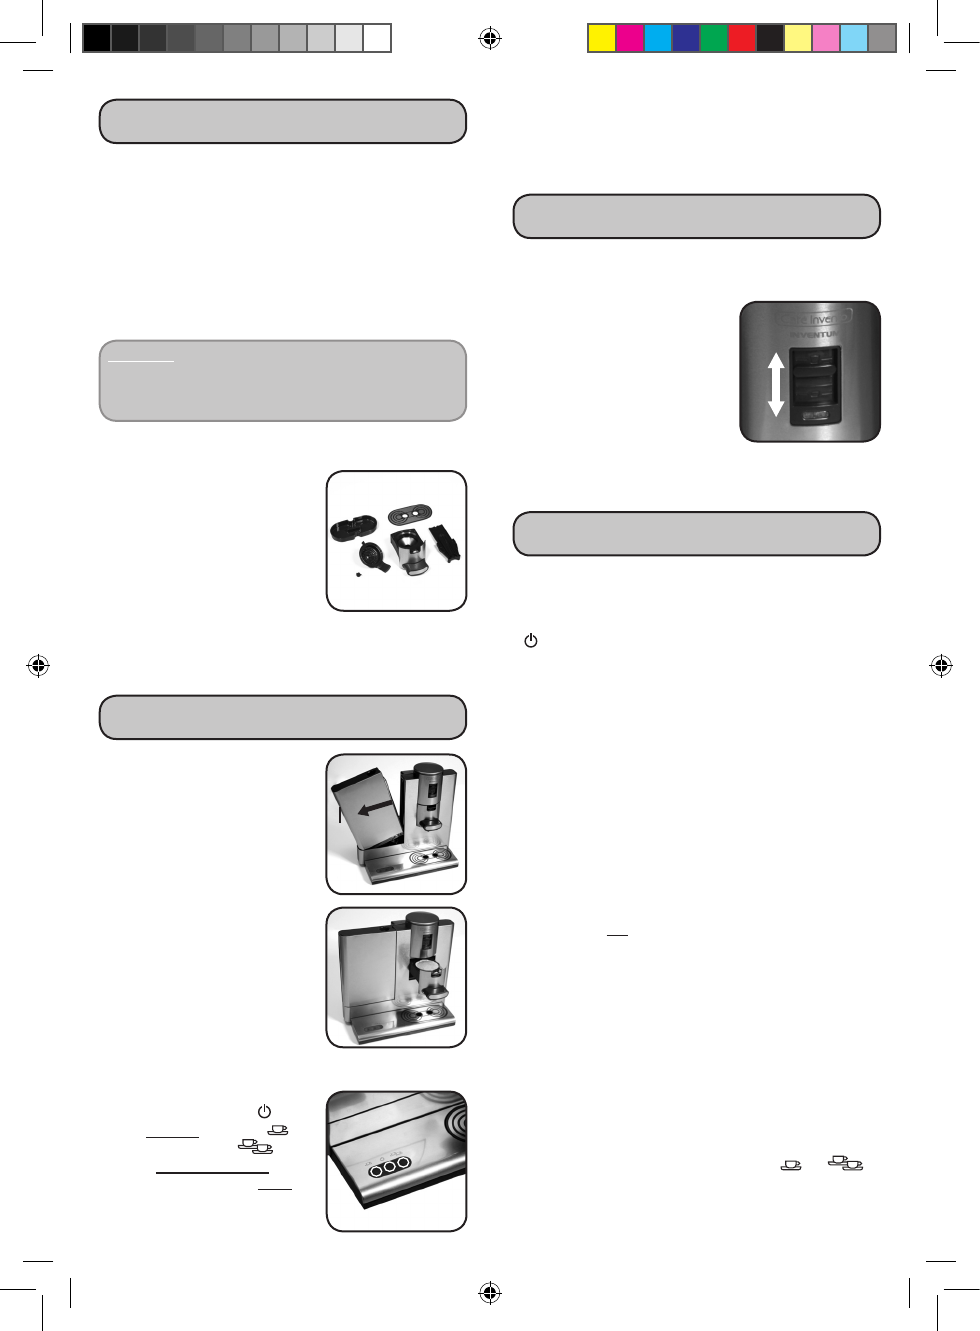
With the taste selector 11 you can select and adjust your
individual water amount/ coffee strenght. You can slide
the taste selector upwards and downwards.
• When you slide the taste selector
downwards, you will get stronger
coffee with a smaller amount of
water.
• Place the taste selector in the
middle and you will get a
standard amount of coffee.
• When you slide the taste selector
completely upwards, the coffee
will get thinner because the appliance will use more
water. We advise to place a mug when you use this
selection.
• Fill the removable waterreservoir 1 with cold water
to the maximum level and place it in the
coffeepadmachine.
• Switch the coffeepadmachine on with the on/off button
.
• The appliance will now heat up the water. The red light
9 will blink slowly while heating. This will take 2
minutes.
• Open the drawer 8 by gently pulling on the handles. The
drawer will now slide open.
• Place a coffeepad in the multi-padholder 14 with the
round side downwards and press it lightly.
Make sure that the coffee is well spread and loose.
Depending on the cups of coffee you want to make,
you can place one or two coffeepads in the multi-
padholder. This coffeepadmachine can be used with
almost all available coffeepads. You can place one or
two coffeepads and coffeepads of different sizes in the
multi-padholder 14. The coffeepadmachine will
automatically adapt to the number of coffeepads you
have placed (max. 2 coffeepads).
Warning: do not use the holders for grounded coffee.
• Slide the drawer 8 gently inwards until it
can’t go further. The green light 10 will light up
indicating that the drawer is locked correctly. The
appliance can not make coffee when the green light is
not lit.
• Place one or two cups under the coffee-outlet 7.
• Adjust the taste-selector 11 for the amount of water
which suits your own taste the best.
If you choose to get more water, your cup will be
lled more, but the coffee will get thinner. If you
choose less water, your cup will become less full,
but the coffee will get stronger.
• Press gently on the button of the number of cups you
want to make, 1 or 2, respective button or .
• The coffeepadmachine will now make coffee with the
amount of water you selected and will pour it in the
coffeecup. When you want the appliance to stop
22
3 | TO RINSE THE MACHINE
5 |MAKING COFFEE
WARNING!Beforeyoumaketheveryrstcupof
coffee, you must rinse the appliance with water.
Follow the next steps carefully to make sure that
theboilerislledwithwatercorrectly.
6
7
815
5
14
14
1
8
7
max.
4 | TASTE SELECTOR