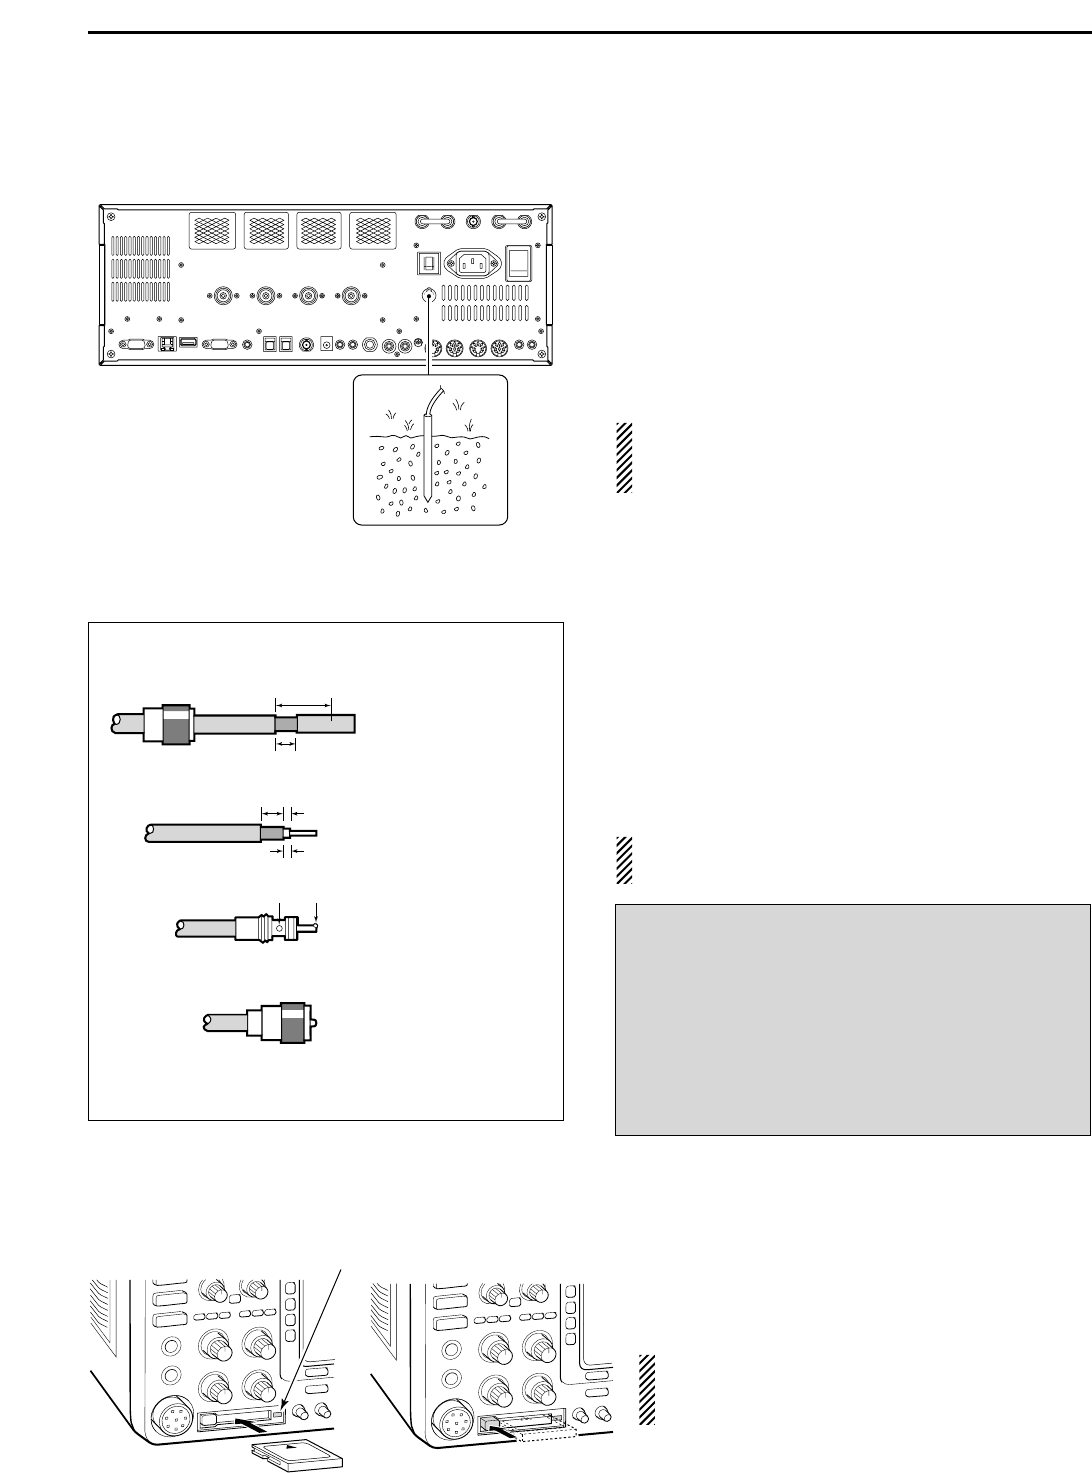
12376
28
Zoom out
Zoom in
Previous page
1/206
Next page
2-3
Grounding
To prevent electrical shock, television interference
(TVI), broadcast interference (BCI) and other prob-
lems, ground the transceiver through the GROUND
terminal on the rear panel.
For best results, connect a heavy gauge wire or strap
to a long earth-sunk copper rod. Make the distance be-
tween the [GND] terminal and ground as short as pos-
sible.
R WARNING: NEVER connect the [GND]
terminal to a gas or electric pipe, since the connec-
tion could cause an explosion or electric shock.
Antenna connection
For radio communications, the antenna is of critical im-
portance, along with output power and receiver sensi-
tivity. Select antenna(s), such as a well-matched 50
antenna, and feedline. We recommend 1.5:1 or better
of Voltage Standing Wave Ratio (VSWR) for your de-
sired band. Of course, the transmission line should be
a coaxial cable.
When using 1 antenna, use the [ANT1] connector.
CAUTION: Protect your transceiver from lightning
by using a lightning arrestor.
CF (Compact Flash) memory card
Insert the supplied CF (Compact Flash) memory
card into the CF memory card slot.
To remove the CF memory card, push-in the button, lo-
cated at left hand side of the slot.
Make sure to install the memory card correctly.
NEVER insert or remove the CF memory card
when the read/write indicator lights or blinks.
Antenna SWR
Each antenna is tuned for a specified frequency
range and SWR may be increased out-of-range.
When the SWR is higher than approx. 2.0:1, the
transceivers power drops to protect the final transis-
tors. In this case, an antenna tuner is useful to match
the transceiver and antenna. Low SWR allows full
power for transmitting. The IC-7800 has an SWR
meter to monitor the antenna SWR continuously.
2
INSTALLATION AND CONNECTIONS
PL-259 CONNECTOR INSTALLATION EXAMPLE
30 mm
9
8 in 10 mm
3
8 in 1–2 mm
1
16 in
30 mm
10 mm (soft solder)
10 mm
12 mm
solder solder
Soft
solder
Coupling ring
Slide the coupling ring
down. Strip the cable
jacket and soft solder.
Slide the connector
body on and solder it.
Screw the coupling
ring onto the
connector body.
Strip the cable as
shown at left. Soft sol-
der the center con-
ductor.
q
w
e
r
28


Need help? Post your question in this forum.

Forumrules


Report abuse

Libble takes abuse of its services very seriously. We're committed to dealing with such abuse according to the laws in your country of residence. When you submit a report, we'll investigate it and take the appropriate action. We'll get back to you only if we require additional details or have more information to share.

Product:

For example, Anti-Semitic content, racist content, or material that could result in a violent physical act.

For example, a credit card number, a personal identification number, or an unlisted home address. Note that email addresses and full names are not considered private information.

Forumrules

To achieve meaningful questions, we apply the following rules:

Register

Register getting emails for Icom IC-7800 at:


You will receive an email to register for one or both of the options.


Get your user manual by e-mail

Enter your email address to receive the manual of Icom IC-7800 in the language / languages: English as an attachment in your email.

The manual is 26,33 mb in size.


You will receive the manual in your email within minutes. If you have not received an email, then probably have entered the wrong email address or your mailbox is too full. In addition, it may be that your ISP may have a maximum size for emails to receive.

The manual is sent by email. Check your email

If you have not received an email with the manual within fifteen minutes, it may be that you have a entered a wrong email address or that your ISP has set a maximum size to receive email that is smaller than the size of the manual.

The email address you have provided is not correct.

Please check the email address and correct it.

Your question is posted on this page

Would you like to receive an email when new answers and questions are posted? Please enter your email address.


Info