Spark Plug
An oily or carboned spark plug makes starting difficult and
decreases the efficiency of the engine. Periodically remove
the spark plug and clean and adjust when necessary.
Gap setting 0.028 - 0.031".
Do not remove spark plug when engine is hot. Do not
sand blast the spark plug to clean it.
Adjusting the Cutting Height
• Never use more than 2 cutting height spacers.
• Spacers can only be fitted between the blade and the
fan and never between blade and the bolt (P).
1. Ensure the Operator Presence Control is released,
when the engine has stopped rotating - disconnect
the spark plug lead.
2. Close the fuel tap (K). Turn your lawnmower on its side.
3. Remove the blade bolt (P1) and blade (P2) as
described in ‘Removing the Blade and Fan’.
4. For a Lower Cut - Add spacers (P3) to a maximum of 2.
5. For a Higher Cut - Take spacers (P3) away.
6. Refit the blade as described in ‘Fitting the Blade and Fan’.
Removing & Fitting the Blade & Fan
AIR CLEANER
TIP
THIS
WAY
ONLY
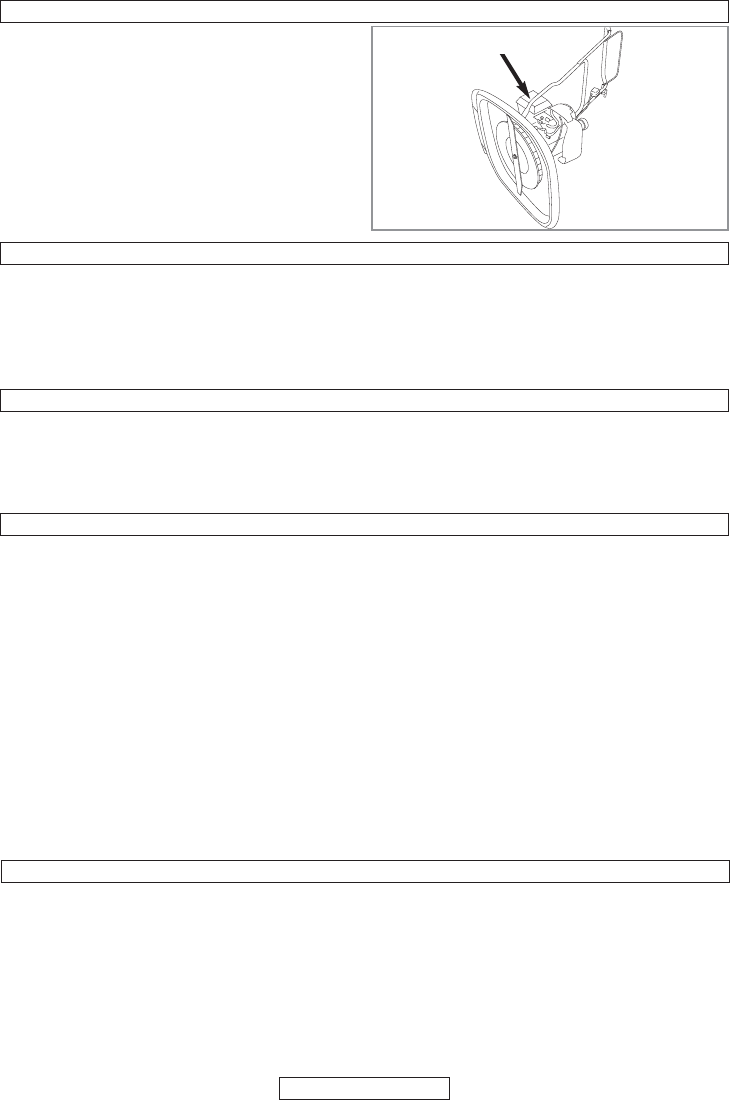
Before any servicing to the
underside of your machine, close
the fuel tap, let the engine run until it
stops, disconnect the spark plug
lead and TIP THE MACHINE ON
ITS SIDE WITH THE AIR CLEANER
UPPERMOST.
IMPORTANT
WARNING
• Always handle the blade with care - sharp edges
could cause injury. USE GLOVES
• Spark plug lead may be hot - handle with care.
Removing the Blade and Fan
• Renew your metal blade after 50 hours mowing or 2
years whichever is the sooner - regardless of
condition.
• If the blade is cracked or damaged replace it with a
new one.
1. Ensure the Operator Presence Control is released,
when the engine has stopped and the blade has
stopped rotating - disconnect the spark plug lead.
2. Fully close the fuel tap (K).
3. Turn your lawnmower on its side with the air cleaner
uppermost (see pic above).
4. To remove the blade bolt (P1), hold the fan (P4)
firmly and with the spanner provided loosen the
blade bolt by turning it anti-clockwise.
5. Remove the blade bolt (P1), blade (P2), spacers (P3)
and fan (P4).
6. Inspect for damage and clean as necessary.
Fitting the Blade and the Fan
• Before using the lawnmower, always visually inspect
to see that blades and bolts are not worn or
damaged.
• Never use more than 2 cutting height spacers.
• Spacers can only be fitted between the blade and
the fan and never between blade and the bolt
.
1.
Ensure the fan is located correctly.
2. Place the spacers (P3) onto the fan ensuring the
pegs (P5)have located into the holes (P6).
3. Place the blade (P2) onto the spacers (P3) ensuring
the pegs (P7) have located into the holes (P8) on the
blade and ensuring the blade is positioned as
illustrated in Figure P.
4. Place the blade bolt (P1) through the centre hole
(P9) of the blade.
5. Tighten down clockwise by hand.
6. Hold the fan firmly and tighten the blade bolt with the
spanner provided.
ENGLISH - 3
How To Mow
• Before using the lawnmower, always visually inspect to see
that blades and bolts are not worn or damaged.
1. Place the handle in the mowing position (C3).
2. Mow twice a week in the growing season. Your lawn will
suffer if more than one third of its length is cut at one time.
• Keep hands and feet away from the blade, a rotating
blade cannot be seen.
•Mowing on banks and slopes can be dangerous. Do
not mow on steep slopes.
• Always keep your feet on flat ground with the mower
below you on the slope and with the spark plug
uppermost to avoid lubricating oil running into the
cylinder.
• Do not use this mower on slopes which are wet or
more than 45
0
from horizontal.
• Never push the mower up the slope.