Control Head Installation
You have two choices for mounting your 1100 Series™ control head, Gimbal mounting, where you use a
surface on the boat, such as the dash, to mount the control head so that it can be tilted up or down, or In-
dash mounting.
Gimbal Mounting the Control Head
If you are gimbal mounting the Humminbird® 1100 Series™, you can pre-assemble the unit in order to plan
the best mounting location.
In addition to the hardware supplied with your control head, you will need a powered hand drill and
various drill bits, various hand tools, including a Phillips head screwdriver, a socket wrench and a flat head
screwdriver, a marker or pencil, safety glasses and dust mask, and marine-grade silicone sealant.
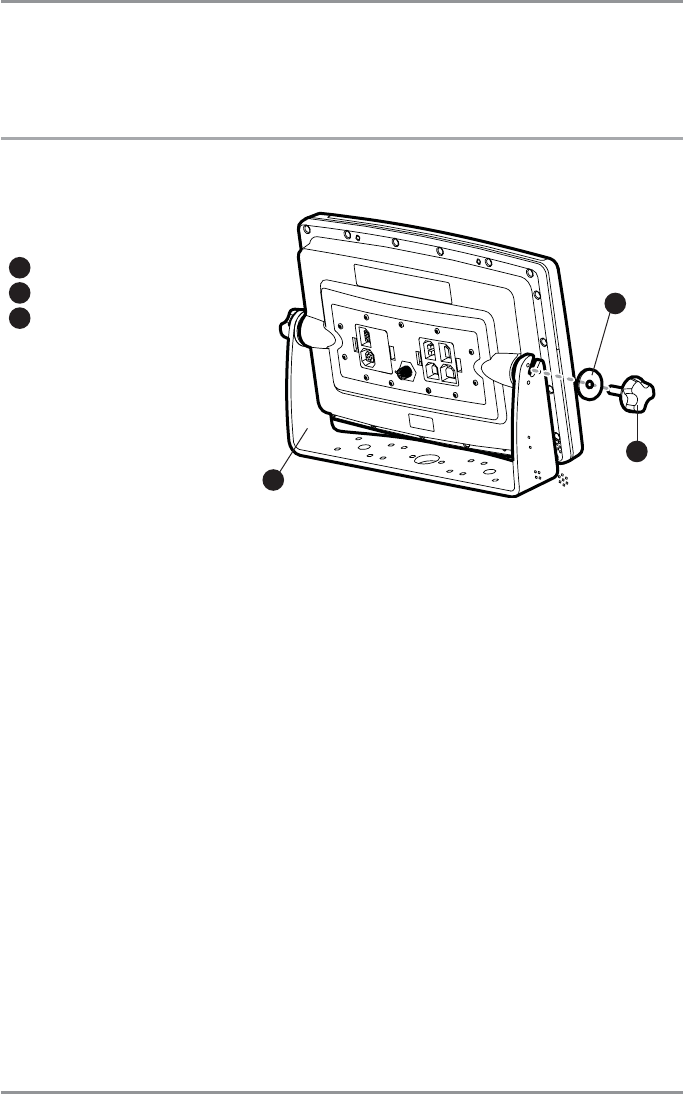
1. Place the control head into the gimbal bracket. Make sure that the straight side of the gimbal arm
is against the back side of the control head.
2. Place a 1" (25 mm) diameter black washer on the gimbal knob and then thread the knob and
washer into the housing. Tighten the gimbal knob to secure the 1100 Series™ control head to the
mount. Repeat step 2 for the other side.
You can now place the control head in various locations to decide which is best for mounting. Rotating the
mounting bracket to the top of the control head will allow for overhead mounting. The chosen mounting
area should allow for sufficient room so the control head can pivot through the full tilt range and allow for
easy removal and installation.
NOTE: You can drill the cable pass hole underneath the gimbal bracket, allowing you to thread the cables through
the hole in the center of the mount; however, if you cannot drill the hole directly under the mounting bracket,
then you will need to drill the cable pass hole behind the bracket, and will need to mount the hole cover there
instead.
NOTE: When drilling holes in fiberglass hulls, it is best to start with a smaller bit and use progressively larger drill
bits to reduce the chance of chipping or flaking the outer coating. Fill all holes with marine grade silicone sealant.
Washer
1
Gimbal Knob
2
Gimbal Mounting Bracket
3
1
2
3
9