Finding information ............................................................................................................................................... 2
2 Getting to know your tablet ........................................................................................................................... 4
Front ....................................................................................................................................................................... 4
Back (closed) .......................................................................................................................................................... 6
Back (open) ............................................................................................................................................................ 7
Top ......................................................................................................................................................................... 8
Updating the software installed on the tablet ................................................................................. 11
3 Connecting to a network .............................................................................................................................. 12
Connecting to a wireless network ....................................................................................................................... 12
Using the wireless controls ............................................................................................................... 12
Using a WLAN ..................................................................................................................................... 12
Using an Internet service provider ................................................................................. 13
Setting up a WLAN .......................................................................................................... 13
Configuring a wireless router ......................................................................................... 13
Protecting your WLAN ..................................................................................................... 13
Connecting to a WLAN ..................................................................................................... 14
Using Bluetooth wireless devices ..................................................................................................... 14
Using HP Mobile Broadband (select models only) .............................................................................................. 15
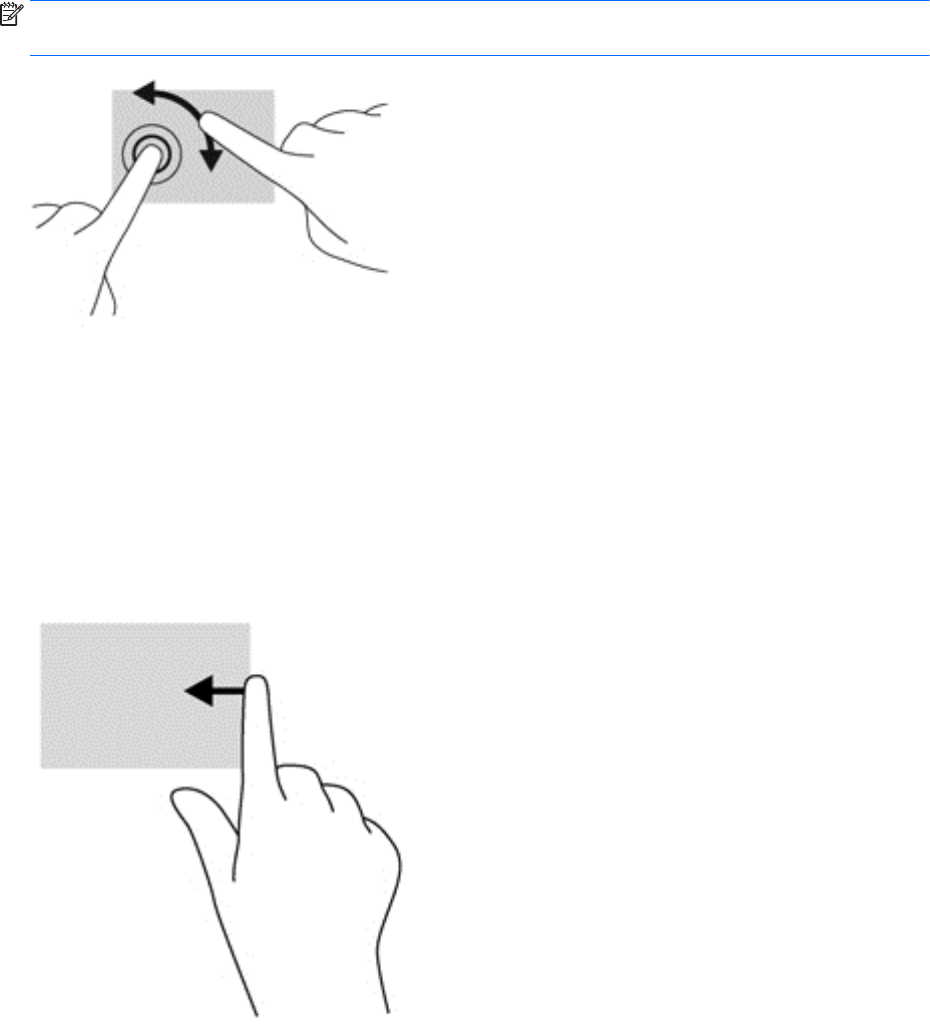
4 Navigating using touch gestures ................................................................................................................... 16
Using touch screen gestures ............................................................................................................................... 16
Using the on-screen keyboard ............................................................................................................................ 21
Video .................................................................................................................................................................... 24
Near Field Communications (NFC) ....................................................................................................................... 30
6 Power management ..................................................................................................................................... 31
Shutting down the tablet .................................................................................................................................... 31
Setting power options ......................................................................................................................................... 31
Using power-saving states ............................................................................................................... 31
Initiating and exiting Sleep ............................................................................................. 31
Using the power meter and power settings ................................................................... 32
Setting password protection on wakeup ....................................................................... 32
Using battery power .......................................................................................................................... 32
Resolving a low battery level ....................................................................... 34
iv
Conserving battery power .............................................................................................. 34
Using external AC power ................................................................................................................... 34
7 External cards and devices ........................................................................................................................... 36
Using smart cards ................................................................................................................................................ 36
Inserting a smart card ....................................................................................................................... 36
Removing a smart card ..................................................................................................................... 36
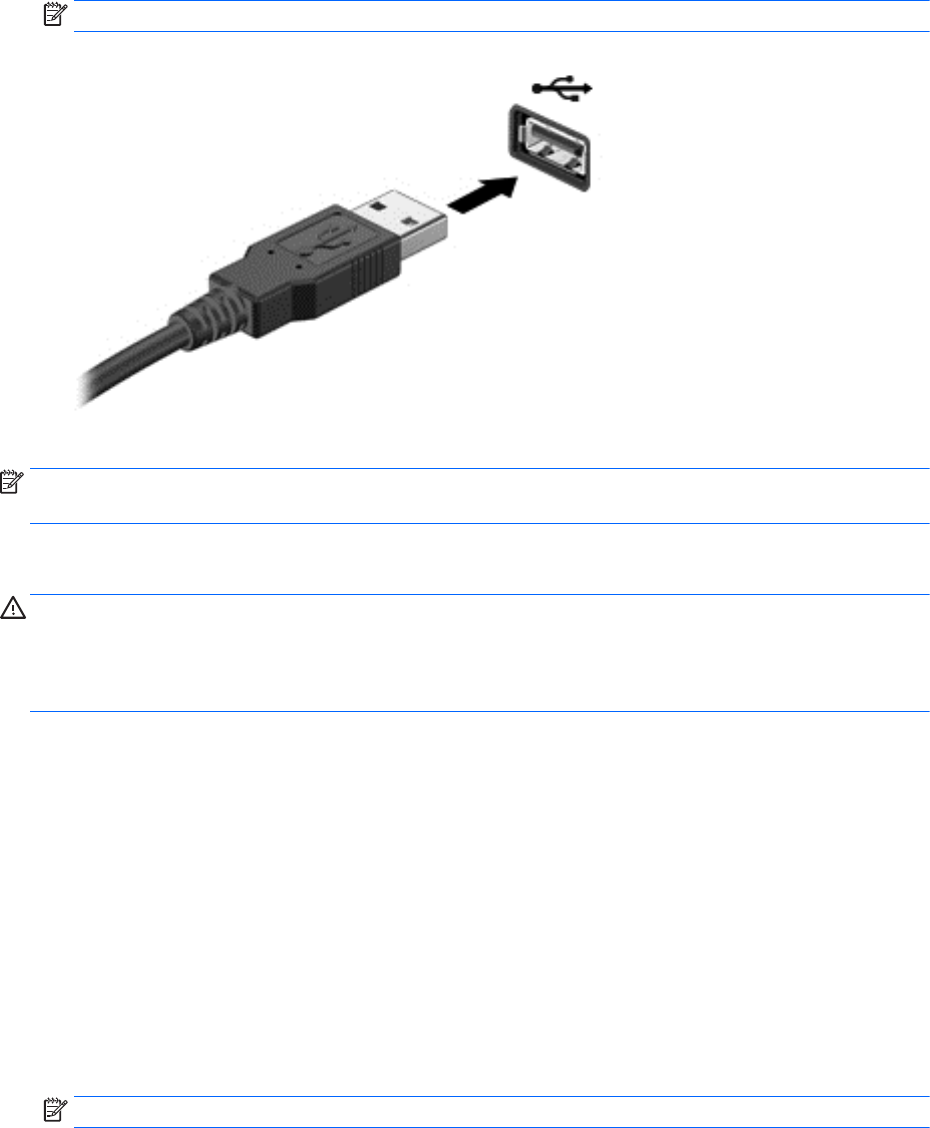
Using a USB device ............................................................................................................................................... 36
Connecting a USB device ................................................................................................................... 36
Removing a USB device ..................................................................................................................... 37
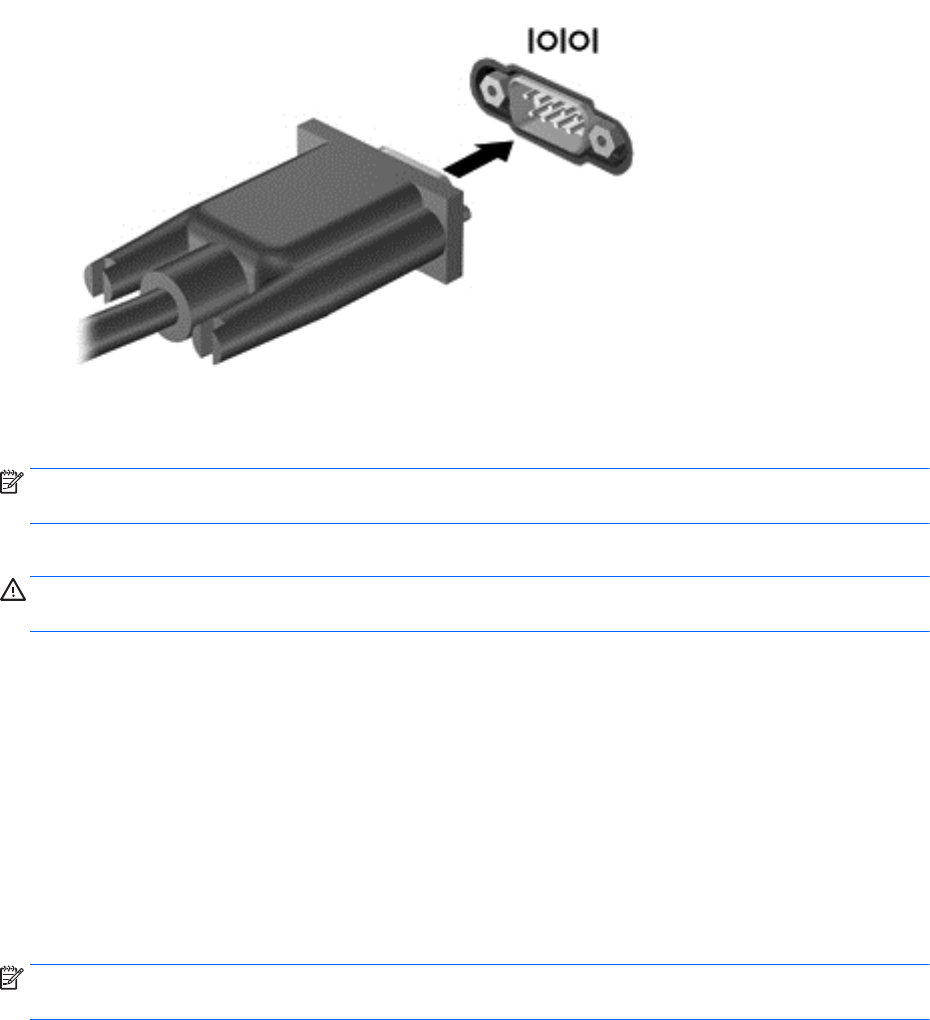
Using a serial device ............................................................................................................................................ 37
Using optional external devices .......................................................................................................................... 38
Using optional external drives .......................................................................................................... 38
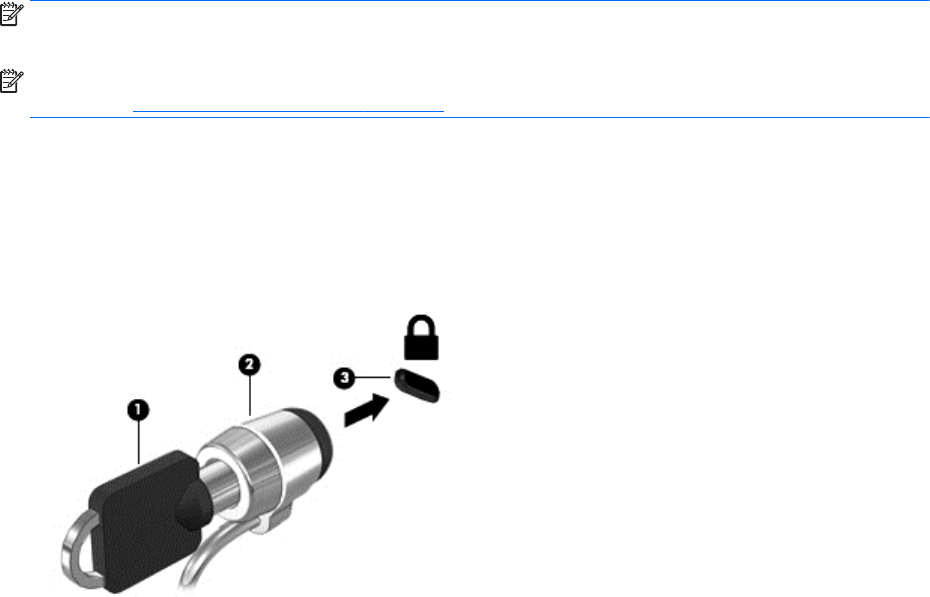
Installing an optional security cable ................................................................................................................... 39
Protecting the tablet ........................................................................................................................................... 40
Using passwords .................................................................................................................................................. 40
Setting passwords in Windows ......................................................................................................... 41
Setting passwords in Computer Setup ............................................................................................. 41
Using antivirus software ..................................................................................................................................... 41
Using firewall software ....................................................................................................................................... 41
Using HP Client Security ...................................................................................................................................... 42
Cleaning your tablet ............................................................................................................................................ 43
Cleaning the display ........................................................................................................ 44
Cleaning the tablet ......................................................................................................... 44
Updating programs and drivers .......................................................................................................................... 44
Using SoftPaq Download Manager ...................................................................................................................... 44
10 Backup and recovery .................................................................................................................................. 46
Backing up your information ............................................................................................................................... 46
Performing a system recovery ............................................................................................................................ 46
Using the Windows recovery tools ................................................................................................... 46
Using f11 recovery tools ................................................................................................................... 47
Changing the boot device order ........................................................................................................ 47
v
Using Windows Refresh or Windows Reset ...................................................................................... 48
11 Computer Setup and HP PC Hardware Diagnostics (UEFI) ............................................................................... 49
Using Computer Setup ......................................................................................................................................... 49
Navigating and selecting in Computer Setup ................................................................................... 49
Restoring factory settings in Computer Setup ................................................................................. 49
Updating the BIOS ............................................................................................................................. 50
Determining the BIOS version ........................................................................................ 50
Downloading a BIOS update .............................................................................................................. 51
Using HP PC Hardware Diagnostics (UEFI) ........................................................................................ 51
12 Support ..................................................................................................................................................... 53
Contacting support .............................................................................................................................................. 53
Input power .......................................................................................................................................................... 54
Appendix A Traveling with the tablet ............................................................................................................... 55
Appendix B Electrostatic discharge .................................................................................................................. 56
Appendix C Troubleshooting ........................................................................................................................... 57
The tablet is unable to start up ......................................................................................................... 57
An external device is not working ..................................................................................................... 57
A video is not visible on an external display ..................................................................................... 58
Index ............................................................................................................................................................. 59
vi
1Welcome
After you set up and register the tablet, it is important to take the following steps:
●
Connect to the Internet—Set up your wireless network so that you can connect to the Internet. For
more information, see
Connecting to a network on page 12.
●
Update your antivirus software—Protect your tablet from damage caused by viruses. The software is
preinstalled on the tablet. For more information, see
Using antivirus software on page 41.
●
Get to know your tablet—Learn about your tablet features. Refer to
Getting to know your tablet
on page 4 and Navigating using touch gestures on page 16 for additional information.
●
Find installed software—Access a list of the software preinstalled on the tablet, as follows:
On the Start screen, swipe up from the center of the touch screen to display the Apps screen. For details
about using the software included with the tablet, see the software manufacturer's instructions, which
may be provided with the software or on the manufacturer's website.
●
Back up your hard drive by creating a recovery flash drive. See
Backup and recovery on page 46.
1
Finding information
The tablet comes with several resources to help you perform various tasks.
ResourcesFor information about
Setup Instructions poster
●
How to set up the tablet
●
Help to identify tablet components
HP Support Assistant
To access HP Support Assistant on the Start screen, tap
the HP Support Assistant app.
To obtain the latest user guide, go to
http://www.hp.com/
support, and select your country. Select Drivers &
Downloads, and then follow the on-screen instructions
●
Operating system information
●
Software, driver, and BIOS updates
●
Troubleshooting tools
●
How to access support
Regulatory, Safety, and Environmental Notices
To access this guide:
1.From the Start screen, type support, and then select
the HP Support Assistant app.
2.Select My computer, and then tap User guides.
●
Regulatory and safety information
●
Environmental information
Safety & Comfort Guide
To access the user guides, tap the HP Support Assistant
app on the Start screen, tap My computer, and then tap
User guides.
– or –
Go to
http://www.hp.com/ergo.
●
Proper workstation setup, posture, health, and work habits
●
Electrical and mechanical safety information
Worldwide Telephone Numbers booklet
This booklet is provided with your tablet.
HP support telephone numbers
HP website
To obtain the latest user guide, go to
http://www.hp.com/
support, and select your country. Select Drivers &
Downloads, and then follow the on-screen instructions
●
Support information
●
Ordering parts and finding additional help
●
Accessories available for the device
Limited Warranty*
To access this guide, tap the HP Support Assistant app on
the Start screen, tap My computer, and then tap Warranty
and services.
– or –
Go to
http://www.hp.com/go/orderdocuments.
Warranty information
*You can find the expressly provided HP Limited Warranty applicable to your product located with the user guides on your tablet and/
or on the CD/DVD provided in the box. In some countries/regions, HP may provide a printed HP Limited Warranty in the box. For some
countries/regions where the warranty is not provided in printed format, you may request a printed copy from
http://www.hp.com/go/
orderdocuments or write to:
●
North America: Hewlett-Packard, MS POD, 11311 Chinden Blvd., Boise, ID 83714, USA
●
Europe, Middle East, Africa: Hewlett-Packard, POD, Via G. Di Vittorio, 9, 20063, Cernusco s/Naviglio (MI), Italy
●
Asia Pacific: Hewlett-Packard, POD, P.O. Box 200, Alexandra Post Office, Singapore 911507
2Chapter 1 Welcome
ResourcesFor information about
When you request a printed copy of your warranty, please include your product number, warranty period (found on your service label),
name, and postal address.
IMPORTANT:Do NOT return your HP product to the addresses above. For worldwide support, go to
http://h20565.www2.hp.com/
portal/site/hpsc.
Finding information3
2Getting to know your tablet
The following sections provide an overview of the HP ElitePad 1000 G2 Rugged Tablet capabilities.
●
Front
●
Back (closed)
●
Back (open)
●
Top
●
Bottom
●
Labels
●
Changing your tablet's settings
●
Finding your hardware and software information
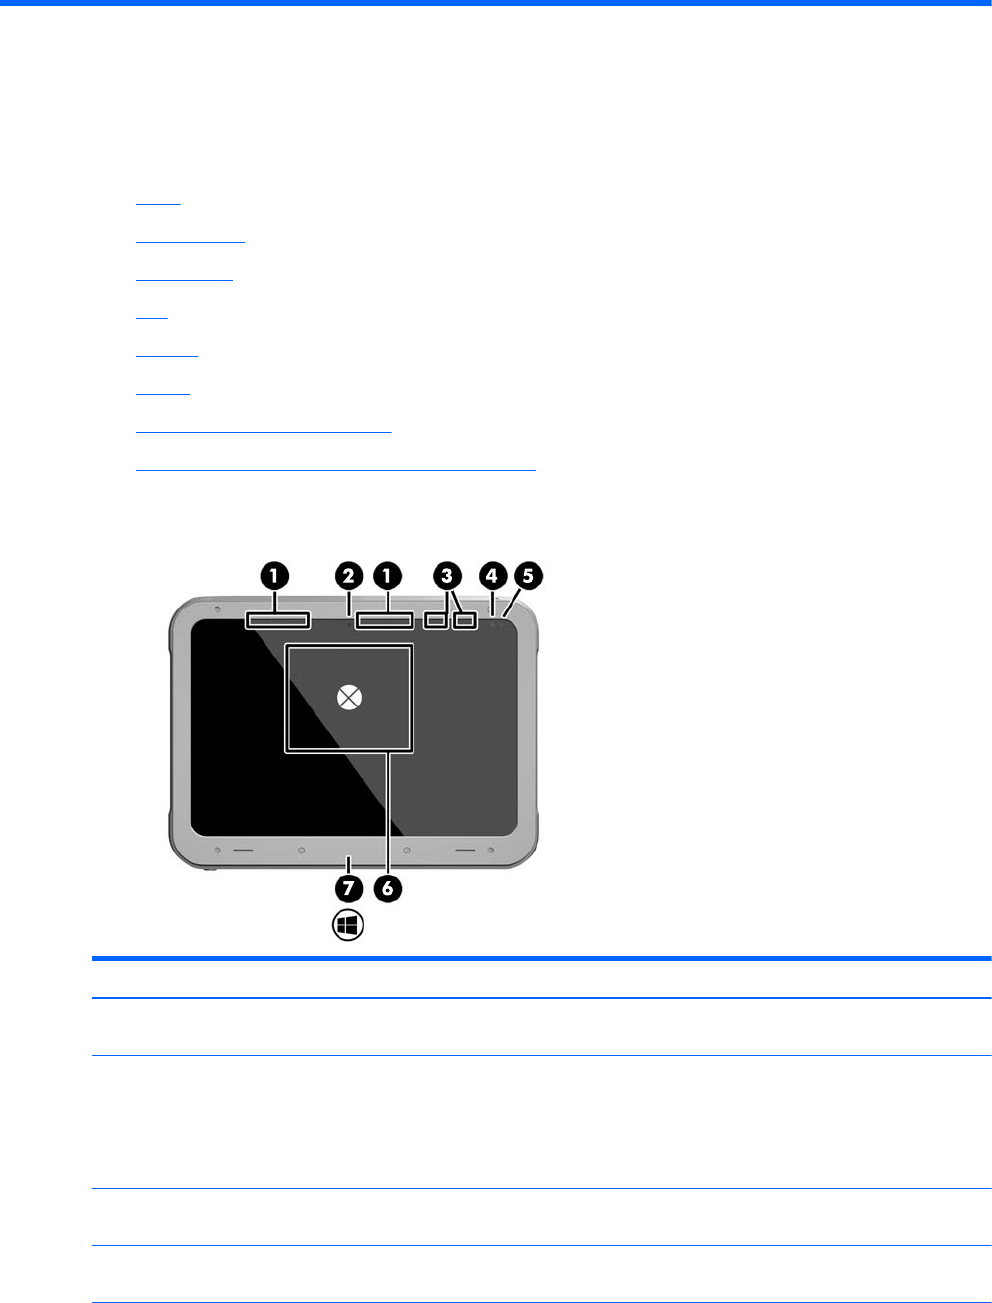
Front
ComponentDescription
(1)WWAN antennas (2)* (select models only)Send and receive wireless signals to communicate with wireless wide
area networks (WWANs).
(2)Front webcamRecords video and captures still photographs.
To use the webcam, tap the YouCam tile on the Start screen, or swipe
from the right edge of the touch screen to display the charms, tap
Search, and then tap the search box. In the search box, type c, and
then tap CyberLink YouCam.
(3)WLAN antennas (2)*Send and receive wireless signals to communicate with wireless local
area networks (WLANs).
(4)Ambient light sensorThe ambient light sensor automatically adjusts the display
brightness based on the lighting conditions in your environment.
4Chapter 2 Getting to know your tablet
ComponentDescription
(5)Webcam status light (front)On: The webcam is on.
(6)Near Field Communications (NFC) tapping area
(select models only)
Allows you to touch an NFC-compatible device to this area to
wirelessly connect and communicate with the tablet and transfer
data back and forth.
(7)Windows buttonDisplays the Start screen.
*The antennas are not visible on the outside of the tablet. For optimal transmission, keep the areas immediately around the antennas
free from obstructions. To see wireless regulatory notices, see the section of the Regulatory, Safety, and Environmental Notices that
applies to your country or region. To access the user guides, tap the HP Support Assistant app on the Start screen, tap My computer,
and then tap User guides.
Front5
Back (closed)
ComponentDescription
(1)I/O doorProvides access to an internal USB port and smart card reader.
(2)Hand strap connectors (2)Are used to attach the included hand strap.
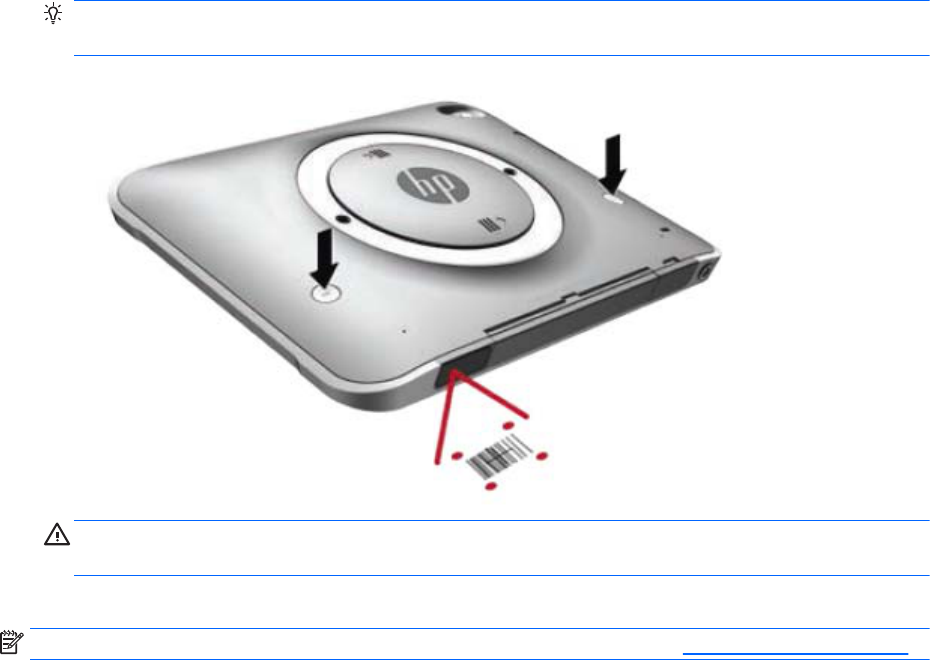
(3)Bar-code scanner buttons (2) (select models
only)
Activate the bar-code scanner when pressed.
For information about using the bar-code scanner, see
Bar-
code scanner (select models only) on page 26.
(4)Webcam lightOn: The webcam is in use.
(5)Webcam Records video and captures photographs. Some models allow
you to videoconference and chat online using streaming video.
For information on using the webcam, access HP Support
Assistant. To access HP Support Assistant, from the Start
screen, select the HP Support Assistant app.
(6)Volume buttons (2)Control the volume.
(7)
Security cable slotAttaches an optional security cable to the tablet. Lift the edge
of the security cable slot dust cover to access the slot.
NOTE:The security cable is designed to act as a deterrent, but
it may not prevent the tablet from being mishandled or stolen.
6Chapter 2 Getting to know your tablet
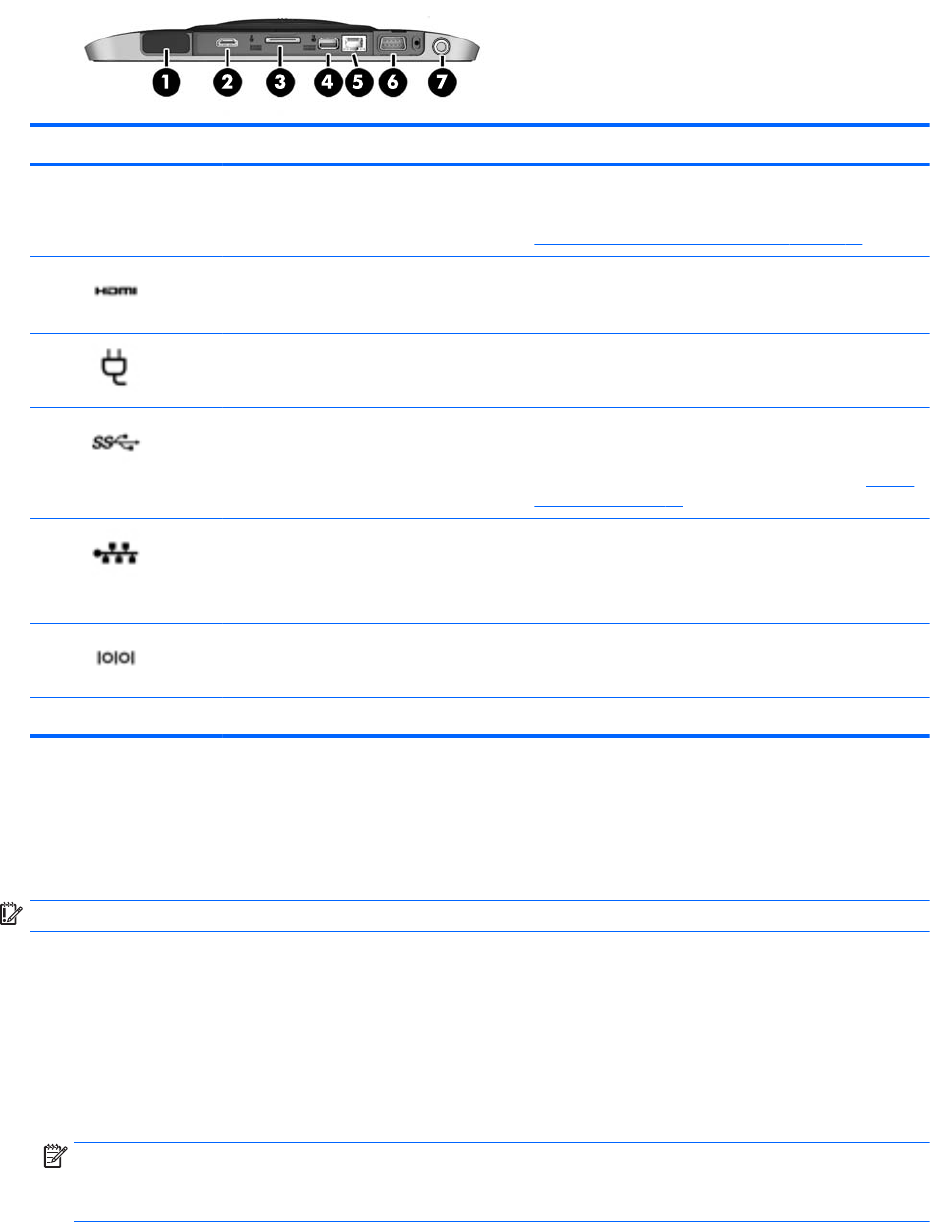
Back (open)
ComponentDescription
(1)
USB 3.0 portSupports a USB user authentication device that can be used
while the I/O door is closed. HP does not recommend using a
wireless transceiver or a USB device that prevents the I/O door
from closing.
For details about different types of USB ports, see
Libble takes abuse of its services very seriously. We're committed to dealing with such abuse according to the laws in your country of residence. When you submit a report, we'll investigate it and take the appropriate action. We'll get back to you only if we require additional details or have more information to share.
Product:
Forumrules
To achieve meaningful questions, we apply the following rules:
First, read the manual;
Check if your question has been asked previously;
Try to ask your question as clearly as possible;
Did you already try to solve the problem? Please mention this;
Is your problem solved by a visitor then let him/her know in this forum;
To give a response to a question or answer, do not use this form but click on the button 'reply to this question';
Your question will be posted here and emailed to our subscribers. Therefore, avoid filling in personal details.
Register
Register getting emails for HP ElitePad 1000 G2 Rugged at:
new questions and answers
new manuals
You will receive an email to register for one or both of the options.
Get your user manual by e-mail
Enter your email address to receive the manual of HP ElitePad 1000 G2 Rugged in the language / languages: English as an attachment in your email.
The manual is 2,88 mb in size.
You will receive the manual in your email within minutes. If you have not received an email, then probably have entered the wrong email address or your mailbox is too full. In addition, it may be that your ISP may have a maximum size for emails to receive.
If you have not received an email with the manual within fifteen minutes, it may be that you have a entered a wrong email address or that your ISP has set a maximum size to receive email that is smaller than the size of the manual.
The email address you have provided is not correct.
Please check the email address and correct it.
Your question is posted on this page
Would you like to receive an email when new answers and questions are posted? Please enter your email address.