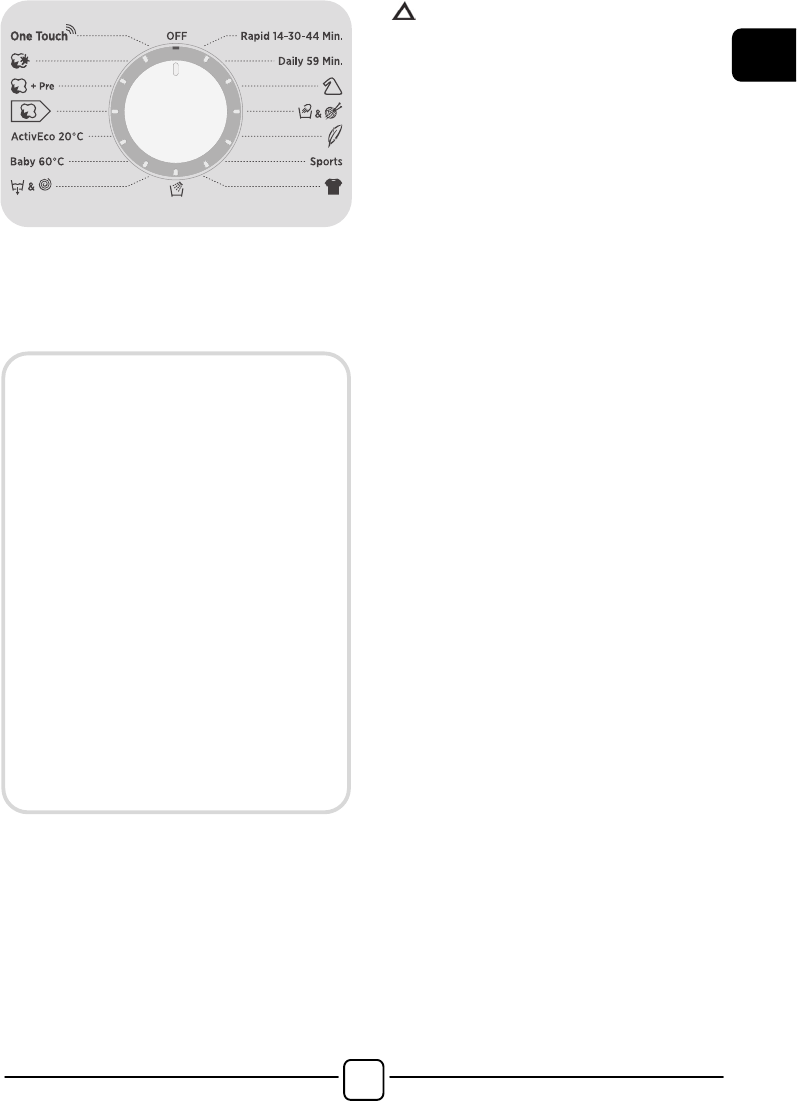
- Stellen Sie das gewünschte Programm ein.
-
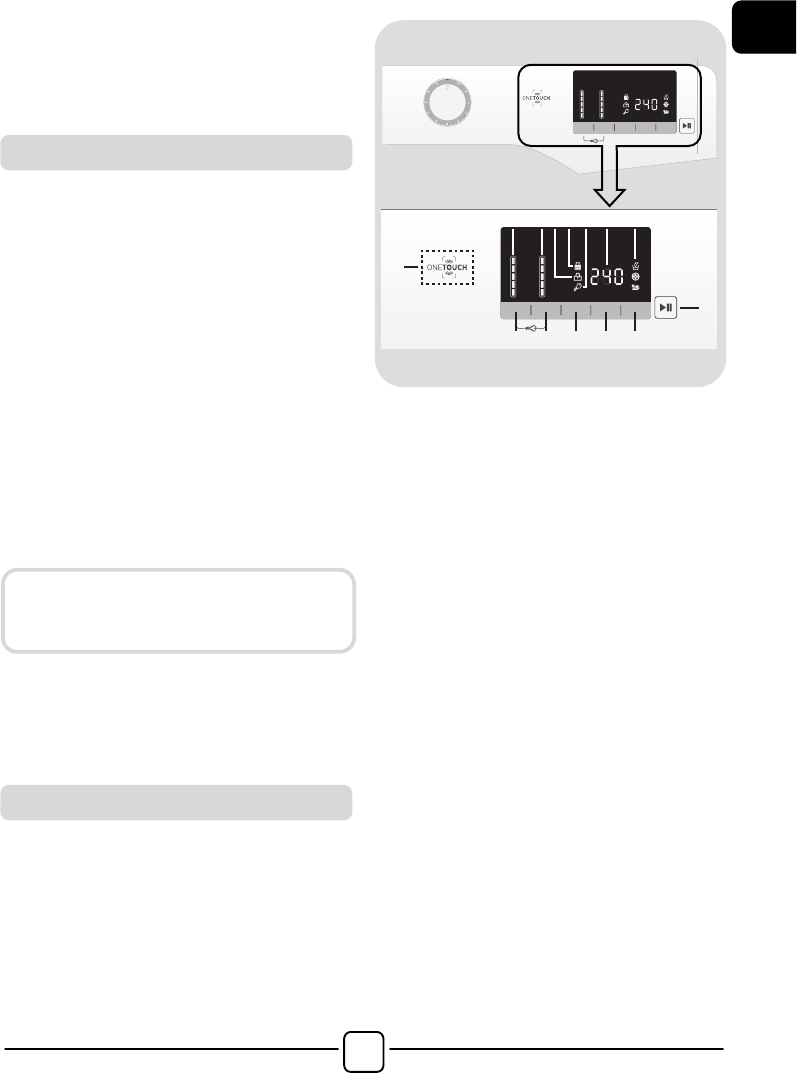
Drücken Sie die Taste STARTZEITVORWAHL
einmal, um die Funktion zu aktivieren
(es erscheint die Anzeige h00 auf dem Display).
Für eine einstündige Verzögerung drücken Sie
die Taste erneut (im Display erscheint die
Anzeige h01). Wiederholen Sie diesen Vorgang
so oft, bis die gewünschte Verzögerung im
Display erscheint. Zum Zurücksetzen der
Startzeitvorwahl die Taste so oft drücken, bis im
Display wieder die Anzeige h00 erscheint.
- Durch das Drücken der Taste
START/PAUSE bestätigen Sie Ihre
Auswahl. Der Countdown beginnt und
das Programm startet automatisch.
! Die eingestellte Startzeitvorwahl kann
unterbrochen werden, indem der
Programmwähler auf AUS gestellt wird.
Sollte es eine Unterbrechung der
Stromversorgung während eines laufenden
Waschvorgangs geben, werden die
Einstellungen gespeichert, um das Programm
bei Wiederinbetriebnahme automatisch
fortzusetzen.
Mit dieser Taste haben Sie die Auswahl
zwischen drei Optionen:
- EXTRA SPÜLEN
! Mit dieser Option können Sie am Ende
des Waschgangs noch ein weiteres Mal
spülen. Diese Option wurde für
Menschen mit empfindlicher und
sensibler Haut entwickelt, bei denen
schon kleinste Waschmittelrückstände zu
Hautreizungen oder Allergien führen.
! Der Einsatz dieser Funktion ist auch
ratsam für Gegenstände von Kindern und
für den Fall stark verschmutzter Wäsche,
für die eine größere Menge an
Waschmittel notwendig ist, oder beim
Waschen von Hand- und Badetüchern,
deren Fasern meistens die Tendenz
haben, das Waschmittel zu speichern.
- HYGIENE+
Sie können diese Funktion nur aktivieren,
wenn Sie als Waschtemperatur 60°C
eingestellt haben. Mit dieser Option wird
während des gesamten Waschgangs Ihre
Kleidung mit konstanter Temperatur gewaschen.
- LEICHTBÜGELN
Durch das Zuwählen dieser Option lässt sich
die Knitterbildung durch Weglassen der
Zwischenschleudergänge bzw. Durchführung
des Endschleuderns bei reduzierter
Schleuderdrehzahl weitestgehend reduzieren.
Mit dieser Taste haben Sie je nach
ausgewähltem Programm die Auswahl
zwischen zwei verschiedenen Optionen.
- KURZPROGRAMME
Die Taste wird aktiv, wenn Sie das
Programm KURZ (14/30/44 Min.) mit dem
Knopf auswählen, und ermöglicht Ihnen,
eine der drei angezeigten Zeiten
auszuwählen.
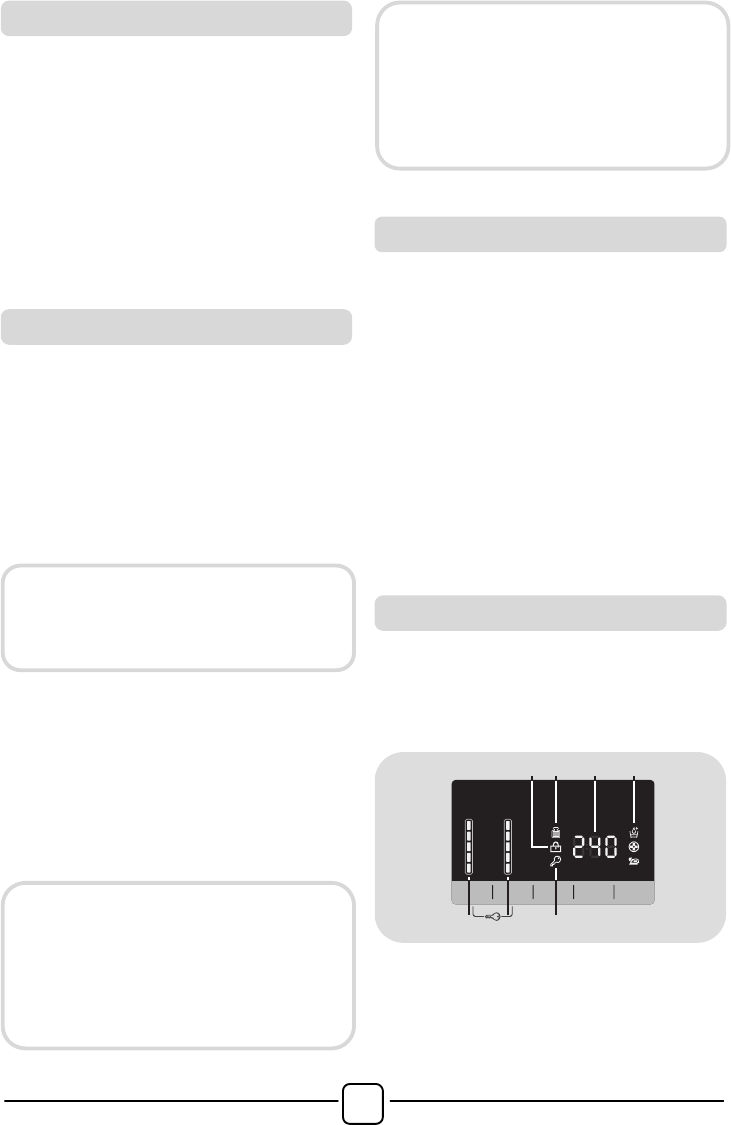
- VERSCHMUTZUNGSGRAD
! Sobald das Programm ausgewählt wurde,
wird die eingestellte Waschzeit für dieses
Programm automatisch angezeigt.
! Mit dieser Option haben Sie je nach
Verschmutzungsgrad des Stoffs die
Auswahl zwischen 3 Waschintensitätsstufen,
die die Länge des Programms verändern
(sie kann nur bei einigen Programmen
genutzt werden – siehe Programmtabelle).