20
IT
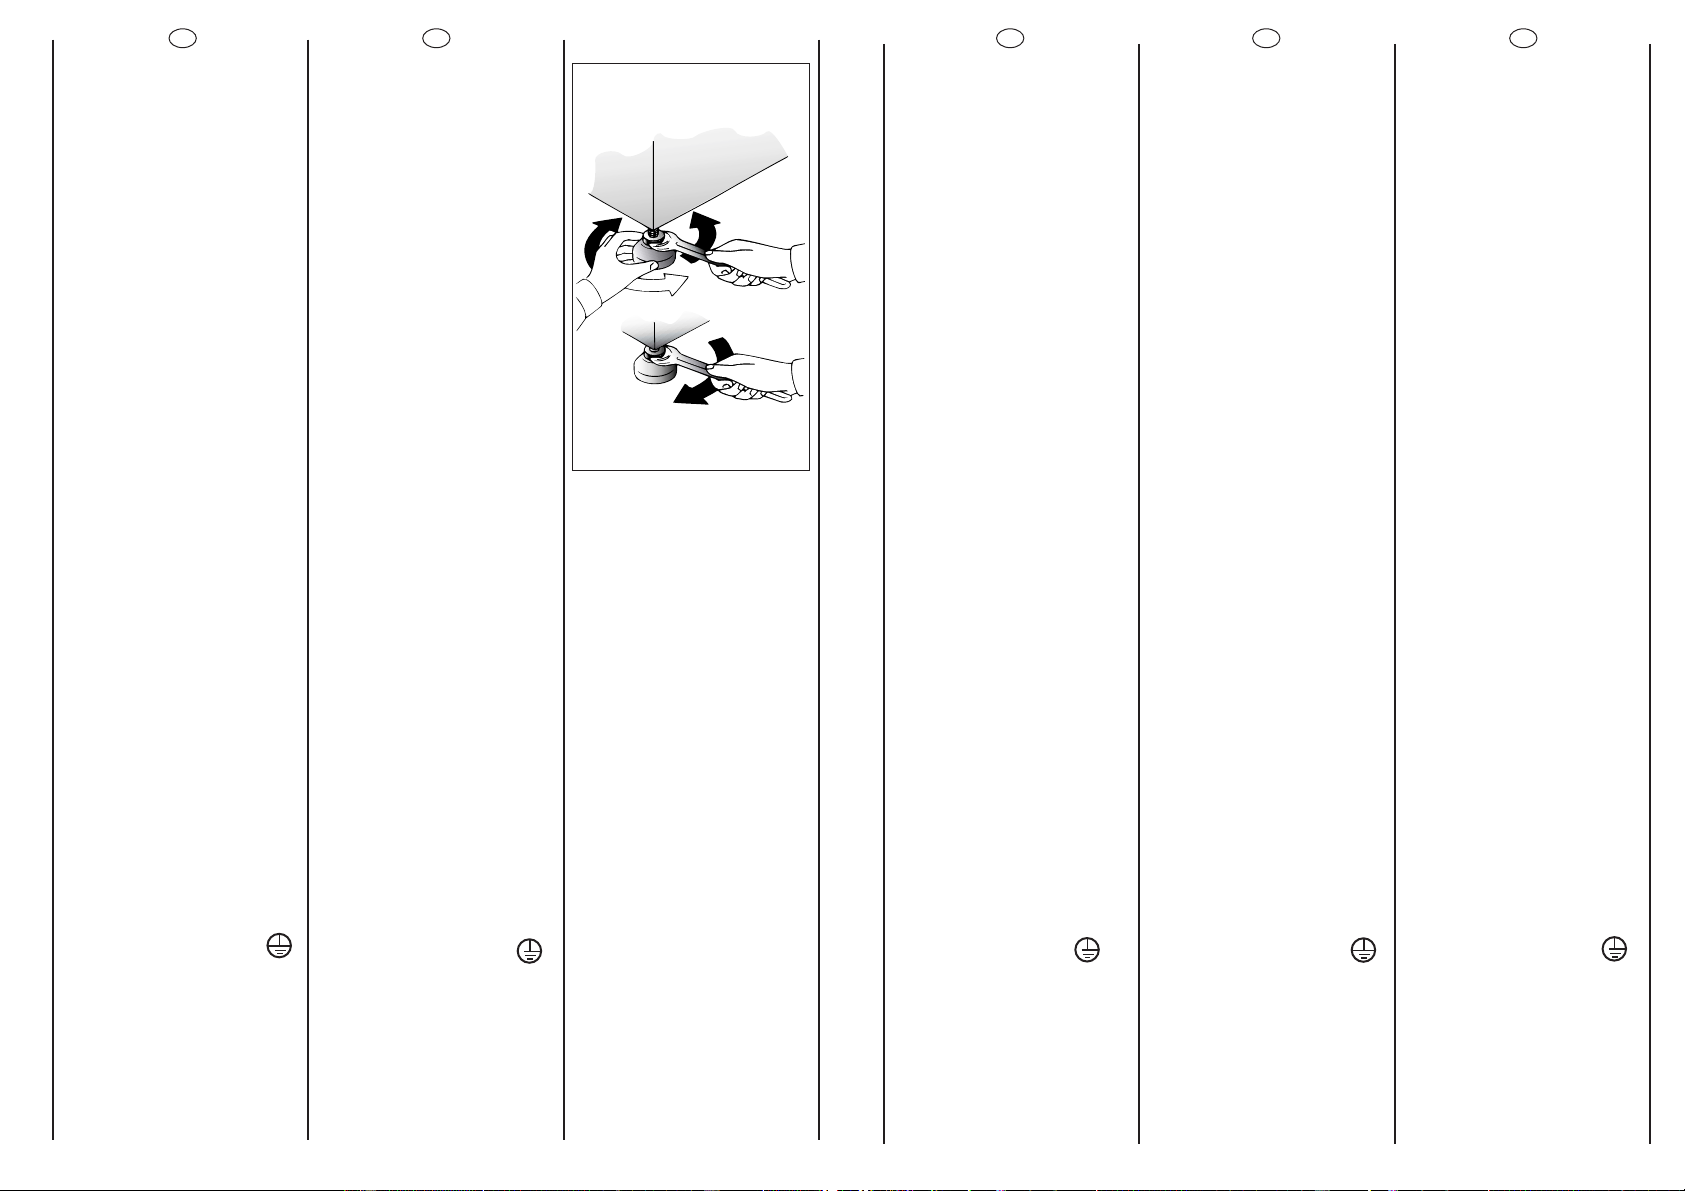
Livelli la macchina con i 4
piedini:
a) Girare in senso orario il
dado per sbloccare la vite
del piedino.
b) Ruotare il piedino e farlo
scendere o salire fino ad
ottenere la perfetta
aderenza al suolo.
c) Bloccare infine il piedino
riavvitando il dado in senso
antiorario, fino a farlo aderire
al fondo della lavatrice.
Inserisca la spina.
ATTENZIONE:
nel caso si renda necessario
sostituire il cavo di
alimentazione,assicurarsi di
rispettare il seguente codice-
colore durante il
collegamento dei singoli fili:
BLU - NEUTRO (N)
MARRONE - FASE (L)
GIALLO-VERDE - TERRA ( )
L’a pparecchio deve essere
posto in modo che la spina
sia accessibile ad
installazione avvenuta.
21
DE
Richten Sie das Gerät mit
den 4 Verstellfüßen
waagerecht aus:
a) Kontermuttern im
Uhrzeigersinn lösen.
b) Standfuß einregulieren,bis
das Gerät genau
ausgerichtet ist (möglichst
mit der Wasserwaage
justieren!).
c) Kontermuttern (gegen
den Uhrzeigersinn) festziehen.
Wichtig: Sollte das Gerät auf
einen Sockel aufgestellt
werden,ist es durch eine
Sockelbefestigung zu sichern.
Erkundigen Sie sich bitte
hierfür im Fachhandel.
Der Hersteller haftet nicht für
unsachgemäße Aufstellung
und Installation.
Stecker einstecken.
ACHTUNG:
Falls das Netzkabel
ausgetauscht werden sollte,
achten Sie beim Anschluss
der einzelnen Kabel
unbedingt auf die folgende
Farbenbelegung:
BLAU - NULLLEITER (N)
BRAUN - PHASE (L)
GELB-GRÜN - ERDE ( )
Nach der Installation muß der
Anschluß zugänglich sein.
EN
Use the 4 feet to level the
machine with the floor:
a) Turn the nut clockwise to
release the screw adjuster of
the foot.
b) Rotate foot to raise or
lower it until it stands firmly on
the ground.
c) Lock the foot in position
by turning the nut anti-
clockwise until it comes up
against the bottom of the
machine.
Insert the plug.
ATTENTION:
should it be necessary to
replace the supply cord,
connect the wire in
accordance with the
following colours/codes:
BLUE - NEUTRAL (N)
BROWN - LIVE (L)
YELLOW-GREEN - EARTH ( )
After installation,the
appliance must be
positioned so that the plug is
accessible.
ES
Nivele la máquina con los 4
pies.
a) Girar la tuerca en el sentido
de las agujas del reloj para
desbloquear el tornillo del pie.
b) Girar el pie y hacerlo bajar
o subir hasta conseguir su
perfecta adherencia al suelo.
c) Bloquear el pie girando la
tuerca en el sentido contrario
a las agujas del reloj hasta
que se adhiera al fondo de la
lavadora.
Enchúfela.
ATENCIÓN:
En el caso que sea necesario
sustituir el cable de
alimentación,asegurese de
respetar el siguiente código
de colores durante la
conexión de cada cable:
AZUL - NEUTRO (N)
MARRÓN - FASE (L)
AMARILLO-VERDE - TIERRA ( )
El aparato tiene que ser
colocado de forma que el
enchufe sea accesible una
vez instalado.
PT
Use os 4 pés para nivelar a
máquina com o chão:
a) Rode a porca no sentido
dos ponteiros do relógio para
soltar a rosca de fixação do
pé.
b) Rode a pé para o erguer
ou baixar até estar
firmemente assente no chão.
c) Fixe o pé nessa posição
rodando a porca no sentido
contrário co dos ponteiros do
relógio até embater no fundo
da máquina.
Ligue a máquina à corrente,
inserindo a ficha do
respectivo cabo de
alimentação na tomada.
ATENÇÃO:
Se for necessário proceder à
substituição do cabo de
alimentação de energia,ao
efectuar a ligação dos fios
individuais,deve sempre
certificar-se de que respeita o
seguinte código de cores:
AZUL - NEUTRO (N)
CASTANHO - FASE (L)
AMARELO-VERDE - TERRA ( )
Depois da instalação,os
acessórios devem estar
posicionados,pelo que a
tomada deve estar num local
acessível.